bonnet Citroen GRAND C4 PICASSO RHD 2016 2.G Owner's Manual
[x] Cancel search | Manufacturer: CITROEN, Model Year: 2016, Model line: GRAND C4 PICASSO RHD, Model: Citroen GRAND C4 PICASSO RHD 2016 2.GPages: 523, PDF Size: 13.63 MB
Page 5 of 523
Hazard warning lamps 222
Horn
2
22
Emergency
or assistance call
2
22
Electronic stability
control
(ESC)
2
23
Seat
bel
ts
2
26
Airbags
2
31
Child
seats
2
36
Deactivating
t
he
p
assenger's
f
ront airbag
2
38
ISOFIX
mountings
2
47
Child
lock
2
54
Safety
Fuel 2 55
Misfuel prevention (Diesel)
2
56
Snow
chains
2
58
Very
cold climate screen(s)
2
59
Towbar
with quickly detachable
towball
2
60
Towing
a trailer
2
62
Energy
economy mode
2
63
Accessories
2
64
Changing
a wiper blade
2
66
Roof
bars
2
67
Bonnet
26
9
Petrol
engines
2
70
Diesel
engines
2
71
Checking
levels
2
72
Checks
2
75
AdBlue
® additive and SCR system
(
BlueHDi Diesel) 2 77
Practical information
Warning triangle 2 81
Temporary
pu
ncture
r
epair kit
2
82
Spare
wheel
2
89
Changing
a bulb
2
99
Changing
a fuse
3
08
12
V battery
3
13
To w i n g
3
17
Running
out of fuel (Diesel)
3
19
In the event o f a b reakdown
Petrol engines 3 20
Petrol weights
3
22
Diesel
engines
3
24
Diesel
weights
3
26
Dimensions
3
28
Identification
ma
rkings
3
29
Technical data
Emergency or assistance 3 30Audio and telematics
Mirrors 2 01
Lighting control stalk
2
04
Automatic
illumination of headlamps
2
09
Automatic
headlamp dipping
2
10
Daytime
running lamps
2
12
Direction
indicators
2
13
Adjusting
the headlamp beam height
2
13
Directional
l
ighting
2
15
Wiper
control stalk
2
16
Screenwash
2
18
Automatic
rain sensitive wipers
2
19
Panoramic
sunroof
2
21
Lighting and v isibility
Alphabetical
in
dex
For the audio and touch screen telematic systems, refer to the
s
upplement to the handbook or go to
t
he following internet address:
http://service.citroen.com/ddb/
Contents
Page 8 of 523
6
Instruments and controls
Touch screen tablet 11-16
Equipment se ttings 1 3-16
Ventilation
9
2-93
Heating
9
4
Dual-zone manual a ir c onditioning 95-96
Dual-zone
automatic
air
c
onditioning
9
7-101
Demisting
/
defrosting
1
02 Door
mirrors
2
01-202
Electric windows, deactivating
7
3 -74
5/6 -speed manual gearbox 1 37
Automatic gearbox
1
38 -142
Opening
the
bonnet
2
69 Courtesy lamps
1
19
Rear view mirror
2
02
Child surveillance mirror
2
03
Panoramic sunroof
2
21
Emergency or assistance
c
all
2
22, 330 -331
Instrument
panels
1
7-20
Gear
efficiency
indicator
1
43
Lighting
dimmer
4
6
Warning
lam
ps
2
1-36
I n di c ato r s
3
7- 4 5
-
s
ervice
indicator
-
o
il
level
indicator
-
r
ange
indicator
for
the
AdBlue
® fluid
E lectric parking brake
1
29 -135
Dashboard
fuses
3
08 -311
Over view
Page 10 of 523
8
Maintenance - Technical data
Petrol weights 322-323
Diesel weights 3 26 -327
Running
out
of
fuel,
Diesel
(
priming pump)
3
19
Checking
levels
2
72-274
-
o
il
-
b
rake
fluid
-
c
oolant
-
s
creenwash
fluid
Checking
components
2
75 -276
-
a
ir
filter
-
p
assenger
c
ompartment
f
ilter
-
o
il
filter
-
e
lectric
parking
brake
-
b
rake
pads
/
discs
Changing
bu
lbs
2
99-307
-
f
ront
-
r
ear Opening
the
bonnet
2
69
Under
the
bonnet,
petrol
2
70
Under
the
bonnet,
Diesel
2
71
Petrol
engines
3
20 -321
Diesel
engines
3
24-325 Identification
ma
rkings
3
29
Dimensions
3
28
12V
battery
3
13 -316
Load
reduction,
economy
mode
2
63
Engine
c
ompartment
f
uses
3
08 -309,
312
Over view
Page 43 of 523
41
Engine oil level indicator*
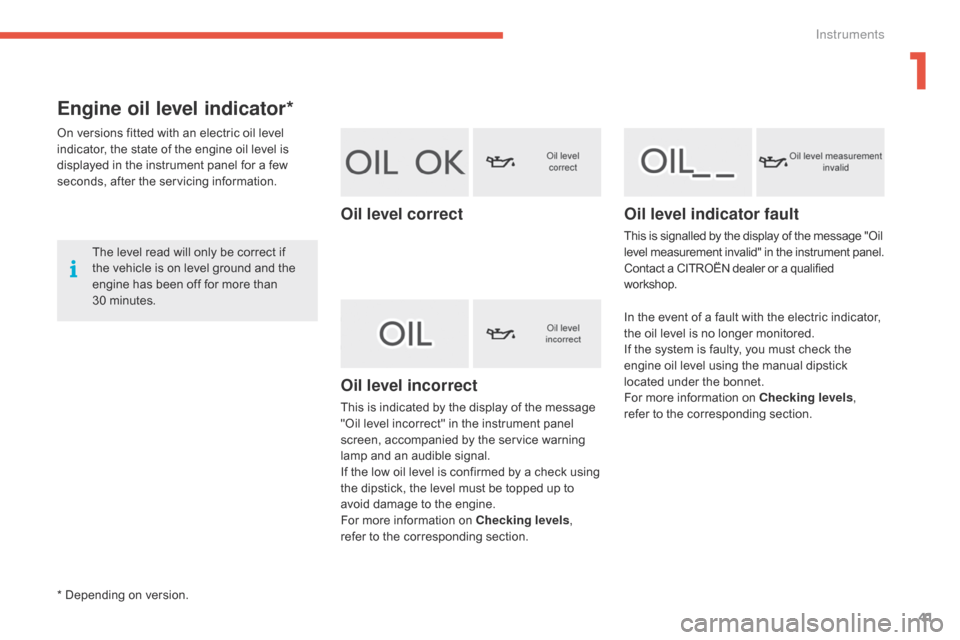
On versions fitted with an electric oil level indicator, the state of the engine oil level is
d
isplayed in the instrument panel for a few
s
econds, after the servicing information.
The
level read will only be correct if
t
he vehicle is on level ground and the
e
ngine has been off for more than
3
0 minutes.
Oil level correct
Oil level incorrect
This is indicated by the display of the message "Oil level incorrect" in the instrument panel
s
creen, accompanied by the service warning
l
amp and an audible signal.
If
the low oil level is confirmed by a check using
t
he dipstick, the level must be topped up to
a
void damage to the engine.
For
more information on Checking levels,
refer
to the corresponding section.
Oil level indicator fault
This is signalled by the display of the message "Oil level measurement invalid" in the instrument panel.
Contact
a CITROËN dealer or a qualified
w
orkshop.
In
the event of a fault with the electric indicator,
t
he oil level is no longer monitored.
If
the system is faulty, you must check the
e
ngine oil level using the manual dipstick
l
ocated under the bonnet.
For
more information on Checking levels,
refer
to the corresponding section.
* Depending on version.
1
Instruments
Page 72 of 523
70
For all work on the alarm system, contact a CITROËN dealer or a
q
ualified
w
orkshop.
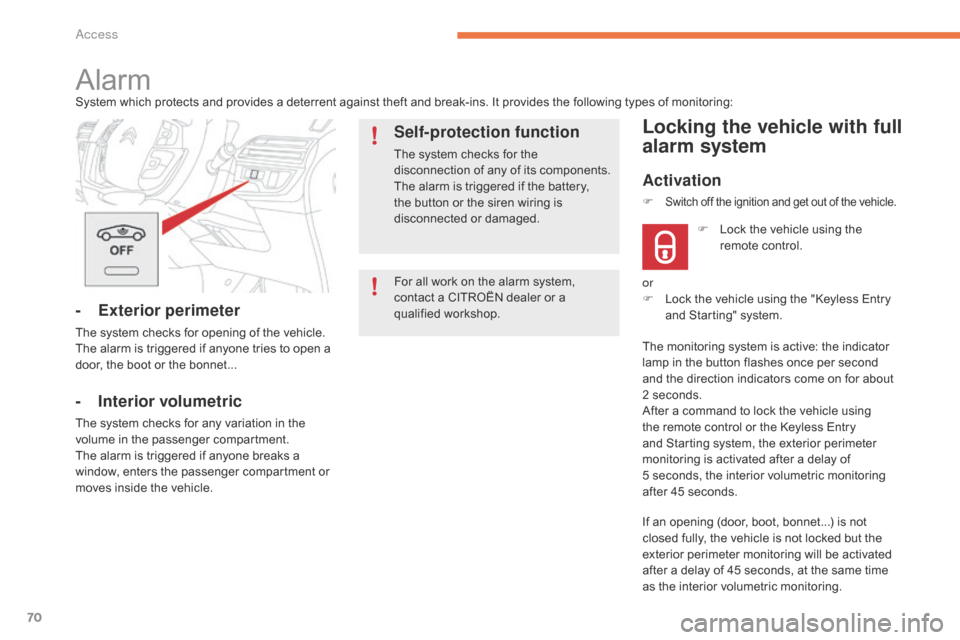
AlarmSystem which protects and provides a deterrent against theft and break-ins. It provides the following types of monitoring:
- Exterior perimeter
The system checks for opening of the vehicle.
T he alarm is triggered if anyone tries to open a
d
oor, the boot or the bonnet...
- Interior volumetric
The system checks for any variation in the volume in the passenger compartment.
The
alarm is triggered if anyone breaks a
w
indow, enters the passenger compartment or
m
oves inside the vehicle.
Self-protection function
The system checks for the disconnection of any of its components.
The
alarm is triggered if the battery,
t
he button or the siren wiring is
d
isconnected
o
r
d
amaged.
Locking the vehicle with full
alarm system
Activation
If an opening (door, boot, bonnet...) is not closed fully, the vehicle is not locked but the
e
xterior perimeter monitoring will be activated
a
fter a delay of 45 seconds, at the same time
a
s the interior volumetric monitoring.
F
L
ock the vehicle using the
r
emote control.
F
Switch off the ignition and get out of the vehicle.
or
F
L ock the vehicle using the "Keyless Entry
a
nd Starting" system.
The
monitoring system is active: the indicator
l
amp in the button flashes once per second
a
nd the direction indicators come on for about
2
seconds.
After
a command to lock the vehicle using
t
he remote control or the Keyless Entry
a
nd Starting system, the exterior perimeter
m
onitoring is activated after a delay of
5 s
econds, the interior volumetric monitoring
a
fter 45 seconds.
Access
Page 148 of 523
146
Operating fault
Have it checked by a CITROËN dealer or a qualified w orkshop.
In
the event of a fault in STOP mode, the vehicle
m
ay stall.
All
of the instrument panel warning lamps come on.
Depending on version, an alert message may also be displayed, asking you to place the gear
s
elector lever at position N and put your foot on
t
he brake pedal.
It is then necessary to switch off the ignition and start the engine again using the "START/STOP" b
utton.
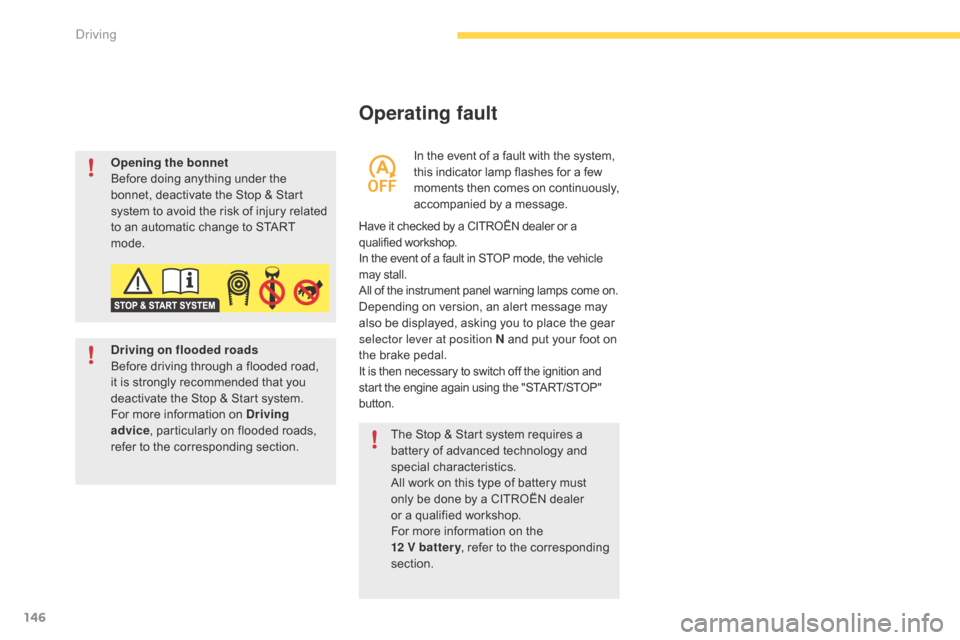
In the event of a fault with the system, this indicator lamp flashes for a few m
oments
t
hen
c
omes
o
n
c
ontinuously,
a
ccompanied by a message.
Opening the bonnet
Before
doing
anything
under
the
b
onnet,
deactivate
the
Stop
&
Start
s
ystem
to
avoid
the
risk
of
injury
related
t
o
an
automatic
change
to
START
m
ode.
Driving on flooded roads
Before
driving
through
a
flooded
road,
i
t
is
strongly
recommended
that
you
d
eactivate
the
Stop
&
Start
system.
For
more
information
on
Driving
advice ,
particularly
on
flooded
roads,
r
efer
to
the
corresponding
section. The
Stop & Start system requires a
b
attery of advanced technology and
sp
ecial
c
haracteristics.
All
work on this type of battery must
o
nly
be done by a CITROËN dealer
or
a
qualified workshop.
For
more information on the
12 V
batter y ,
refer to the corresponding
s
ection.
Driving
Page 271 of 523
269
Bonnet
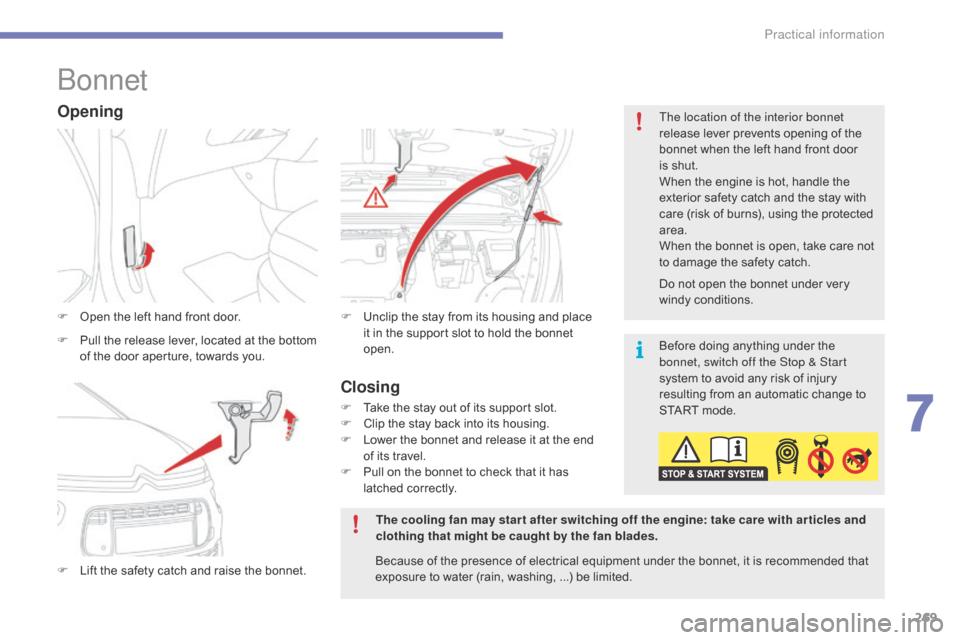
F Open the left hand front door.
F
L
ift the safety catch and raise the bonnet.F
U nclip the stay from its housing and place i
t in the support slot to hold the bonnet
ope
n.
Opening
F Pull the release lever, located at the bottom o
f the door aperture, towards you. Before
doing anything under the
b
onnet, switch off the Stop & Start
system
to avoid any risk of injury
r
esulting from an automatic change to
S
TART mode.
The cooling fan may star t after switching off the engine: take care with ar ticles and
clothing that might be caught by the fan blades. Do
not open the bonnet under very
wi
ndy
c
onditions.
The location of the interior bonnet
release lever prevents opening of the
b
onnet when the left hand front door
i
s shut.
When the engine is hot, handle the
e
xterior safety catch and the stay with
c
are (risk of burns), using the protected
a
rea.
When the bonnet is open, take care not
t
o damage the safety catch.
Because of the presence of electrical equipment under the bonnet, it is recommended that
e
xposure to water (rain, washing, ...) be limited.
Closing
F Take the stay out of its support slot.
F C lip the stay back into its housing.
F
L
ower the bonnet and release it at the end
o
f its travel.
F
P
ull on the bonnet to check that it has
l
atched correctly.
7
Practical information
Page 274 of 523
272
Checking levels
Take care when working under the bonnet, as certain areas of the engine may be extremely hot (risk of burns) and the cooling fan could start at any time (even with the ignition off).
Engine oil level
The check is carried out either when the ignition is switched on using the
o
il level indicator in the instrument
p
anel for vehicles so equipped, or
u
sing the dipstick.Checking using the dipstick
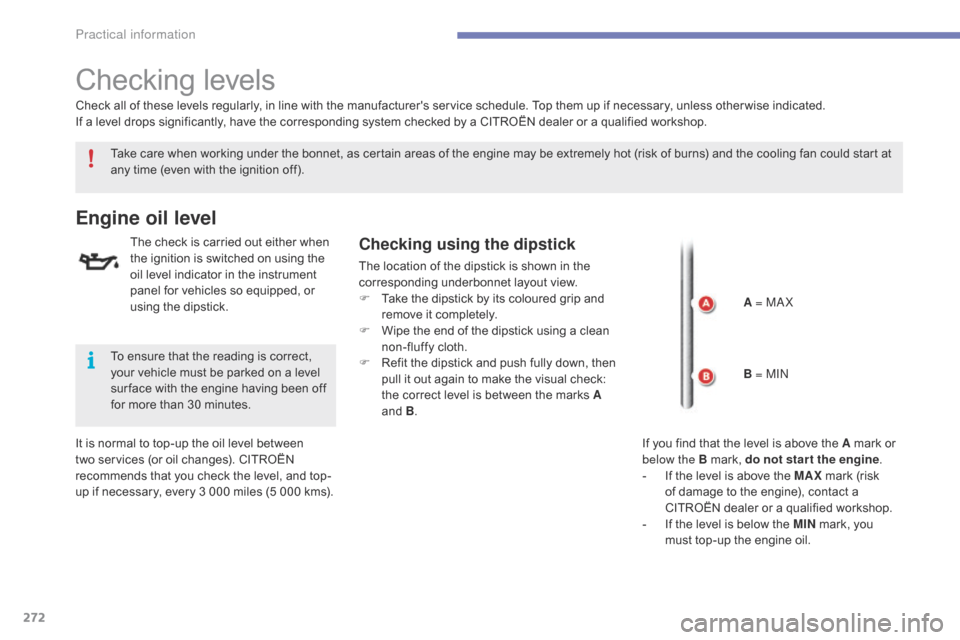
The location of the dipstick is shown in the corresponding underbonnet layout view.
F
T
ake the dipstick by its coloured grip and
r
emove it completely.
F
W
ipe the end of the dipstick using a clean
n
on-fluffy cloth.
F
R
efit the dipstick and push fully down, then
p
ull it out again to make the visual check:
t
he correct level is between the marks A
and
B.
It
is
normal
to
top-up
the
oil
level
between
t
wo
services
(or
oil
changes).
CITROËN
r
ecommends
that
you
check
the
level,
and
top-
up
if
necessary,
every
3
000
miles
(5
000
kms).
Check
all
of
these
levels
regularly,
in
line
with
the
manufacturer's service schedule. Top them up if necessary, unless other wise indicated.
If
a
level
drops
significantly,
have
the
corresponding system checked by a CITROËN dealer or a qualified workshop.
To
ensure
that
the
reading
is
correct,
y
our
vehicle
must
be
parked
on
a
level
s
ur face
with
the
engine
having
been
off
f
or
more
than
30
minutes. A = MA X
B = MIN
If
you find that the level is above the A mark or
belo
w the B mark, do not star t the engine.
-
I
f the level is above the MAX
mark (risk
o
f damage to the engine), contact a
C
ITROËN dealer or a qualified workshop.
-
I
f the level is below the MIN
mark, you
m
ust top-up the engine oil.
Practical information
Page 275 of 523
273
The brake fluid level should be close to the "MA X" mark. If it is not, check
t
he brake pad wear.
Brake fluid level
Changing the fluid
Refer to the manufacturer's service schedule for details of the interval for this operation.
Fluid specification
The brake fluid must conform to the manufacturer's r ecommendations.
Topping-up the engine oil level
The location of the oil filler cap is shown in the
corresponding underbonnet layout view.
F
U
nscrew the oil filler cap to reveal the filler
aperture.
F
A
dd oil in small quantities, avoiding any
s
pills on engine components (risk of fire).
F
W
ait a few minutes before checking the
l
evel again using the dipstick.
F
A
dd more oil if necessary.
F
A
fter checking the level, carefully refit the
o
il filler cap and the dipstick in its tube.
Engine oil change
Refer to the manufacturer's service schedule for details of the interval for this operation.
In
order to maintain the reliability of the engine
a
nd emission control system, never use
a
dditives in the engine oil.
After
topping-up the oil, the check when
s
witching on the ignition with the oil
l
evel indicator in the instrument panel
i
s not valid during the 30 minutes after
t
opping-up.
Oil grade
Before topping-up the oil or changing the oil, c
heck that the oil is the correct grade for your
e
ngine and conforms to the manufacturer's
r
ecommendations.
7
Practical information
Page 315 of 523
313
12 V battery
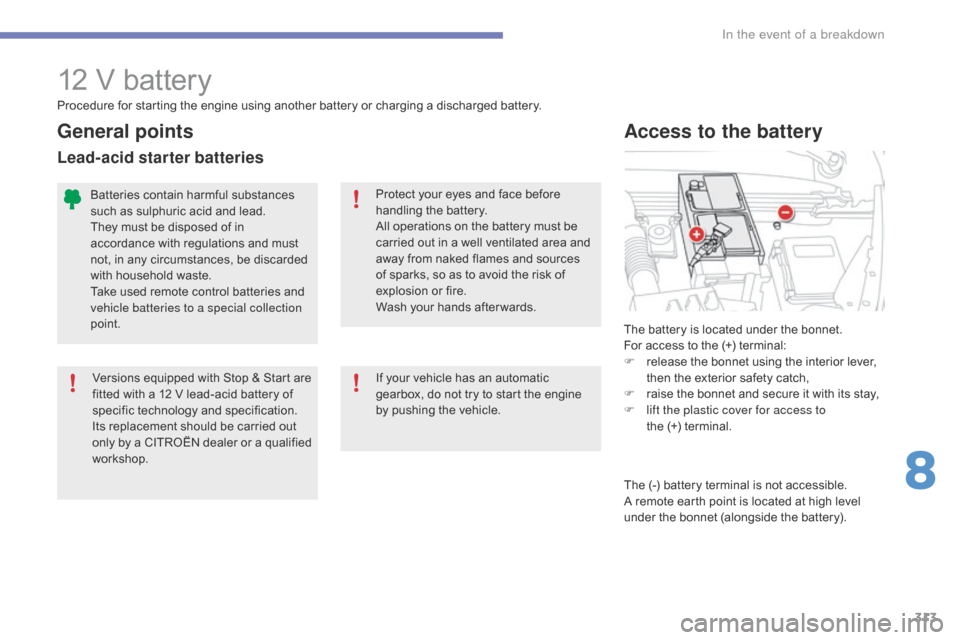
The battery is located under the bonnet.
F or access to the (+) terminal:
F
r
elease the bonnet using the interior lever,
t
hen the exterior safety catch,
F
r
aise the bonnet and secure it with its stay,
F
l
ift the plastic cover for access to
the (+) terminal.
Access to the battery
Procedure for starting the engine using another battery or charging a discharged battery.
P rotect your eyes and face before
h
andling the battery.
All
operations on the battery must be
c
arried out in a well ventilated area and
a
way from naked flames and sources
o
f sparks, so as to avoid the risk of
e
xplosion or fire.
Wash
your hands after wards.
Versions
equipped with Stop & Start are
f
itted with a 12 V lead-acid battery of
s
pecific
t
echnology
a
nd
s
pecification.
Its
replacement should be carried out
o
nly
by
a
CITROËN
dealer
or
a
qualified
w
orkshop.
Batteries
contain harmful substances
s
uch as sulphuric acid and lead.
They
must be disposed of in
a
ccordance with regulations and must
n
ot, in any circumstances, be discarded
w
ith household waste.
Take
used remote control batteries and
v
ehicle batteries to a special collection
point.
General points
Lead-acid starter batteries
If your vehicle has an automatic g earbox, do not try to start the engine
b
y pushing the vehicle.
The
(-) battery terminal is not accessible.
A r
emote earth point is located at high level
u
nder the bonnet (alongside the battery).
8
In the event of a breakdown