run flat Citroen GRAND C4 PICASSO RHD 2016 2.G Owner's Manual
[x] Cancel search | Manufacturer: CITROEN, Model Year: 2016, Model line: GRAND C4 PICASSO RHD, Model: Citroen GRAND C4 PICASSO RHD 2016 2.GPages: 523, PDF Size: 13.63 MB
Page 260 of 523
258
Original tyre sizeT ype of chain
205/60 R16 Maximum
link size:
9
mm
205/55
R17
225/45
R18 THULE
model
K
-Summit K34 only
For
more information on snow chains, contact a
C
ITROËN dealer or a qualified workshop.
Use
only chains designed to be fitted the type
o
f
wheel on your vehicle:
Snow chains
In wintry conditions, snow chains improve traction as well as the behaviour of the vehicle when braking.
T he snow chains must be fitted only
t
o the front wheels. They must never
b
e fitted to "space-saver" type spare
w
heels.
Advice on installation
F If you have to fit the chains during a j
ourney, stop the vehicle on a flat sur face
o
n the side of the road.
F
A
pply the parking brake and position any
w
heel chocks to prevent movement of your
v
ehicle.
F
F
it the chains following the instructions
p
rovided by the manufacturer.
F
M
ove off gently and drive for a few
m
oments, without exceeding 30 mph
(
50 km/h).
F
S
top your vehicle and check that the snow
c
hains are correctly tightened.
Take
account
of
the
legislation
in
force
i
n your country on the use of snow
chains
and
the
maximum
running
speed
a
uthorised. Avoid
driving with snow chains on roads
t
hat have been cleared of snow, to
a
void damaging your vehicle's tyres and
t
he road sur face. If your vehicle is fitted
w
ith alloy wheels, check that no part of
t
he chain or its fixings is in contact with
t
he wheel rim.
It
is
strongly
recommended
that
before
y
ou
leave,
you
practise
fitting
the
snow
c
hains
on
a
level
and
dry
sur face.
Practical information
Page 265 of 523
263
Exiting economy mode
These functions are reactivated automatically next time the vehicle is driven.
In
order to restore the use of these functions
i
mmediately, start the engine and let it run:
-
f
or less than ten minutes, to use the
e
quipment for approximately five minutes,
-
f
or more than ten minutes, to use the
e
quipment for up to approximately
t
hirty minutes.
Let
the engine run for the duration specified to
e
nsure that the battery charge is sufficient.
Do
not repeatedly and continuously restart the
e
ngine in order to charge the battery.
A
flat battery prevents the engine from starting.
For
more information on the 12 V batter y, refer
to
the corresponding section.
Load reduction mode
System which manages the use of certain functions according to the level of charge
r
emaining in the battery.
When
the vehicle is being driven, the load
r
eduction function temporarily deactivates
c
ertain functions, such as the air conditioning,
t
he heated rear screen...
The
deactivated functions are reactivated
a
utomatically as soon as conditions permit.
Energy economy mode
Switching to economy
mode
A message appears in the instrument panel s
creen indicating that the vehicle has switched
t
o economy mode and the active functions are
p
ut on standby.
If
a telephone call is being made at this time, it
w
ill be maintained for around 10 minutes with
t
he Bluetooth hands-free system of your audio
s
ystem.
System
which manages the duration of use of certain functions to conserve a sufficient level of
c
harge in the battery.
After the engine has stopped, you can still use functions such as the audio and telematics
s
ystem, windscreen wipers, dipped beam headlamps, courtesy lamps, etc. for a maximum
c
ombined duration of about forty minutes.
7
Practical information
Page 290 of 523
288
Checking / adjusting tyre pressures
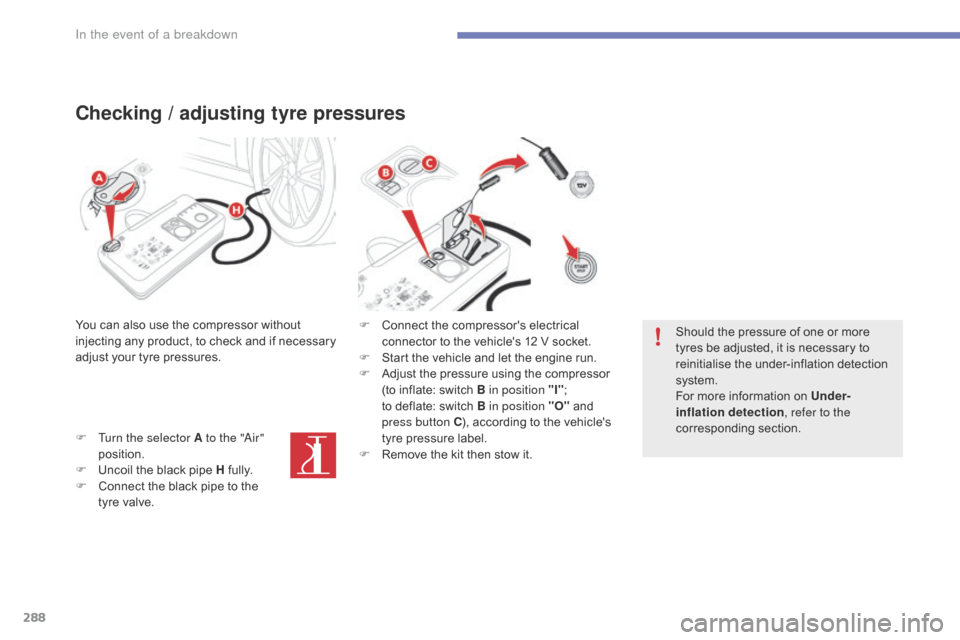
You can also use the compressor without injecting any product, to check and if necessary
a
djust your tyre pressures.
F
T
urn the selector A to the "Air"
position.
F
U
ncoil the black pipe H
f
ully.
F
C
onnect the black pipe to the
t
yre valve. F
C onnect the compressor's electrical
c
onnector to the vehicle's 12 V socket.
F
S
tart the vehicle and let the engine run.
F
A
djust the pressure using the compressor
(
to inflate: switch B in position "I";
t
o deflate: switch B in position "O"
and
p
ress button C),
according to the vehicle's
t
yre pressure label.
F
R
emove the kit then stow it.Should
the pressure of one or more
t
yres be adjusted, it is necessary to
r
einitialise the under-inflation detection
s
ystem.
For
more information on Under-
inflation detection , refer to the
corresponding
s
ection.
In the event of a breakdown
Page 316 of 523
314
F Start the engine of the vehicle with the g
ood battery and leave it running for a few
m
inutes.
F
O
perate the starter on the broken down
v
ehicle and let the engine run.
I
f the engine does not start straight away,
s
witch off the ignition and wait a few
m
oments before trying again.
F
W
ait until the engine returns to idle then
d
isconnect the jump lead cables in the
r
everse
o
rder.
F
R
efit the plastic cover to the (+) terminal, if
y
our vehicle has one.
F
A
llow the engine to run for at least
3
0 minutes, by driving or with the vehicle
s
tationary, so that the battery reaches an
adequate
state of charge.
Starting using another battery
Some functions, including Stop & Start, are not available if the battery is not
sufficiently
c
harged.
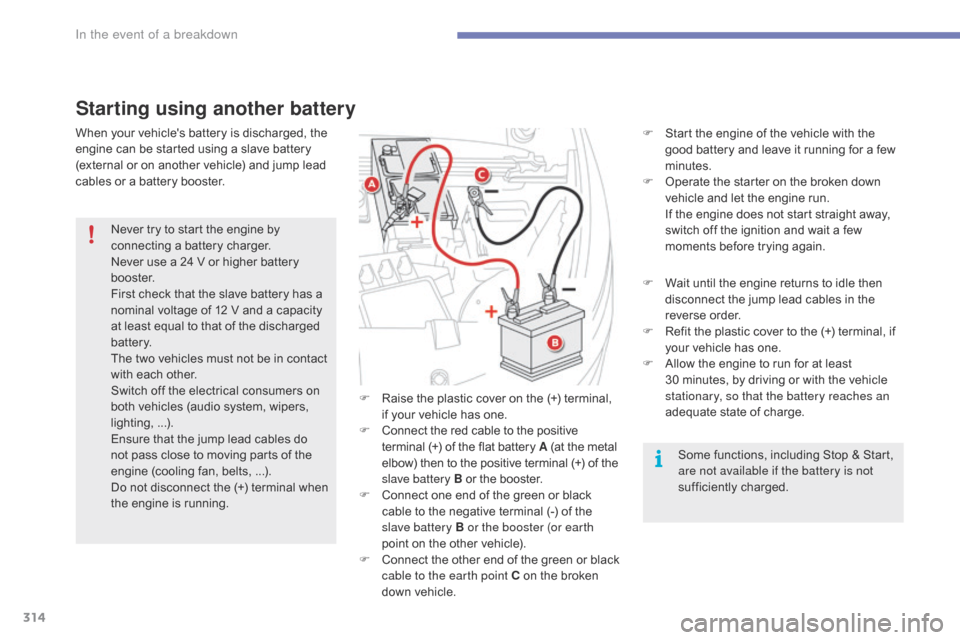
F
R
aise
the
plastic
cover
on
the
(+)
terminal,
i
f
your
vehicle
has
one.
F
C
onnect
the
red
cable
to
the
positive
t
erminal
(+)
of
the
flat
battery
A
(at
the
metal e
lbow)
then
to
the
positive
terminal (+)
of
the s
lave battery B
or
the
booster.
F
C
onnect
one
end
of
the
green
or
black
c
able
to
the
negative
terminal
(-)
of
the
s
lave battery B or the booster (or earth
point
on
the
other
vehicle).
F
C
onnect
t
he
o
ther
e
nd
o
f
t
he
g
reen
o
r
b
lack
c
able to the earth point C
on
the
broken
d
own
vehicle.
Never
try
to
start
the
engine
by
c
onnecting
a
battery
charger.
Never
use
a
24
V
or
higher
battery
b
o o s t e r.
First
check
that
the
slave
battery
has
a
n
ominal
voltage
of
12
V
and
a
capacity
a
t
least
equal
to
that
of
the
discharged
b
attery.
The
two
vehicles
must
not
be
in
contact
w
ith
each
other.
Switch
off
the
electrical
consumers
on
b
oth
vehicles
(audio
system,
wipers,
l
ighting, ...).
Ensure
that
the
jump
lead
cables
do
n
ot
pass
close
to
moving
parts
of
the
e
ngine
(cooling
fan,
belts, ...).
Do
not
disconnect
the
(+)
terminal
when
t
he
engine
is
running.
When
your
vehicle's
battery
is
discharged,
the
e
ngine
can
be
started
using
a
slave
battery
(
external
or
on
another
vehicle)
and
jump
lead
c
ables
or
a
battery
booster.
In the event of a breakdown
Page 337 of 523
335
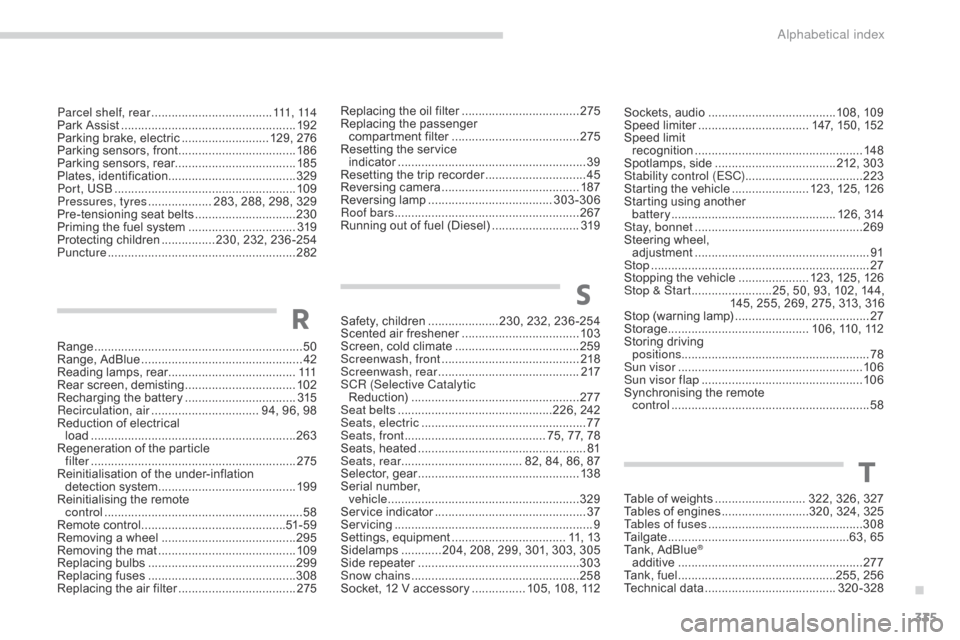
Range .............................................................. 50
Range, AdBlue ............................... .................42
Reading
lamps, rear
...................................... 111
R
ear
s
creen,
d
emisting
................................. 10
2
Recharging
the battery
.................................3
15
Recirculation, air
...............................
. 94, 96, 98
Reduction
of electrical
load
............................................................. 26
3
Regeneration
of the particle
filter
........
..................................................... 275
Reinitialisation
of the under-inflation
detection
system
......................................... 19
9
Reinitialising
the remote
control
........................................................... 58
R
emote control
........................................... 51
- 5 9
Removing
a wheel
..............................
..........295
Removing
the mat
...............................
..........109
Replacing
bu
lbs
..............................
..............299
Replacing
f
uses
..............................
..............308
Replacing
the air filter
...................................2
75Replacing
the oil filter
...................................
2
75
Replacing
t
he
p
assenger
c
ompartment filter
......................................
2
75
Resetting the service
indicator
...............................
.........................
39
Resetting the trip recorder
..............................
45
R
eversing
c
amera
...............................
..........
187
Reversing
lam
p
.....................................
3
03-306
Roof bars
....................................................... 2
67
Running out of fuel (Diesel)
..........................
3
19
R
Parcel shelf, rear ....................................
111 , 114
Park Assist ............................... .....................192
Parking
brake, electric
.......................... 1
29, 276
Parking
sensors, front
...................................18
6
Parking
sensors, rear.................................... 185
Plates,
id
entification ...................................... 329
Port, USB
...................................................... 10
9
Pressures, tyres
................... 2
83, 288, 298, 329
Pre-tensioning
seat belts
..............................23
0
Priming
the fuel system
................................31
9
Protecting
children
................2
30, 232, 236 -254
Puncture
................
........................................ 282 Sockets,
audio ......................................
10 8, 10 9
Speed l imiter ............................... .. 147, 150, 152
Speed
limit
recognition
.................................................. 14
8
Spotlamps,
si
de
....................................2
12, 303
Stability control (ESC) ...................................223
Starting
the vehicle
....................... 1
23, 125, 126
Starting
using another
battery
................................................. 1
26, 314
Stay, bonnet
...............................
...................269
Steering
wheel,
adjustment
.................................................... 91
St
op
...............
..................................................27
Stopping
the vehicle
..................... 1
23, 125, 126
Stop & Start
........................2
5, 50, 93, 102, 144,
145,
255, 269, 275, 313, 316
Stop
(warning lamp)
........................................2
7
Storage
................
.......................... 106, 110, 112
Storing
driving
positions ........................................................ 78
Sun visor
....................................................... 10
6
Sun visor flap
...............................
.................10 6
Synchronising
the remote
control
........................................................... 58
S
afety, children
.....................2
30, 232, 236 -254
Scented
air freshener
...................................10
3
Screen,
cold climate
.....................................25
9
Screenwash, front
......................................... 2
18
Screenwash, rear
...............................
...........217
SCR (Selective Catalytic Reduction)
.................................................. 2
77
Seat belts
..............................................2
26, 242
Seats, electric
................................................. 77
Se
ats, front
...............................
........... 75, 77, 78
Seats,
h
eated
...............................
...................81
Seats, rear
.................................... 8
2, 84, 86, 87
Selector,
ge
ar
................................................13
8
Serial
number,
vehicle
...............................
..........................329
Service
i
ndicator
.............................................37
S
ervicing
...............................
............................ 9
Settings,
e
quipment
.................................. 1
1, 13
Sidelamps
............ 2
04, 208, 299, 301, 303, 305
Side
r
epeater
..............................
..................303
Snow chains
.................................................. 25
8
Socket,
12 V accessory
................ 1
05, 108, 112
S
Table of weights ........................... 322, 326, 327
Tables of engines ..........................3 20, 324, 325
Tables of fuses
.............................................. 3
08
Tailgate
................
......................................63, 65
Tank,
AdBlue
®
additive ............... ........................................ 277
Tank,
fuel
...............................
................255, 256
Technical
da
ta
....................................... 32
0-328
T
.
Alphabetical index