driver Citroen JUMPER 2016 2.G Owner's Guide
[x] Cancel search | Manufacturer: CITROEN, Model Year: 2016, Model line: JUMPER, Model: Citroen JUMPER 2016 2.GPages: 276, PDF Size: 8.93 MB
Page 61 of 276
59
jumper_en_Chap03_Ergo-et-confort_ed01-2015
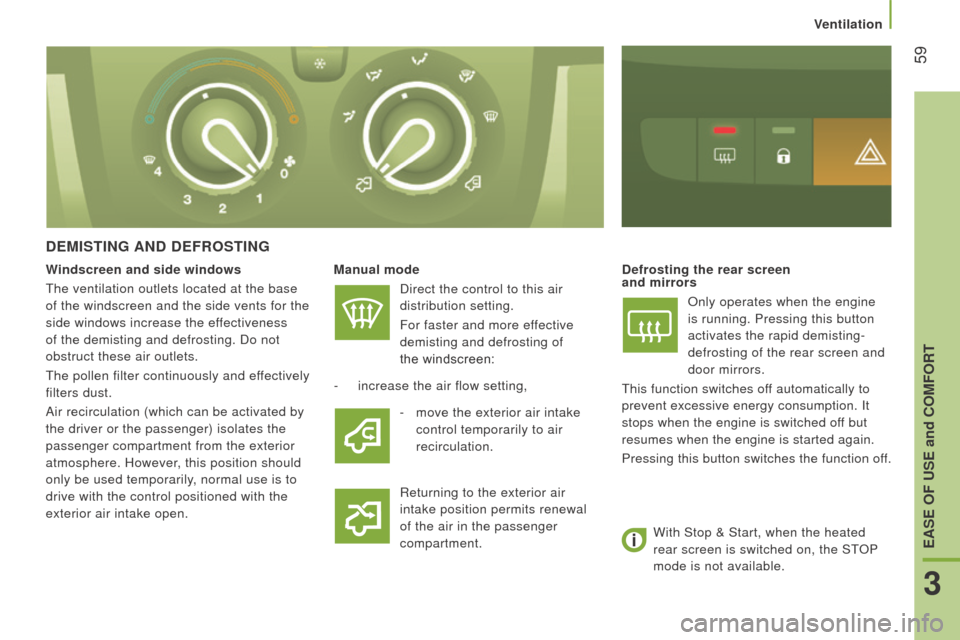
dEMIStInG And dEF r OS t I n G
Manual mode
Direct the control to this air
distribution setting.
For faster and more effective
demisting and defrosting of
the windscreen:d efrosting the rear screen
and mirrors
o nly operates when the engine
is running. Pressing this button
activates the rapid demisting-
defrosting of the rear screen and
door mirrors.
This function switches off automatically to
prevent excessive energy consumption.
i t
stops when the engine is switched off but
resumes when the engine is started again.
Pressing this button switches the function off.
-
increase the air flow setting,
r
eturning to the exterior air
intake position permits renewal
of the air in the passenger
compartment.
Windscreen and side windows
The ventilation outlets located at the base
of the windscreen and the side vents for the
side windows increase the effectiveness
of the demisting and defrosting. Do not
obstruct these air outlets.
The pollen filter continuously and effectively
filters dust.
Air recirculation (which can be activated by
the driver or the passenger) isolates the
passenger compartment from the exterior
atmosphere. However, this position should
only be used temporarily, normal use is to
drive with the control positioned with the
exterior air intake open.
-
move the exterior air intake
control temporarily to air
recirculation.
With Stop & Start, when the heated
rear screen is switched on, the ST
o
P
mode is not available.
Ventilation
3
EASE OF uSE and cOMFOrt
Page 67 of 276
65
jumper_en_Chap03_Ergo-et-confort_ed01-2015
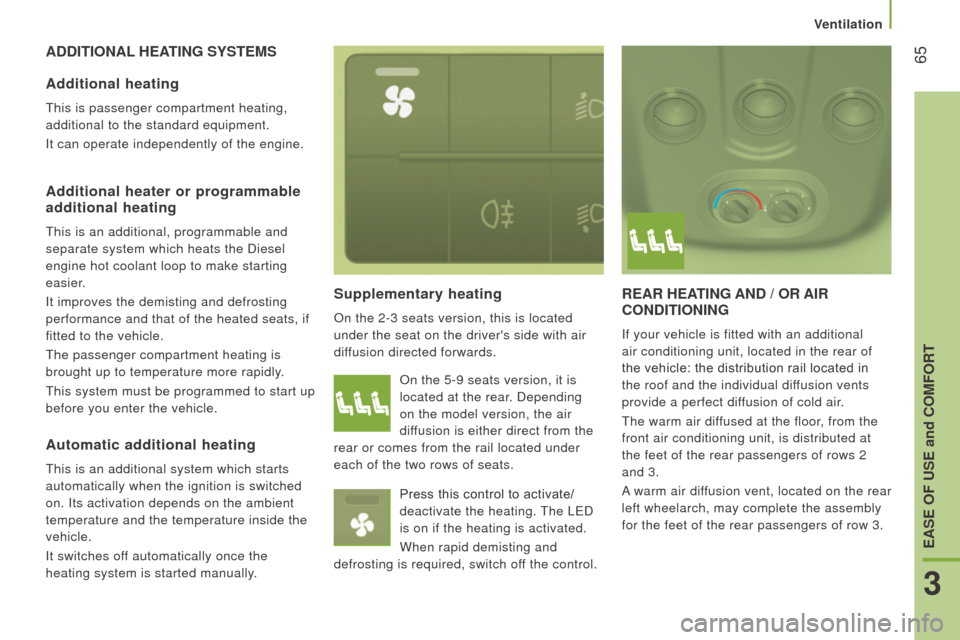
AddItIOnAL HEAt I n G SYS t EMS
Supplementary heating
on the 2-3 seats version, this is located
under the seat on the driver's side with air
diffusion directed forwards.
rEAr HEAt I n G A nd / O r AI r
c O nd I t IO n I n G
if your vehicle is fitted with an additional
air conditioning unit, located in the rear of
the vehicle: the distribution rail located in
the roof and the individual diffusion vents
provide a perfect diffusion of cold air.
The warm air diffused at the floor, from the
front air conditioning unit, is distributed at
the feet of the rear passengers of rows
2
and 3.
A warm air diffusion vent, located on the rear
left wheelarch, may complete the assembly
for the feet of the rear passengers of row 3.
Additional heating
This is passenger compartment heating,
additional to the standard equipment.
i
t can operate independently of the engine.
Additional heater or programmable
additional heating
This is an additional, programmable and
separate system which heats the Diesel
engine hot coolant loop to make starting
easier.
i
t improves the demisting and defrosting
performance and that of the heated seats, if
fitted to the vehicle.
The passenger compartment heating is
brought up to temperature more rapidly.
This system must be programmed to start up
before you enter the vehicle.
o
n the 5-9 seats version, it is
located at the rear. Depending
on the model version, the air
diffusion is either direct from the
rear or comes from the rail located under
each of the two rows of seats.
Press this control to activate/
deactivate the heating. The LED
is on if the heating is activated.
When rapid demisting and
defrosting is required, switch off the control.
Automatic additional heating
This is an additional system which starts
automatically when the ignition is switched
on.
i ts activation depends on the ambient
temperature and the temperature inside the
vehicle.
i
t switches off automatically once the
heating system is started manually.
Ventilation
3
EASE OF uSE and cOMFOrt
Page 68 of 276
66
jumper_en_Chap03_Ergo-et-confort_ed01-2015
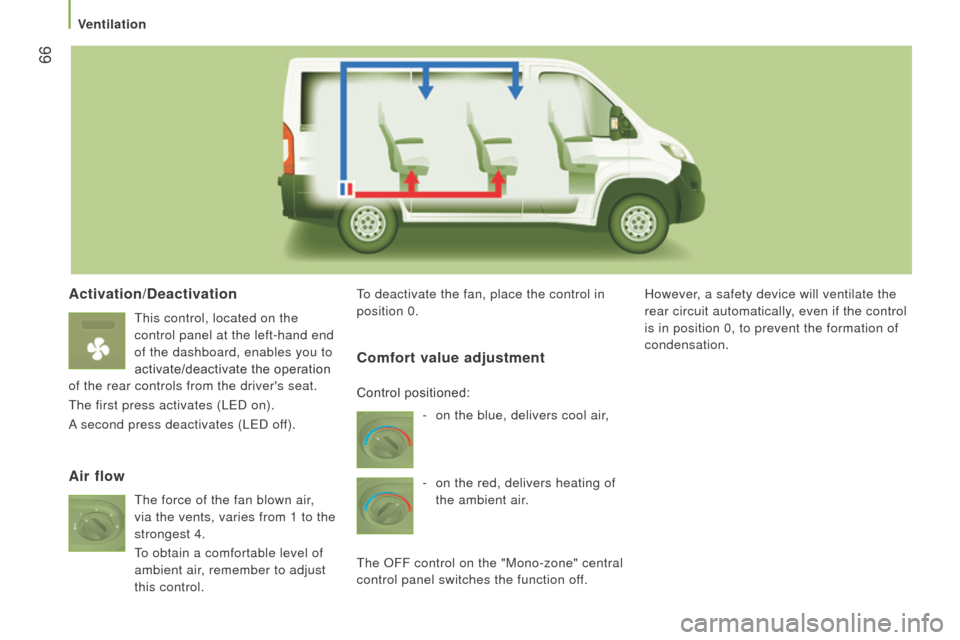
Activation/deactivation
This control, located on the
control panel at the left-hand end
of the dashboard, enables you to
activate/deactivate the operation
of the rear controls from the driver's seat.
The first press activates (LED on).
A second press deactivates (LED off). To deactivate the fan, place the control in
position 0.
However, a safety device will ventilate the
rear circuit automatically, even if the control
is in position 0, to prevent the formation of
condensation.
Air flow
c
omfort value adjustment
- on the blue, delivers cool air
,
-
on the red, delivers heating of
the ambient air.
The
o
FF control on the "Mono-zone" central
control panel switches the function off. Control positioned:
The force of the fan blown air,
via the vents, varies from 1 to the
strongest 4.
To obtain a comfortable level of
ambient air, remember to adjust
this control.
Ventilation
Page 73 of 276
71
jumper_en_Chap03_Ergo-et-confort_ed01-2015
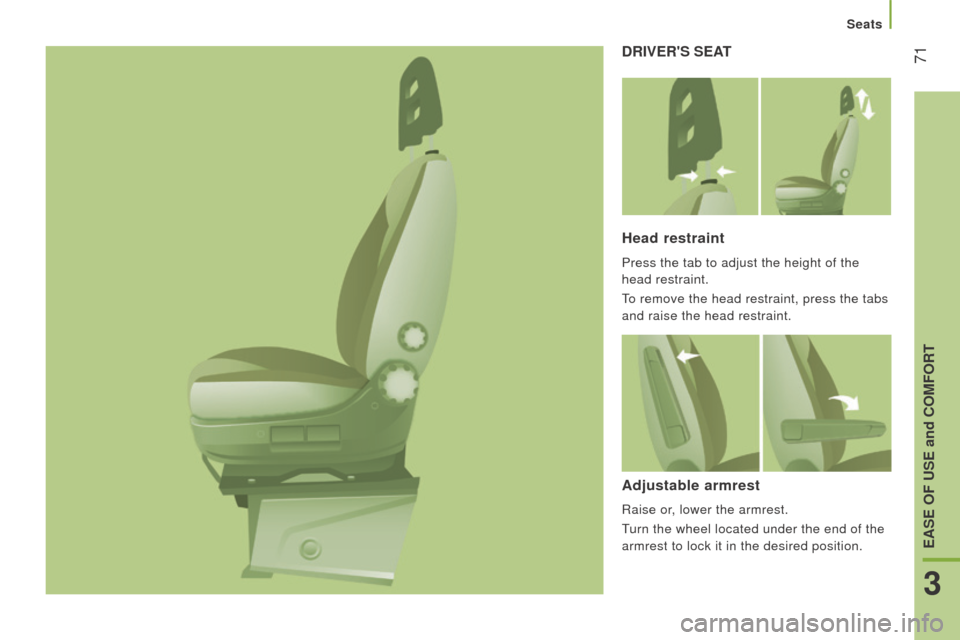
drIVEr'S SEAt
Head restraint
Press the tab to adjust the height of the
head restraint.
To remove the head restraint, press the tabs
and raise the head restraint.
Adjustable armrest
raise or, lower the armrest.
T urn the wheel located under the end of the
armrest to lock it in the desired position.
Seats
3
EASE OF uSE and cOMFOrt
Page 74 of 276
72
jumper_en_Chap03_Ergo-et-confort_ed01-2015
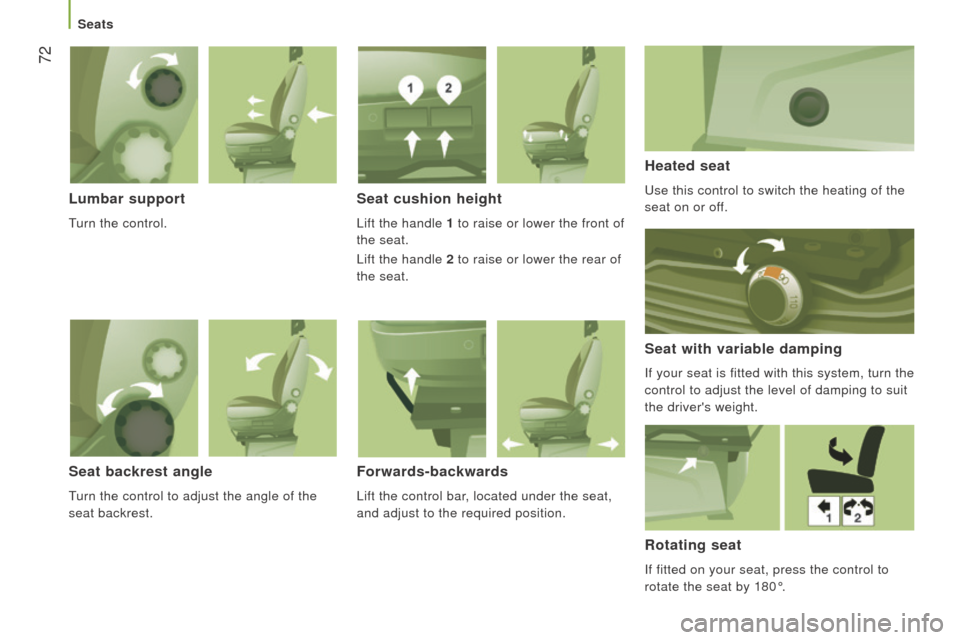
Lumbar support
Turn the control.
Seat cushion height
Lift the handle 1 to raise or lower the front of
the seat.
Lift the handle 2 to raise or lower the rear of
the seat.
Heated seat
Use this control to switch the heating of the
seat on or off.
Seat with variable damping
if your seat is fitted with this system, turn the
control to adjust the level of damping to suit
the driver's weight.
Seat backrest angle
Turn the control to adjust the angle of the
seat backrest.
Forwards-backwards
Lift the control bar, located under the seat,
and adjust to the required position.
rotating seat
if fitted on your seat, press the control to
rotate the seat by 180°.
Seats
Page 78 of 276
76
jumper_en_Chap03_Ergo-et-confort_ed01-2015
cABIn FIttInGS
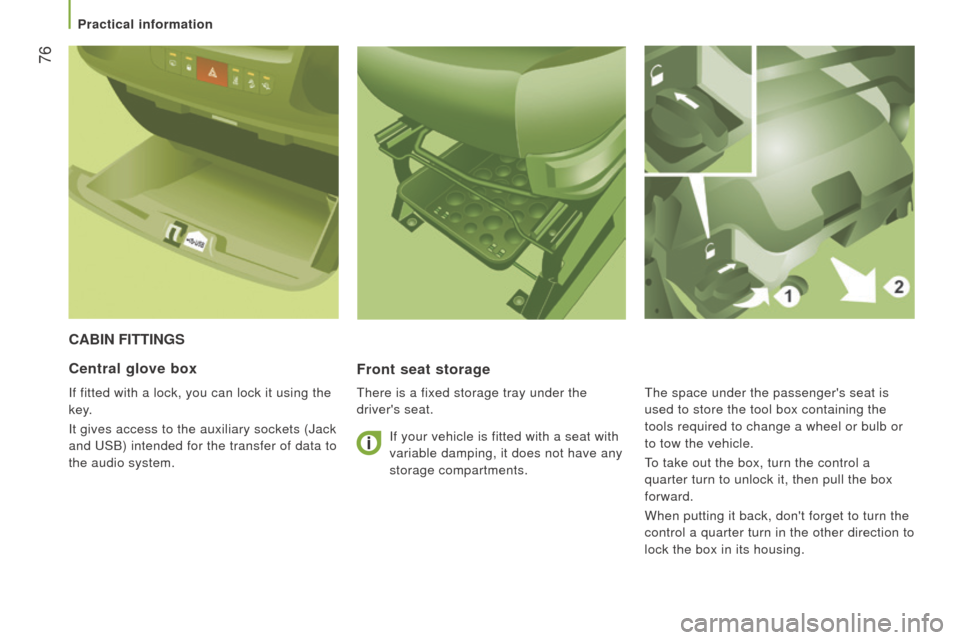
Front seat storage
There is a fixed storage tray under the
driver's seat.
central glove box
if fitted with a lock, you can lock it using the
key .
i
t gives access to the auxiliary sockets (Jack
and USB) intended for the transfer of data to
the audio system.
i
f your vehicle is fitted with a seat with
variable damping, it does not have any
storage compartments. The space under the passenger's seat is
used to store the tool box containing the
tools required to change a wheel or bulb or
to tow the vehicle.
To take out the box, turn the control a
quarter turn to unlock it, then pull the box
forward.
When putting it back, don't forget to turn the
control a quarter turn in the other direction to
lock the box in its housing.
Practical information
Page 82 of 276
80
jumper_en_Chap03_Ergo-et-confort_ed01-2015
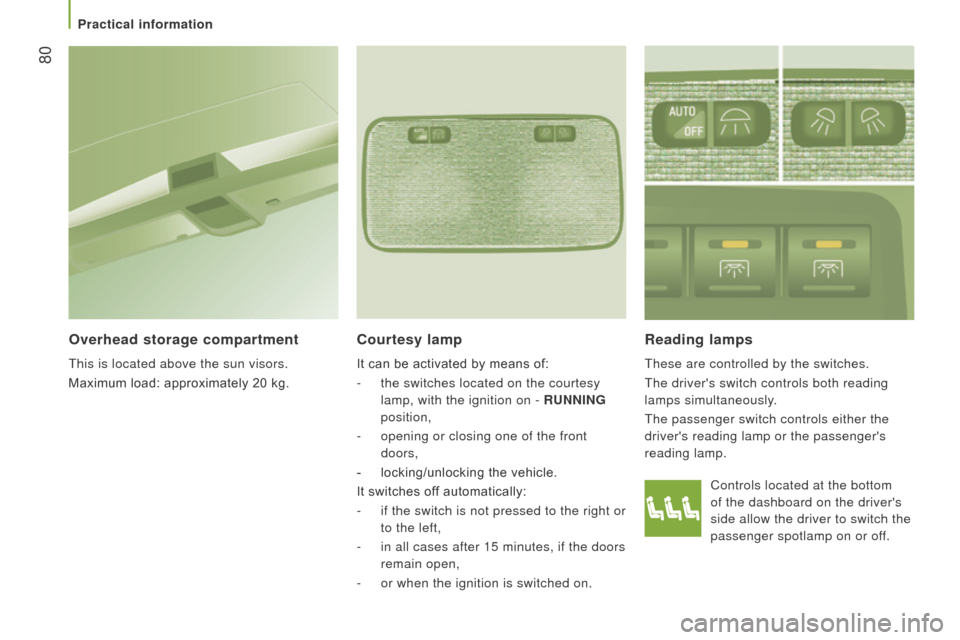
Controls located at the bottom
of the dashboard on the driver's
side allow the driver to switch the
passenger spotlamp on or off.
reading lamps
These are controlled by the switches.
The driver's switch controls both reading
lamps simultaneously.
The passenger switch controls either the
driver's reading lamp or the passenger's
reading lamp.
courtesy lamp
It can be activated by means of:
-
the switches located on the courtesy
lamp, with the ignition on -
runn I n G
position,
-
opening or closing one of the front
doors,
-
locking/unlocking the vehicle.
It switches of
f automatically:
-
if the switch is not pressed to the right or
to the left,
-
in all cases after 15 minutes, if the doors
remain open,
-
or when the ignition is switched on.
Overhead storage compartment
This is located above the sun visors.
Maximum load: approximately 20 kg.
Practical information
Page 84 of 276
82
jumper_en_Chap03_Ergo-et-confort_ed01-2015
Load retainer
on the floor, behind the front seats, a
horizontal partition protects the driver and
front passengers against the risk of load
movement.
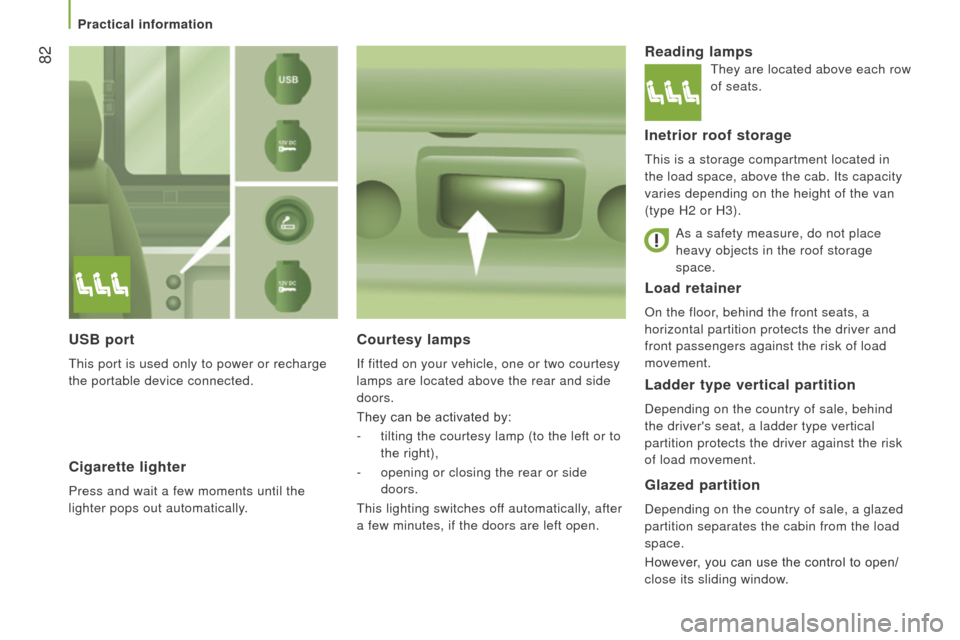
courtesy lamps
if fitted on your vehicle, one or two courtesy
lamps are located above the rear and side
doors.
They can be activated by:
-
tilting the courtesy lamp (to the left or to
the right),
-
opening or closing the rear or side
doors.
This lighting switches off automatically, after
a few minutes, if the doors are left open.
reading lamps
Inetrior roof storage
This is a storage compartment located in
the load space, above the cab. i ts capacity
varies depending on the height of the van
(type H2 or H3).
Ladder type vertical partition
Depending on the country of sale, behind
the driver's seat, a ladder type vertical
partition protects the driver against the risk
of load movement.
Glazed partition
Depending on the country of sale, a glazed
partition separates the cabin from the load
space.
However, you can use the control to open/
close its sliding window.
uSB port
This port is used only to power or recharge
the portable device connected.
cigarette lighter
Press and wait a few moments until the
lighter pops out automatically. As a safety measure, do not place
heavy objects in the roof storage
space.
They are located above each row
of seats.
Practical information
Page 87 of 276
85
jumper_en_Chap03_Ergo-et-confort_ed01-2015
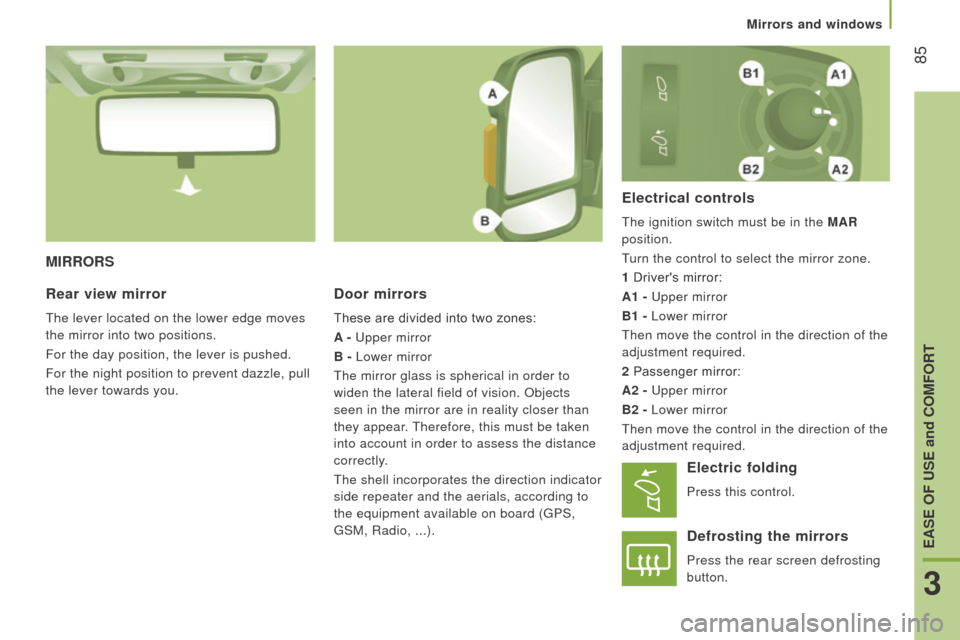
MIrrOrS
d
oor mirrors
These are divided into two zones:
A - Upper mirror
B - Lower mirror
The mirror glass is spherical in order to
widen the lateral field of vision.
o bjects
seen in the mirror are in reality closer than
they appear. Therefore, this must be taken
into account in order to assess the distance
correctly.
The shell incorporates the direction indicator
side repeater and the aerials, according to
the equipment available on board (GPS,
GSM,
r adio, ...).
Electrical controls
The ignition switch must be in the MAr
position.
T
urn the control to select the mirror zone.
1 Driver's mirror:
A1 - Upper mirror
B1 - Lower mirror
Then move the control in the direction of the
adjustment required.
2 Passenger mirror:
A2 - Upper mirror
B2 - Lower mirror
Then move the control in the direction of the
adjustment required.
rear view mirror
The lever located on the lower edge moves
the mirror into two positions.
For the day position, the lever is pushed.
For the night position to prevent dazzle, pull
the lever towards you.
Electric folding
Press this control.
defrosting the mirrors
Press the rear screen defrosting
button.
Mirrors and windows
3
EASE OF uSE and cOMFOrt
Page 88 of 276
86
jumper_en_Chap03_Ergo-et-confort_ed01-2015
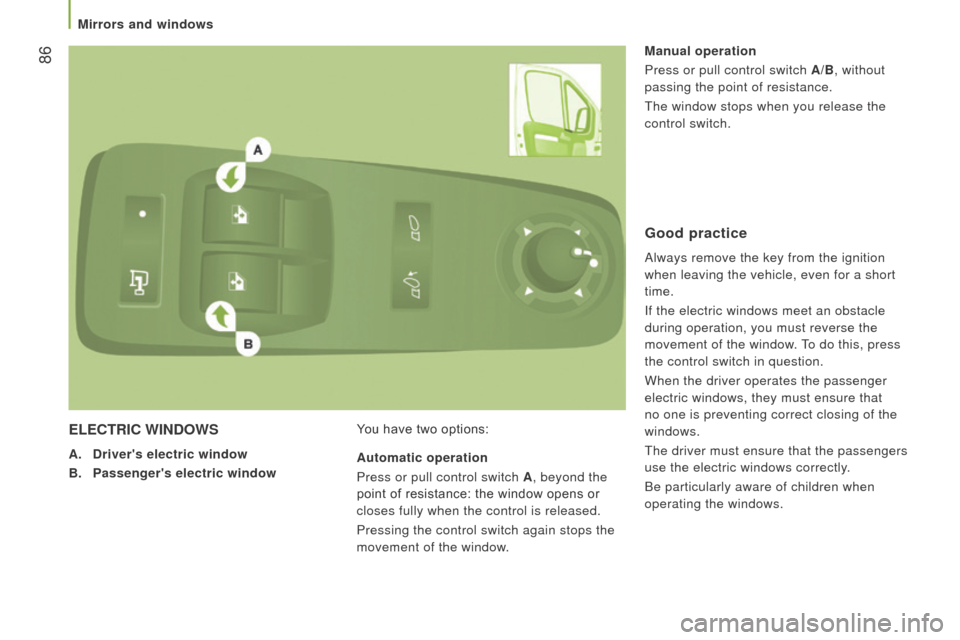
ELEctrIc WIndOWS
A. d river's electric window
B.
Passenger's electric window Y
ou have two options:Manual operation
Press or pull control switch A/B, without
passing the point of resistance.
The window stops when you release the
control switch.
Automatic operation
Press or pull control switch A , beyond the
point of resistance: the window opens or
closes fully when the control is released.
Pressing the control switch again stops the
movement of the window.
Good practice
Always remove the key from the ignition
when leaving the vehicle, even for a short
time.
i
f the electric windows meet an obstacle
during operation, you must reverse the
movement of the window. To do this, press
the control switch in question.
When the driver operates the passenger
electric windows, they must ensure that
no one is preventing correct closing of the
windows.
The driver must ensure that the passengers
use the electric windows correctly.
Be particularly aware of children when
operating the windows.
Mirrors and windows