display Citroen JUMPER DAG 2008 2.G User Guide
[x] Cancel search | Manufacturer: CITROEN, Model Year: 2008, Model line: JUMPER DAG, Model: Citroen JUMPER DAG 2008 2.GPages: 163, PDF Size: 2.74 MB
Page 33 of 163
35
2
READY TO SET OFF
Instruments and controls
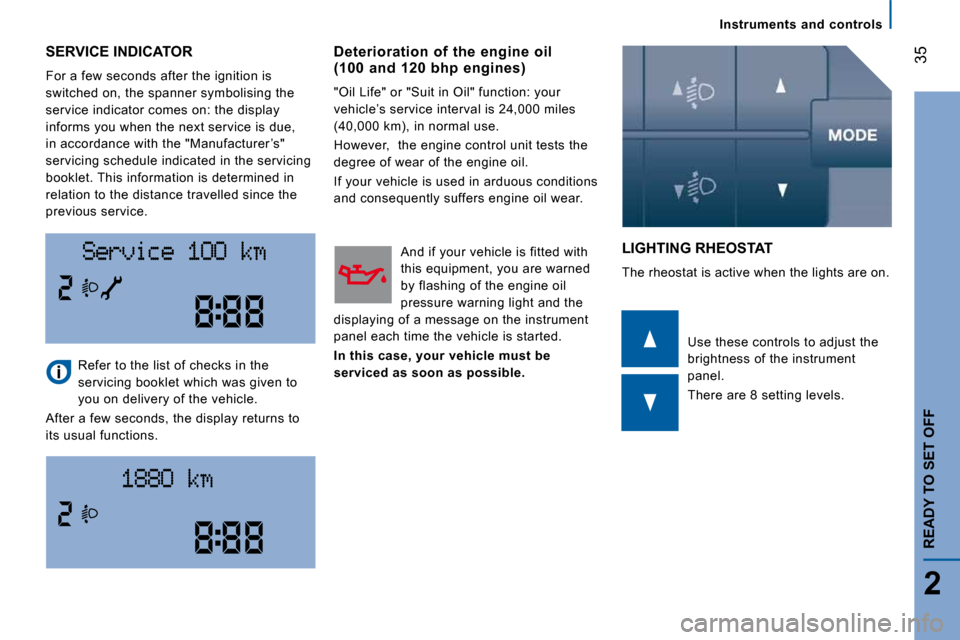
SERVICE INDICATOR
For a few seconds after the ignition is
switched on, the spanner symbolising the
service indicator comes on: the display
informs you when the next service is due,
in accordance with the "Manufacturer ’s"
servicing schedule indicated in the servicing
booklet. This information is determined in
relation to the distance travelled since the
previous service.
LIGHTING RHEOSTAT
The rheostat is active when the lights are on.
Refer to the list of checks in the
servicing booklet which was given to
you on delivery of the vehicle.
After a few seconds, the display returns to
its usual functions. Use these controls to adjust the
brightness of the instrument
panel.
There are 8 setting levels.
Deterioration of the engine oil (100 and 120 bhp engines)
"Oil Life" or "Suit in Oil" function: your
vehicle’s service interval is 24,000 miles
(40,000 km), in normal use.
However, the engine control unit tests the
degree of wear of the engine oil.
If your vehicle is used in arduous conditions
and consequently suffers engine oil wear.
And if your vehicle is fitted with
this equipment, you are warned
by flashing of the engine oil
pressure warning light and the
displaying of a message on the instrument
panel each time the vehicle is started.
In this case, your vehicle must be
serviced as soon as possible.
Page 37 of 163

2
READY TO SET OFF
Starting and stopping
Fault When a malfunction of the
system occurs, this warning light
comes on accompanied by an
audible signal and confirmed by
a message on the display, if fitted in your
vehicle.
Contact a CITROËN dealer to have the
system checked.
The HHC (Hill Holder Control) or Hill Start
Assistance function is a driving comfort
feature. It is not an automatic vehicle
parking function or an automatic handbrake. Good practice when stopping
Minimise engine and gearbox wear
When switching off the ignition, let the
engine run for a few seconds to allow the
turbocharger to return to idle.
Do not press the accelerator when switching
off the ignition.
There is no need to engage a gear after
parking the vehicle.
Page 39 of 163
41
3
ERGONOMICS AND COMFORT
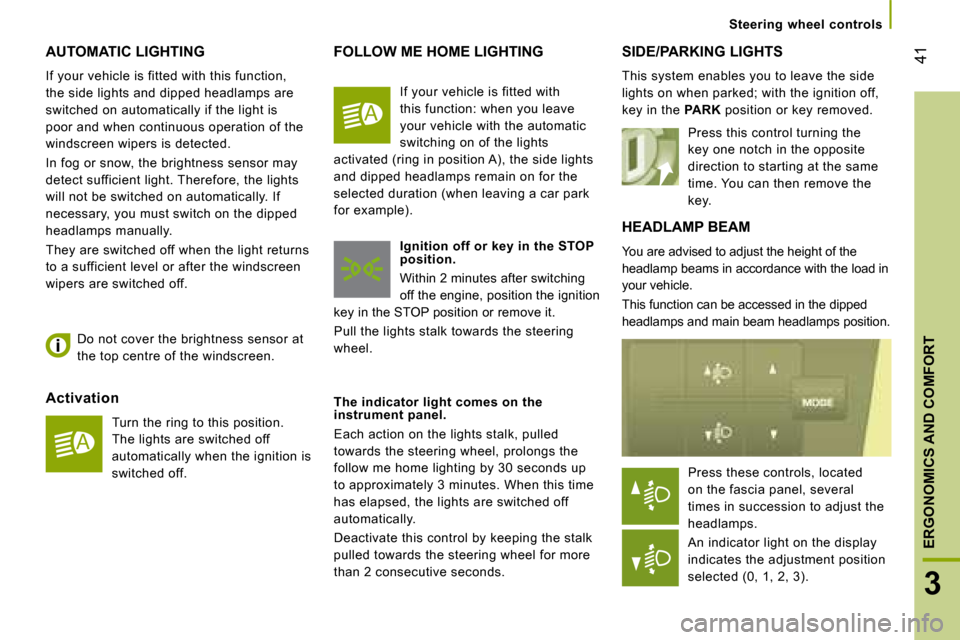
AUTOMATIC LIGHTING
If your vehicle is fitted with this function,
the side lights and dipped headlamps are
switched on automatically if the light is
poor and when continuous operation of the
windscreen wipers is detected.
In fog or snow, the brightness sensor may
detect sufficient light. Therefore, the lights
will not be switched on automatically. If
necessary, you must switch on the dipped
headlamps manually.
They are switched off when the light returns
to a sufficient level or after the windscreen
wipers are switched off.
HEADLAMP BEAM
You are advised to adjust the height of the
headlamp beams in accordance with the load in
your vehicle.
This function can be accessed in the dipped
headlamps and main beam headlamps position.
SIDE/PARKING LIGHTS
This system enables you to leave the side
lights on when parked; with the ignition off,
key in the PARK position or key removed.
Activation Turn the ring to this position.
The lights are switched off
automatically when the ignition is
switched off.
Do not cover the brightness sensor at
the top centre of the windscreen.
FOLLOW ME HOME LIGHTING
Ignition off or key in the STOP
position.
Within 2 minutes after switching
off the engine, position the ignition
key in the STOP position or remove it.
Pull the lights stalk towards the steering
wheel.
The indicator light comes on the
instrument panel.
Each action on the lights stalk, pulled
towards the steering wheel, prolongs the
follow me home lighting by 30 seconds up
to approximately 3 minutes. When this time
has elapsed, the lights are switched off
automatically.
Deactivate this control by keeping the stalk
pulled towards the steering wheel for more
than 2 consecutive seconds. Press this control turning the
key one notch in the opposite
direction to starting at the same
time. You can then remove the
key.
If your vehicle is fitted with
this function: when you leave
your vehicle with the automatic
switching on of the lights
activated (ring in position A), the side lights
and dipped headlamps remain on for the
selected duration (when leaving a car park
for example).
Press these controls, located
on the fascia panel, several
times in succession to adjust the
headlamps.
An indicator light on the display
indicates the adjustment position
selected (0, 1, 2, 3). Steering wheel controls
Page 41 of 163
43
3
ERGONOMICS AND COMFORT
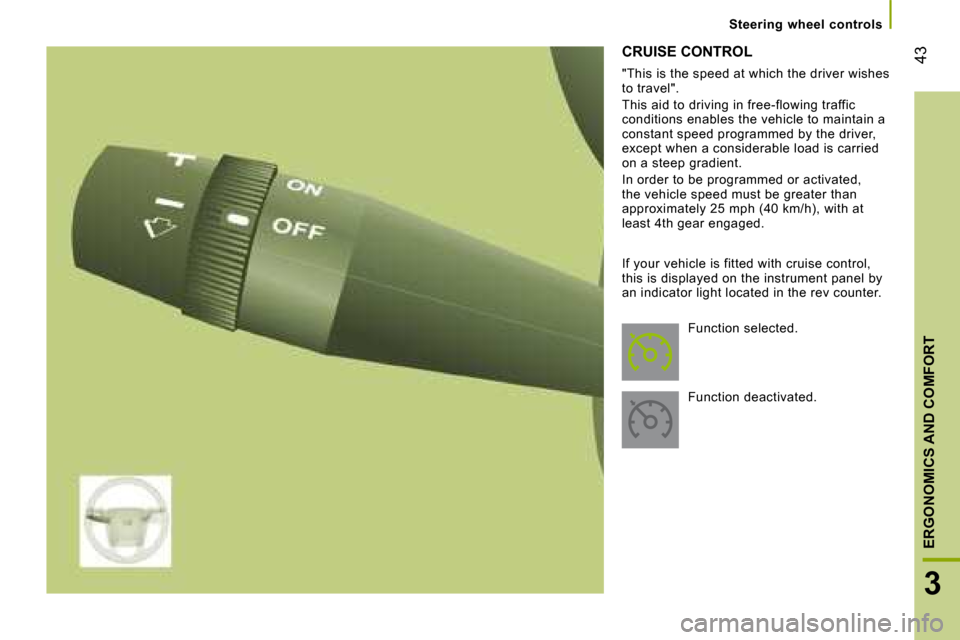
CRUISE CONTROL
"This is the speed at which the driver wishes
to travel".
This aid to driving in free-flowing traffic
conditions enables the vehicle to maintain a
constant speed programmed by the driver,
except when a considerable load is carried
on a steep gradient.
In order to be programmed or activated,
the vehicle speed must be greater than
approximately 25 mph (40 km/h), with at
least 4th gear engaged.
If your vehicle is fitted with cruise control,
this is displayed on the instrument panel by
an indicator light located in the rev counter. Function selected.
Function deactivated. Steering wheel controls
Page 48 of 163
50
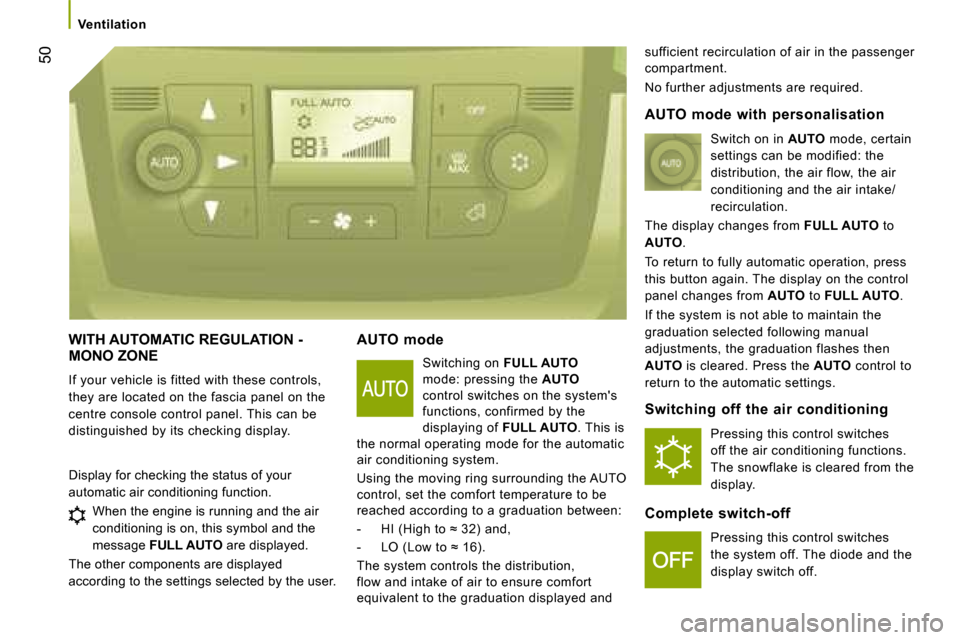
WITH AUTOMATIC REGULATION - MONO ZONE
If your vehicle is fitted with these controls,
they are located on the fascia panel on the
centre console control panel. This can be
distinguished by its checking display. AUTO mode
Switching on FULL AUTO
mode: pressing the AUTO
control switches on the system's
functions, confirmed by the
displaying of FULL AUTO . This is
the normal operating mode for the automatic
air conditioning system.
Using the moving ring surrounding the AUTO
control, set the comfort temperature to be
reached according to a graduation between:
� � � �-� � �H�I� �(�H�i�g�h� �t�o� �≈� �3�2�)� �a�n�d�,�
� � �-� � �L�O� �(�L�o�w� �t�o� �≈� �1�6�)�.� �
The system controls the distribution,
flow and intake of air to ensure comfort
equivalent to the graduation displayed and sufficient recirculation of air in the passenger
compartment.
No further adjustments are required.
Display for checking the status of your
automatic air conditioning function. When the engine is running and the air
conditioning is on, this symbol and the
message FULL AUTO are displayed.
The other components are displayed
according to the settings selected by the user. AUTO mode with personalisation
Switch on in AUTO mode, certain
settings can be modified: the
distribution, the air flow, the air
conditioning and the air intake/
recirculation.
The display changes from FULL AUTO to
AUTO .
To return to fully automatic operation, press
this button again. The display on the control
panel changes from AUTO to FULL AUTO .
If the system is not able to maintain the
graduation selected following manual
adjustments, the graduation flashes then
AUTO is cleared. Press the AUTO control to
return to the automatic settings.
Switching off the air conditioning
Pressing this control switches
off the air conditioning functions.
The snowflake is cleared from the
display.
Complete switch-off Pressing this control switches
the system off. The diode and the
display switch off.
Ventilation
Page 52 of 163
54
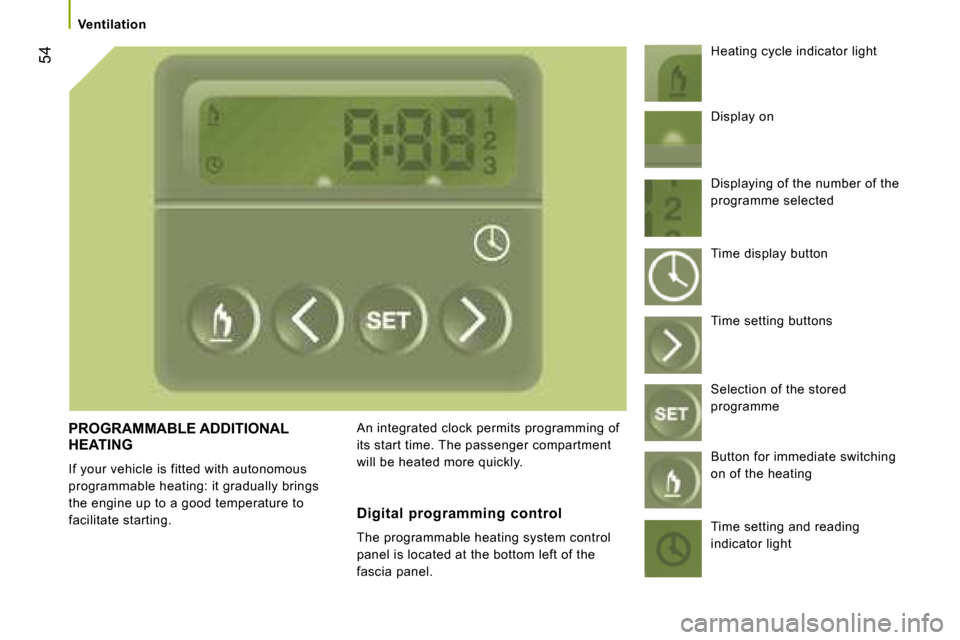
PROGRAMMABLE ADDITIONAL HEATING
If your vehicle is fitted with autonomous
programmable heating: it gradually brings
the engine up to a good temperature to
facilitate starting. An integrated clock permits programming of
its start time. The passenger compartment
will be heated more quickly. Heating cycle indicator light
Digital programming control
The programmable heating system control
panel is located at the bottom left of the
fascia panel. Display on
Displaying of the number of the
programme selected
Time display button
Time setting buttons
Selection of the stored
programme
Button for immediate switching
on of the heating
Time setting and reading
indicator light
Ventilation
Page 53 of 163
55
3
ERGONOMICS AND COMFORT
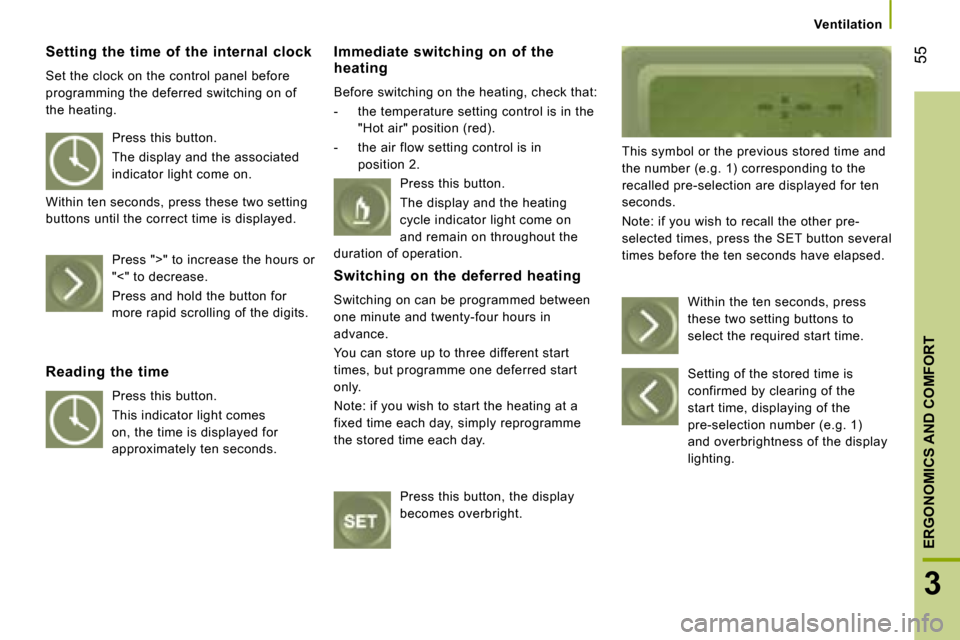
Setting the time of the internal clock
Set the clock on the control panel before
programming the deferred switching on of
the heating. Immediate switching on of the
heating
Before switching on the heating, check that:
- the temperature setting control is in the
"Hot air" position (red).
- the air flow setting control is in position 2. This symbol or the previous stored time and
the number (e.g. 1) corresponding to the
recalled pre-selection are displayed for ten
seconds.
Note: if you wish to recall the other pre-
selected times, press the SET button several
times before the ten seconds have elapsed.
Press this button.
The display and the associated
indicator light come on.
Within ten seconds, press these two setting
buttons until the correct time is displayed.
Press ">" to increase the hours or
"<" to decrease.
Press and hold the button for
more rapid scrolling of the digits.
Reading the time Press this button.
This indicator light comes
on, the time is displayed for
approximately ten seconds. Press this button.
The display and the heating
cycle indicator light come on
and remain on throughout the
duration of operation.
Switching on the deferred heating
Switching on can be programmed between
one minute and twenty-four hours in
advance.
You can store up to three different start
times, but programme one deferred start
only.
Note: if you wish to start the heating at a
fixed time each day, simply reprogramme
the stored time each day.
Press this button, the display
becomes overbright. Within the ten seconds, press
these two setting buttons to
select the required start time.
Setting of the stored time is
confirmed by clearing of the
start time, displaying of the
pre-selection number (e.g. 1)
and overbrightness of the display
lighting. Ventilation
Page 54 of 163
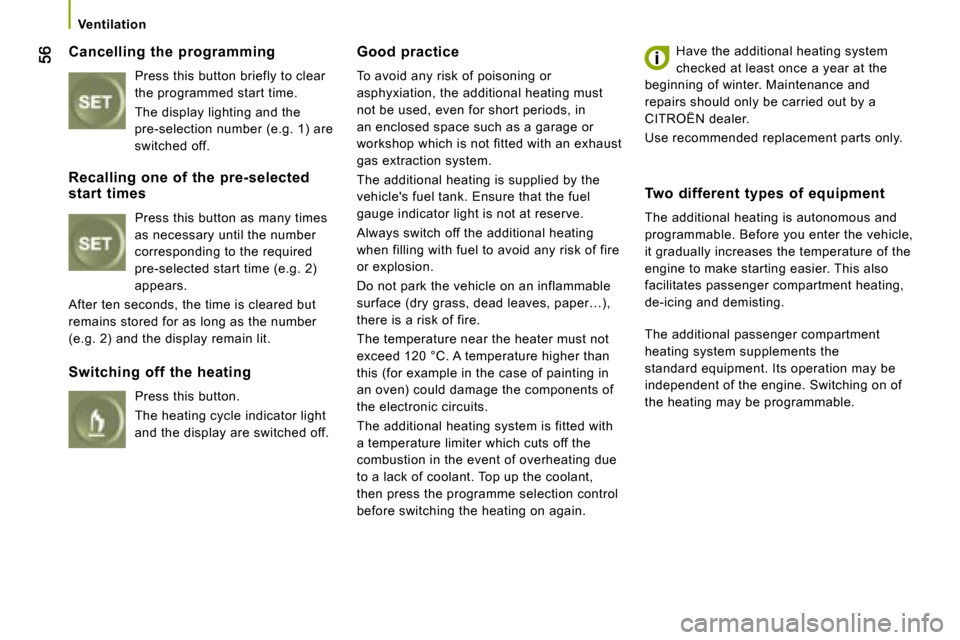
Cancelling the programming Press this button briefly to clear
the programmed start time.
The display lighting and the
pre-selection number (e.g. 1) are
switched off. Good practice
To avoid any risk of poisoning or
asphyxiation, the additional heating must
not be used, even for short periods, in
an enclosed space such as a garage or
workshop which is not fitted with an exhaust
gas extraction system.
The additional heating is supplied by the
vehicle's fuel tank. Ensure that the fuel
gauge indicator light is not at reserve.
Always switch off the additional heating
when filling with fuel to avoid any risk of fire
or explosion.
Do not park the vehicle on an inflammable
surface (dry grass, dead leaves, paper…),
there is a risk of fire.
The temperature near the heater must not
exceed 120 °C. A temperature higher than
this (for example in the case of painting in
an oven) could damage the components of
the electronic circuits.
The additional heating system is fitted with
a temperature limiter which cuts off the
combustion in the event of overheating due
to a lack of coolant. Top up the coolant,
then press the programme selection control
before switching the heating on again. Have the additional heating system
checked at least once a year at the
�b�e�g�i�n�n�i�n�g� �o�f� �w�i�n�t�e�r�.� �M�a�i�n�t�e�n�a�n�c�e� �a�n�d�
repairs should only be carried out by a
CITROËN dealer.
Use recommended replacement parts only.
Recalling one of the pre-selected
start times Press this button as many times
as necessary until the number
corresponding to the required
pre-selected start time (e.g. 2)
appears.
After ten seconds, the time is cleared but
remains stored for as long as the number
(e.g. 2) and the display remain lit.
Switching off the heating
Press this button.
The heating cycle indicator light
and the display are switched off. Two different types of equipment
The additional heating is autonomous and
programmable. Before you enter the vehicle,
it gradually increases the temperature of the
engine to make starting easier. This also
facilitates passenger compartment heating,
de-icing and demisting.
The additional passenger compartment
heating system supplements the
standard equipment. Its operation may be
independent of the engine. Switching on of
the heating may be programmable.
Ventilation
Page 70 of 163
72
Mode
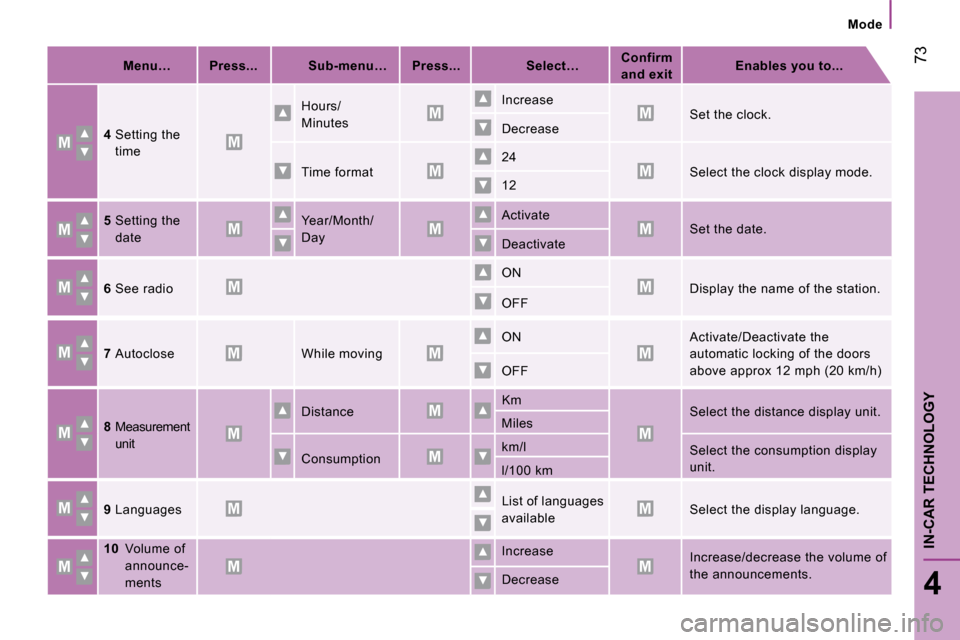
MODE
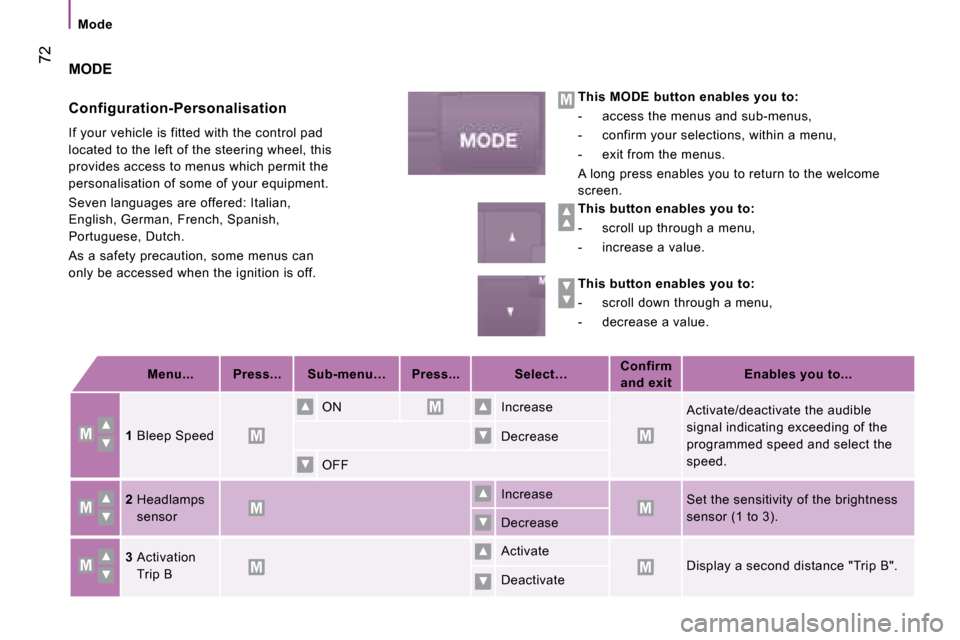
Configuration-Personalisation
If your vehicle is fitted with the control pad
located to the left of the steering wheel, this
provides access to menus which permit the
personalisation of some of your equipment.
Seven languages are offered: Italian,
English, German, French, Spanish,
Portuguese, Dutch.
As a safety precaution, some menus can
only be accessed when the ignition is off.
This MODE button enables you to:
- access the menus and sub-menus,
- confirm your selections, within a menu,
- exit from the menus.
A long press enables you to return to the welcome
screen.
This button enables you to:
- scroll up through a menu,
- increase a value.
This button enables you to:
- scroll down through a menu,
- decrease a value.
Menu... Press... Sub-menu… Press... Select…
Confirm
and exit
Enables you to...
1 Bleep Speed
ON Increase
Activate/deactivate the audible
signal indicating exceeding of the
programmed speed and select the
speed.
Decrease
OFF
2 Headlamps
sensor
Increase
Set the sensitivity of the brightness
sensor (1 to 3).
Decrease
3 Activation
Trip B Activate
Display a second distance "Trip B".
Deactivate
Page 71 of 163
Mode
73
4
IN-CAR TECHNOLOGY
Menu… Press... Sub-menu… Press... Select…
Confirm
and exit
Enables you to...
4 Setting the
time
Hours/
Minutes
Increase
Set the clock.
Decrease
Time format 24
Select the clock display mode.
12
5 Setting the
date Year/Month/
Day Activate
Set the date.
Deactivate
6 See radio
ON
Display the name of the station.
OFF
7 Autoclose
While moving ON
Activate/Deactivate the
automatic locking of the doors
above approx 12 mph (20 km/h)
OFF
8 Measurement
unit
Distance
Km
Select the distance display unit.
Miles
Consumption km/l
Select the consumption display
unit.
l/100 km
9 Languages List of languages
available Select the display language.
10
Volume of
announce-
ments
Increase
Increase/decrease the volume of
the announcements.
Decrease