stop start Citroen JUMPER RELAY 2012 2.G User Guide
[x] Cancel search | Manufacturer: CITROEN, Model Year: 2012, Model line: JUMPER RELAY, Model: Citroen JUMPER RELAY 2012 2.GPages: 184, PDF Size: 4.62 MB
Page 44 of 184
42
Starting and stopping
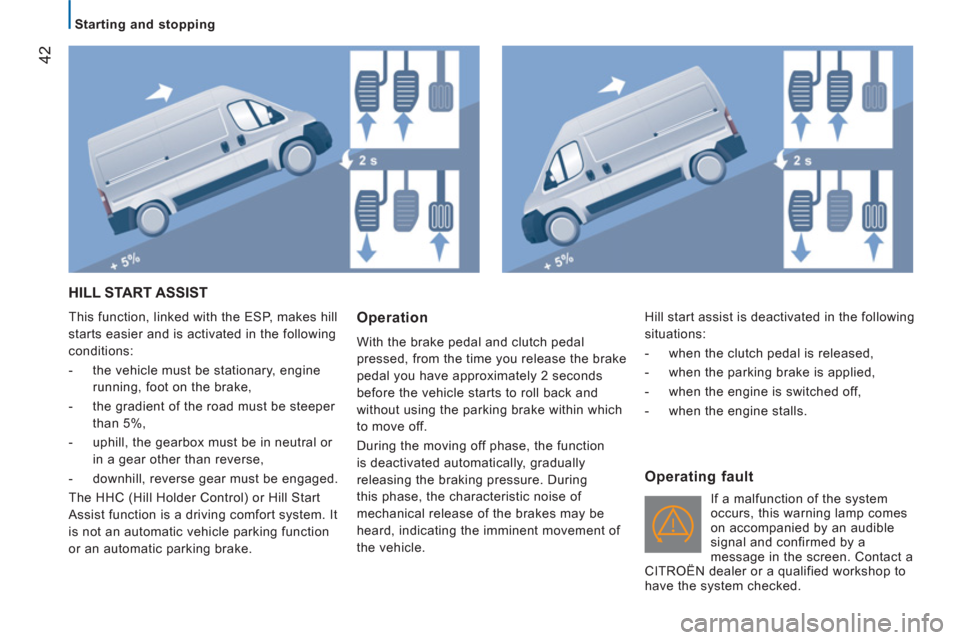
HILL START ASSIST
This function, linked with the ESP, makes hill
starts easier and is activated in the following
conditions:
- the vehicle must be stationary, engine
running, foot on the brake,
- the gradient of the road must be steeper
than 5%,
- uphill, the gearbox must be in neutral or
in a gear other than reverse,
- downhill, reverse gear must be engaged.
The HHC (Hill Holder Control) or Hill Start
Assist function is a driving comfort system. It
is not an automatic vehicle parking function
or an automatic parking brake. Operation
With the brake pedal and clutch pedal
pressed, from the time you release the brake
pedal you have approximately 2 seconds
before the vehicle starts to roll back and
without using the parking brake within which
to move off.
During the moving off phase, the function
is deactivated automatically, gradually
releasing the braking pressure. During
this phase, the characteristic noise of
mechanical release of the brakes may be
heard, indicating the imminent movement of
the vehicle.
Operating fault
If a malfunction of the system
occurs, this warning lamp comes
on accompanied by an audible
signal and confirmed by a
message in the screen. Contact a
CITROËN dealer or a qualified workshop to
have the system checked. Hill start assist is deactivated in the following
situations:
- when the clutch pedal is released,
- when the parking brake is applied,
- when the engine is switched off,
- when the engine stalls.
Page 45 of 184
43
2
READY TO G
O
Starting and stopping
The Stop & Start system puts the engine
temporarily into standby - STOP mode -
during stops in the traffic (red lights, traffic
jams, or other...). The engine restarts
automatically - START mode - as soon as
you want to move off. The restart takes
place instantly, quickly and silently.
Perfect for urban use, the Stop & Start
system reduces fuel consumption and
exhaust emissions and offers the comfort of
complete silence when stationary.
STOP & START
O
peration
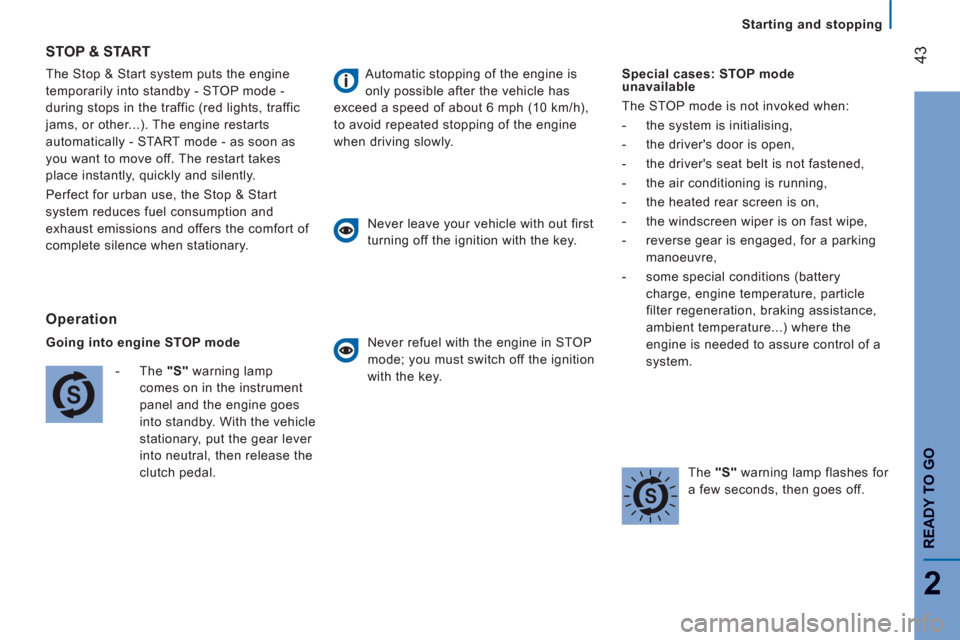
Going into engine STOP mode
- The "S"
warning lamp
comes on in the instrument
panel and the engine goes
into standby. With the vehicle
stationary, put the gear lever
into neutral, then release the
clutch pedal.
Automatic stopping of the engine is
only possible after the vehicle has
exceed a speed of about 6 mph (10 km/h),
to avoid repeated stopping of the engine
when driving slowly.
Never leave your vehicle with out first
turning off the ignition with the key.
Never refuel with the engine in STOP
mode; you must switch off the ignition
with the key.
Special cases: STOP mode
unavailable
The STOP mode is not invoked when:
- the system is initialising,
- the driver's door is open,
- the driver's seat belt is not fastened,
- the air conditioning is running,
- the heated rear screen is on,
- the windscreen wiper is on fast wipe,
- reverse gear is engaged, for a parking
manoeuvre,
- some special conditions (battery
charge, engine temperature, particle
filter regeneration, braking assistance,
ambient temperature...) where the
engine is needed to assure control of a
system.
The "S"
warning lamp flashes for
a few seconds, then goes off.
Page 46 of 184
44
Starting and stopping
Going into engine START mode
- The "S"
warning lamp goes
off and the engine restarts.
If following an automatic restart in START
mode, the driver takes no action on the
the vehicle during the next 3 minutes, the
system stops the engine definitively. The
engine can then only be restarted using the
key.
Special cases: START invoked
automatically
The START mode is invoked automatically
when:
- the vehicle's is free wheeling on a slope,
- the windscreen wiper is on fast wipe,
- the air conditioning is running,
- the engine has been stopped for around
3 minutes with Stop & Start,
- some special conditions (battery charge,
engine temperature, braking assistance,
ambient temperature...) where the
engine is needed to assure control of a
system.
In this case, a message appears
in the instrument panel screen,
accompanied by the "S"
warning
lamp, which flashes for a few
seconds, then goes off.
Good practice
With a manual gearbox in STOP mode, if a
gear is engaged without fully depressing the
clutch pedal, restarting may not take place.
A warning lamp or message is displayed
in the instrument panel asking you to fully
depress the clutch pedal to allow restarting.
With the engine stopped in STOP mode,
if the driver unfasten's their seat belt and
opens a front door, the engine can only be
restarted using the ignition key. There is an
audible signal, accompanied by flashing of
the "S"
warning lamp and, depending on
equipment, a message is displayed.
This operation is perfectly normal.
With the vehicle in gear, automatic engine
restarting is only allowed by fully depressing
the clutch pedal.
Page 47 of 184
45
2
READY TO G
O
Starting and stopping
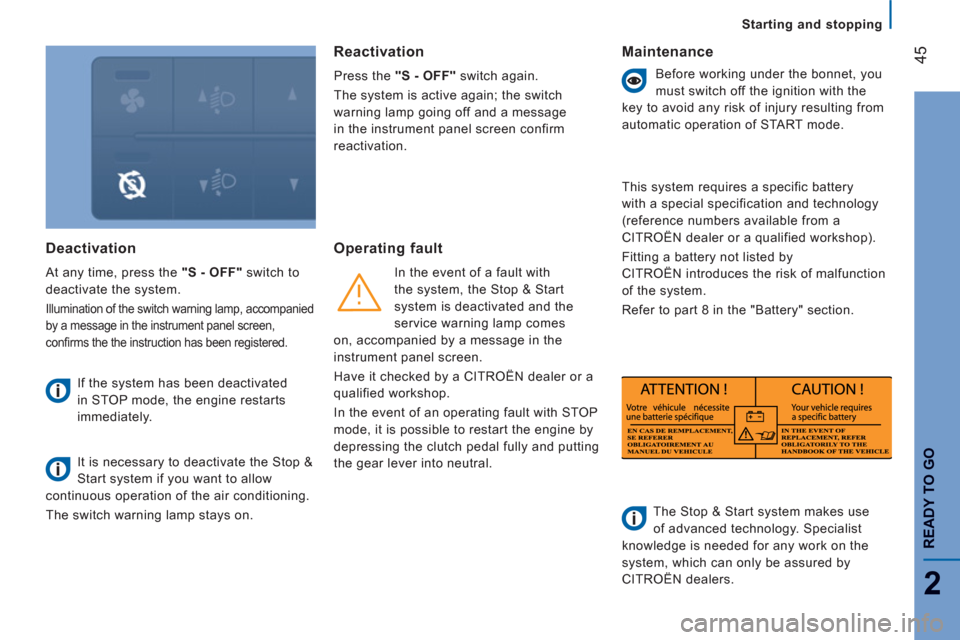
Deactivation
At any time, press the "S - OFF"
switch to
deactivate the system.
Illumination of the switch warning lamp, accompanied
by a message in the instrument panel screen,
confi rms the the instruction has been registered.
If the system has been deactivated
in STOP mode, the engine restarts
immediately.
It is necessary to deactivate the Stop &
Start system if you want to allow
continuous operation of the air conditioning.
The switch warning lamp stays on.
Reactivation
Press the "S - OFF"
switch again.
The system is active again; the switch
warning lamp going off and a message
in the instrument panel screen confirm
reactivation.
Operating fault
In the event of a fault with
the system, the Stop & Start
system is deactivated and the
service warning lamp comes
on, accompanied by a message in the
instrument panel screen .
Have it checked by a CITROËN dealer or a
qualified workshop.
In the event of an operating fault with STOP
mode, it is possible to restart the engine by
depressing the clutch pedal fully and putting
the gear lever into neutral.
Maintenance
Before working under the bonnet, you
must switch off the ignition with the
key to avoid any risk of injury resulting from
automatic operation of START mode.
This system requires a specific battery
with a special specification and technology
(reference numbers available from a
CITROËN dealer or a qualified workshop).
Fitting a battery not listed by
CITROËN introduces the risk of malfunction
of the system.
Refer to part 8 in the "Battery" section.
The Stop & Start system makes use
of advanced technology. Specialist
knowledge is needed for any work on the
system, which can only be assured by
CITROËN dealers.
Page 52 of 184
50
Steering mounted controls
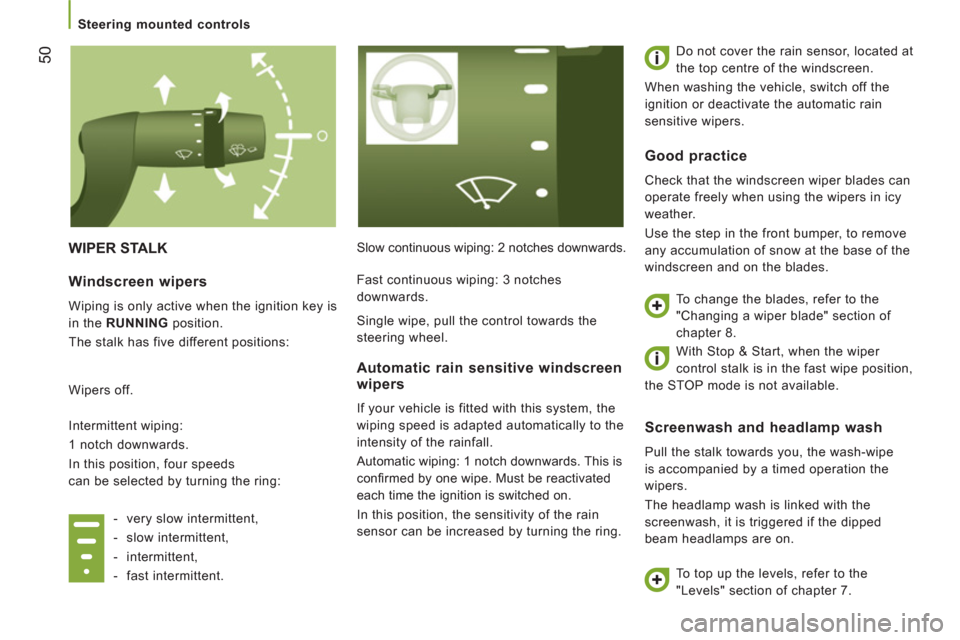
WIPER STALK
Slow continuous wiping: 2 notches downwards. Do not cover the rain sensor, located at
the top centre of the windscreen.
When washing the vehicle, switch off the
ignition or deactivate the automatic rain
sensitive wipers.
Screenwash and headlamp wash
Pull the stalk towards you, the wash-wipe
is accompanied by a timed operation the
wipers.
The headlamp wash is linked with the
screenwash, it is triggered if the dipped
beam headlamps are on.
Windscreen wipers
Wiping is only active when the ignition key is
in the RUNNING
position.
The stalk has five different positions:
Wipers off.
Intermittent wiping:
1 notch downwards.
In this position, four speeds
can be selected by turning the ring:
- very slow intermittent,
- slow intermittent,
- intermittent,
- fast intermittent.
Automatic rain sensitive windscreen
wipers
If your vehicle is fitted with this system, the
wiping speed is adapted automatically to the
intensity of the rainfall.
Automatic wiping: 1 notch downwards. This is
confi rmed by one wipe. Must be reactivated
each time the ignition is switched on.
In this position, the sensitivity of the rain
sensor can be increased by turning the ring.
Good practice
Check that the windscreen wiper blades can
operate freely when using the wipers in icy
weather.
Use the step in the front bumper, to remove
any accumulation of snow at the base of the
windscreen and on the blades.
To change the blades, refer to the
"Changing a wiper blade" section of
chapter 8.
To top up the levels, refer to the
"Levels" section of chapter 7. Fast continuous wiping: 3 notches
downwards.
Single wipe, pull the control towards the
steering wheel.
With Stop & Start, when the wiper
control stalk is in the fast wipe position,
the STOP mode is not available.
Page 56 of 184
54
Ventilation
VENTILATION
DEMISTING AND DEFROSTING
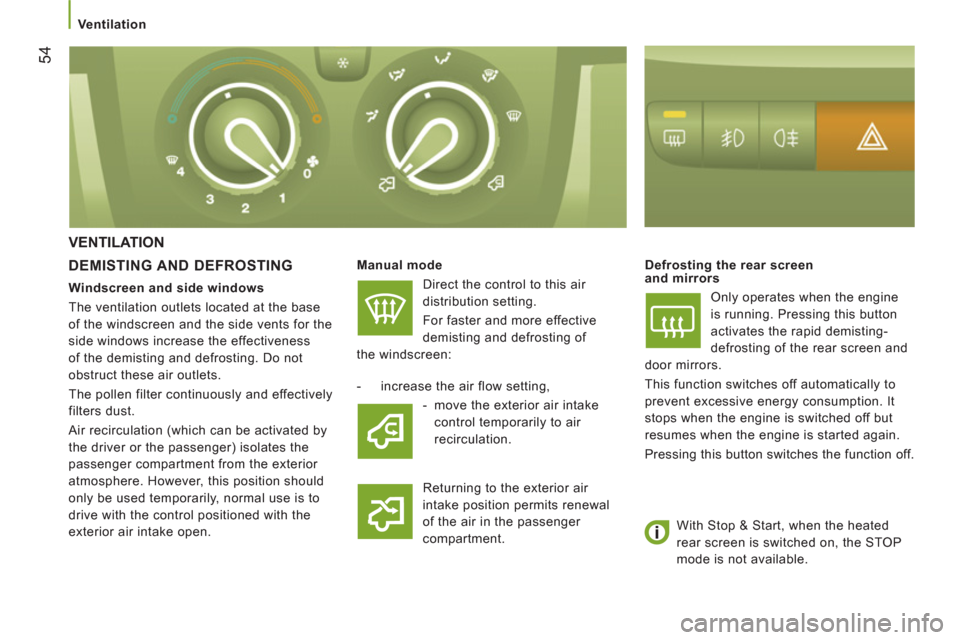
Manual mode
Direct the control to this air
distribution setting.
For faster and more effective
demisting and defrosting of
the windscreen:
Defrosting the rear screen
and mirrors
Only operates when the engine
is running. Pressing this button
activates the rapid demisting-
defrosting of the rear screen and
door mirrors.
This function switches off automatically to
prevent excessive energy consumption. It
stops when the engine is switched off but
resumes when the engine is started again.
Pressing this button switches the function off.
- increase the air flow setting,
- move the exterior air intake
control temporarily to air
recirculation.
Returning to the exterior air
intake position permits renewal
of the air in the passenger
compartment.
Windscreen and side windows
The ventilation outlets located at the base
of the windscreen and the side vents for the
side windows increase the effectiveness
of the demisting and defrosting. Do not
obstruct these air outlets.
The pollen filter continuously and effectively
filters dust.
Air recirculation (which can be activated by
the driver or the passenger) isolates the
passenger compartment from the exterior
atmosphere. However, this position should
only be used temporarily, normal use is to
drive with the control positioned with the
exterior air intake open.
With Stop & Start, when the heated
rear screen is switched on, the STOP
mode is not available.
Page 113 of 184
111
Bluetooth hands-free system
4
TECHNOLOGY
on
BOAR
D
Displaying the fi le information
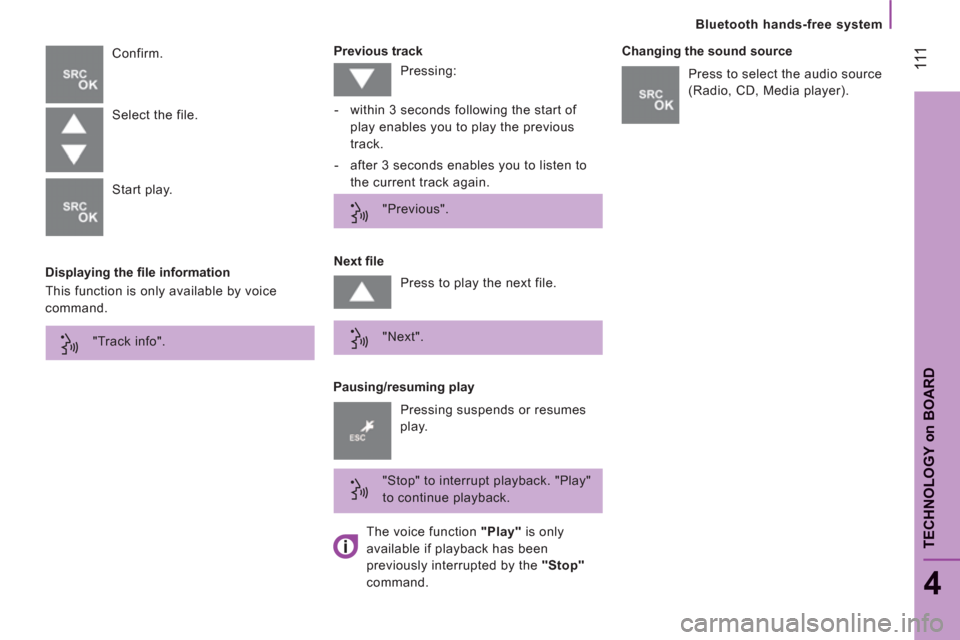
Previous track
Confirm.
Pausing/resuming play
Next fi le
Changing the sound source
Select the file.
Start play.
This function is only available by voice
command. Pressing:
- within 3 seconds following the start of
play enables you to play the previous
track.
- after 3 seconds enables you to listen to
the current track again.
"Previous".
Press to play the next file.
"Next".
"Stop" to interrupt playback. "Play"
to continue playback. Press to select the audio source
(Radio, CD, Media player).
Pressing suspends or resumes
play. "Track info".
The voice function "Play"
is only
available if playback has been
previously interrupted by the "Stop"
command.
Page 121 of 184
5
SAFETY
Seat belts
SEAT BELTS
CAB SEAT BELTS
The front seats are fitted with pre-tensioners
and force limiters.
The bench rear seat is fitted with two seat
belts.
If you install a bench seat after handover, it
must be fitted with seat belts.
REAR SEAT BELTS
The seats/bench seats are fitted with three-
point seat belts and inertia reels.
The centre seat has a seat belt guide and
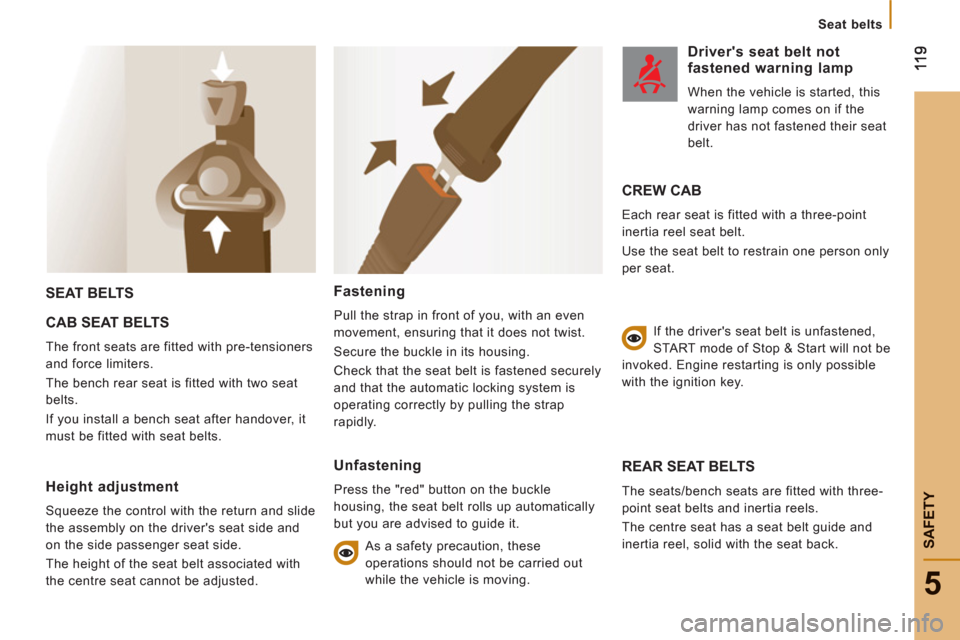
inertia reel, solid with the seat back. Height adjustment
Squeeze the control with the return and slide
the assembly on the driver's seat side and
on the side passenger seat side.
The height of the seat belt associated with
the centre seat cannot be adjusted.
Fastening
Pull the strap in front of you, with an even
movement, ensuring that it does not twist.
Secure the buckle in its housing.
Check that the seat belt is fastened securely
and that the automatic locking system is
operating correctly by pulling the strap
rapidly.
Unfastening
Press the "red" button on the buckle
housing, the seat belt rolls up automatically
but you are advised to guide it.
As a safety precaution, these
operations should not be carried out
while the vehicle is moving.
Driver's seat belt not fastened warning lamp
When the vehicle is started, this
warning lamp comes on if the
driver has not fastened their seat
belt.
CREW CAB
Each rear seat is fitted with a three-point
inertia reel seat belt.
Use the seat belt to restrain one person only
per seat.
If the driver's seat belt is unfastened,
START mode of Stop & Start will not be
invoked. Engine restarting is only possible
with the ignition key.
Page 143 of 184

14
1
7
CHECK
S
Checks
CHECKS
Air filter and passenger compartmentfilter
A clogged passenger compartment fi lter may
reduce the performance of the air conditioning
system and generate undesirable odours. The
replacement intervals for these components
are indicated in the servicing booklet.
Depending on the environment (dusty
atmosphere...) and the use of the vehicle
(urban driving...), change them twice as often
if necessary, refer to the "Under the bonnet"
section of chapter 7.
Manual gearbox
Have the level checked in accordance with
the manufacturer's servicing schedule.
To check the main levels and certain
components, in accordance with the
manufacturer's servicing schedule, refer to
the pages of the servicing booklet which
correspond to your vehicle's engine.
Only use products recommended by
CITROËN or products of equivalent quality
and specification.
In order to optimise the operation of units as
important as the braking system, CITROËN
selects and offers specific products.
In order to avoid damaging the electrical
units, high pressure washing to clean the
engine compartment is strictly prohibited.
Parking brake
Where the parking brake travel is too great
or there is a reduction in the performance
of the system, the parking brake should be
adjusted, even between services.
Have the system checked by a CITROËN
dealer. Bleeding the water contained in the Diesel filter
If this warning lamp comes on,
bleed the filter, otherwise bleed
regularly each time the engine oil
is changed.
To drain the water out, unscrew the bleed
screw or the water in Diesel sensor, located
at the base of the filter. Leave open until
all of the water has been drained out. Then
tighten the bleed screw or the water sensor.
HDi engines use advanced technology. All
work requires a special qualification which is
guaranteed by a CITROËN dealer.
Battery
At the start of winter, have your battery
checked by a CITROËN dealer.
Brake pads
Brake pad wear depends on the style of
driving, in particular for vehicles which are
used in town, over short distances. It may
be necessary to check the thickness of the
pads, even between services.
Unless there is a leak on the system, a drop
in the brake fluid level indicates that the
brake pads are worn.
Brake disc/drum wear status
For any information relating to checking
the brake disc/drum wear status, contact a
CITROËN dealer.
Oil filter
Change the filter regularly, in accordance
with the servicing schedule.
The presence of this label, in particular
with the Stop & Start system, indicates the
use of a specific 12 V lead-acid battery
with special technology and specification.
The involvement of a CITROËN dealer
or a qualified workshop is essential when
replacing or disconnecting the battery.
Page 146 of 184
144
Fuel
Low fuel level
When the fuel tank level E
(Empty) is reached, this warning
lamp comes on. At this moment,
you have enough fuel left to
drive approximately 30 miles (50 km)
,
depending on the driving conditions, the
engine and the profile of the road. Fill up
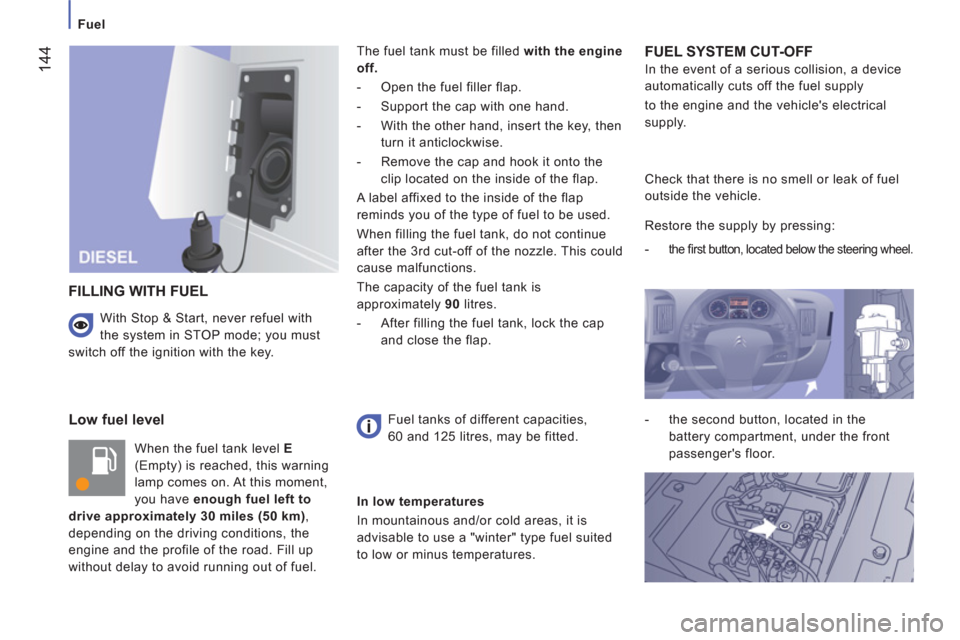
without delay to avoid running out of fuel. The fuel tank must be filled with the engine
off.
- Open the fuel filler flap.
- Support the cap with one hand.
- With the other hand, insert the key, then
turn it anticlockwise.
- Remove the cap and hook it onto the
clip located on the inside of the flap.
A label affixed to the inside of the flap
reminds you of the type of fuel to be used.
When filling the fuel tank, do not continue
after the 3rd cut-off of the nozzle. This could
cause malfunctions.
The capacity of the fuel tank is
approximately 90
litres.
- After filling the fuel tank, lock the cap
and close the flap.
FUEL SYSTEM CUT-OFF
In the event of a serious collision, a device
automatically cuts off the fuel supply
to the engine and the vehicle's electrical
supply.
FILLING WITH FUEL
Fuel tanks of different capacities,
60 and 125 litres, may be fitted. Check that there is no smell or leak of fuel
outside the vehicle.
Restore the supply by pressing:
-
the fi rst button,
located below the steering wheel.
- the second button, located in the
battery compartment, under the front
passenger's floor.
In low temperatures
In mountainous and/or cold areas, it is
advisable to use a "winter" type fuel suited
to low or minus temperatures.
With Stop & Start, never refuel with
the system in STOP mode; you must
switch off the ignition with the key.