window Citroen JUMPER RELAY 2012 2.G Owner's Manual
[x] Cancel search | Manufacturer: CITROEN, Model Year: 2012, Model line: JUMPER RELAY, Model: Citroen JUMPER RELAY 2012 2.GPages: 184, PDF Size: 4.62 MB
Page 4 of 184
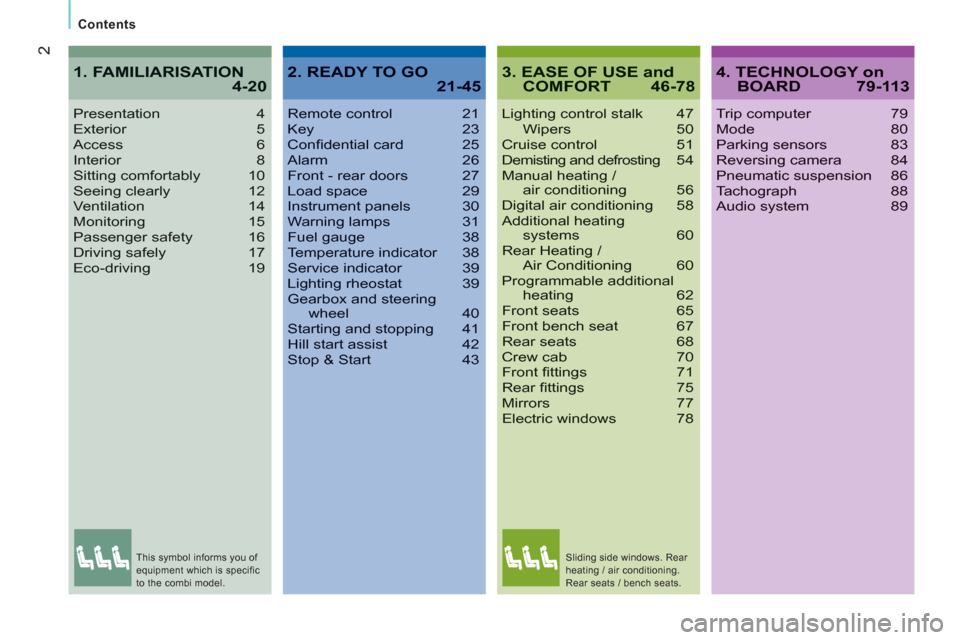
2
Contents
3. EASE OF USE andCOMFORT 46-78
Lighting control stalk 47Wipers 50Cruise control 51Demisting and defrosting54Manual heating / air conditioning 56Digital air conditioning 58Additional heating systems 60Rear Heating / Air Conditioning 60Programmable additionalheating 62Front seats 65Front bench seat 67Rear seats 68Crew cab 70Front fi ttings 71Rear fi ttings 75Mirrors 77Electric windows 78
Presentation4Exterior 5Access6Interior 8Sitting comfortably 10Seeing clearly 12Ventilation 14Monitoring 15Passenger safety 16Driving safely 17Eco-driving 19
1. FAMILIARISATION4-204. TECHNOLOGY onBOARD 79-113
Trip computer 79Mode 80Parking sensors 83Reversing camera 84Pneumatic suspension 86Tachograph 88Audio system 89
2. READY TO GO 21-45
Remote control 21Key 23Confi dential card 25Alarm 26Front - rear doors 27Load space 29Instrument panels 30Warning lamps 31Fuel gauge 38Temperature indicator 38Service indicator 39Lighting rheostat 39Gearbox and steeringwheel 40Starting and stopping 41Hill start assist 42Stop & Start 43
This symbol informs you of
equipment which is specific
to the combi model. Sliding side windows. Rear
heating / air conditioning.
Rear seats / bench seats.
Page 15 of 184
3331
FAMILIARISATION
13
Familiarisation
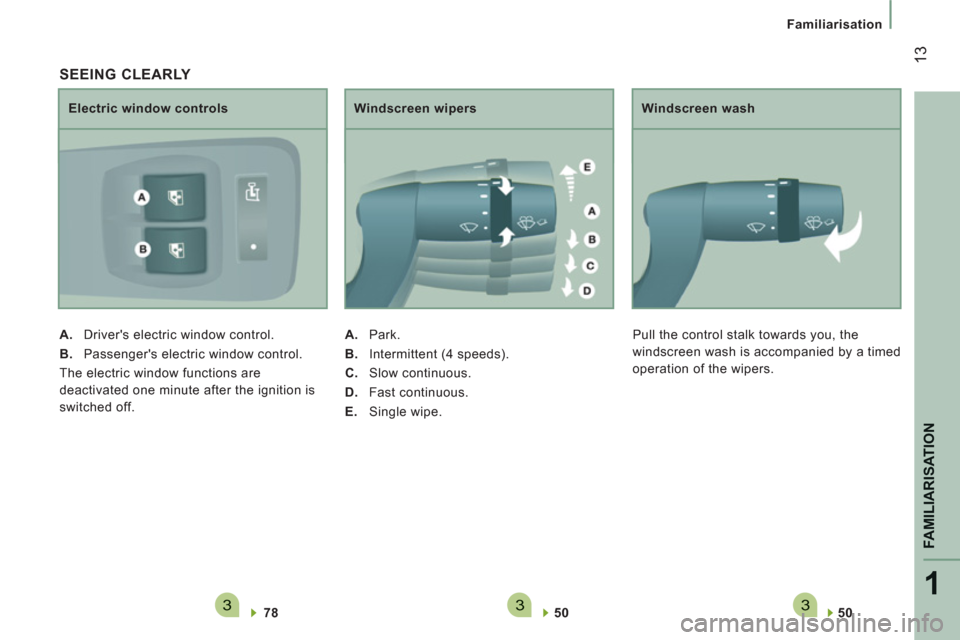
50
Windscreen wash
Pull the control stalk towards you, the
windscreen wash is accompanied by a timed
operation of the wipers.
SEEING CLEARLY
78
Electric window controls
A.
Driver's electric window control.
B.
Passenger's electric window control.
The electric window functions are
deactivated one minute after the ignition is
switched off.
50
Windscreen wipers
A.
Park.
B.
Intermittent (4 speeds).
C.
Slow continuous.
D.
Fast continuous.
E.
Single wipe.
Page 21 of 184
19
ECO-DRIVING
Eco-driving is a range of everyday practices that allow the motorist to optimise their fuel consumption and CO2 emissions.
Optimise the use of your gearbox
With a manual gearbox, move off gently,
change up without waiting and drive by
changing up quite soon. If your vehicle
has the system, the gear efficiency
indicator invites you to change up; it is
displayed in the instrument panel, follow
its instructions.
Drive smoothly
Maintain a safe distance between vehicles,
use engine braking rather than the
brake pedal, and press the accelerator
progressively. These practices contribute
towards a reduction in fuel consumption
and CO
2 emissions and also helps reduce
the background traffic noise.
If your vehicle has cruise control, make
use of the system at speeds above 25 mph
(40 km/h) when the traffic is flowing well.
Control the use of your electricalequipment
Before moving off, if the passenger
compartment is too warm, ventilate it by
opening the windows and air vents before
using the air conditioning.
Above 30 mph (50 km/h), close the windows
and leave the air vents open.
Remember to make use of equipment
that can help keep the temperature in the
passenger compartment down (sunroof and
window blinds...).
Switch off the air conditioning, unless it has
automatic digital regulation, as soon as the
desired temperature is attained.
Switch off the demisting and defrosting
controls, if not automatic.
Switch off the heated seat as soon as
possible.
Switch off the headlamps and front foglamps
when the level of light does not require their
use.
Avoid running the engine before moving
off, particularly in winter; your vehicle will
warm up much faster while driving.
As a passenger, if you avoid connecting
your multimedia devices (film, music,
video game...), you will contribute towards
limiting the consumption of electrical
energy, and so of fuel.
Disconnect your portable devices before
leaving the vehicle.
Page 56 of 184
54
Ventilation
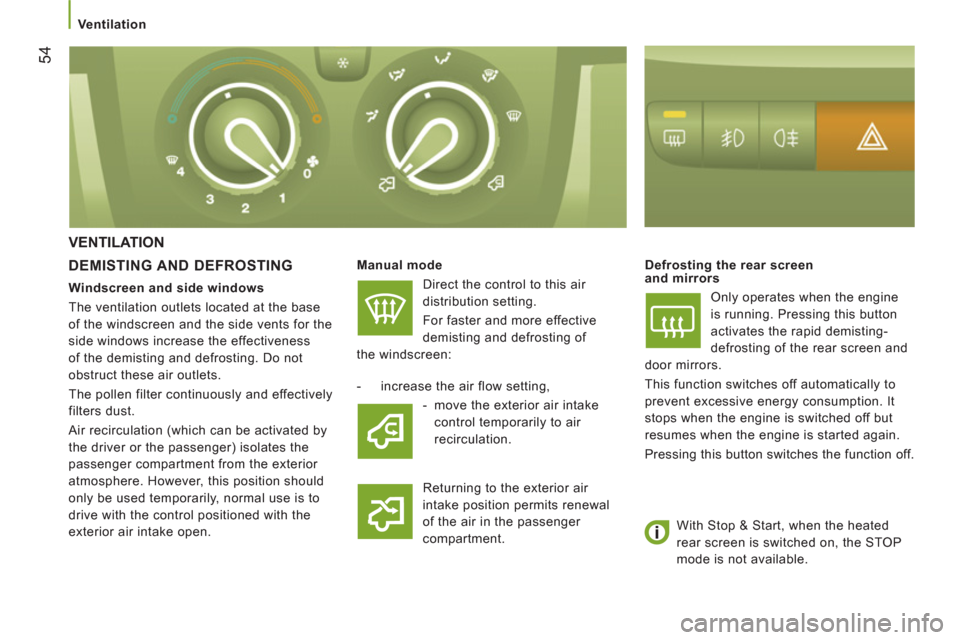
VENTILATION
DEMISTING AND DEFROSTING
Manual mode
Direct the control to this air
distribution setting.
For faster and more effective
demisting and defrosting of
the windscreen:
Defrosting the rear screen
and mirrors
Only operates when the engine
is running. Pressing this button
activates the rapid demisting-
defrosting of the rear screen and
door mirrors.
This function switches off automatically to
prevent excessive energy consumption. It
stops when the engine is switched off but
resumes when the engine is started again.
Pressing this button switches the function off.
- increase the air flow setting,
- move the exterior air intake
control temporarily to air
recirculation.
Returning to the exterior air
intake position permits renewal
of the air in the passenger
compartment.
Windscreen and side windows
The ventilation outlets located at the base
of the windscreen and the side vents for the
side windows increase the effectiveness
of the demisting and defrosting. Do not
obstruct these air outlets.
The pollen filter continuously and effectively
filters dust.
Air recirculation (which can be activated by
the driver or the passenger) isolates the
passenger compartment from the exterior
atmosphere. However, this position should
only be used temporarily, normal use is to
drive with the control positioned with the
exterior air intake open.
With Stop & Start, when the heated
rear screen is switched on, the STOP
mode is not available.
Page 57 of 184
55
3
EASE OF USE
and
COMFOR
T
Ventilation
CORRECT USE OF THE AIR CONDITIONING
In order to be effective, the air conditioning
should only be used with the windows
closed. However, if the interior temperature
remains high after a prolonged period
parked in the sun, first ventilate the
passenger compartment for a few minutes. For even air distribution, ensure that the
exterior air intake grille located at the base
of the windscreen is not obstructed and that
the side and central vents, the air outlets on
the floor and the air extractor at the rear are
open.
The air conditioning is useful in all seasons
as it eliminates condensation and air
humidity. Operate the air conditioning system for
5 to 10 minutes, once or twice a month,
to keep it in good working order.
Have the filter elements (air filter and
passenger compartment filter) replaced
regularly. If you drive in a dusty environment,
have them replaced twice as often.
It is normal that the condensation created by
the air conditioning system results in a flow
of water which may form a puddle under the
vehicle when parked.
If the system does not produce cold air, do
not use it and contact a CITROËN dealer.
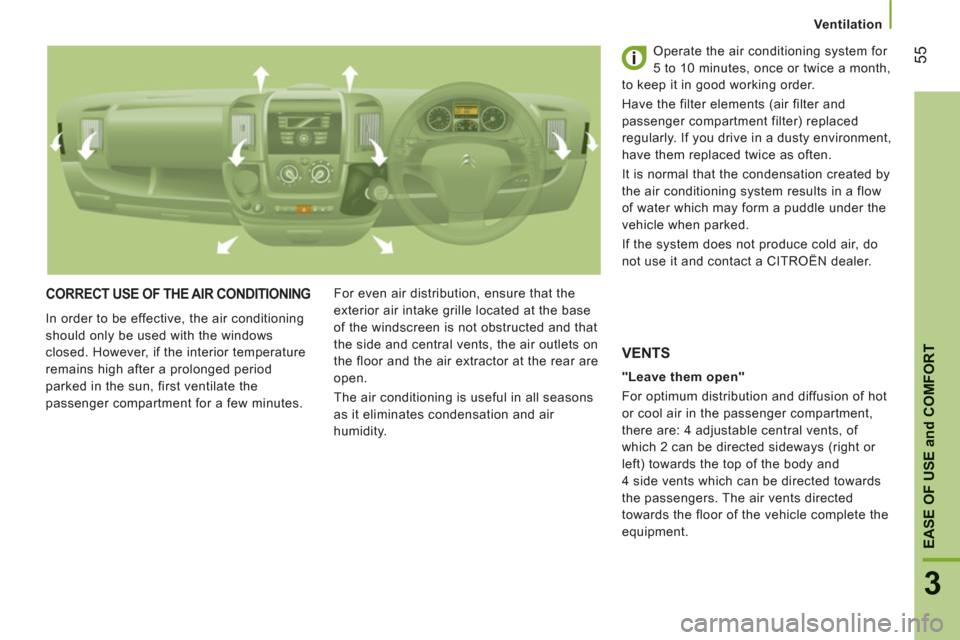
"Leave them open"
For optimum distribution and diffusion of hot
or cool air in the passenger compartment,
there are: 4 adjustable central vents, of
which 2 can be directed sideways (right or
left) towards the top of the body and
4 side vents which can be directed towards
the passengers. The air vents directed
towards the floor of the vehicle complete the
equipment.
VENTS
Page 58 of 184

56
Ventilation
WITH MANUAL ADJUSTMENT
If your vehicle is fitted with these controls,
they are located on the dashboard on the
centre console control panel.
Temperature adjustment
Control positioned:
- in the blue zone provides cool air,
Air flow
The force of the blown air, from
the vents, varies from 1 to the
strongest 4. Remember to adjust
this control in order to reach the
ambient air comfort level. To switch off the
blower, place the control in position 0.
Air conditioning
The air conditioning mode can only operate
with the engine running.
The air blower must be set to at
least 1.
Pressing the button triggers the
operation of the air conditioning,
the LED is on. Pressing the button again
switches the function off and the LED is
switched off.
Air distribution
The air supply distribution is directed by the
control turned towards:
the side vents and the central
vents,
the side vents, the central vents
and the footwells,
the footwells,
the windscreen, the footwells and
the side windows,
the windscreen and the side
windows.
- in the red zone provides heating
of the interior ambient air.
Page 61 of 184
59
3
EASE OF USE
and
COMFOR
T
Ventilation
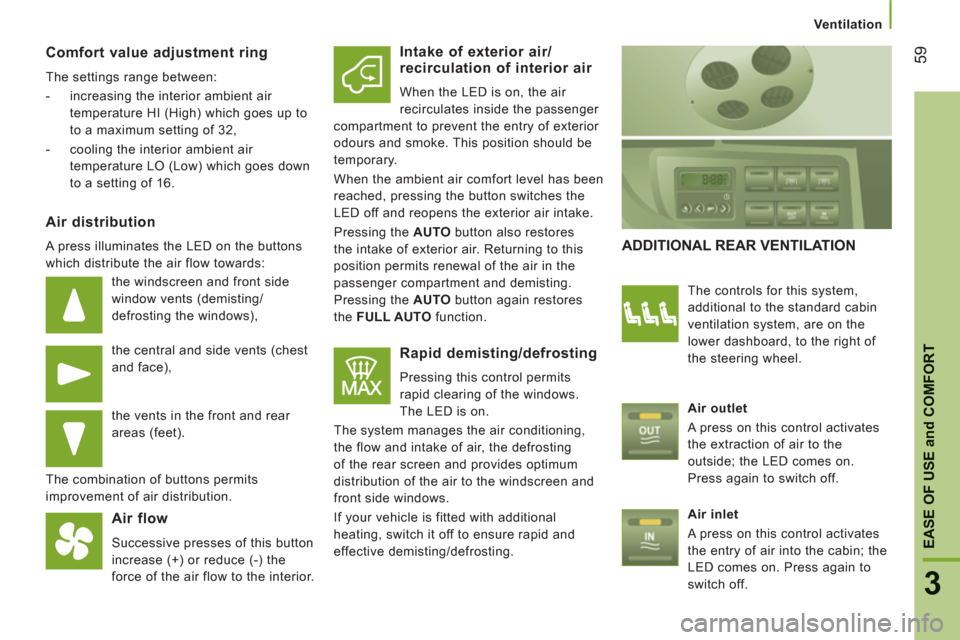
Comfort value adjustment ring
The settings range between:
- increasing the interior ambient air
temperature HI (High) which goes up to
to a maximum setting of 32,
- cooling the interior ambient air
temperature LO (Low) which goes down
to a setting of 16.
Air distribution
A press illuminates the LED on the buttons
which distribute the air flow towards:
the windscreen and front side
window vents (demisting/
defrosting the windows),
the central and side vents (chest
and face),
the vents in the front and rear
areas (feet).
The combination of buttons permits
improvement of air distribution.
Air flow
Successive presses of this button
increase (+) or reduce (-) the
force of the air flow to the interior.
Intake of exterior air/
recirculation of interior air
When the LED is on, the air
recirculates inside the passenger
compartment to prevent the entry of exterior
odours and smoke. This position should be
temporary.
When the ambient air comfort level has been
reached, pressing the button switches the
LED off and reopens the exterior air intake.
Pressing the AUTO
button also restores
the intake of exterior air. Returning to this
position permits renewal of the air in the
passenger compartment and demisting.
Pressing the AUTO
button again restores
the FULL AUTO
function.
Rapid demisting/defrosting
Pressing this control permits
rapid clearing of the windows.
The LED is on.
The system manages the air conditioning,
the flow and intake of air, the defrosting
of the rear screen and provides optimum
distribution of the air to the windscreen and
front side windows.
If your vehicle is fitted with additional
heating, switch it off to ensure rapid and
effective demisting/defrosting.
ADDITIONAL REAR VENTILATION
The controls for this system,
additional to the standard cabin
ventilation system, are on the
lower dashboard, to the right of
the steering wheel.
Air outlet
A press on this control activates
the extraction of air to the
outside; the LED comes on.
Press again to switch off.
Air inlet
A press on this control activates
the entry of air into the cabin; the
LED comes on. Press again to
switch off.
Page 78 of 184
76
Practical information
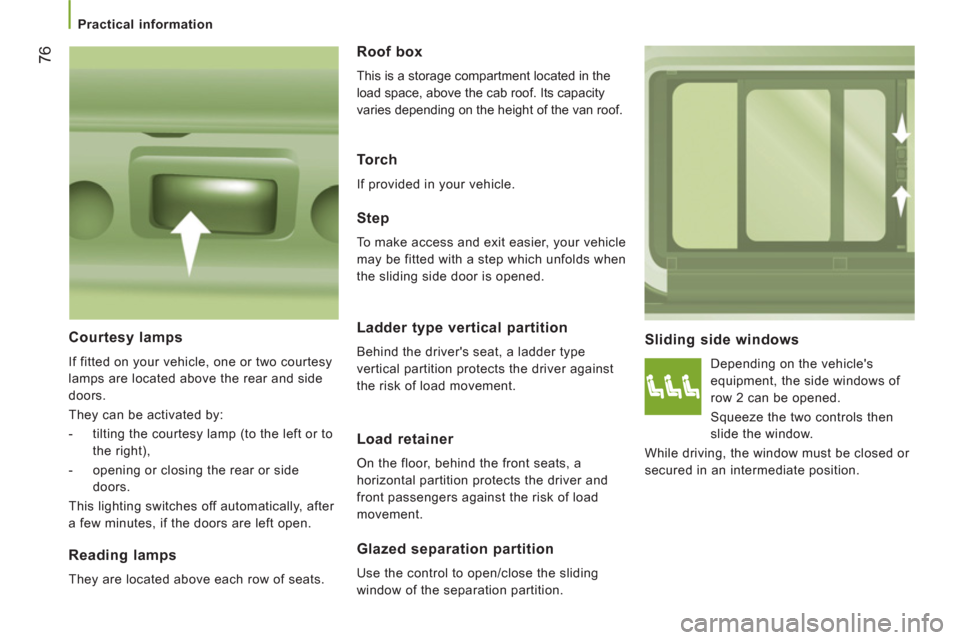
Sliding side windows
Depending on the vehicle's
equipment, the side windows of
row 2 can be opened.
Squeeze the two controls then
slide the window.
While driving, the window must be closed or
secured in an intermediate position.
Step
To make access and exit easier, your vehicle
may be fitted with a step which unfolds when
the sliding side door is opened.
Courtesy lamps
If fitted on your vehicle, one or two courtesy
lamps are located above the rear and side
doors.
They can be activated by:
- tilting the courtesy lamp (to the left or to
the right),
- opening or closing the rear or side
doors.
This lighting switches off automatically, after
a few minutes, if the doors are left open.
Reading lamps
They are located above each row of seats.
Roof box
This is a storage compartment located in the
load space, above the cab roof. Its capacity
varies depending on the height of the van roof.
Torch
If provided in your vehicle.
Ladder type vertical partition
Behind the driver's seat, a ladder type
vertical partition protects the driver against
the risk of load movement.
Load retainer
On the floor, behind the front seats, a
horizontal partition protects the driver and
front passengers against the risk of load
movement.
Glazed separation partition
Use the control to open/close the sliding
window of the separation partition.
Page 79 of 184
77
3
EASE OF USE
and
COMFOR
T
Mirrors and windows
MIRRORS AND WINDOWS
MIRROR
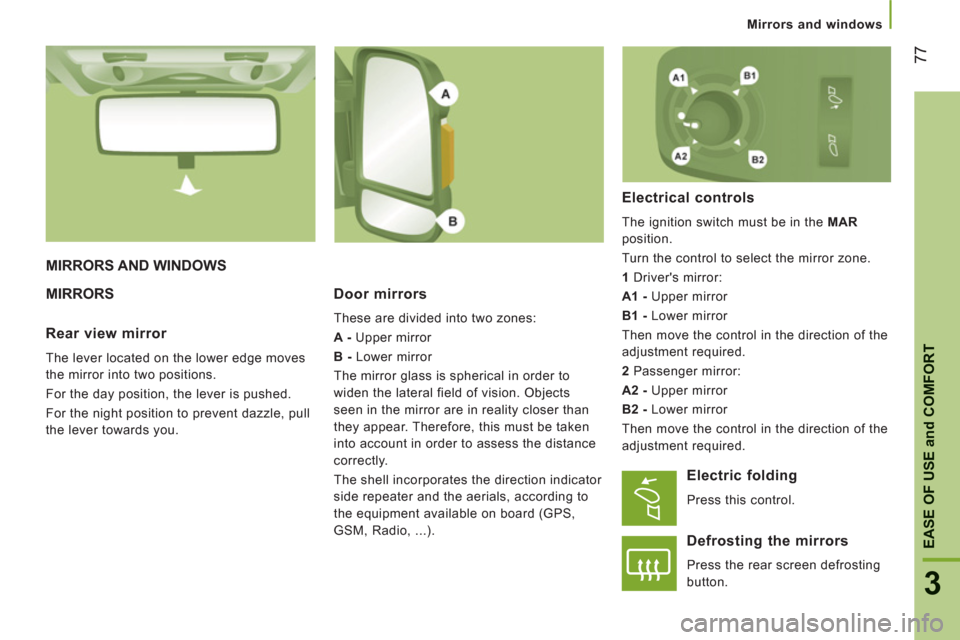
S Door mirrors
These are divided into two zones:
A -
Upper mirror
B -
Lower mirror
The mirror glass is spherical in order to
widen the lateral field of vision. Objects
seen in the mirror are in reality closer than
they appear. Therefore, this must be taken
into account in order to assess the distance
correctly.
The shell incorporates the direction indicator
side repeater and the aerials, according to
the equipment available on board (GPS,
GSM, Radio, ...).
Electrical controls
The ignition switch must be in the MAR
position.
Turn the control to select the mirror zone.
1
Driver's mirror:
A1 -
Upper mirror
B1 -
Lower mirror
Then move the control in the direction of the
adjustment required.
2
Passenger mirror:
A2 -
Upper mirror
B2 -
Lower mirror
Then move the control in the direction of the
adjustment required.
Rear view mirror
The lever located on the lower edge moves
the mirror into two positions.
For the day position, the lever is pushed.
For the night position to prevent dazzle, pull
the lever towards you.
Electric folding
Press this control.
Defrosting the mirrors
Press the rear screen defrosting
button.
Page 80 of 184
78
Mirrors and windows
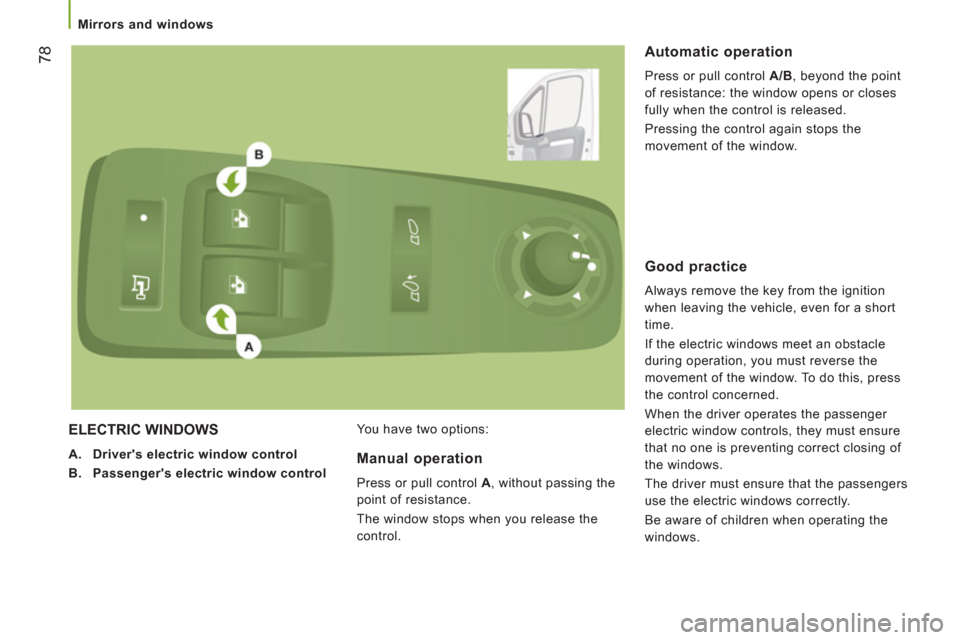
ELECTRIC WINDOWS
A.
Driver's electric window control
B.
Passenger's electric window control
You have two options:
Automatic operation
Press or pull control A/B
, beyond the point
of resistance: the window opens or closes
fully when the control is released.
Pressing the control again stops the
movement of the window.
Manual operation
Press or pull control A
, without passing the
point of resistance.
The window stops when you release the
control.
Good practice
Always remove the key from the ignition
when leaving the vehicle, even for a short
time.
If the electric windows meet an obstacle
during operation, you must reverse the
movement of the window. To do this, press
the control concerned.
When the driver operates the passenger
electric window controls, they must ensure
that no one is preventing correct closing of
the windows.
The driver must ensure that the passengers
use the electric windows correctly.
Be aware of children when operating the
windows.