display Citroen JUMPER RHD 2012.5 2.G Owner's Manual
[x] Cancel search | Manufacturer: CITROEN, Model Year: 2012.5, Model line: JUMPER RHD, Model: Citroen JUMPER RHD 2012.5 2.GPages: 184, PDF Size: 4.45 MB
Page 21 of 184
19
ECO-DRIVING
Eco-driving is a range of everyday practices that allow the motorist to optimise their fuel consumption and CO2 emissions.
Optimise the use of your gearbox
With a manual gearbox, move off gently,
change up without waiting and drive by
changing up quite soon. If your vehicle has
the system, the gear shift indicator invites
you to change up; it is displayed in the
instrument panel, follow its instructions.
Drive smoothly
Maintain a safe distance between vehicles,
use engine braking rather than the
brake pedal, and press the accelerator
progressively. These practices contribute
towards a reduction in fuel consumption
and CO
2 emissions and also helps reduce
the background traffic noise.
If your vehicle has cruise control, make
use of the system at speeds above 25 mph
(40 km/h) when the traffic is flowing well.
Control the use of your electricalequipment
Before moving off, if the passenger
compartment is too warm, ventilate it by
opening the windows and air vents before
using the air conditioning.
Above 30 mph (50 km/h), close the windows
and leave the air vents open.
Remember to make use of equipment
that can help keep the temperature in the
passenger compartment down (sunroof and
window blinds...).
Switch off the air conditioning, unless it has
automatic digital regulation, as soon as the
desired temperature is attained.
Switch off the demisting and defrosting
controls, if not automatic.
Switch off the heated seat as soon as
possible.
Switch off the headlamps and front foglamps
when the level of light does not require their
use.
Avoid running the engine before moving
off, particularly in winter; your vehicle will
warm up much faster while driving.
As a passenger, if you avoid connecting
your multimedia devices (film, music,
video game...), you will contribute towards
limiting the consumption of electrical
energy, and so of fuel.
Disconnect your portable devices before
leaving the vehicle.
Page 32 of 184
30
Instruments and controls
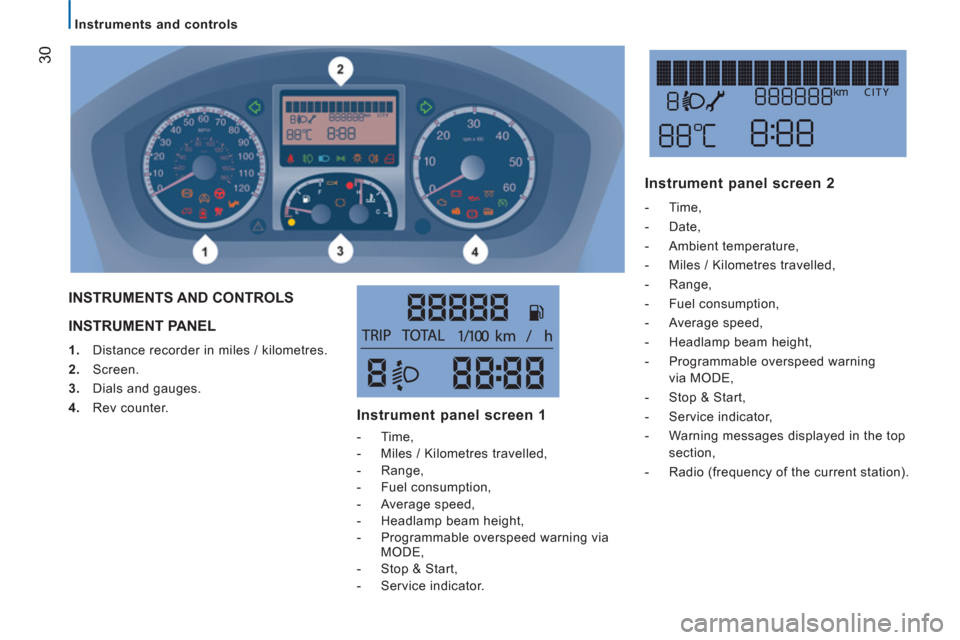
INSTRUMENT PANEL
1.
Distance recorder in miles / kilometres.
2.
Screen.
3.
Dials and gauges.
4.
Rev counter.
INSTRUMENTS AND CONTROLS
Instrument panel screen 1
- Time,
- Miles / Kilometres travelled,
- Range,
- Fuel consumption,
- Average speed,
- Headlamp beam height,
- Programmable overspeed warning via
MODE,
- Stop & Start,
- Service indicator.
Instrument panel screen 2
- Time,
- Date,
- Ambient temperature,
- Miles / Kilometres travelled,
- Range,
- Fuel consumption,
- Average speed,
- Headlamp beam height,
- Programmable overspeed warning
via MODE,
- Stop & Start,
- Service indicator,
- Warning messages displayed in the top
section,
- Radio (frequency of the current station).
Page 39 of 184
37
2
READY TO G
O
Instruments and controls
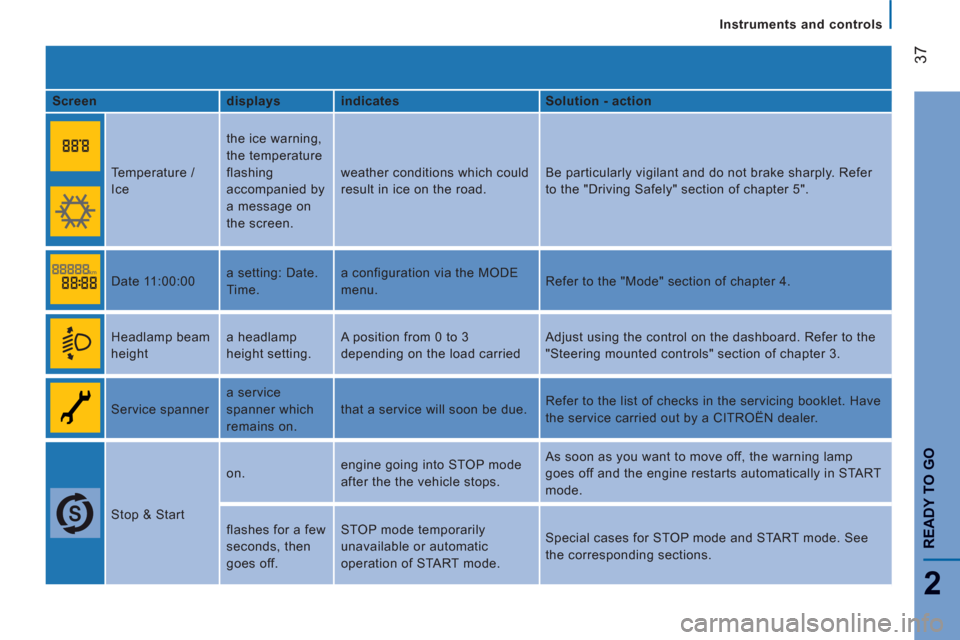
Screen
displays
indicates
Solution - action
Temperature /
Ice the ice warning,
the temperature
flashing
accompanied by
a message on
the screen. weather conditions which could
result in ice on the road. Be particularly vigilant and do not brake sharply. Refer
to the "Driving Safely" section of chapter 5".
Date 11:00:00 a setting: Date.
Time. a configuration via the MODE
menu. Refer to the "Mode" section of chapter 4.
Headlamp beam
height a headlamp
height setting. A position from 0 to 3
depending on the load carried Adjust using the control on the dashboard. Refer to the
"Steering mounted controls" section of chapter 3.
Service spanner a service
spanner which
remains on. that a service will soon be due. Refer to the list of checks in the servicing booklet. Have
the service carried out by a CITROËN dealer.
Stop & Start on. engine going into STOP mode
after the the vehicle stops. As soon as you want to move off, the warning lamp
goes off and the engine restarts automatically in START
mode.
flashes for a few
seconds, then
goes off. STOP mode temporarily
unavailable or automatic
operation of START mode. Special cases for STOP mode and START mode. See
the corresponding sections.
Page 41 of 184
39
2
READY TO G
O
Instruments and controls
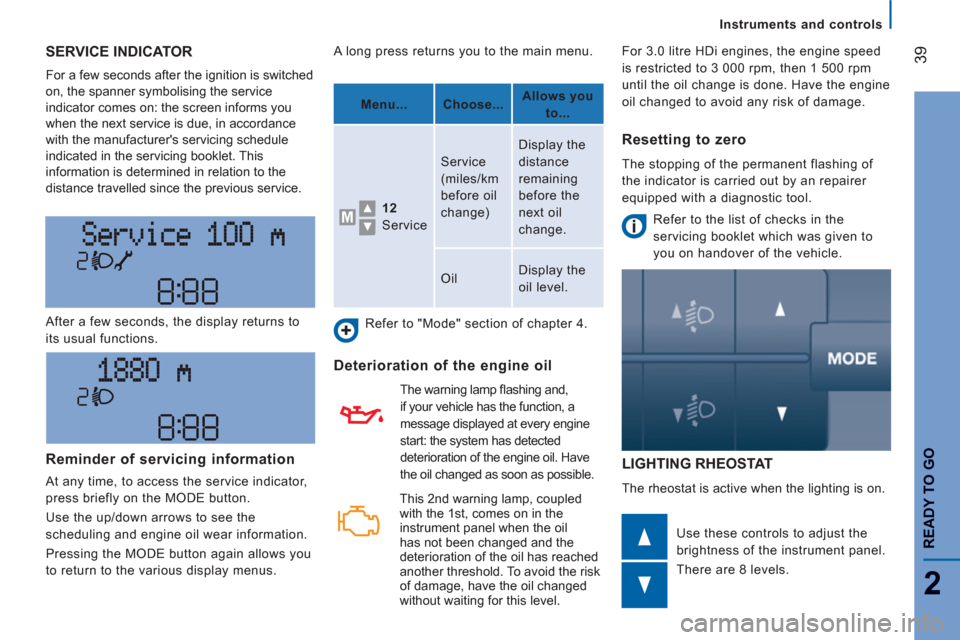
SERVICE INDICATOR
For a few seconds after the ignition is switched
on, the spanner symbolising the service
indicator comes on: the screen informs you
when the next service is due, in accordance
with the manufacturer's servicing schedule
indicated in the servicing booklet. This
information is determined in relation to the
distance travelled since the previous service.
LIGHTING RHEOSTAT
The rheostat is active when the lighting is on. After a few seconds, the display returns to
its usual functions.
Use these controls to adjust the
brightness of the instrument panel.
There are 8 levels. A long press returns you to the main menu.
Refer to "Mode" section of chapter 4.
Deterioration of the engine oil
The warning lamp fl ashing and,
if your vehicle has the function, a
message displayed at every engine
start: the system has detected
deterioration of the engine oil. Have
the oil changed as soon as possible.
Reminder of servicing information
At any time, to access the service indicator,
press briefly on the MODE button.
Use the up/down arrows to see the
scheduling and engine oil wear information.
Pressing the MODE button again allows you
to return to the various display menus.
Menu...
Choose...
Allows you
to...
12
Service Service
(miles/km
before oil
change) Display the
distance
remaining
before the
next oil
change.
Oil Display the
oil level.
Resetting to zero
The stopping of the permanent flashing of
the indicator is carried out by an repairer
equipped with a diagnostic tool.
Refer to the list of checks in the
servicing booklet which was given to
you on handover of the vehicle. For 3.0 litre HDi engines, the engine speed
is restricted to 3 000 rpm, then 1 500 rpm
until the oil change is done. Have the engine
oil changed to avoid any risk of damage.
This 2 nd warning lamp, coupled
with the 1 st , comes on in the
instrument panel when the oil
has not been changed and the
deterioration of the oil has reached
another threshold. To avoid the risk
of damage, have the oil changed
without waiting for this level.
Page 46 of 184
44
Starting and stopping
Going into engine START mode
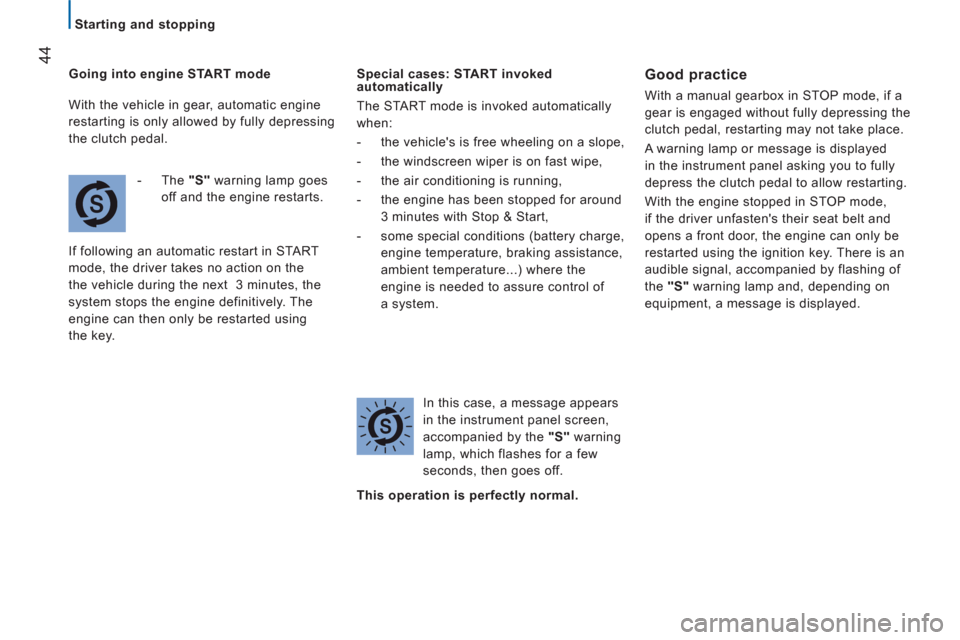
- The "S"
warning lamp goes
off and the engine restarts.
If following an automatic restart in START
mode, the driver takes no action on the
the vehicle during the next 3 minutes, the
system stops the engine definitively. The
engine can then only be restarted using
the key.
Special cases: START invoked
automatically
The START mode is invoked automatically
when:
- the vehicle's is free wheeling on a slope,
- the windscreen wiper is on fast wipe,
- the air conditioning is running,
- the engine has been stopped for around
3 minutes with Stop & Start,
- some special conditions (battery charge,
engine temperature, braking assistance,
ambient temperature...) where the
engine is needed to assure control of
a system.
In this case, a message appears
in the instrument panel screen,
accompanied by the "S"
warning
lamp, which flashes for a few
seconds, then goes off.
Good practice
With a manual gearbox in STOP mode, if a
gear is engaged without fully depressing the
clutch pedal, restarting may not take place.
A warning lamp or message is displayed
in the instrument panel asking you to fully
depress the clutch pedal to allow restarting.
With the engine stopped in STOP mode,
if the driver unfasten's their seat belt and
opens a front door, the engine can only be
restarted using the ignition key. There is an
audible signal, accompanied by flashing of
the "S"
warning lamp and, depending on
equipment, a message is displayed.
This operation is perfectly normal.
With the vehicle in gear, automatic engine
restarting is only allowed by fully depressing
the clutch pedal.
Page 53 of 184
51
3
EASE OF USE
and
COMFOR
T
Steering mounted controls
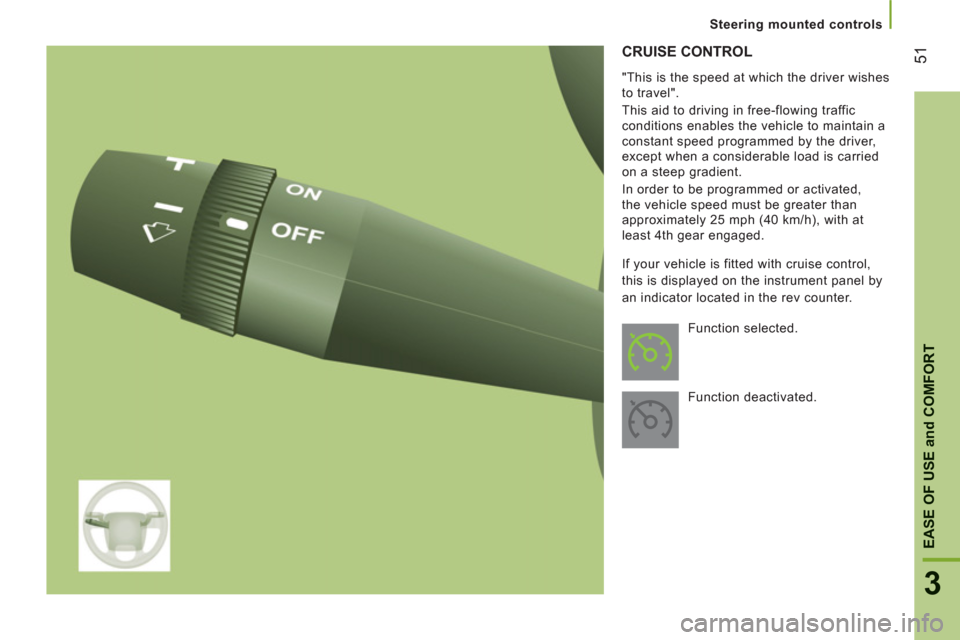
CRUISE CONTROL
"This is the speed at which the driver wishes
to travel".
This aid to driving in free-flowing traffic
conditions enables the vehicle to maintain a
constant speed programmed by the driver,
except when a considerable load is carried
on a steep gradient.
In order to be programmed or activated,
the vehicle speed must be greater than
approximately 25 mph (40 km/h), with at
least 4th gear engaged.
Function selected.
Function deactivated. If your vehicle is fitted with cruise control,
this is displayed on the instrument panel by
an indicator located in the rev counter.
Page 60 of 184
58
Ventilation
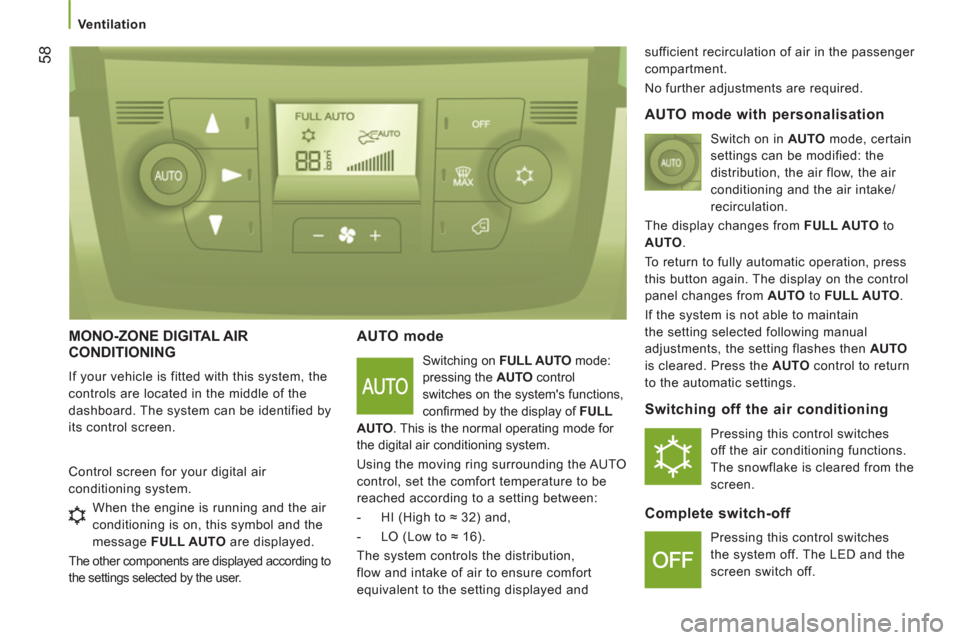
MONO-ZONE DIGITAL AIR
CONDITIONING
If your vehicle is fitted with this system, the
controls are located in the middle of the
dashboard. The system can be identified by
its control screen.
AUTO mode
Switching on FULL AUTO
mode:
pressing the AUTO
control
switches on the system's functions,
confi rmed by the display of FULL
AUTO
. This is the normal operating mode for
the digital air conditioning system.
Using the moving ring surrounding the AUTO
control, set the comfort temperature to be
reached according to a setting between:
- HI (High to ≈ 32) and,
- LO (Low to ≈ 16).
The system controls the distribution,
flow and intake of air to ensure comfort
equivalent to the setting displayed and sufficient recirculation of air in the passenger
compartment.
No further adjustments are required.
Control screen for your digital air
conditioning system.
When the engine is running and the air
conditioning is on, this symbol and the
message FULL AUTO
are displayed.
The other components are displayed according to
the settings selected by the user.
AUTO mode with personalisation
Switch on in AUTO
mode, certain
settings can be modified: the
distribution, the air flow, the air
conditioning and the air intake/
recirculation.
The display changes from FULL AUTO
to
AUTO
.
To return to fully automatic operation, press
this button again. The display on the control
panel changes from AUTO
to FULL AUTO
.
If the system is not able to maintain
the setting selected following manual
adjustments, the setting flashes then AUTO
is cleared. Press the AUTO
control to return
to the automatic settings.
Switching off the air conditioning
Pressing this control switches
off the air conditioning functions.
The snowflake is cleared from the
screen.
Complete switch-off
Pressing this control switches
the system off. The LED and the
screen switch off.
Page 64 of 184
62
Ventilation
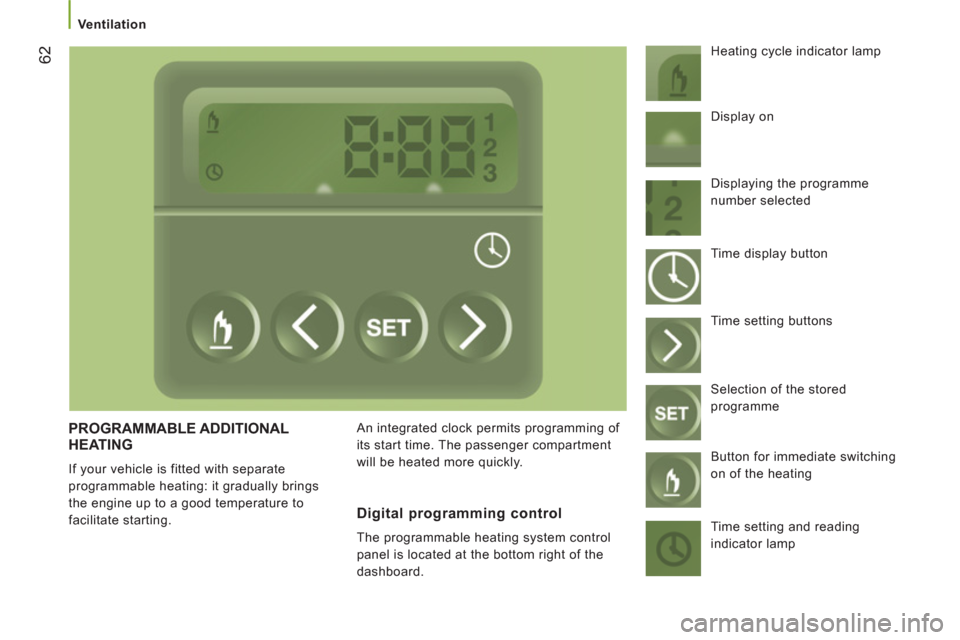
PROGRAMMABLE ADDITIONAL
HEATING
If your vehicle is fitted with separate
programmable heating: it gradually brings
the engine up to a good temperature to
facilitate starting. An integrated clock permits programming of
its start time. The passenger compartment
will be heated more quickly. Heating cycle indicator lamp
Digital programming control
The programmable heating system control
panel is located at the bottom right of the
dashboard. Display on
Displaying the programme
number selected
Time display button
Time setting buttons
Selection of the stored
programme
Button for immediate switching
on of the heating
Time setting and reading
indicator lamp
Page 65 of 184
63
3
EASE OF USE
and
COMFOR
T
Ventilation
Setting the time of the internal clock
Set the clock on the control panel before
programming the deferred switching on of
the heating.
Immediate switching on of the heating
Before switching on the heating, check that:
- the temperature setting control is in the
"Hot air" position (red).
- the air fl ow setting control is in position 2.
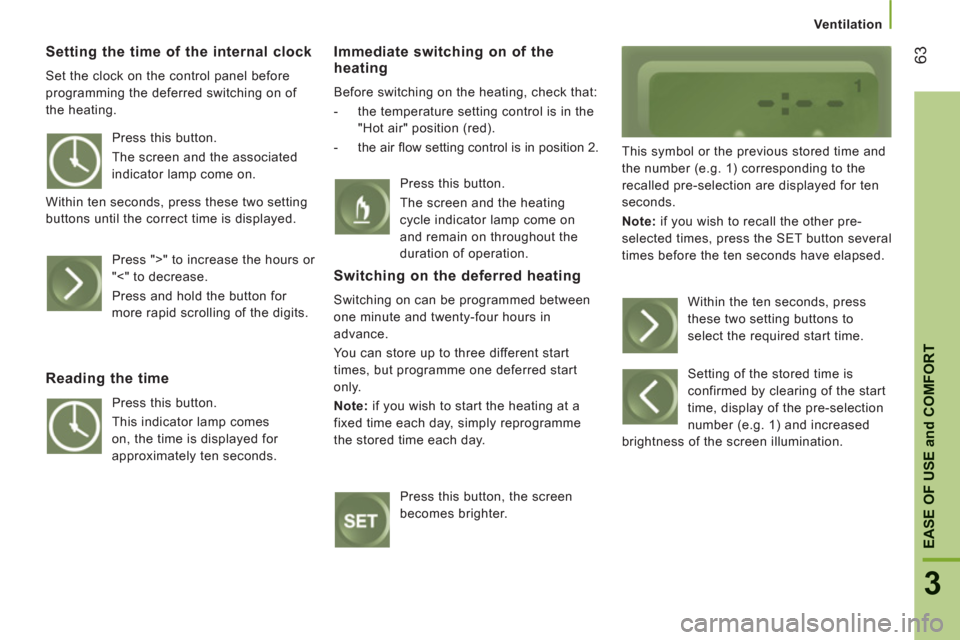
This symbol or the previous stored time and
the number (e.g. 1) corresponding to the
recalled pre-selection are displayed for ten
seconds.
Note:
if you wish to recall the other pre-
selected times, press the SET button several
times before the ten seconds have elapsed. Press this button.
The screen and the associated
indicator lamp come on.
Within ten seconds, press these two setting
buttons until the correct time is displayed.
Press ">" to increase the hours or
"<" to decrease.
Press and hold the button for
more rapid scrolling of the digits.
Reading the time
Press this button.
This indicator lamp comes
on, the time is displayed for
approximately ten seconds. Press this button.
The screen and the heating
cycle indicator lamp come on
and remain on throughout the
duration of operation.
Switching on the deferred heating
Switching on can be programmed between
one minute and twenty-four hours in
advance.
You can store up to three different start
times, but programme one deferred start
only.
Note
:
if you wish to start the heating at a
fixed time each day, simply reprogramme
the stored time each day.
Press this button, the screen
becomes brighter. Within the ten seconds, press
these two setting buttons to
select the required start time.
Setting of the stored time is
confirmed by clearing of the start
time, display of the pre-selection
number (e.g. 1) and increased
brightness of the screen illumination.
Page 83 of 184
81
4
TECHNOLOGY
on
BOAR
D
Mode
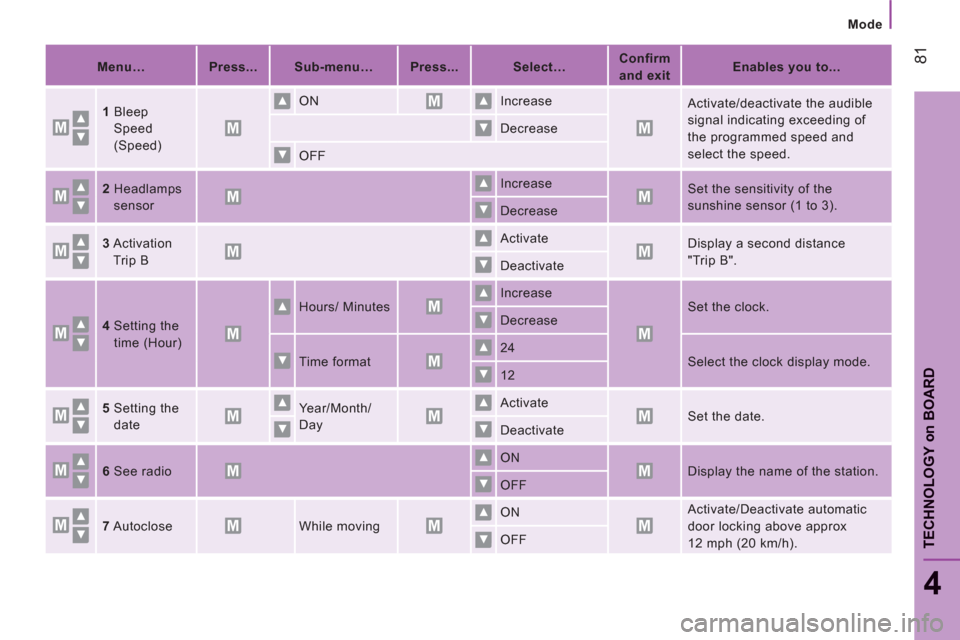
Menu…
Press...
Sub-menu…
Press...
Select…
Confirm
and exit
Enables you to...
1
Bleep
Speed
(Speed) ON
Increase
Activate/deactivate the audible
signal indicating exceeding of
the programmed speed and
select the speed. Decrease
OFF
2
Headlamps
sensor Increase
Set the sensitivity of the
sunshine sensor (1 to 3).
Decrease
3
Activation
Trip B Activate
Display a second distance
"Trip B".
Deactivate
4
Setting the
time (Hour) Hours/ Minutes
Increase
Set the clock.
Decrease
Time format 24
Select the clock display mode.
12
5
Setting the
date Year/Month/
Day Activate
Set the date.
Deactivate
6
See radio
ON
Display the name of the station.
OFF
7
Autoclose
While moving
ON
Activate/Deactivate automatic
door locking above approx
12 mph (20 km/h). OFF