tow CITROEN JUMPY 2006 Owners Manual
[x] Cancel search | Manufacturer: CITROEN, Model Year: 2006, Model line: JUMPY, Model: CITROEN JUMPY 2006Pages: 252, PDF Size: 12.15 MB
Page 5 of 252
CONTENTS
Contents
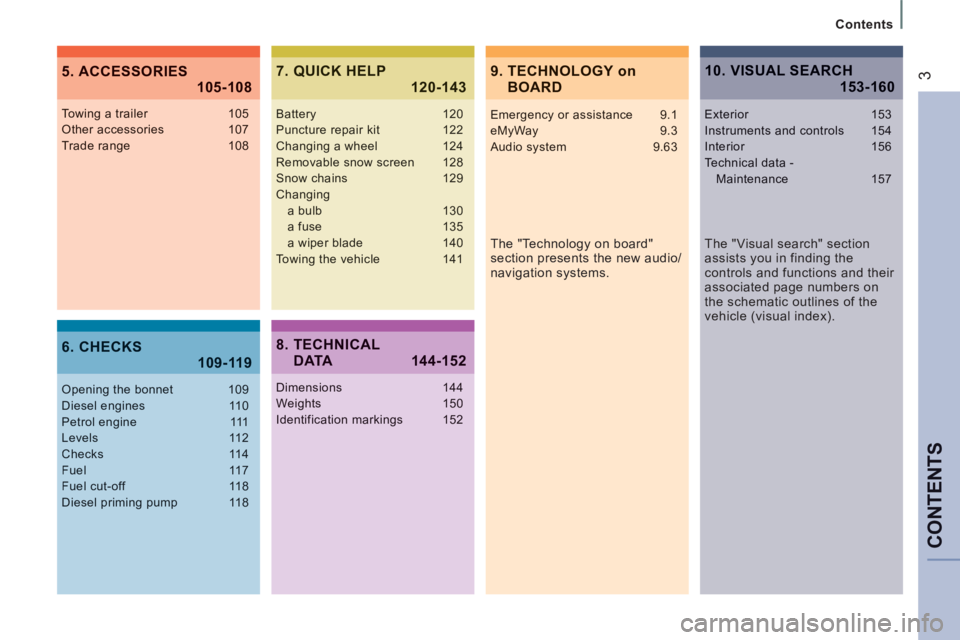
39. TECHNOLOGY on BOARD 5. ACCESSORIES 105-108
6. CHECKS 109-119
7. QUICK HELP 120-143
The "Technology on board"
section presents the new audio/
navigation systems.
Towing a trailer 105Other accessories 107Trade range 108
Opening the bonnet 109Diesel engines 110Petrol engine 111Levels 112Checks 114Fuel 117Fuel cut-off 118Diesel priming pump 118
Battery 120Puncture repair kit 122Changing a wheel 124Removable snow screen 128Snow chains 129Changing a bulb 130 a fuse 135 a wiper blade 140Towing the vehicle 141
8. TECHNICAL DATA 144-152
Dimensions 144Weights 150Identification markings 152
10. VISUAL SEARCH 153-160
Emergency or assistance 9.1eMyWay 9.3Audio system 9.63
The "Visual search" section
assists you in finding the
controls and functions and their
associated page numbers on
the schematic outlines of the
vehicle (visual index).
Exterior 153Instruments and controls 154Interior 156Technical data - Maintenance 157
Page 10 of 252
6
7
6
6
Exterior
8
11 0
Diesel engines
Petrol engine
111
141
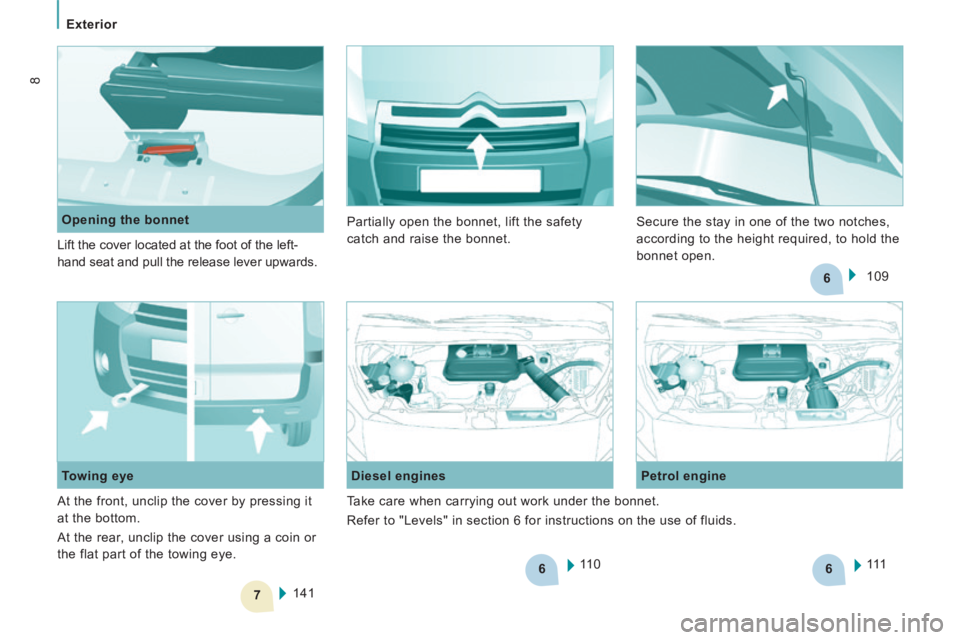
Towing eye Opening the bonnet
Lift the cover located at the foot of the left-
hand seat and pull the release lever upwards.
At the front, unclip the cover by pressing it
at the bottom.
At the rear, unclip the cover using a coin or
the flat part of the towing eye. 109
Partially open the bonnet, lift the safety
catch and raise the bonnet.
Secure the stay in one of the two notches,
according to the height required, to hold the
bonnet open.
Take care when carrying out work under the bonnet.
Refer to "Levels" in section 6 for instructions on the use of fluids.
Page 18 of 252
5
333
Interior
16
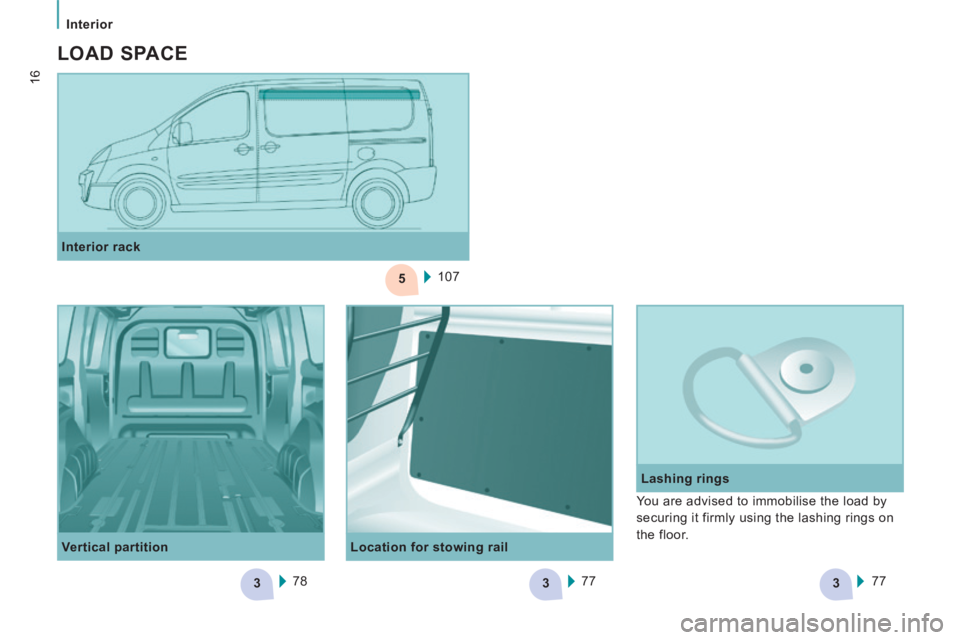
Location for stowing rail Lashing rings
Interior rack
107
Vertical partition 78 77
77 You are advised to immobilise the load by
securing it firmly using the lashing rings on
the floor.
LOAD SPACE
Page 20 of 252
18ECO-DRIVING
Eco-driving is a range of everyday practices that allow the motorist to \
optimise their fuel
consumption and CO
2 emissions.
Optimise the use of your
gearbox
With a manual gearbox, move off gently
and change up without waiting. During
acceleration change up early.
With an automatic or electronic gearbox,
give preference to automatic mode and
avoid pressing the accelerator pedal
heavily or suddenly.
Control the use of your
electrical equipment
Before moving off, if the passenger
compartment is too warm, ventilate it by
opening the windows and air vents before
using the air conditioning.
Above 30 mph (50 km/h), close the windows
and leave the air vents open. Switch off the headlamps and front
foglamps when the level of light does not
require their use.
Avoid running the engine before moving
off, particularly in winter; your vehicle will
warm up much faster while driving.
Drive smoothly
Maintain a safe distance between vehicles,
use engine braking rather than the
brake pedal, and press the accelerator
progressively. These practices contribute
towards a reduction in fuel consumption and
CO
2 emissions and also helps reduce the
background traffic noise.
If your vehicle has cruise control, make use
of the system at speeds above 25 mph
(40 km/h) when the traffic is flowing well.
As a passenger, if you avoid connecting
your multimedia devices (film, music,
video game...), you will contribute towards
limiting the consumption of electrical
energy, and so of fuel.
Disconnect your portable devices before
leaving the vehicle. Remember to make use of equipment
that can help keep the temperature in the
passenger compartment down (sunroof
and window blinds...).
Switch off the air conditioning, unless it
has automatic regulation, as soon as the
desired temperature is attained.
Switch off the demisting and defrosting
controls, if not automatic.
Switch off the heated seat as soon as
possible.
The gear efficiency indicator invites
you engage the most suitable gear: as
soon as the indication is displayed in the
instrument panel, follow it straight away.
For vehicles fitted with an electronic or
automatic gearbox, this indicator appears
only in manual mode.
Page 27 of 252
25
Access
READY TO GO
2
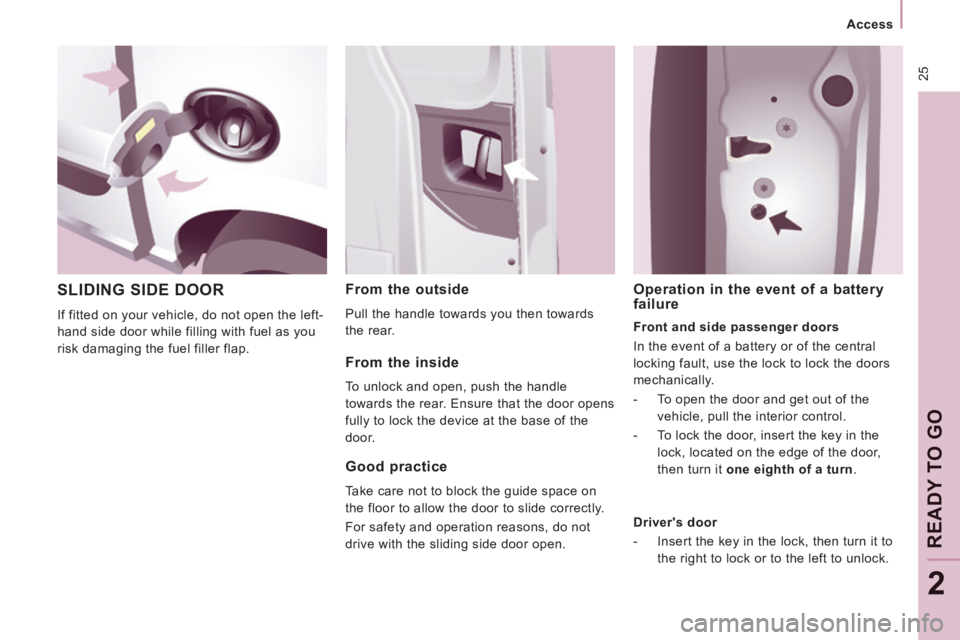
SLIDING SIDE DOOR
If fitted on your vehicle, do not open the left-
hand side door while filling with fuel as you
risk damaging the fuel filler flap.
From the outside
Pull the handle towards you then towards
the rear.
Good practice
Take care not to block the guide space on
the floor to allow the door to slide correctly.
For safety and operation reasons, do not
drive with the sliding side door open.
From the inside
To unlock and open, push the handle
towards the rear. Ensure that the door opens
fully to lock the device at the base of the
door.
Operation in the event of a battery
failure
Front and side passenger doors
In the event of a battery or of the central
locking fault, use the lock to lock the doors
mechanically.
- To open the door and get out of the vehicle, pull the interior control.
- To lock the door, insert the key in the lock, located on the edge of the door,
then turn it one eighth of a turn .
Driver's door
- Insert the key in the lock, then turn it to the right to lock or to the left to unlock.
Page 28 of 252
26
Access
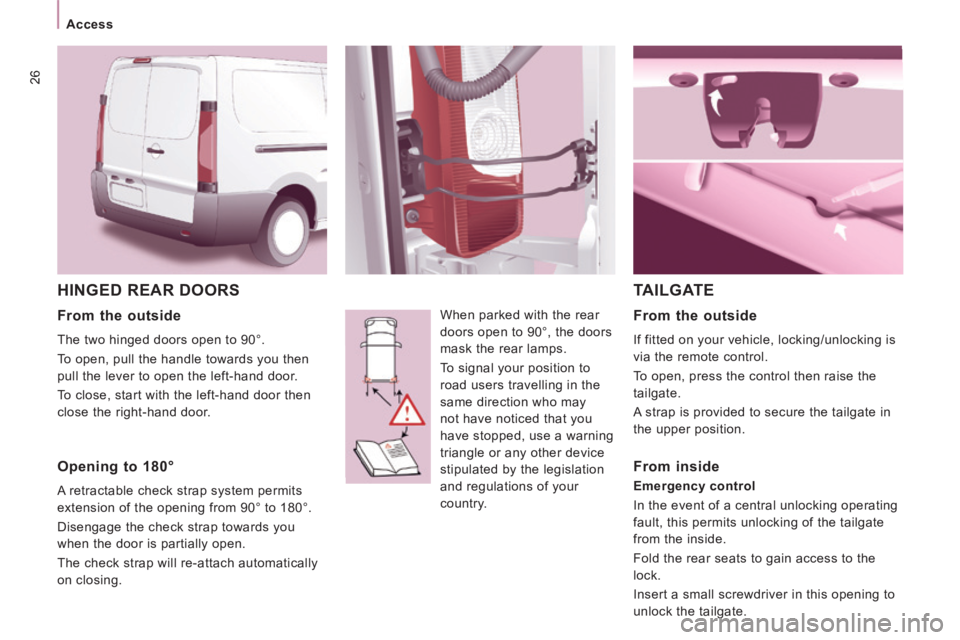
HINGED REAR DOORS
When parked with the rear
doors open to 90°, the doors
mask the rear lamps.
To signal your position to
road users travelling in the
same direction who may
not have noticed that you
have stopped, use a warning
triangle or any other device
stipulated by the legislation
and regulations of your
country.
TAILGATE
From the outside
The two hinged doors open to 90°.
To open, pull the handle towards you then
pull the lever to open the left-hand door.
To close, start with the left-hand door then
close the right-hand door.
Opening to 180°
A retractable check strap system permits
extension of the opening from 90° to 180°.
Disengage the check strap towards you
when the door is partially open.
The check strap will re-attach automatically
on closing.
From the outside
If fitted on your vehicle, locking/unlocking is
via the remote control.
To open, press the control then raise the
tailgate.
A strap is provided to secure the tailgate in
the upper position.
From inside
Emergency control
In the event of a central unlocking operating
fault, this permits unlocking of the tailgate
from the inside.
Fold the rear seats to gain access to the
lock.
Insert a small screwdriver in this opening to
unlock the tailgate.
Page 35 of 252
33
Instruments and controls
READY TO GO
2
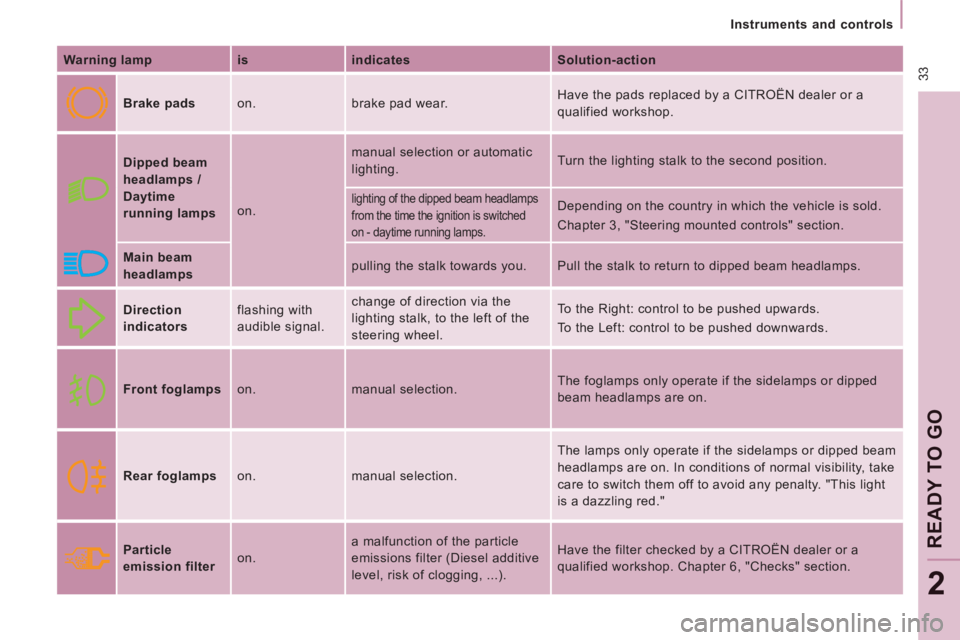
Warning lamp is indicates Solution-action
Brake pads on. brake pad wear. Have the pads replaced by a CITROËN dealer or a
qualified workshop.
Dipped beam
headlamps /
Daytime
running lamps
on. manual selection or automatic
lighting.
Turn the lighting stalk to the second position.
lighting of the dipped beam headlamps
from the time the ignition is switched
on - daytime running lamps. Depending on the country in which the vehicle is sold.
Chapter 3, "Steering mounted controls" section.
Main beam
headlamps pulling the stalk towards you.
Pull the stalk to return to dipped beam headlamps.
Direction
indicators
flashing with
audible signal. change of direction via the
lighting stalk, to the left of the
steering wheel. To the Right: control to be pushed upwards.
To the Left: control to be pushed downwards.
Front foglamps on. manual selection. The foglamps only operate if the sidelamps or dipped
beam headlamps are on.
Rear foglamps on. manual selection. The lamps only operate if the sidelamps or dipped beam
headlamps are on. In conditions of normal visibility, take
care to switch them off to avoid any penalty. "This light
is a dazzling red."
Particle
emission filter
on. a malfunction of the particle
emissions filter (Diesel additive
level, risk of clogging, ...). Have the filter checked by a CITROËN dealer or a
qualified workshop. Chapter 6, "Checks" section.
Page 45 of 252
43
READY TO GO
2
Gearboxes and steering wheel
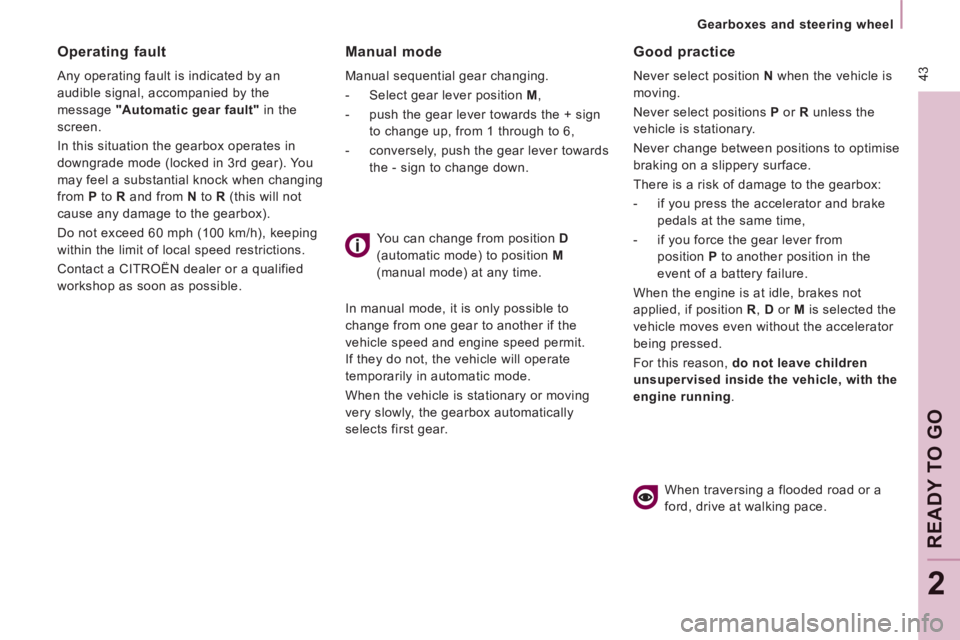
Manual mode
Manual sequential gear changing.
- Select gear lever position M ,
- push the gear lever towards the + sign to change up, from 1 through to 6,
- conversely, push the gear lever towards the - sign to change down.
You can change from position D
(automatic mode) to position M
(manual mode) at any time.
In manual mode, it is only possible to
change from one gear to another if the
vehicle speed and engine speed permit.
If they do not, the vehicle will operate
temporarily in automatic mode.
When the vehicle is stationary or moving
very slowly, the gearbox automatically
selects first gear.
Good practice
Never select position N when the vehicle is
moving.
Never select positions P or R unless the
vehicle is stationary.
Never change between positions to optimise
braking on a slippery surface.
There is a risk of damage to the gearbox:
- if you press the accelerator and brake pedals at the same time,
- if you force the gear lever from position P to another position in the
event of a battery failure.
When the engine is at idle, brakes not
applied, if position R , D or M is selected the
vehicle moves even without the accelerator
being pressed.
For this reason, do not leave children
unsupervised inside the vehicle, with the
engine running .
Operating fault
Any operating fault is indicated by an
audible signal, accompanied by the
message "Automatic gear fault" in the
screen.
In this situation the gearbox operates in
downgrade mode (locked in 3rd gear). You
may feel a substantial knock when changing
from P to R and from N to R (this will not
cause any damage to the gearbox).
Do not exceed 60 mph (100 km/h), keeping
within the limit of local speed restrictions.
Contact a CITROËN dealer or a qualified
workshop as soon as possible.
When traversing a flooded road or a
ford, drive at walking pace.
Page 48 of 252
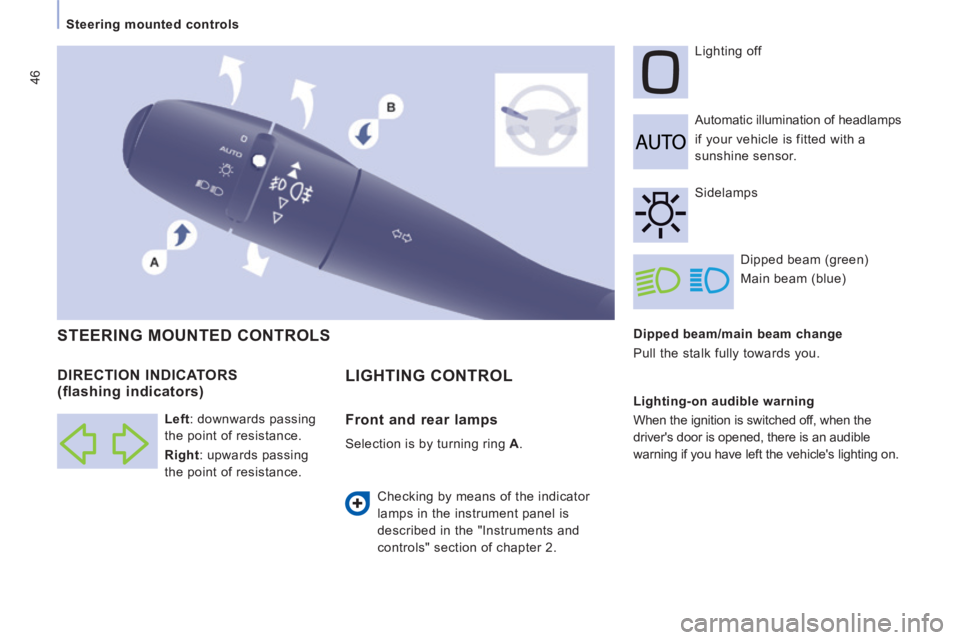
46
Steering mounted controls Dipped beam/main beam change
Pull the stalk fully towards you. Automatic illumination of headlamps
if your vehicle is fitted with a
sunshine sensor. Lighting off
Dipped beam (green)
Main beam (blue)
DIRECTION INDICATORS
(flashing indicators)
STEERING MOUNTED CONTROLS
Checking by means of the indicator
lamps in the instrument panel is
described in the "Instruments and
controls" section of chapter 2. Sidelamps
Lighting-on audible warning
When the ignition is switched off, when the
driver's door is opened, there is an audible
warning if you have left the vehicle's lighting on.
Left : downwards passing
the point of resistance.
Right : upwards passing
the point of resistance.
LIGHTING CONTROL
Front and rear lamps
Selection is by turning ring
A .
Page 51 of 252

49
Steering mounted controls
EASE OF USE
and
COMFORT
3
WINDSCREEN WIPER STALK
Manual windscreen wipers
2 Fast wipe (heavy rain).
1 Normal wipe (moderate rain).
l Intermittent wipe.
0 Off.
Single wipe
(press downwards). Do not cover the rain sensor,
located in the centre of the
windscreen, behind the mirror.
Wash-wipe and headlamp wash
Pull the stalk towards you, the wash-wipe
is accompanied by a timed sweep of the
wipers.
The headlamp wash is linked with the wash-
wipe, it is triggered if the dipped headlamps
are on.
In the I ntermittent position, the wiping speed
is in proportion to the vehicle speed. To top up the levels, refer to the
"Levels" section of chapter 6.
In the AUTO position, the windscreen wipers
operate automatically and adapt their speed
to the intensity of the rainfall.
When not in AUTO mode, for the other
positions, refer to the manual windscreen
wipers section.
Whenever the ignition has been switched
off for more than one minute, with the
windscreen wiper stalk in position 2, 1 or I,
the stalk must be reactivated:
- move the stalk to any position,
- then move it back to the required
position.
Automatic rain sensitive windscreen wipers