maintenance CITROEN JUMPY 2008 Owners Manual
[x] Cancel search | Manufacturer: CITROEN, Model Year: 2008, Model line: JUMPY, Model: CITROEN JUMPY 2008Pages: 252, PDF Size: 12.15 MB
Page 5 of 252
CONTENTS
Contents
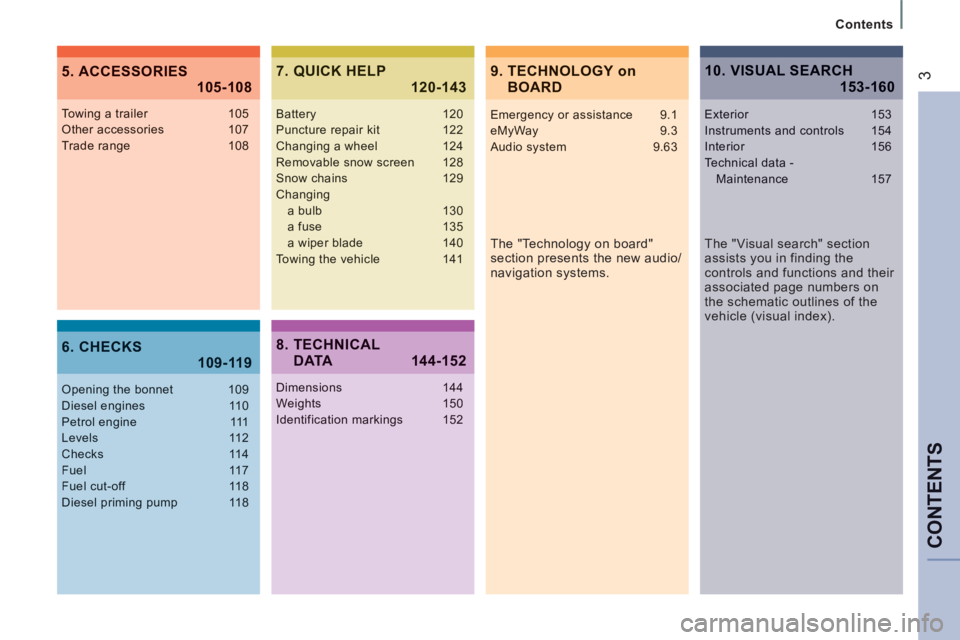
39. TECHNOLOGY on BOARD 5. ACCESSORIES 105-108
6. CHECKS 109-119
7. QUICK HELP 120-143
The "Technology on board"
section presents the new audio/
navigation systems.
Towing a trailer 105Other accessories 107Trade range 108
Opening the bonnet 109Diesel engines 110Petrol engine 111Levels 112Checks 114Fuel 117Fuel cut-off 118Diesel priming pump 118
Battery 120Puncture repair kit 122Changing a wheel 124Removable snow screen 128Snow chains 129Changing a bulb 130 a fuse 135 a wiper blade 140Towing the vehicle 141
8. TECHNICAL DATA 144-152
Dimensions 144Weights 150Identification markings 152
10. VISUAL SEARCH 153-160
Emergency or assistance 9.1eMyWay 9.3Audio system 9.63
The "Visual search" section
assists you in finding the
controls and functions and their
associated page numbers on
the schematic outlines of the
vehicle (visual index).
Exterior 153Instruments and controls 154Interior 156Technical data - Maintenance 157
Page 21 of 252
19
FAMILIARISATION
1
Limit the causes of
excess consumption
Spread loads throughout the vehicle;
place the heaviest items in the bottom of
the boot, as close as possible to the rear
seats.
Limit the loads carried in the vehicle and
reduce wind resistance (roof bars, roof
rack, bicycle carrier, trailer...). Use a roof
box in preference.
Remove roof bars and roof racks after
use.
At the end of winter, remove snow tyres
and refit your summer tyres.
Observe the recommendations
on maintenance
Check the tyre pressures regularly, when
cold, referring to the label in the door
aperture, driver's side.
Carry out this check in particular:
- before a long journey,
- at each change of season,
- after a long period out of use.
Don't forget the spare wheel and the tyres
on any trailer or caravan.
Have your vehicle serviced regularly
(engine oil, oil filter, air filter, passenger
compartment filter...) and observe the
schedule of operations recommended in the
maintenance and warranty guide. When refuelling, do not continue after the
third cut-off of the nozzle to avoid any
overflow.
At the wheel of your new vehicle, it is only
after the fi rst 1 800 miles (3 000 kilometres)
that you will see the fuel consumption settle
down to a consistent average.
Page 36 of 252
34
Instruments and controls
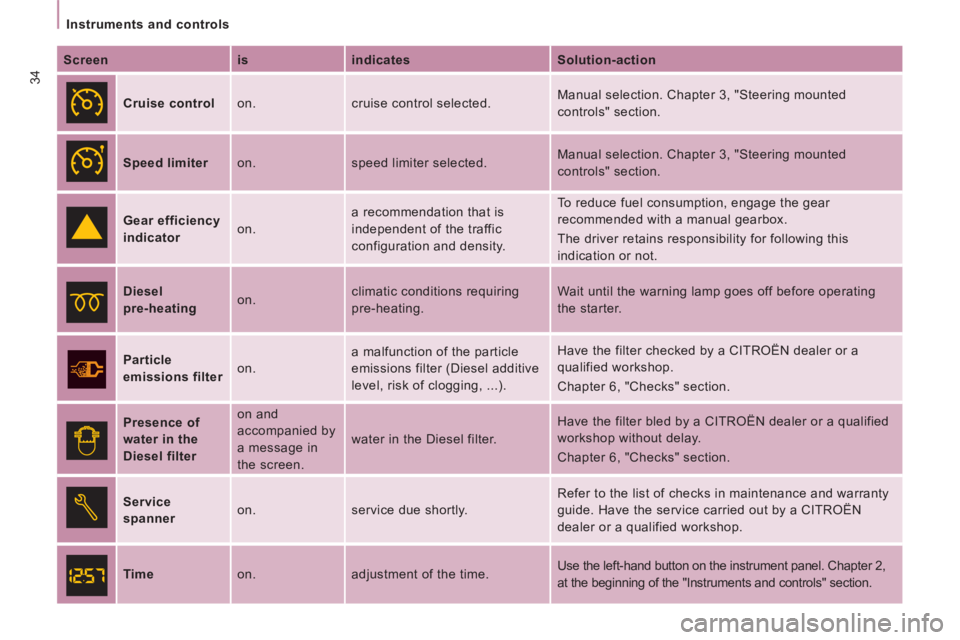
Screen is indicates Solution-action
Cruise control on. cruise control selected. Manual selection. Chapter 3, "Steering mounted
controls" section.
Speed limiter on. speed limiter selected. Manual selection. Chapter 3, "Steering mounted
controls" section.
Gear efficiency
indicat or
on. a recommendation that is
independent of the traffic
configuration and density. To reduce fuel consumption, engage the gear
recommended with a manual gearbox.
The driver retains responsibility for following this
indication or not.
Diesel
pre-heating
on. climatic conditions requiring
pre-heating. Wait until the warning lamp goes off before operating
the starter.
Particle
emissions filter
on. a malfunction of the particle
emissions filter (Diesel additive
level, risk of clogging, ...). Have the filter checked by a CITROËN dealer or a
qualified workshop.
Chapter 6, "Checks" section.
Presence of
water in the
Diesel filter
on and
accompanied by
a message in
the screen.
water in the Diesel filter.
Have the filter bled by a CITROËN dealer or a qualified
workshop without delay.
Chapter 6, "Checks" section.
Service
spanner
on.
service due shortly. Refer to the list of checks in maintenance and warranty
guide. Have the service carried out by a CITROËN
dealer or a qualified workshop.
Time on. adjustment of the time. Use the left-hand button on the instrument panel. Chapter 2,
at the beginning of the "Instruments and controls" section.
Page 68 of 252
66
Ventilation Have the heater checked at least
once a year at the beginning of winter.
Maintenance and repairs should only be
carried out by a CITROËN dealer or a
qualified workshop. Use recommended
replacement parts only.
Page 81 of 252
79
Rear suspension
EASE OF USE
and
COMFORT
3
Metal suspension
This equipment adopts long movement limiters
which make it possible to guarantee stable
behaviour both when loaded and when empty.
No action on your part is required except to
ensure that maintenance is carried out and that
the authorised loads are complied with. irrespective of the weight of the load, within
the limit of the authorised values. On board,
the increasing or lightening of the load on the
vehicle's platform is detected by two height
sensors. When all of the doors are closed,
the sensors trigger the automatic height
correction and determine the optimum height
of the sill for the vehicle's driving conditions.
Deactivation of automatic height correction
The control which permits deactivation of
automatic regulation is located on the right-
hand side, at the rear of the vehicle.
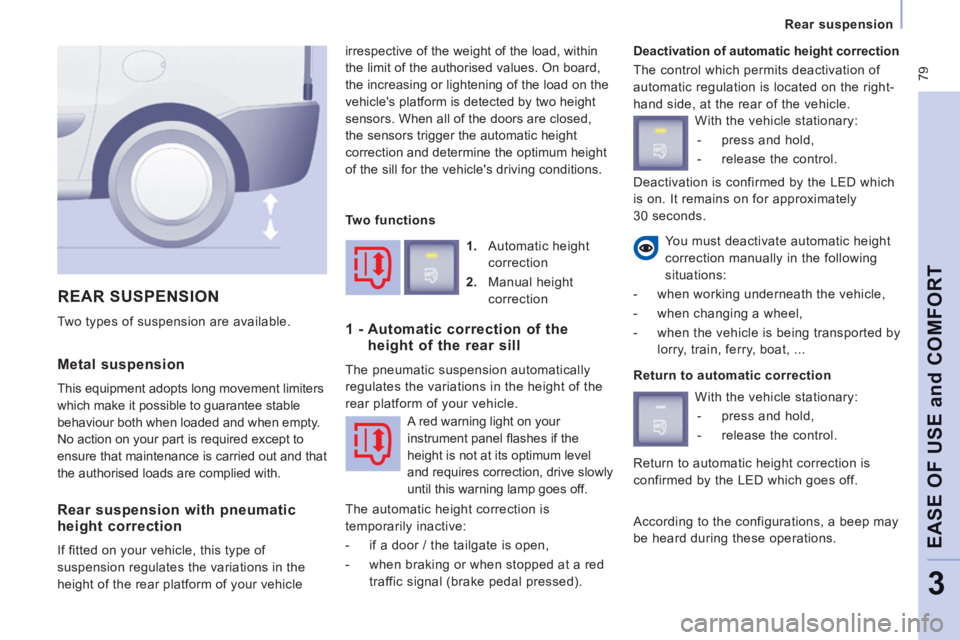
REAR SUSPENSION
You must deactivate automatic height
correction manually in the following
situations:
- when working underneath the vehicle,
- when changing a wheel,
- when the vehicle is being transported by lorry, train, ferry, boat, ...
Two types of suspension are available.
Rear suspension with pneumatic
height correction
If fi tted on your vehicle, this type of
suspension regulates the variations in the
height of the rear platform of your vehicle 1. Automatic height
correction
2. Manual height correction
1 - Automatic correction of the height of the rear sill
The pneumatic suspension automatically
regulates the variations in the height of the
rear platform of your vehicle.
A red warning light on your
instrument panel fl ashes if the
height is not at its optimum level
and requires correction, drive slowly
until this warning lamp goes off.
The automatic height correction is
temporarily inactive:
- if a door / the tailgate is open,
- when braking or when stopped at a red traffic signal (brake pedal pressed). With the vehicle stationary:
- press and hold,
- release the control.
Return to automatic correction With the vehicle stationary: - press and hold,
- release the control.
According to the configurations, a beep may
be heard during these operations.
Two functions
Return to automatic height correction is
confirmed by the LED which goes off. Deactivation is confirmed by the LED which
is on. It remains on for approximately
30 seconds.
Page 94 of 252
92
Seat belts
The force limiter reduces the pressure of
the seat belt against the body of the
occupants.
The pretensioning seat belts are active when
the ignition is switched on.
The inertia reels are fitted with a device
which automatically locks the strap in the
event of a collision or emergency braking or
if the vehicle rolls over.
You can unfasten the seat belt by pressing
the red button on the buckle. Guide the seat
belt after unfastening.
The airbag warning lamp comes on if
the pretensioners are deployed. Contact
a CITROËN dealer or a qualified
workshop.
In order to be effective, a seat belt
must:
- restrain one person only,
- must not be twisted, check by pulling in front of you with an even
movement,
- be tightened as close to the body as possible.
The upper part of the seat belt should
be positioned in the hollow of
the shoulder.
The lap part should be placed as low as
possible on the pelvis.
Do not invert the seat belt buckles as they
will not fulfil their role completely. If the Recommendations for children:
- use a suitable child seat if the
passenger is less than 12 years old or
shorter than one metre fifty,
- never allow a child to travel on your lap, even with the seat belt fastened.
FRONT SEAT BELTS
For more information on child seats,
refer to the "Children on board" section
of chapter 4.
In accordance with current safety
regulations, your CITROËN dealer can
guarantee all work or any checks, from
testing to maintenance, on your seat belt
equipment.
Have the seat belts checked regularly (even
after a minor impact) by a CITROËN dealer
or a qualified workshop: they must not show
any signs of wear, cutting or fraying and they
must not be converted or modified.
Clean the seat belt straps with soapy
water or a textile cleaning product, sold
by CITROËN dealers.
With front airbags
The front seats are fitted with pretensioners
and force limiters.
Without front airbag
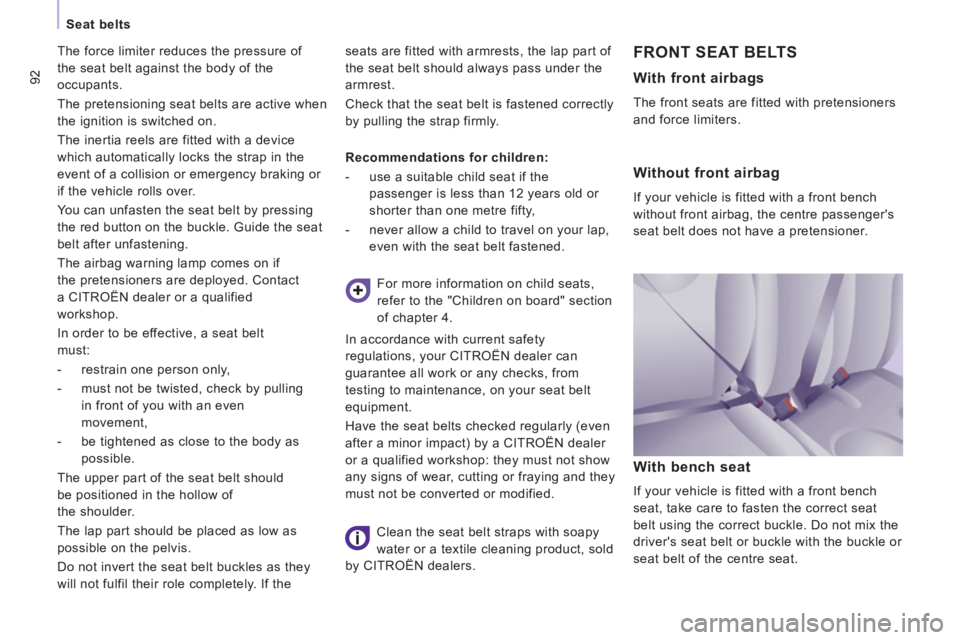
If your vehicle is fitted with a front bench
without front airbag, the centre passenger's
seat belt does not have a pretensioner.
With bench seat
If your vehicle is fitted with a front bench
seat, take care to fasten the correct seat
belt using the correct buckle. Do not mix the
driver's seat belt or buckle with the buckle or
seat belt of the centre seat.
seats are fitted with armrests, the lap part of
the seat belt should always pass under the
armrest.
Check that the seat belt is fastened correctly
by pulling the strap firmly.
Page 110 of 252
108
Equipment The fitting of electrical equipment
or accessories which are not
recommended by CITROËN may result
in the failure of your vehicle's electronic
system. Please note this specific warning.
You are advised to contact a representative
of the Marque to be shown the range of
recommended equipment and accessories.
Depending on the country in which the
vehicle is sold or operated, it is compulsory
to have a high visibility safety vest, warning
triangle and replacement bulbs available in
the vehicle.
Installation of radiocommunication
transmitters
Before installing accessory
radiocommunication transmitters with an
external aerial on your vehicle, you are
advised to contact a representative of the
CITROËN marque.
The CITROËN dealer network can inform
you of the specifications (frequency
band, maximum output power, aerial
position, specific installation conditions)
of the transmitters which can be fitted,
in accordance with the Motor Vehicle
Electromagnetic Compatibility Directive
(2004/104/CE). Front mud flaps, rear mud flaps, ...
Range of trade
equipment
Parts and Services technical information
publishes an accessory catalogue offering
various equipment and fittings, such as:
Screenwash, replacement fuses, wiper
blades, interior and exterior cleaning
and maintenance products, replacement
bulbs, ...
Roof bars for short, medium and long
wheelbase (load retainers for all models).
Towbar, towbar harness: trailer towbar which must be fi tted by the network.
Sill plate, loading roller, sill. Sill plate,
loading roller, sill.
Roof bars for the various heights, roof bars,
ladder.
Separation partitions and grilles, smooth,
non-slip wooden protective floor.
Protective grilles, multimedia.
Another range is also available, structured
around comfort, leisure and maintenance:
Anti-theft alarm, window engraving, first aid
kit, high visibility safety vest, rear parking
sensors, warning triangle, ...
Front seat covers compatible with airbags,
bench, rubber mats, carpet mats, snow
chains. To prevent the mat from becoming caught
under the pedals:
- ensure that the mat and its fi xings are
positioned correctly,
- never fi t one mat on top of another.
Audio equipment, hands-free kit, speakers,
CD changer, navigation, ...
Regardless of the audio and telematic
equipment offered on the market, the
technical constraints linked with the fi tting of
equipment of these families of products mean
that the special features of the equipment and
its compatibility with the capacities of the your
vehicle's standard equipment must be taken
into account. Please contact a dealer for
information before fi tting such equipment.
Page 114 of 252
11 2
Levels
LEVELS
To maintain the reliability of engines and
emission control systems, the use of
additives in engine oil is prohibited. Changing the brake fluid
The brake fluid must be changed at
the intervals stated, according to the
manufacturer's servicing schedule.
Use fluids recommended by the
manufacturer, which fulfil DOT4 standards.
The level must be between the MIN and
MAX marks on the reservoir.
If fluid has to be added frequently, this
indicates a fault which must be checked by a
CITROËN dealer or a qualified workshop as
soon as possible.
Warning lamps
These regular maintenance operations
will keep your vehicle in good running
order. Consult a CITROËN dealer or the
servicing and warranty booklet enclosed in
the handbook pack.
If you have to remove / refit the engine
style cover, handle it with care to avoid
damaging the fixing clips.
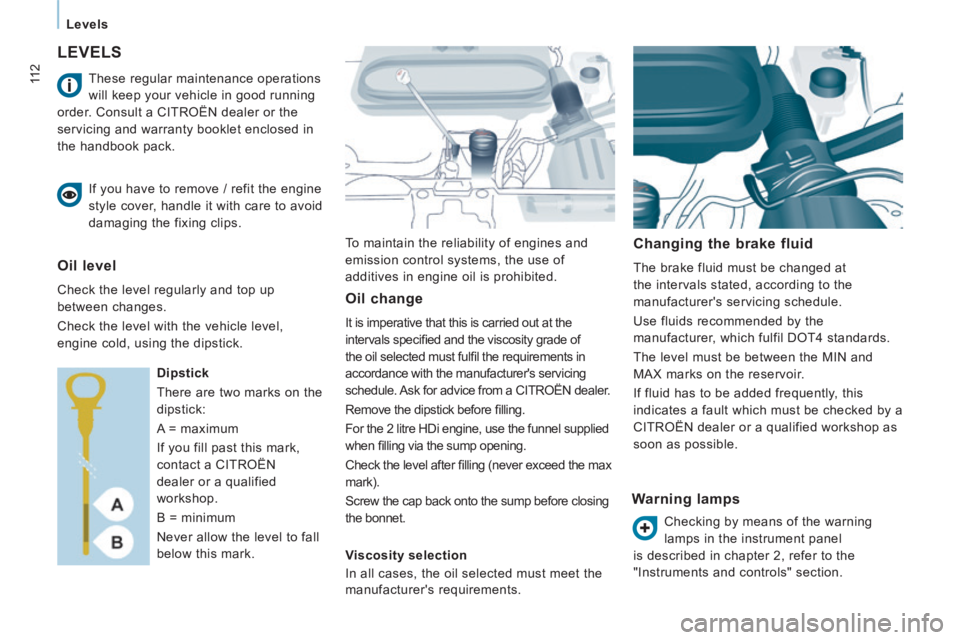
Oil level
Check the level regularly and top up
between changes.
Check the level with the vehicle level,
engine cold, using the dipstick. Dipstick
There are two marks on the
dipstick:
A = maximum
If you fill past this mark,
contact a CITROËN
dealer or a qualified
workshop.
B = minimum
Never allow the level to fall
below this mark. Oil change
It is imperative that this is carried out at the
intervals specifi ed and the viscosity grade of
the oil selected must fulfi l the requirements in
accordance with the manufacturer's servicing
schedule. Ask for advice from a CITROËN dealer.
Remove the dipstick before fi lling.
For the 2 litre HDi engine, use the funnel supplied
when fi lling via the sump opening.
Check the level after fi lling (never exceed the max
mark).
Screw the cap back onto the sump before closing
the bonnet.
Viscosity selection
In all cases, the oil selected must meet the
manufacturer's requirements. Checking by means of the warning
lamps in the instrument panel
is described in chapter 2, refer to the
"Instruments and controls" section.
Page 117 of 252
11 5
Checks
CHECKS
6
Manual gearbox
Have the level checked in accordance with
the manufacturer's servicing schedule.
Good practice
To check the main levels and certain
components, in accordance with the
manufacturer's servicing schedule, refer to
the pages of the maintenance and warranty
guide which correspond to your vehicle's
engine. Only use products recommended by
CITROËN or products of equivalent
quality and specification.
In order to optimise the operation of units as
important as the braking system, CITROËN
selects and offers specific products.
In order to avoid damaging the electrical
units, high pressure washing to clean the
engine compartment is strictly prohibited.
After washing the vehicle dampness, or in
winter, ice may form on the brake discs and
pads: braking efficiency may be reduced.
Make some light brake applications to dry
and de-ice the brakes.
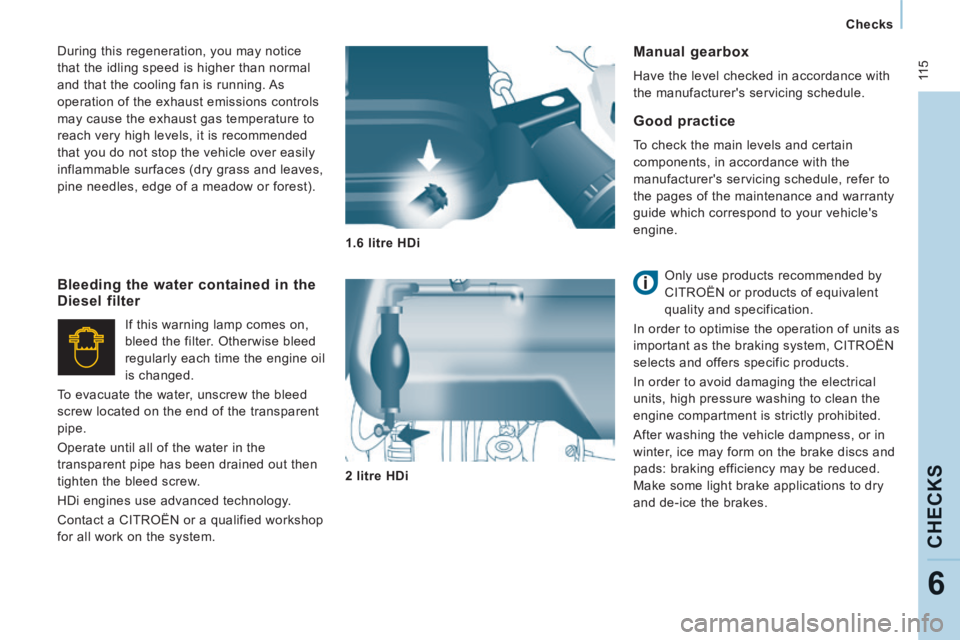
Bleeding the water contained in the
Diesel filter
If this warning lamp comes on,
bleed the filter. Otherwise bleed
regularly each time the engine oil
is changed.
To evacuate the water, unscrew the bleed
screw located on the end of the transparent
pipe.
Operate until all of the water in the
transparent pipe has been drained out then
tighten the bleed screw.
HDi engines use advanced technology.
Contact a CITROËN or a qualified workshop
for all work on the system. 1.6 litre HDi
2 litre HDi
During this regeneration, you may notice
that the idling speed is higher than normal
and that the cooling fan is running. As
operation of the exhaust emissions controls
may cause the exhaust gas temperature to
reach very high levels, it is recommended
that you do not stop the vehicle over easily
inflammable surfaces (dry grass and leaves,
pine needles, edge of a meadow or forest).
Page 243 of 252
157
Technical data - Maintenance
VISUAL SEARCH
10
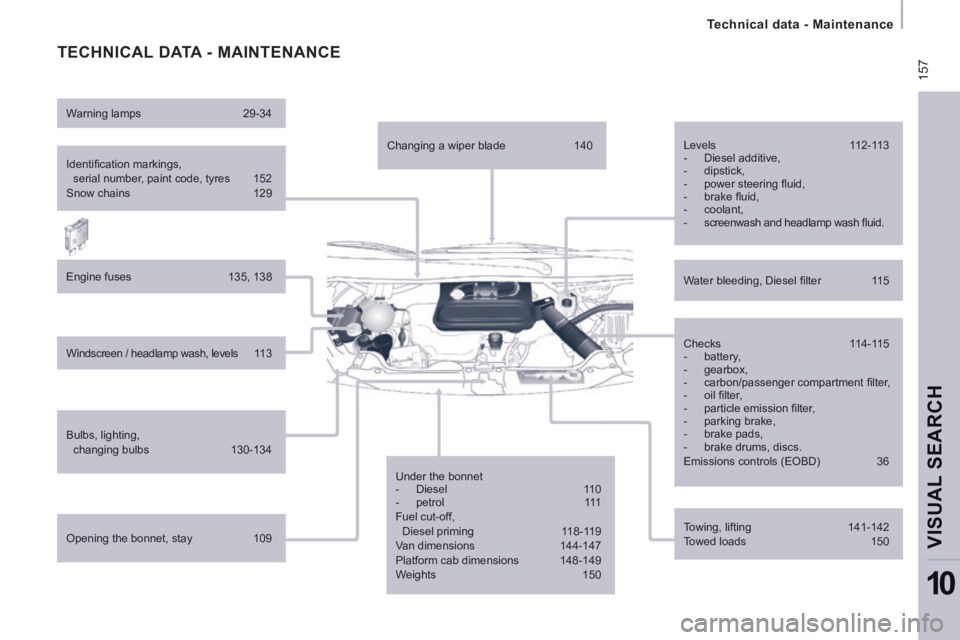
TECHNICAL DATA - MAINTENANCE
Identifi cation markings, serial number, paint code, tyres 152
Snow chains 129
Engine fuses 135, 138
Windscreen / headlamp wash, levels 113
Bulbs, lighting, changing bulbs 130-134
Opening the bonnet, stay 109
Warning lamps
29-34
Changing a wiper blade 140
Under the bonnet
- Diesel 110
- petrol 111
Fuel cut-off, Diesel priming 118-119
Van dimensions 144-147
Platform cab dimensions 148-149
Weights 150 Checks
114-115
- battery,
- gearbox,
- carbon/passenger compartment fi lter,
- oil fi lter,
- particle emission fi lter,
- parking brake,
- brake pads,
- brake drums, discs.
Emissions controls (EOBD) 36 Water bleeding, Diesel fi lter 115 Levels 112-113
- Diesel additive,
- dipstick,
- power steering fl uid,
- brake fl uid,
- coolant,
- screenwash and headlamp wash fl uid.
Towing, lifting 141-142
Towed loads 150