Screen CITROEN JUMPY 2009 User Guide
[x] Cancel search | Manufacturer: CITROEN, Model Year: 2009, Model line: JUMPY, Model: CITROEN JUMPY 2009Pages: 252, PDF Size: 12.15 MB
Page 40 of 252
38
Instruments and controls Service overdue With the engine running the spanner
remains on until the service has been
carried out.
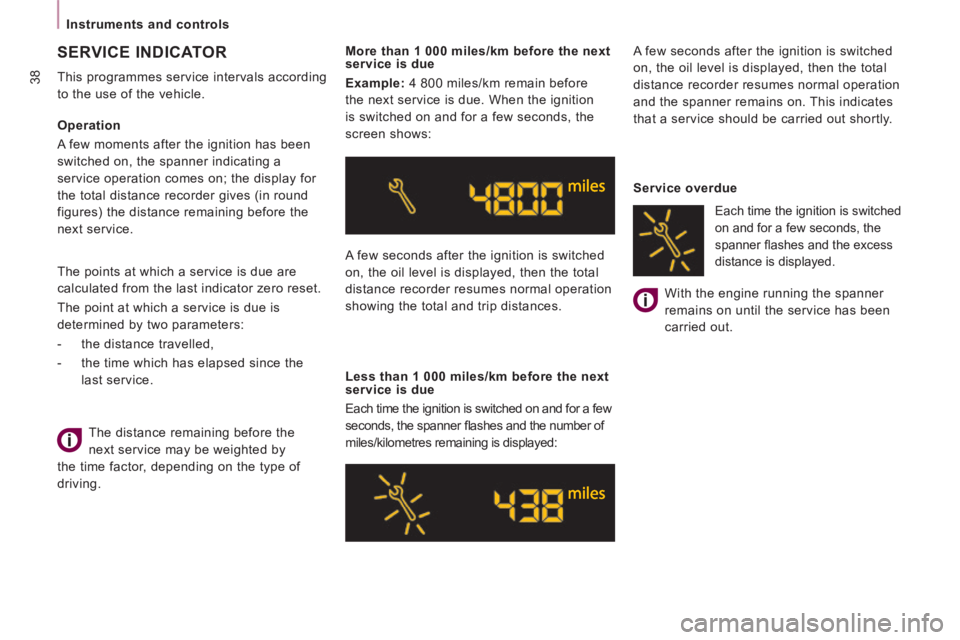
Each time the ignition is switched
on and for a few seconds, the
spanner fl ashes and the excess
distance is displayed.
Operation
A few moments after the ignition has been
switched on, the spanner indicating a
service operation comes on; the display for
the total distance recorder gives (in round
figures) the distance remaining before the
next service. A few seconds after the ignition is switched
on, the oil level is displayed, then the total
distance recorder resumes normal operation
showing the total and trip distances.
Less than 1 000 miles/km before the next
service is due
Each time the ignition is switched on and for a few
seconds, the spanner fl ashes and the number of
miles/kilometres remaining is displayed: A few seconds after the ignition is switched
on, the oil level is displayed, then the total
distance recorder resumes normal operation
and the spanner remains on. This indicates
that a service should be carried out shortly.
The distance remaining before the
next service may be weighted by
the time factor, depending on the type of
driving. More than 1 000 miles/km before the next
service is due
Example: 4 800 miles/km remain before
the next service is due. When the ignition
is switched on and for a few seconds, the
screen shows:
SERVICE INDICATOR
This programmes service intervals according
to the use of the vehicle.
The points at which a service is due are
calculated from the last indicator zero reset.
The point at which a service is due is
determined by two parameters:
- the distance travelled,
- the time which has elapsed since the
last service.
Page 41 of 252
39
Instruments and controls
READY TO GO
2
When the display shows "=0" , release
the button; the spanner disappears.
After this operation, if you wish to disconnect
the battery, lock the vehicle and wait for at
least five minutes, otherwise the zero re-set
will not be registered.
Zero re-set
Your CITROËN dealer or a qualified
workshop carries out this operation after
each service.
However, if you carry out the service
yourself, the re-set procedure is as follows:
- switch off the ignition,
- press and hold the trip recorder reset button,
- switch on the ignition.
The display begins a countdown.
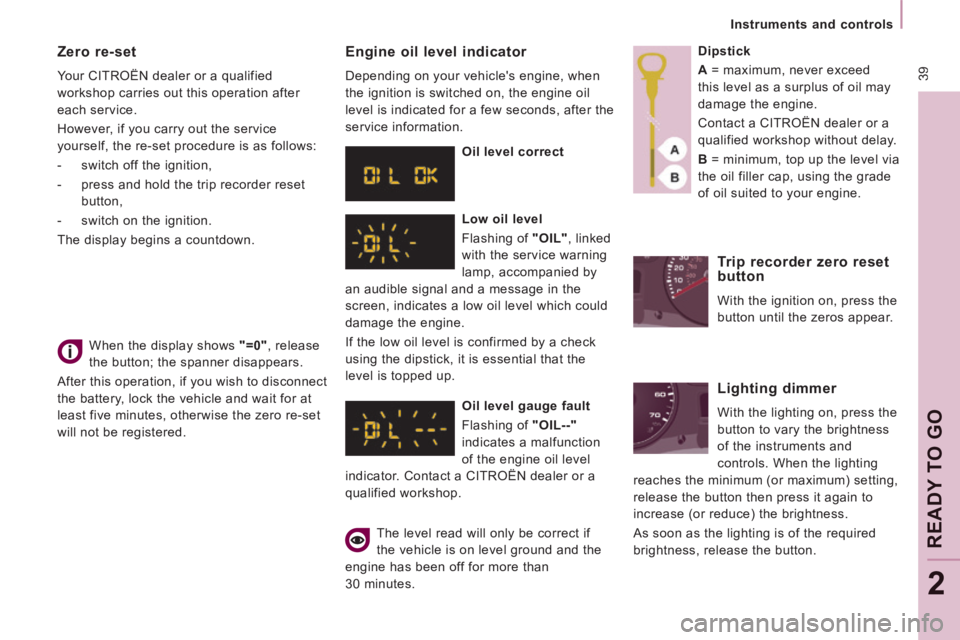
Engine oil level indicator
Depending on your vehicle's engine, when
the ignition is switched on, the engine oil
level is indicated for a few seconds, after the
service information.
Oil level correct
Low oil level
Flashing of "OIL" , linked
with the service warning
lamp, accompanied by
an audible signal and a message in the
screen, indicates a low oil level which could
damage the engine.
If the low oil level is confirmed by a check
using the dipstick, it is essential that the
level is topped up.
Oil level gauge fault
Flashing of "OIL--"
indicates a malfunction
of the engine oil level
indicator. Contact a CITROËN dealer or a
qualified workshop.
The level read will only be correct if
the vehicle is on level ground and the
engine has been off for more than
30 minutes. Dipstick
A
= maximum, never exceed
this level as a surplus of oil may
damage the engine.
Contact a CITROËN dealer or a
qualified workshop without delay.
B = minimum, top up the level via
the oil filler cap, using the grade
of oil suited to your engine.
Trip recorder zero reset
button
With the ignition on, press the
button until the zeros appear.
Lighting dimmer
With the lighting on, press the
button to vary the brightness
of the instruments and
controls. When the lighting
reaches the minimum (or maximum) setting,
release the button then press it again to
increase (or reduce) the brightness.
As soon as the lighting is of the required
brightness, release the button.
Page 43 of 252
41
READY TO GO
2
Gearboxes and steering wheel
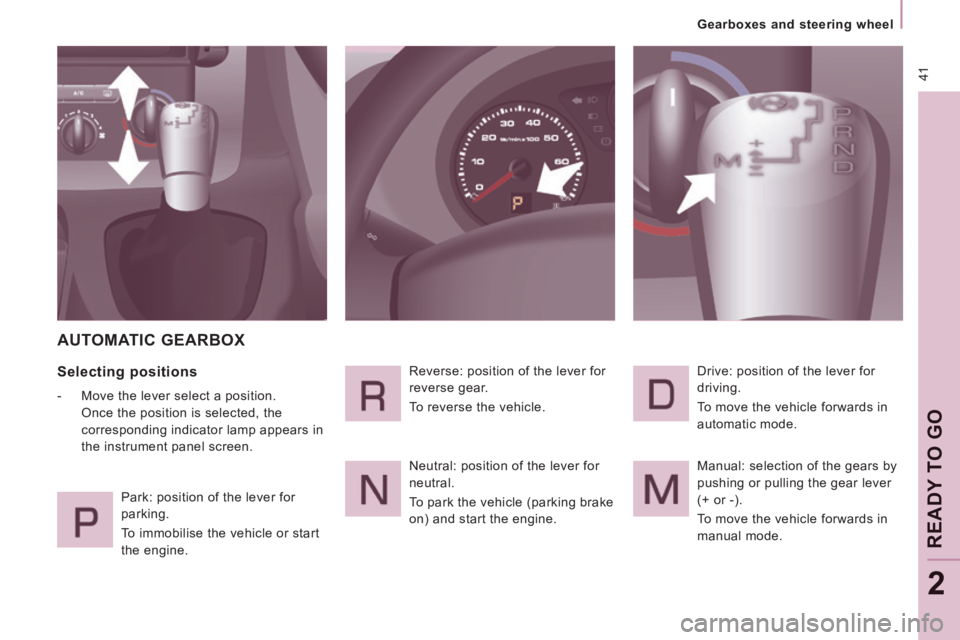
AUTOMATIC GEARBOX
Selecting positions
- Move the lever select a position. Once the position is selected, the
corresponding indicator lamp appears in
the instrument panel screen.
Park: position of the lever for
parking.
To immobilise the vehicle or start
the engine. Reverse: position of the lever for
reverse gear.
To reverse the vehicle.
Neutral: position of the lever for
neutral.
To park the vehicle (parking brake
on) and start the engine.
Drive: position of the lever for
driving.
To move the vehicle forwards in
automatic mode.
Manual: selection of the gears by
pushing or pulling the gear lever
(+ or -).
To move the vehicle forwards in
manual mode.
Page 45 of 252
43
READY TO GO
2
Gearboxes and steering wheel
Manual mode
Manual sequential gear changing.
- Select gear lever position M ,
- push the gear lever towards the + sign to change up, from 1 through to 6,
- conversely, push the gear lever towards the - sign to change down.
You can change from position D
(automatic mode) to position M
(manual mode) at any time.
In manual mode, it is only possible to
change from one gear to another if the
vehicle speed and engine speed permit.
If they do not, the vehicle will operate
temporarily in automatic mode.
When the vehicle is stationary or moving
very slowly, the gearbox automatically
selects first gear.
Good practice
Never select position N when the vehicle is
moving.
Never select positions P or R unless the
vehicle is stationary.
Never change between positions to optimise
braking on a slippery surface.
There is a risk of damage to the gearbox:
- if you press the accelerator and brake pedals at the same time,
- if you force the gear lever from position P to another position in the
event of a battery failure.
When the engine is at idle, brakes not
applied, if position R , D or M is selected the
vehicle moves even without the accelerator
being pressed.
For this reason, do not leave children
unsupervised inside the vehicle, with the
engine running .
Operating fault
Any operating fault is indicated by an
audible signal, accompanied by the
message "Automatic gear fault" in the
screen.
In this situation the gearbox operates in
downgrade mode (locked in 3rd gear). You
may feel a substantial knock when changing
from P to R and from N to R (this will not
cause any damage to the gearbox).
Do not exceed 60 mph (100 km/h), keeping
within the limit of local speed restrictions.
Contact a CITROËN dealer or a qualified
workshop as soon as possible.
When traversing a flooded road or a
ford, drive at walking pace.
Page 49 of 252
47
Steering mounted controls
EASE OF USE
and
COMFORT
3
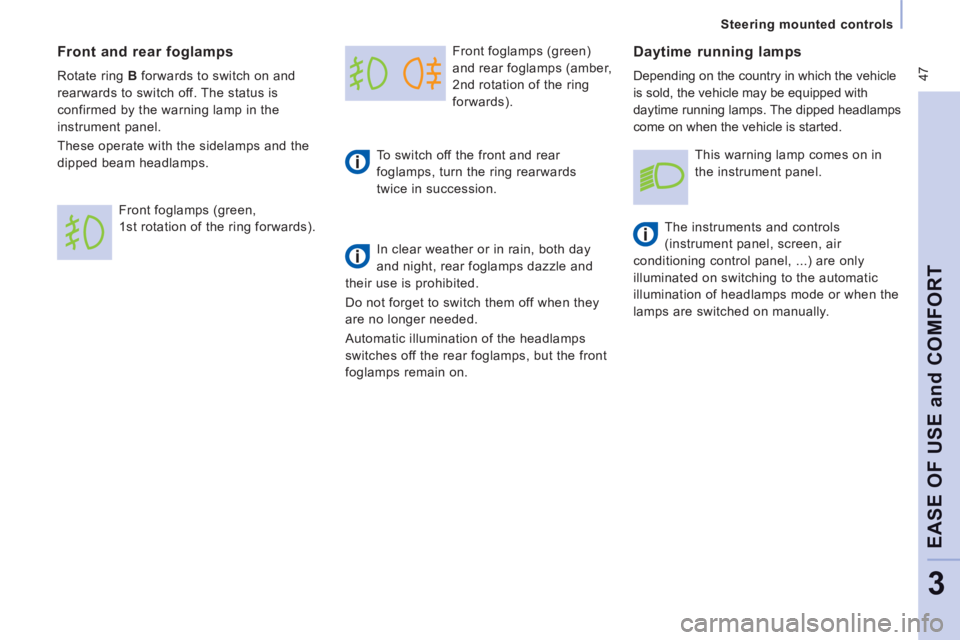
Front foglamps (green)
and rear foglamps (amber,
2nd rotation of the ring
forwards).
To switch off the front and rear
foglamps, turn the ring rearwards
twice in succession.
In clear weather or in rain, both day
and night, rear foglamps dazzle and
their use is prohibited.
Do not forget to switch them off when they
are no longer needed.
Automatic illumination of the headlamps
switches off the rear foglamps, but the front
foglamps remain on. Daytime running lamps
Depending on the country in which the vehicle
is sold, the vehicle may be equipped with
daytime running lamps. The dipped headlamps
come on when the vehicle is started.
The instruments and controls
(instrument panel, screen, air
conditioning control panel, ...) are only
illuminated on switching to the automatic
illumination of headlamps mode or when the
lamps are switched on manually.
Front and rear foglamps
Rotate ring B forwards to switch on and
rearwards to switch off. The status is
confirmed by the warning lamp in the
instrument panel.
These operate with the sidelamps and the
dipped beam headlamps.
Front foglamps (green,
1st rotation of the ring forwards). This warning lamp comes on in
the instrument panel.
Page 50 of 252
48
Steering mounted controls
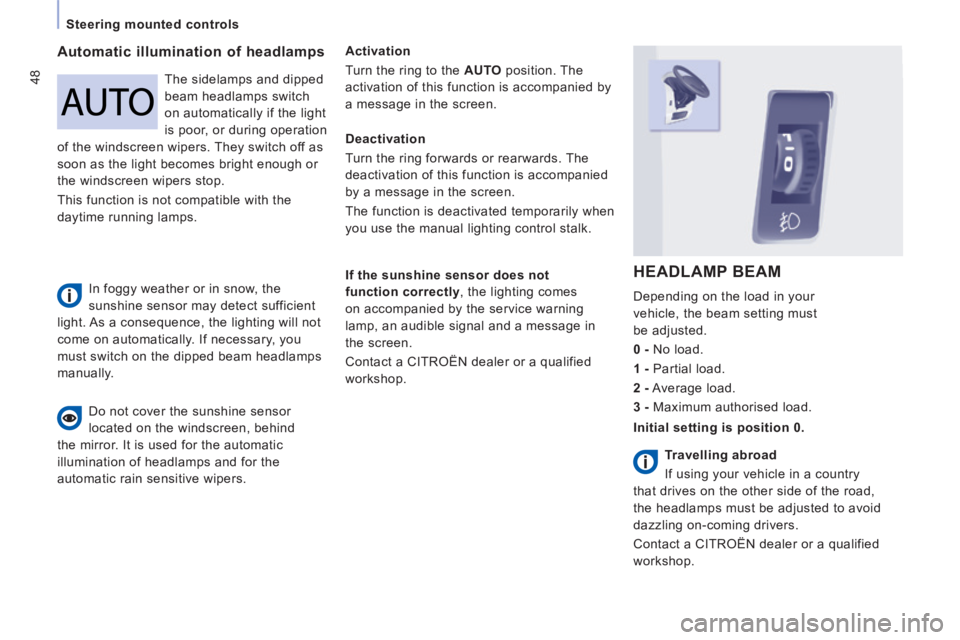
Automatic illumination of headlamps Activation
Turn the ring to the AUTO position. The
activation of this function is accompanied by
a message in the screen.
If the sunshine sensor does not
function correctly , the lighting comes
on accompanied by the service warning
lamp, an audible signal and a message in
the screen.
Contact a CITROËN dealer or a qualified
workshop.
HEADLAMP BEAM
Depending on the load in your
vehicle, the beam setting must
be adjusted.
0 - No load.
1 - Partial load.
2 - Average load.
3 - Maximum authorised load.
Do not cover the sunshine sensor
located on the windscreen, behind
the mirror. It is used for the automatic
illumination of headlamps and for the
automatic rain sensitive wipers. The sidelamps and dipped
beam headlamps switch
on automatically if the light
is poor, or during operation
of the windscreen wipers. They switch off as
soon as the light becomes bright enough or
the windscreen wipers stop.
This function is not compatible with the
daytime running lamps. Deactivation
Turn the ring forwards or rearwards. The
deactivation of this function is accompanied
by a message in the screen.
The function is deactivated temporarily when
you use the manual lighting control stalk.
Initial setting is position 0.
In foggy weather or in snow, the
sunshine sensor may detect sufficient
light. As a consequence, the lighting will not
come on automatically. If necessary, you
must switch on the dipped beam headlamps
manually.
Travelling abroad
If using your vehicle in a country
that drives on the other side of the road,
the headlamps must be adjusted to avoid
dazzling on-coming drivers.
Contact a CITROËN dealer or a qualified
workshop.
Page 51 of 252

49
Steering mounted controls
EASE OF USE
and
COMFORT
3
WINDSCREEN WIPER STALK
Manual windscreen wipers
2 Fast wipe (heavy rain).
1 Normal wipe (moderate rain).
l Intermittent wipe.
0 Off.
Single wipe
(press downwards). Do not cover the rain sensor,
located in the centre of the
windscreen, behind the mirror.
Wash-wipe and headlamp wash
Pull the stalk towards you, the wash-wipe
is accompanied by a timed sweep of the
wipers.
The headlamp wash is linked with the wash-
wipe, it is triggered if the dipped headlamps
are on.
In the I ntermittent position, the wiping speed
is in proportion to the vehicle speed. To top up the levels, refer to the
"Levels" section of chapter 6.
In the AUTO position, the windscreen wipers
operate automatically and adapt their speed
to the intensity of the rainfall.
When not in AUTO mode, for the other
positions, refer to the manual windscreen
wipers section.
Whenever the ignition has been switched
off for more than one minute, with the
windscreen wiper stalk in position 2, 1 or I,
the stalk must be reactivated:
- move the stalk to any position,
- then move it back to the required
position.
Automatic rain sensitive windscreen wipers
Page 52 of 252

50
Steering mounted controls
Special position of the windscreen
wipers
In the minute following switching off of the
ignition, any action on the stalk positions the
wipers against the windscreen uprights. This action enables you to position the
wiper blades for winter parking, cleaning or
replacement.
Refer to the "Changing a windscreen
wiper blade" section of chapter 7.
When using an automatic car wash,
switch off the ignition to avoid
triggering the automatic wiping.
In winter, it is advisable to wait for the
windscreen to completely clear of ice before
operating automatic wipe. Rear wiper
Turn the ring to the first position.
Rear screenwash
Turn the ring past the first
position: the rear screenwash
then the rear wiper operates for a fixed time.
In winter, in the event of a considerable
amount of snow or ice, switch on the
heated rear screen. Once the screen is
clear, remove the snow or ice which has
accumulated on the rear wiper blade. You
can then operate the rear windscreen wiper.
To park the wipers in their normal position
after this has been done, switch on the
ignition and move the stalk.
Activation
Press the control downwards. Activation of
the function is accompanied by a message
in the screen.
The automatic rain sensitive windscreen wipers
function must be reactivated by pressing the
stalk downwards, if the ignition has been
switched off for more than one minute.
Deactivation / Switching off
Place the windscreen wipers stalk in
position
I , 1 or 2 . Deactivation of the function
is accompanied by a message in the screen.
In the event of malfunction of the automatic
windscreen wipers, the windscreen wipers
will operate in intermittent mode.
Contact a CITROËN dealer or a qualified
workshop to have the system checked.
Page 57 of 252

55
Steering mounted controls
EASE OF USE
and
COMFORT
3
Selecting the function
- Place the switch in the LIMIT position.
The limiter is selected but is not yet
active. The screen indicates the last
programmed speed.
Programming a speed
A speed can be programmed without
activating the limiter but with the engine
running.
To memorise a speed higher than the
previous one:
- press the Set + button.
A brief press increases the speed
by 1 mph (km/h).
A maintained press increases the speed in
steps of 5 mph (km/h).
To memorise a speed lower than the
previous one:
- press the Set - button.
A brief press decreases the speed
by 1 mph (km/h).
A maintained press decreases the speed in
steps of 5 mph (km/h).
Activation/Deactivation (off)
Pressing this button once activates the
limiter, pressing the button again deactivates
it (OFF).
Page 59 of 252

57
Ventilation
EASE OF USE
and
COMFORT
3
WITH MANUAL SETTINGS
If your vehicle is fitted with these controls,
they are located on the control panel of the
dashboard centre console.
Air distribution
Air distribution is directed by turning the
control towards: the side vents and the central
vents,
the side vents, the central vents
and the footwells,
the footwells,
the windscreen and the footwells,
Air flow
The air conditioning does not operate if the
air flow is set to 0.
the windscreen.
Air conditioning A/C
If fitted on your vehicle, the air conditioning
can only operate with the engine running. Pressing the button triggers the
operation of the air conditioning,
the LED is on. Pressing the
button again switches the function
off and the LED goes off.
Temperature adjustment
Control positioned:
- in the red zone, produces heating of the interior air.
- in the blue zone, produces
cool air,
The air distribution can be
modulated by placing the control
in the intermediate positions,
marked "●". The fan speed varies from 1 to
the fastest 4. Position 0 switches
it off.
Remember to adjust this control
in order to attain the desired
comfort level.
VENTILATION