engine Citroen JUMPY 2010 2.G Owner's Guide
[x] Cancel search | Manufacturer: CITROEN, Model Year: 2010, Model line: JUMPY, Model: Citroen JUMPY 2010 2.GPages: 225, PDF Size: 10.84 MB
Page 111 of 225

105
Battery
QUICK HELP
7
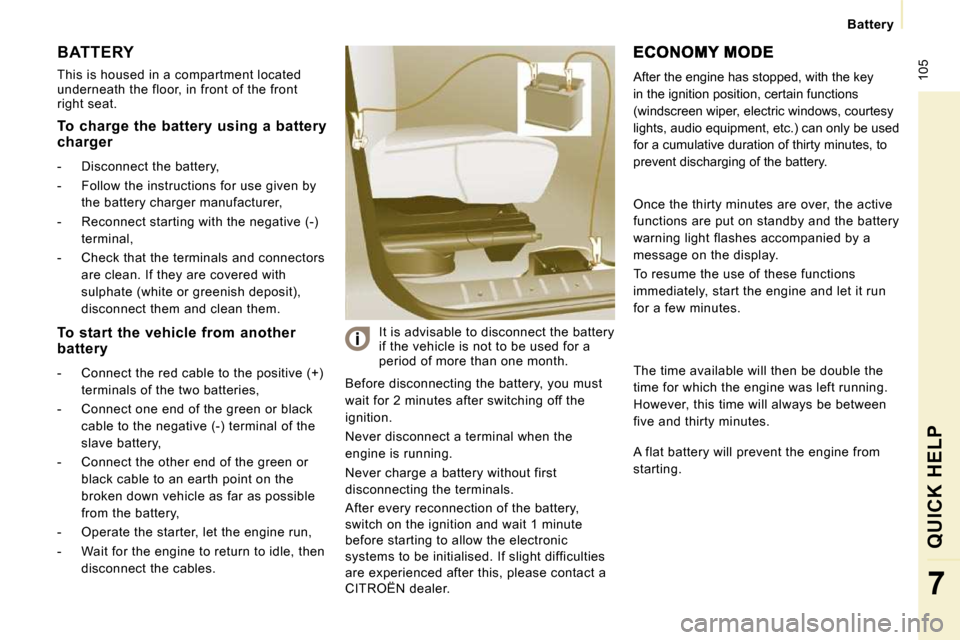
BATTERY
This is housed in a compartment located
underneath the floor, in front of the front
right seat. Before disconnecting the battery, you must
wait for 2 minutes after switching off the
ignition.
Never disconnect a terminal when the
engine is running.
Never charge a battery without first
disconnecting the terminals.
After every reconnection of the battery,
switch on the ignition and wait 1 minute
before starting to allow the electronic
systems to be initialised. If slight difficulties
are experienced after this, please contact a
CITROËN dealer. It is advisable to disconnect the battery
if the vehicle is not to be used for a
period of more than one month. After the engine has stopped, with the key
in the ignition position, certain functions
(windscreen wiper, electric windows, courtesy
lights, audio equipment, etc.) can only be used
for a cumulative duration of thirty minutes, to
prevent discharging of the battery.
To charge the battery using a battery
charger
- Disconnect the battery,
- Follow the instructions for use given by
the battery charger manufacturer,
- Reconnect starting with the negative (-) terminal,
- Check that the terminals and connectors are clean. If they are covered with
sulphate (white or greenish deposit),
disconnect them and clean them.
To start the vehicle from another
battery
- Connect the red cable to the positive (+) terminals of the two batteries,
- Connect one end of the green or black cable to the negative (-) terminal of the
slave battery,
- Connect the other end of the green or black cable to an earth point on the
broken down vehicle as far as possible
from the battery,
- Operate the starter, let the engine run,
- Wait for the engine to return to idle, then disconnect the cables. Once the thirty minutes are over, the active
functions are put on standby and the battery
warning light flashes accompanied by a
message on the display.
To resume the use of these functions
immediately, start the engine and let it run
for a few minutes.
The time available will then be double the
time for which the engine was left running.
However, this time will always be between
five and thirty minutes.
A flat battery will prevent the engine from
starting.
Page 112 of 225

106
Repairing a wheel
PUNCTURE REPAIR KIT
The kit is located at the rear left of the
vehicle.
The temporary tyre repair kit consists of
a compressor and a bottle (containing a
sealant). Using the kit
- Switch off the ignition,
- affix the speed limitation sticker to the
vehicle's steering wheel to remind you
that a wheel is in temporary use,
- check that the switch A is at position " 0 ",
- connect the pipe of the bottle 1 to the
valve of the tyre to be repaired,
- connect the compressor's electrical plug to the vehicle's 12 V socket,
- start the vehicle and let the engine run,
- switch on the compressor by pressing the switch A to position " 1 " until the tyre
pressure reaches 2.0 bars, - remove the compressor, unclip and
store the bottle in a sealed bag to avoid
staining your vehicle with traces of fluid,
- drive immediately, for approximately two miles (three kilometres), at reduced
speed (between 12 and 37 mph (20 and
60 km/h)), to seal the puncture,
- stop to check the repair and the pressure,
Vehicles supplied with a temporary
puncture repair kit do not have a spare
wheel or tooling (jack, wheelbrace, ...). If, after approximately five to
ten minutes, you are not able to obtain
this pressure, the tyre cannot be repaired;
contact a CITROËN dealer for roadside
assistance.
Page 113 of 225

Repairing a wheel
QUICK HELP
7
Warning, the bottle of fluid contains
ethylene-glycol, this product is harmful
if swallowed and causes irritation to the
eyes. Keep this product out of reach of
children.
The expiry date of the fluid is indicated
under the bottle.
The bottle is intended for a single use; once
opened, it must be replaced.
After use, do not discard the bottle into the
environment, take it to a CITROËN dealer or
to a specialised waste disposal site.
Do not forget to obtain a new bottle of
sealant available from CITROËN dealers.
- connect the compressor pipe directly to the valve of the repaired wheel.
- connect the compressor's electrical plug to the vehicle's 12 V socket again,
- start the vehicle again and let the engine run, - adjust the pressure using the
compressor (to inflate: switch A in
position " 1 "; to deflate: switch A in
position " 0 " and press button B ), in
accordance with the vehicle's tyre
pressure label (located on the door
aperture, on the driver's side), then
remember to check that the leak has
been sealed correctly (no further
loss of pressure after several miles
(kilometres)),
- remove the compressor, then stow the complete kit,
- drive at reduced speed (50 mph (80 km/h) max) limiting the distance
travelled to approximately 125 miles
(200 km),
- visit a CITROËN dealer as soon as possible to have the tyre repaired or
replaced by a technician.
Page 126 of 225

119
Changing a fuse
QUICK HELP
7
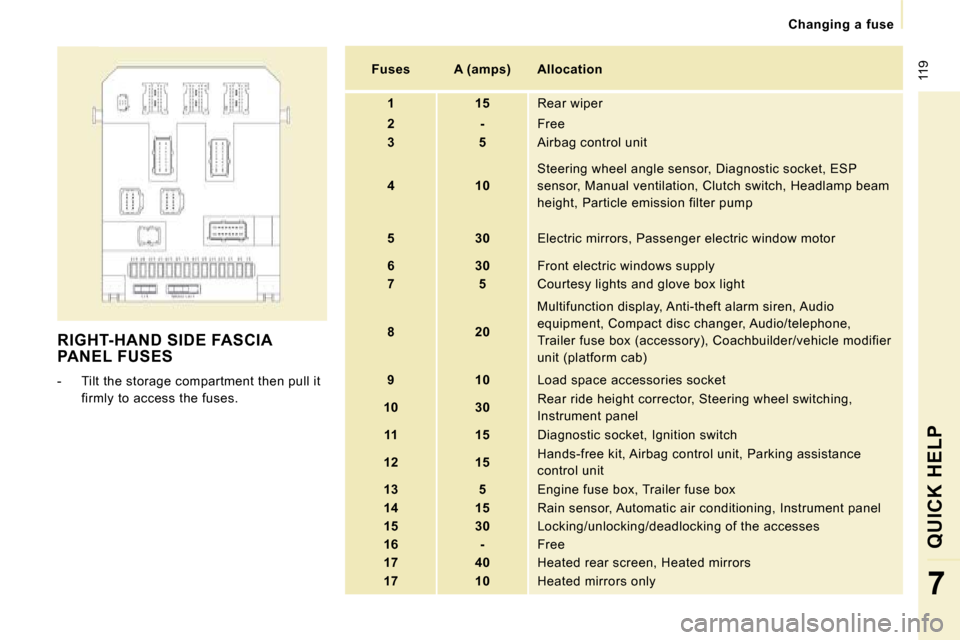
RIGHT-HAND SIDE FASCIA PANEL FUSES
- Tilt the storage compartment then pull it firmly to access the fuses.
Fuses A (amps) Allocation
1 15 Rear wiper
2 - Free
3 5 Airbag control unit
4 10 Steering wheel angle sensor, Diagnostic socket, ES
P
sensor, Manual ventilation, Clutch switch, Headlamp beam
height, Particle emission filter pump
5 30 Electric mirrors, Passenger electric window mot or
6 30 Front electric windows supply
7 5 Courtesy lights and glove box light
8 20 Multifunction display, Anti-theft alarm siren, Aud
io
equipment, Compact disc changer, Audio/telephone,
Trailer fuse box (accessory), Coachbuilder/vehicle modifier
unit (platform cab)
9 10 Load space accessories socket
10 30 Rear ride height corrector, Steering wheel switchi
ng,
Instrument panel
11 15 Diagnostic socket, Ignition switch
12 15 Hands-free kit, Airbag control unit, Parking assis
tance
control unit
13 5 Engine fuse box, Trailer fuse box
14 15 Rain sensor, Automatic air conditioning, Instru ment panel
15 30 Locking/unlocking/deadlocking of the accesses
16 - Free
17 40 Heated rear screen, Heated mirrors
17 10 Heated mirrors only
Page 128 of 225

121
Changing a fuse
QUICK HELP
7
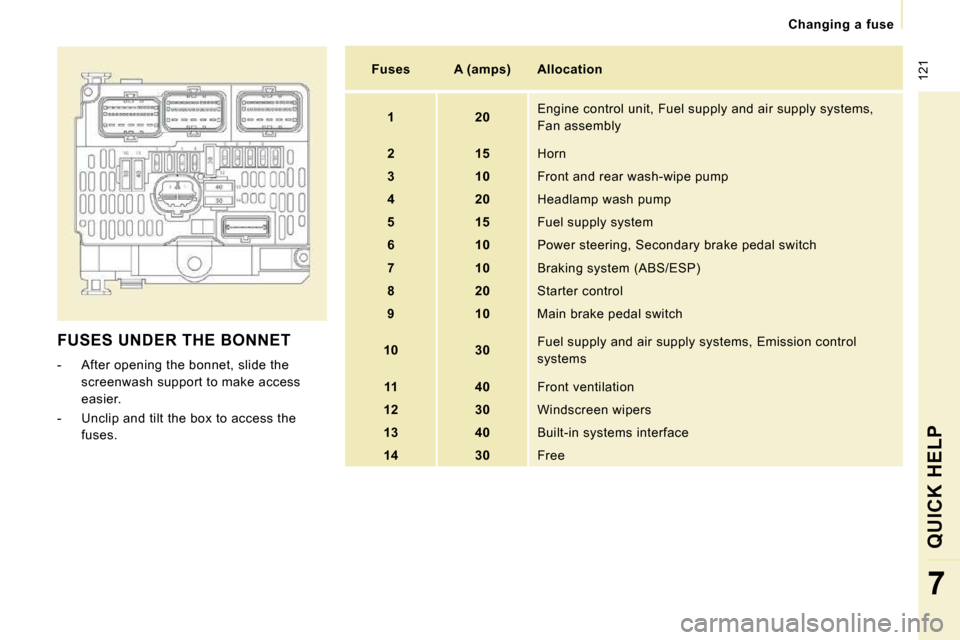
FUSES UNDER THE BONNET
- After opening the bonnet, slide the screenwash support to make access
easier.
- Unclip and tilt the box to access the fuses.
Fuses A (amps) Allocation
1 20 Engine control unit, Fuel supply and air supply sy
stems,
Fan assembly
2 15 Horn
3 10 Front and rear wash-wipe pump
4 20 Headlamp wash pump
5 15 Fuel supply system
6 10 Power steering, Secondary brake pedal switch
7 10 Braking system (ABS/ESP)
8 20 Starter control
9 10 Main brake pedal switch
10 30 Fuel supply and air supply systems, Emission contr
ol
systems
11 40 Front ventilation
12 30 Windscreen wipers
13 40 Built-in systems interface
14 30 Free
Page 131 of 225

124
Having your vehicle towed
Without lifting
(4 wheels on the road)
You should always use a towbar.
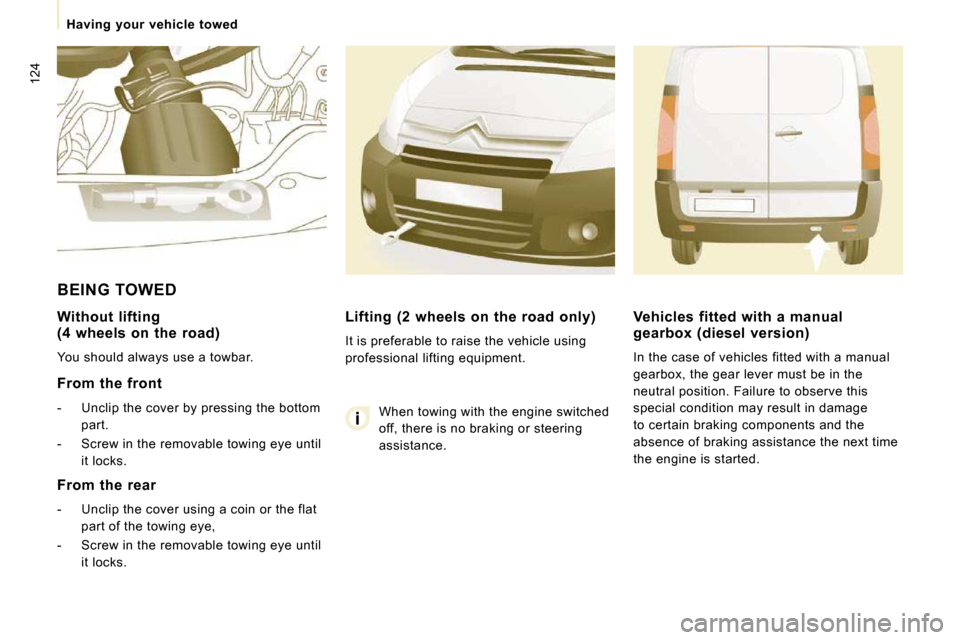
From the front
- Unclip the cover by pressing the bottom part.
- Screw in the removable towing eye until it locks.
BEING TOWED
Lifting (2 wheels on the road only)
It is preferable to raise the vehicle using
professional lifting equipment.
From the rear
- Unclip the cover using a coin or the flat part of the towing eye,
- Screw in the removable towing eye until it locks. When towing with the engine switched
off, there is no braking or steering
assistance.
Vehicles fitted with a manual
gearbox (diesel version)
In the case of vehicles fitted with a manual
gearbox, the gear lever must be in the
neutral position. Failure to observe this
special condition may result in damage
to certain braking components and the
absence of braking assistance the next time
the engine is started.
Page 138 of 225

Weights
WEIGHTS AND TOWED LOADS (KG)
For further information, refer to your registration certificate.
In each country, it is imperative that the towed l oads permitted by local legislation are complied wi th. To find out your vehicle's towing
capabilities and its gross train weight, contact a CITROËN dealer.
Load transfer
If the towing vehicle has not reached the GVW, it is possible to transfer this weight to the trailer.
In all cases, do not exceed the weight of the trai ler and the GTW, indicated on your registration cer tificate.
Comply with the towing capacities of your vehicle.
Engine Body type
Number of
seats
Kerb weight
Maximum
weight (1)
Maximum
payload
Payload
without driver
Braked towed
weight (2)
1.6 HDi 90 Short (L1-H1)
227 2 1 661 2 661 1 000 925 1 672
3 1 673 2 661 988 913 1 672
Short (L1-H1) 229 2 1 661 2 861 1 200 1 125 1 472
3 1 673 2 861 1 188 1 113 1 472
Long (L2-H1) 229 2 1 680 2 880 1 200 1 125 1 453
3 1 692 2 880 1 188 1 113 1 453
Raised
(L2-H2) 229 2 1 700 2 900 1 200 1 125 1 433
3 1 712 2 900 1 188 1 113 1 433
Page 139 of 225

133
Weights
TECHNICAL DATA
8
(1) Gross vehicle weight (GVW).
(2) Braked towed weight with load transfer: this can be increased on condition that the equivalent o f this load is removed from the vehicle so
that the GTW is not exceeded.
High exterior temperatures may result in a reducti on in the performance of the vehicle to protect the engine. When the exterior temperature
is higher than 37 °C, limit the towed weight to 700 kg, without load transfer.
The speed of a towing vehicle must not exceed 60 m ph (100 km/h) (comply with the legislation in force in your country).
Engine Body type
Number of
seats
Kerb weight
Maximum
weight (1)
Maximum
payload
Payload
without driver
Braked towed
weight (2)
2.0 HDi 120 and
2.0 HDi 120 PEF Short (L1-H1)
227 2 1 702 2 702 1 000 925 2 000
3 1 714 2 702 988 913 2 000
Short (L1-H1) 229 2 1 702 2 902 1 200 1 125 1 998
3 1 714 2 902 1 188 1 113 1 998
Long (L2-H1) 229 2 1 732 2 932 1 200 1 125 1 968
3 1 744 2 932 1 188 1 113 1 968
Raised
(L2-H2)
229 2 1 763 2 963 1 200 1 125 1 937
3 1 775 2 963 1 188 1 113 1 937
Page 140 of 225

134
Weights
(1) Gross vehicle weight (GVW).
(2) Braked towed weight with load transfer: this can be increased on condition that the equivalent o f this load is removed from the vehicle so
that the GTW is not exceeded.
High exterior temperatures may result in a reducti on in the performance of the vehicle to protect the engine. When the exterior temperature
is higher than 37 °C, limit the towed weight to 700 kg, without load transfer.
The speed of a towing vehicle must not exceed 60 m ph (100 km/h) (comply with the legislation in force in your country).
Engine Body type
Number of
seats
Kerb weight
Maximum
weight (1)
Maximum
payload
Payload
without driver
Braked towed
weight (2)
2.0 HDi 136 PEF Short (L1-H1)
227 2 1 717 2 717 1 000 925 2 000
3 1 729 2 717 988 913 2 000
Short (L1-H1) 229 2 1 717 2 917 1 200 1 125 2 000
3 1 729 2 917 1 188 1 113 2 000
Long (L2-H1) 229 2 1 746 2 946 1 200 1 125 2 000
3 1 758 2 946 1 188 1 113 2 000
2.0 PETROL 140 Short (L1-H1)
227 2 1 661 2 661 1 000 925 1 389
3 1 673 2 661 988 913 1 389
Short (L1-H1) 229 2 1 661 2 861 1 200 1 125 1 189
3 1 673 2 861 1 188 1 113 1 189
Long (L2-H1) 229 2 1 680 2 880 1 200 1 125 1 170
3 1 692 2 880 1 188 1 113 1 170
Raised
(L2-H2)
229 2 1 700 2 900 1 200 1 125 1 150
3 1 712 2 900 1 188 1 113 1 150
Page 141 of 225

135
Diesel - Petrol engines
TECHNICAL DATA
8
Diesel Petrol
1.6 HDi 90 2.0 HDi 120 2.0 HDi 120 PEF 2 .0 HDi 136 PEF 2.0 PETROL 140
Gearbox Manual
Gears 5 6 6 5
Power (bhp) 90 120 136 138
Power (DIN) 92 122 138 143
Cubic capacity (cm 3
) 1 560 1 997 1 997 1 997
Bore x stroke (mm) 75 x 88 85 x 88 85 x 88 85 x 88
EU standard maximum power (kW) 66 88 100 103
Max power engine speed (rpm) 4 000 4 000 4 000 6 000
EU standard max torque (Nm) 180 300 320 180
Max torque engine speed (rpm) 1 750 2 000 2 000 2 500
Fuel Diesel Diesel Diesel Diesel Unleaded
Particle emission filter No No Yes Yes /
Catalytic converter Yes Yes Yes Yes -
ENGINES AND GEARBOXES
For further information, consult the internet sit e at the address: http://service.citroen.com