Full Citroen JUMPY 2011 2.G Owner's Manual
[x] Cancel search | Manufacturer: CITROEN, Model Year: 2011, Model line: JUMPY, Model: Citroen JUMPY 2011 2.GPages: 260, PDF Size: 9.5 MB
Page 26 of 260

24
Access
SLIDING SIDE DOOR
If fitted on your vehicle, do not open the left-
hand side door while filling with fuel as you
risk damaging the fuel filler flap.
From the outside
Pull the handle towards you then towards
the rear.
Good practice
Take care not to block the guide space on
the floor to allow the door to slide correctly.
For safety and operation reasons, do not
drive with the sliding side door open.
From the inside
To unlock and open, push the handle
towards the rear. Ensure that the door opens
fully to lock the device at the base of the
door.
Operation in the event of a battery
failure
Front and side passenger doors
In the event of a malfunction of the battery
or of the central locking, use the lock to lock
the doors mechanically.
- To open the door and get out of the
vehicle, pull the interior control.
- To lock the door, insert the key in the
lock, located on the edge of the door,
then turn it one eighth of a turn
.
Driver's door
- Insert the key in the lock, then turn it to
the right to lock or to the left to unlock.
Page 36 of 260

34
Instruments and controls
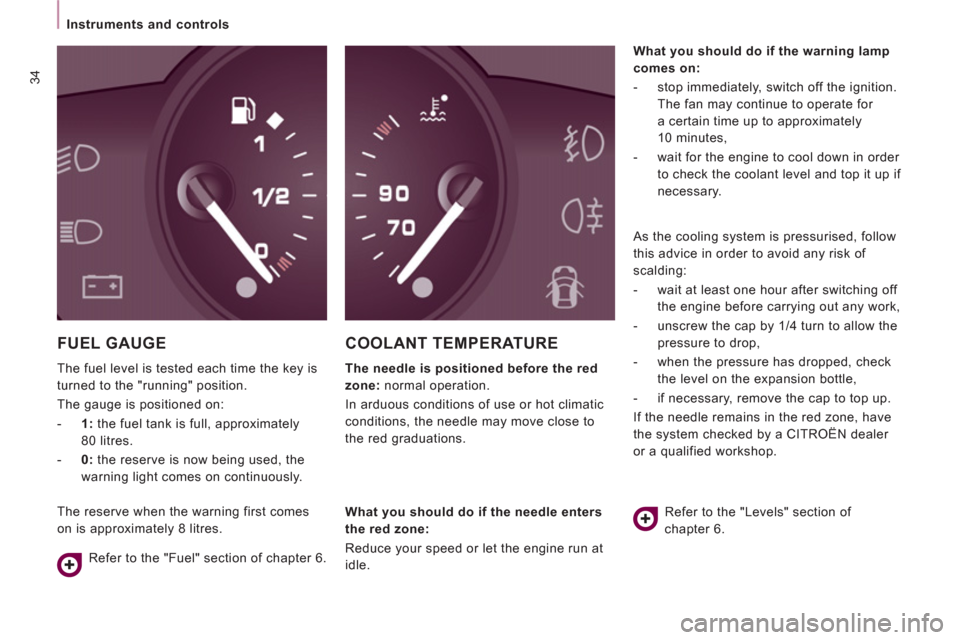
FUEL GAUGE
The fuel level is tested each time the key is
turned to the "running" position.
The gauge is positioned on:
- 1:
the fuel tank is full, approximately
80 litres.
- 0:
the reserve is now being used, the
warning light comes on continuously.
COOLANT TEMPERATURE
The needle is positioned before the red
zone:
normal operation.
In arduous conditions of use or hot climatic
conditions, the needle may move close to
the red graduations.
What you should do if the warning lamp
comes on:
- stop immediately, switch off the ignition.
The fan may continue to operate for
a certain time up to approximately
10 minutes,
- wait for the engine to cool down in order
to check the coolant level and top it up if
necessary.
Refer to the "Fuel" section of chapter 6.
What you should do if the needle enters
the red zone:
Reduce your speed or let the engine run at
idle. Refer to the "Levels" section of
chapter 6. The reserve when the warning first comes
on is approximately 8 litres. As the cooling system is pressurised, follow
this advice in order to avoid any risk of
scalding:
- wait at least one hour after switching off
the engine before carrying out any work,
- unscrew the cap by 1/4 turn to allow the
pressure to drop,
- when the pressure has dropped, check
the level on the expansion bottle,
- if necessary, remove the cap to top up.
If the needle remains in the red zone, have
the system checked by a CITROËN dealer
or a qualified workshop.
Page 39 of 260

37
Gearboxes and steering wheel
READY TO GO
2
Reverse gear
In the 6-speed configuration, raise the collar
under the gear knob to engage reverse gear.
Never engage reverse gear before the
vehicle is completely stationary.
The lever should be moved slowly to reduce
the noise on engaging reverse gear. To change gear easily, always press the
clutch pedal fully.
To prevent the mat from becoming caught
under the pedal:
- ensure that the mat is positioned
correctly,
- never fit one mat on top of another.
When driving, avoid leaving your hand on
the gear knob as the force exerted, even if
slight, may wear the internal components of
the gearbox over time.
5-speed gearbox
6-speed gearbox
Gear shift indicator
In order to drive as fuel effi ciently as
possible with a manual gearbox, this
indicator lamp indicates to the driver
to change up.
The driver remains responsible
for deciding whether or not to follow this
indication, since the indicator lamp comes on
without taking into account the confi guration
of the road, the amount of traffi c and safety
factors.
The lighting of this indicator lamp cannot be
deactivated.
When reverse gear is engaged
and when changing down whilst
decelerating, the function is disabled.
Page 43 of 260

41
READY TO GO
2
STARTING AND STOPPING
Key
Take care to prevent the key from coming
into contact with grease, dust, rain or a
damp environment.
A heavy object attached to the key (key
ring, ...) weighing the key down in the
ignition switch may cause a malfunction.
Good practice when starting
Door or bonnet open warning light
If this comes on, a door or the
bonnet is not closed correctly, check!
Diesel pre-heating warning light
If the temperature is high
enough, the warning light comes
on for less than one second, you
can start without waiting.
In cold weather, wait for this warning light to
switch off then operate the starter (Starting
position) until the engine starts.
Good practice when stopping
Minimise engine and gearbox wear
When switching off the ignition, let the
engine run for a few seconds to allow the
turbocharger (Diesel engine) to return to idle.
Do not press the accelerator when switching
off the ignition.
There is no need to engage a gear after
parking the vehicle.
Running and accessories position.
To unlock the steering, turn the steering
wheel gently while turning the key, without
forcing. In this position, certain accessories
can be used.
Starting position.
The starter is operated, the engine turns
over, release the key.
STOP position:
steering lock.
The ignition is off. Turn the steering wheel
until the steering locks. Remove the key.
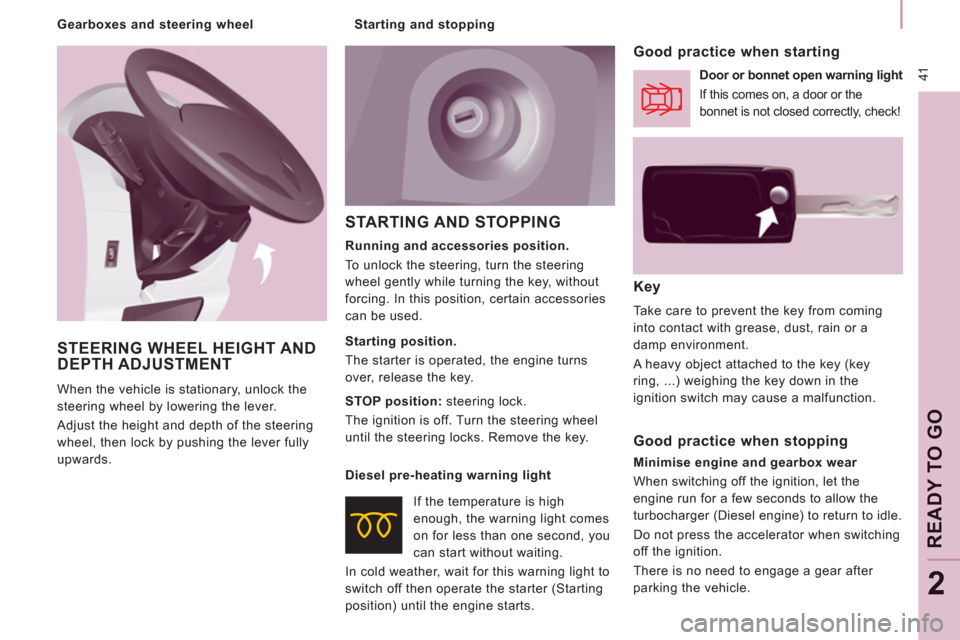
STEERING WHEEL HEIGHT ANDDEPTH ADJUSTMENT
When the vehicle is stationary, unlock the
steering wheel by lowering the lever.
Adjust the height and depth of the steering
wheel, then lock by pushing the lever fully
upwards.
Starting and stopping
Gearboxes and steering wheel
Page 44 of 260

42
Steering mounted controls
Dipped beam/main beam change
Pull the stalk fully towards you. Automatic lights
if your vehicle is fitted with a
brightness sensor. Lights off
Dipped beam (green)
Main beam (blue)
DIRECTION INDICATORS
(flashing)
STEERING MOUNTED CONTROLS
Checking by means of the indicator
lights on the instrument panel is
described in the "Instruments and
controls" section of chapter 2. Side lights
Lights-on buzzer
When the ignition is switched off, when the
driver's door is opened, a buzzer sounds if
you have left your lights on.
Left : downwards passing
the point of resistance.
Right : upwards passing
the point of resistance.
LIGHTING CONTROL
Front and rear lights
Selection is by turning ring A
.
Page 59 of 260

57
Ventilation
EASE OF USE
and COMFOR
T
3
Air flow
Press the small fan
button to
reduce the flow or the large fan
button to increase the flow.
On the display, the blades of the fan darken
when the flow is increased.
Manual operation
You can, according to your requirements,
make a different selection from that offered
by the system by changing a setting.
The other functions will still be controlled
automatically. Pressing the AUTO
button
restores fully automatic operation.
Intake of exterior air/
Recirculation of interior air
Press this button to recirculate
the interior air. The recirculation
symbol is displayed.
Recirculation prevents exterior odours
and smoke from entering the passenger
compartment. Avoid prolonged operation
in interior air recirculation mode (risk of
condensation, odour and humidity).
Pressing this button again activates the
intake of exterior air.
Air distribution
Pressing this button several times
in succession directs the air flow
towards:
- the windscreen,
- the windscreen and footwells,
- the footwells,
- the side vents, central vents and
footwells,
- the side vents and central vents.
Deactivating the system
Press the air flow small fan
button until the fan symbol
disappears.
This action deactivates all of the system's
functions, with the exception of the air
recirculation and rear screen demisting
(if fitted on your vehicle). Your comfort
setting is no longer maintained and is
switched off.
For your comfort, do not deactivate the
system for long periods.
Pressing the large fan
button or
the AUTO
button reactivates the
system with the values set before
it was deactivated.
Switching the air conditioning
On/Off
Press this button, the A/C
symbol is displayed and the air
conditioning is activated.
Pressing this button again switches off the
air cooling.
Page 67 of 260

65
Seats
EASE OF USE
and COMFOR
T
3
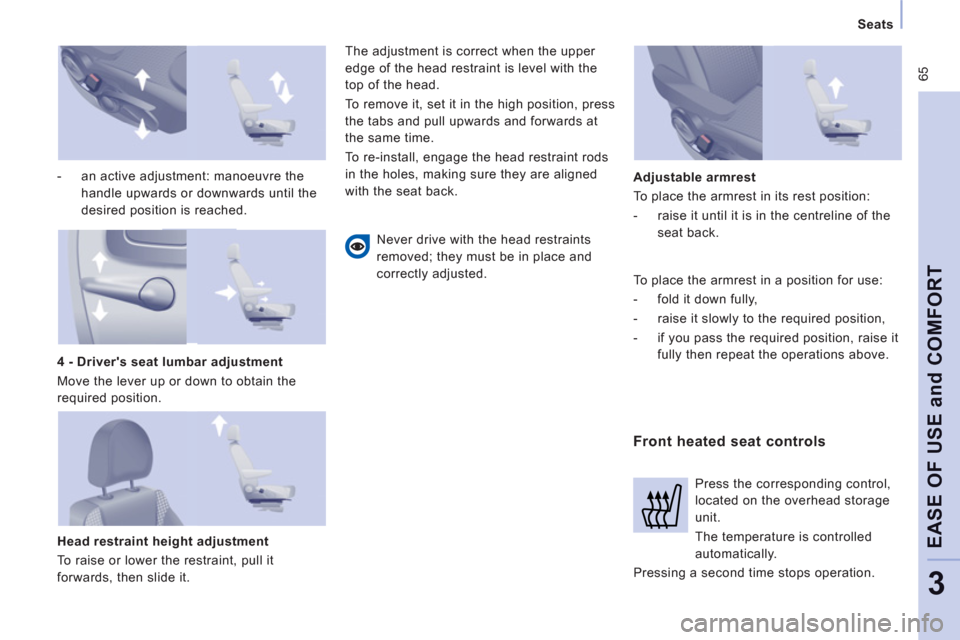
- an active adjustment: manoeuvre the
handle upwards or downwards until the
desired position is reached.
Head restraint height adjustment
To raise or lower the restraint, pull it
forwards, then slide it. The adjustment is correct when the upper
edge of the head restraint is level with the
top of the head.
To remove it, set it in the high position, press
the tabs and pull upwards and forwards at
the same time.
To re-install, engage the head restraint rods
in the holes, making sure they are aligned
with the seat back.
Never drive with the head restraints
removed; they must be in place and
correctly adjusted.
Front heated seat controls
Adjustable armrest
To place the armrest in its rest position:
- raise it until it is in the centreline of the
seat back.
4 - Driver's seat lumbar adjustment
Move the lever up or down to obtain the
required position.
Press the corresponding control,
located on the overhead storage
unit.
The temperature is controlled
automatically.
Pressing a second time stops operation. To place the armrest in a position for use:
- fold it down fully,
- raise it slowly to the required position,
- if you pass the required position, raise it
fully then repeat the operations above.
Page 83 of 260

81
Mirrors and windows
EASE OF USE
and
COMFOR
T
3
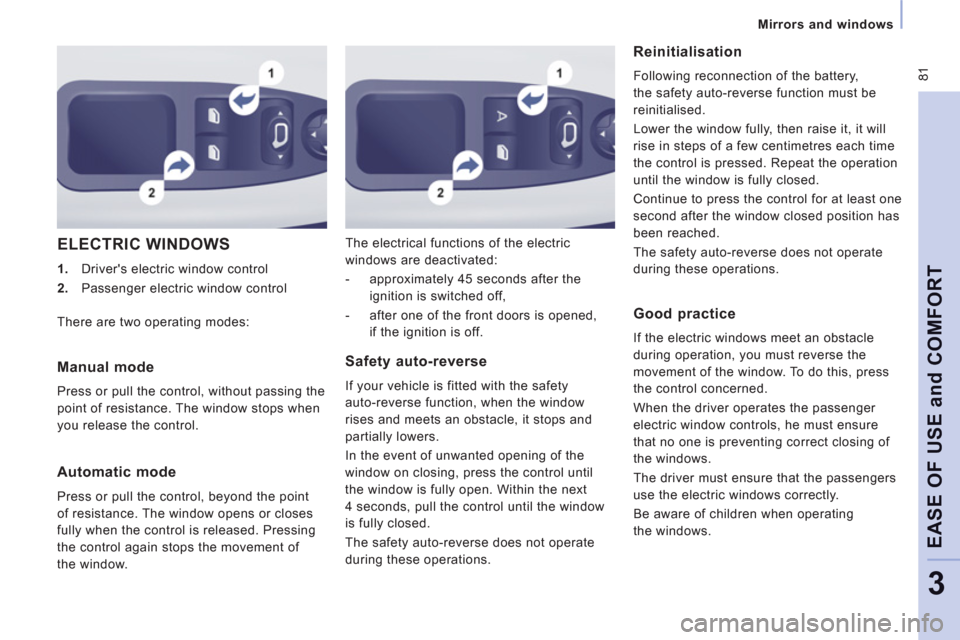
ELECTRIC WINDOWS
1.
Driver's electric window control
2.
Passenger electric window control The electrical functions of the electric
windows are deactivated:
- approximately 45 seconds after the
ignition is switched off,
- after one of the front doors is opened,
if the ignition is off.
Reinitialisation
Following reconnection of the battery,
the safety auto-reverse function must be
reinitialised.
Lower the window fully, then raise it, it will
rise in steps of a few centimetres each time
the control is pressed. Repeat the operation
until the window is fully closed.
Continue to press the control for at least one
second after the window closed position has
been reached.
The safety auto-reverse does not operate
during these operations.
Manual mode
Press or pull the control, without passing the
point of resistance. The window stops when
you release the control.
Automatic mode
Press or pull the control, beyond the point
of resistance. The window opens or closes
fully when the control is released. Pressing
the control again stops the movement of
the window.
Safety auto-reverse
If your vehicle is fitted with the safety
auto-reverse function, when the window
rises and meets an obstacle, it stops and
partially lowers.
In the event of unwanted opening of the
window on closing, press the control until
the window is fully open. Within the next
4 seconds, pull the control until the window
is fully closed.
The safety auto-reverse does not operate
during these operations. There are two operating modes:
Good practice
If the electric windows meet an obstacle
during operation, you must reverse the
movement of the window. To do this, press
the control concerned.
When the driver operates the passenger
electric window controls, he must ensure
that no one is preventing correct closing of
the windows.
The driver must ensure that the passengers
use the electric windows correctly.
Be aware of children when operating
the windows.
Page 119 of 260

11
7
Changing a wheel
QUICK HEL
P
7
- Open the cover, located on the sill,
to access the carrier bolt.
- Unscrew the bolt using the wheelbrace
until the carrier is lowered fully.
- Detach the carrier from the hook and
place the spare wheel near the wheel
to be changed.
3. SPARE WHEEL
- Gain access to the spare wheel from
the rear.
- Open the rear doors. You can switch on the courtesy lamp
to improve visibility.
Page 120 of 260

118
Changing a wheel
4. OPERATING PROCEDURE
- Place the jack in contact with the
locating point provided, the one which is
closest to the wheel to be changed.
Ensure that the jack is straight and that
the base of the jack is fully in contact
with the ground.
- Extend the jack to lift the wheel clear of
the ground.
- Resume and complete the unscrewing of
the wheel bolts.
- Remove the bolts and remove the wheel.
- Remove the trim pulling it using the
towing eye.
- Loosen the wheel bolts and start
unscrewing them. Do not extend the jack until you have
started unscrewing the bolts on the
wheel to be changed and have placed the
chock under the wheel diagonally opposite.