display Citroen JUMPY 2011 2.G Owner's Manual
[x] Cancel search | Manufacturer: CITROEN, Model Year: 2011, Model line: JUMPY, Model: Citroen JUMPY 2011 2.GPages: 260, PDF Size: 9.5 MB
Page 15 of 260
9
9
3
9
3
3
13
Interior
FAMILIARISATIO
N
1
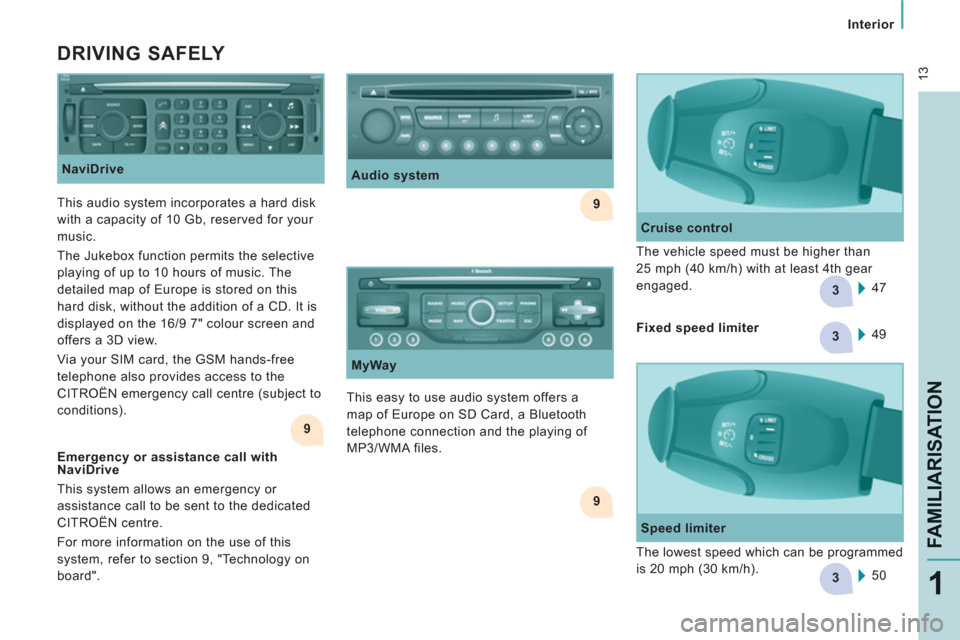
DRIVING SAFELY
NaviDrive
This easy to use audio system offers a
map of Europe on SD Card, a Bluetooth
telephone connection and the playing of
MP3/WMA files. 47
Cruise control
The vehicle speed must be higher than
25 mph (40 km/h) with at least 4th gear
engaged.
Audio system
This audio system incorporates a hard disk
with a capacity of 10 Gb, reserved for your
music.
The Jukebox function permits the selective
playing of up to 10 hours of music. The
detailed map of Europe is stored on this
hard disk, without the addition of a CD. It is
displayed on the 16/9 7" colour screen and
offers a 3D view.
Via your SIM card, the GSM hands-free
telephone also provides access to the
CITROËN emergency call centre (subject to
conditions).
MyWay
50
Speed limiter
The lowest speed which can be programmed
is 20 mph (30 km/h).
Emergency or assistance call with
NaviDrive
This system allows an emergency or
assistance call to be sent to the dedicated
CITROËN centre.
For more information on the use of this
system, refer to section 9, "Technology on
board".
Fixed speed limiter
49
Page 19 of 260
17
FAMILIARISATIO
N
1
ECO-DRIVING
Eco-driving is a range of everyday practices that allow the motorist to optimise their fuel
consumption and CO
2 emissions.
Optimise the use of your
gearbox
With a manual gearbox, move off gently,
change up without waiting and drive by
changing up quite soon. If your vehicle has
the system, the gear shift indicator invites
you to change up; it is displayed in the
instrument panel, follow its instructions.
With an automatic or electronic gearbox,
stay in Drive "D"
or Auto "A"
, according to
the type of gearbox, without pressing the
accelerator pedal heavily or suddenly.
Control the use of your
electrical equipment
Before moving off, if the passenger
compartment is too warm, ventilate it by
opening the windows and air vents before
using the air conditioning.
Above 30 mph (50 km/h), close the windows
and leave the air vents open.
Switch off the headlamps and front
foglamps when the level of light does not
require their use.
Avoid running the engine before moving
off, particularly in winter; your vehicle will
warm up much faster while driving.
Drive smoothly
Maintain a safe distance between vehicles,
use engine braking rather than the
brake pedal, and press the accelerator
progressively. These practices contribute
towards a reduction in fuel consumption and
CO
2 emissions and also helps reduce the
background traffic noise.
If your vehicle has cruise control, make
use of the system at speeds above 25 mph
(40 km/h) when the traffic is flowing well.
As a passenger, if you avoid connecting
your multimedia devices (film, music,
video game...), you will contribute towards
limiting the consumption of electrical
energy, and so of fuel.
Disconnect your portable devices before
leaving the vehicle.
Remember to make use of equipment
that can help keep the temperature in the
passenger compartment down (sun roof
and window blinds...).
Switch off the air conditioning, unless it
has automatic digital regulation, as soon
as the desired temperature is attained.
Switch off the demisting and defrosting
controls, if not automatic.
Switch off the heated seat as soon as
possible.
Page 22 of 260
Access
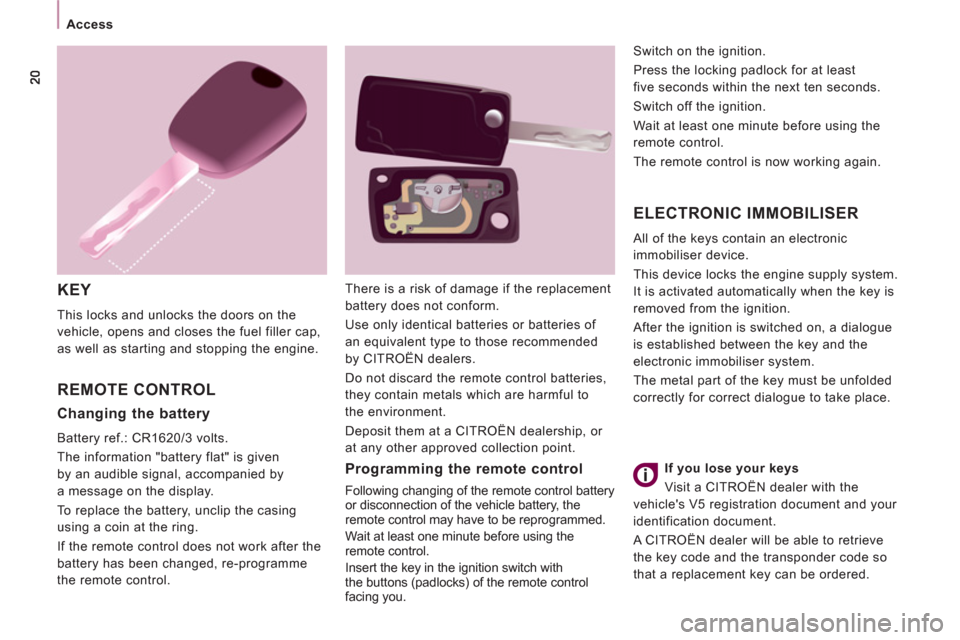
KEY
This locks and unlocks the doors on the
vehicle, opens and closes the fuel filler cap,
as well as starting and stopping the engine.
REMOTE CONTROL ELECTRONIC IMMOBILISER
All of the keys contain an electronic
immobiliser device.
This device locks the engine supply system.
It is activated automatically when the key is
removed from the ignition.
After the ignition is switched on, a dialogue
is established between the key and the
electronic immobiliser system.
The metal part of the key must be unfolded
correctly for correct dialogue to take place.
Programming the remote control
Following changing of the remote control battery
or disconnection of the vehicle battery, the
remote control may have to be reprogrammed.
Wait at least one minute before using the
remote control.
Insert the key in the ignition switch with
the buttons (padlocks) of the remote control
facing you. Switch on the ignition.
Press the locking padlock for at least
five seconds within the next ten seconds.
Switch off the ignition.
Wait at least one minute before using the
remote control.
The remote control is now working again.
There is a risk of damage if the replacement
battery does not conform.
Use only identical batteries or batteries of
an equivalent type to those recommended
by CITROËN dealers.
Do not discard the remote control batteries,
they contain metals which are harmful to
the environment.
Deposit them at a CITROËN dealership, or
at any other approved collection point.
Changing the battery
Battery ref.: CR1620/3 volts.
The information "battery flat" is given
by an audible signal, accompanied by
a message on the display.
To replace the battery, unclip the casing
using a coin at the ring.
If the remote control does not work after the
battery has been changed, re-programme
the remote control.
If you lose your keys
Visit a CITROËN dealer with the
vehicle's V5 registration document and your
identification document.
A CITROËN dealer will be able to retrieve
the key code and the transponder code so
that a replacement key can be ordered.
Page 29 of 260
27
Instruments and controls
READY TO GO
2
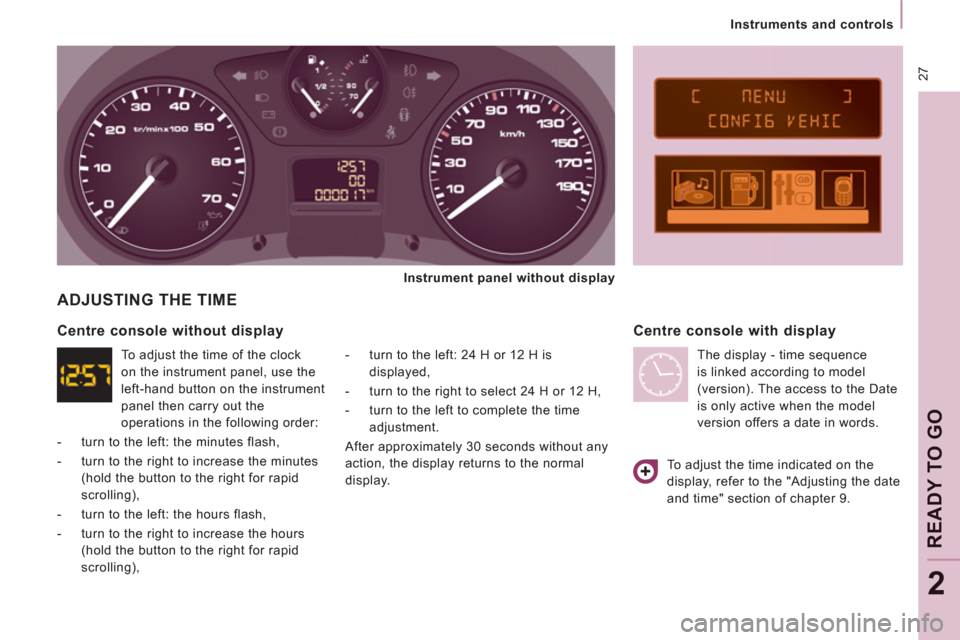
ADJUSTING THE TIME
- turn to the left: 24 H or 12 H is
displayed,
- turn to the right to select 24 H or 12 H,
- turn to the left to complete the time
adjustment.
After approximately 30 seconds without any
action, the display returns to the normal
display.
Centre console with display
The display - time sequence
is linked according to model
(version). The access to the Date
is only active when the model
version offers a date in words.
Centre console without display
To adjust the time of the clock
on the instrument panel, use the
left-hand button on the instrument
panel then carry out the
operations in the following order:
- turn to the left: the minutes flash,
- turn to the right to increase the minutes
(hold the button to the right for rapid
scrolling),
- turn to the left: the hours flash,
- turn to the right to increase the hours
(hold the button to the right for rapid
scrolling), To adjust the time indicated on the
display, refer to the "Adjusting the date
and time" section of chapter 9.
Instrument panel without display
Page 31 of 260
29
Instruments and controls
READY TO GO
2
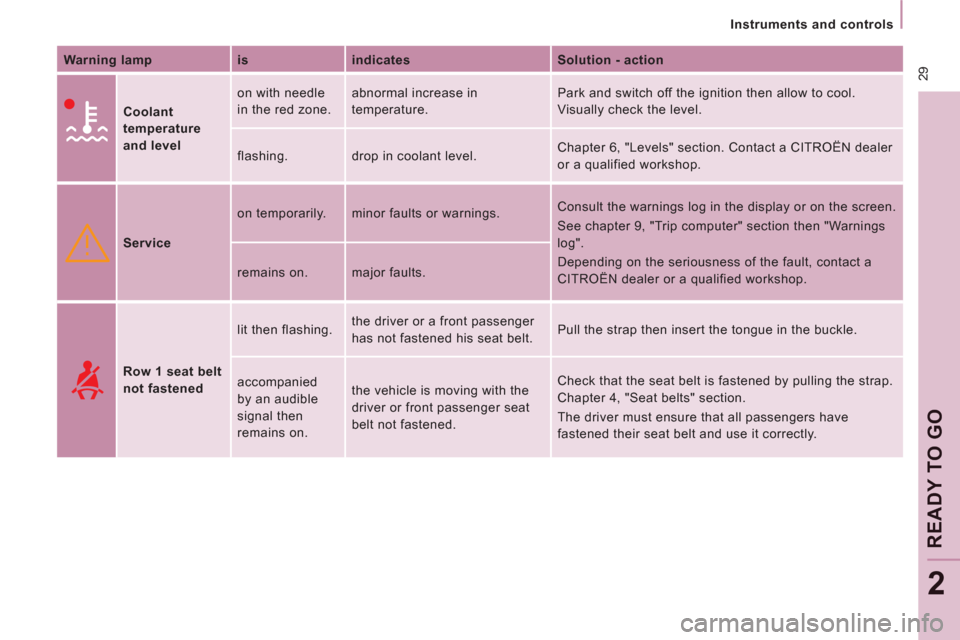
Warning lamp
is
indicates
Solution - action
Coolant
temperature
and level on with needle
in the red zone. abnormal increase in
temperature. Park and switch off the ignition then allow to cool.
Visually check the level.
flashing. drop in coolant level. Chapter 6, "Levels" section. Contact a CITROËN dealer
or a qualified workshop.
Service on temporarily. minor faults or warnings. Consult the warnings log in the display or on the screen.
See chapter 9, "Trip computer" section then "Warnings
log".
Depending on the seriousness of the fault, contact a
CITROËN dealer or a qualified workshop. remains on. major faults.
Row 1 seat belt
not fastened lit then flashing. the driver or a front passenger
has not fastened his seat belt. Pull the strap then insert the tongue in the buckle.
accompanied
by an audible
signal then
remains on. the vehicle is moving with the
driver or front passenger seat
belt not fastened. Check that the seat belt is fastened by pulling the strap.
Chapter 4, "Seat belts" section.
The driver must ensure that all passengers have
fastened their seat belt and use it correctly.
Page 35 of 260
33
Instruments and controls
READY TO GO
2
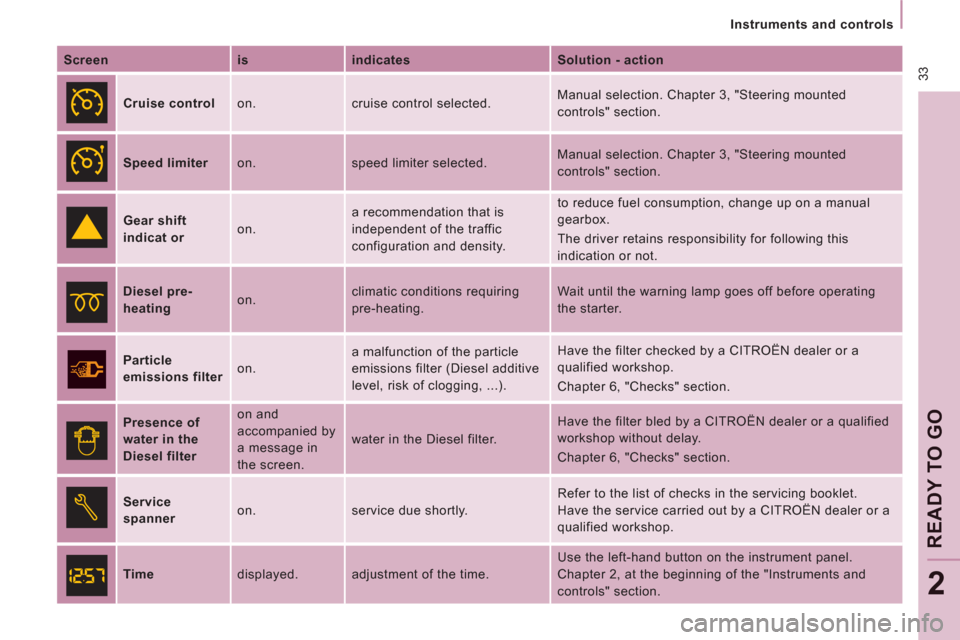
Screen
is
indicates
Solution - action
Cruise control on. cruise control selected. Manual selection. Chapter 3, "Steering mounted
controls" section.
Speed limiter on. speed limiter selected. Manual selection. Chapter 3, "Steering mounted
controls" section.
Gear shift
indicat
or on. a recommendation that is
independent of the traffic
configuration and density. to reduce fuel consumption, change up on a manual
gearbox.
The driver retains responsibility for following this
indication or not.
Diesel pre-
heating on. climatic conditions requiring
pre-heating. Wait until the warning lamp goes off before operating
the starter.
Particle
emissions filter
on. a malfunction of the particle
emissions filter (Diesel additive
level, risk of clogging, ...). Have the filter checked by a CITROËN dealer or a
qualified workshop.
Chapter 6, "Checks" section.
Presence of
water in the
Diesel filter on and
accompanied by
a message in
the screen. water in the Diesel filter. Have the filter bled by a CITROËN dealer or a qualified
workshop without delay.
Chapter 6, "Checks" section.
Service
spanner on. service due shortly. Refer to the list of checks in the servicing booklet.
Have the service carried out by a CITROËN dealer or a
qualified workshop.
Time displayed. adjustment of the time. Use the left-hand button on the instrument panel.
Chapter 2, at the beginning of the "Instruments and
controls" section.
Page 37 of 260
35
Instruments and controls
READY TO GO
2
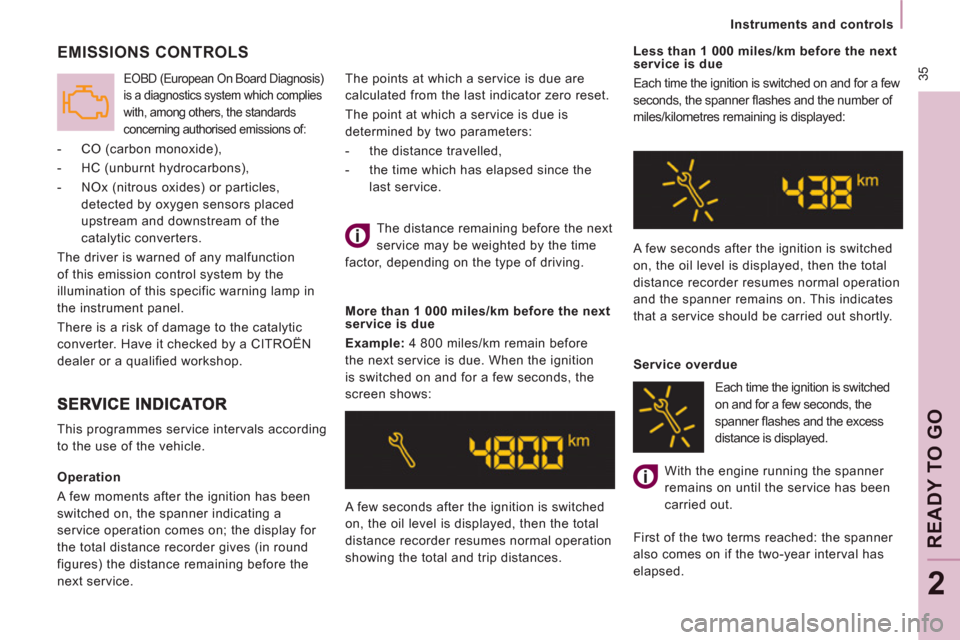
Operation
A few moments after the ignition has been
switched on, the spanner indicating a
service operation comes on; the display for
the total distance recorder gives (in round
figures) the distance remaining before the
next service. A few seconds after the ignition is switched
on, the oil level is displayed, then the total
distance recorder resumes normal operation
showing the total and trip distances.
Less than 1 000 miles/km before the next
service is due
Each time the ignition is switched on and for a few
seconds, the spanner fl ashes and the number of
miles/kilometres remaining is displayed:
A few seconds after the ignition is switched
on, the oil level is displayed, then the total
distance recorder resumes normal operation
and the spanner remains on. This indicates
that a service should be carried out shortly.
Service overdue
With the engine running the spanner
remains on until the service has been
carried out.
First of the two terms reached: the spanner
also comes on if the two-year interval has
elapsed.
The distance remaining before the next
service may be weighted by the time
factor, depending on the type of driving.
More than 1 000 miles/km before the next
service is due
Example:
4 800 miles/km remain before
the next service is due. When the ignition
is switched on and for a few seconds, the
screen shows:
This programmes service intervals according
to the use of the vehicle.
EMISSIONS CONTROLS
- CO (carbon monoxide),
- HC (unburnt hydrocarbons),
- NOx (nitrous oxides) or particles,
detected by oxygen sensors placed
upstream and downstream of the
catalytic converters.
The driver is warned of any malfunction
of this emission control system by the
illumination of this specific warning lamp in
the instrument panel.
There is a risk of damage to the catalytic
converter. Have it checked by a CITROËN
dealer or a qualified workshop.
EOBD (European On Board Diagnosis)
is a diagnostics system which complies
with, among others, the standards
concerning authorised emissions of:
Each time the ignition is switched
on and for a few seconds, the
spanner fl ashes and the excess
distance is displayed. The points at which a service is due are
calculated from the last indicator zero reset.
The point at which a service is due is
determined by two parameters:
- the distance travelled,
- the time which has elapsed since the
last service.
Page 38 of 260
Instruments and controls
After this operation, if you wish to
disconnect the battery, lock the vehicle
and wait for at least five minutes, otherwise
the zero re-set will not be registered.
Zero re-set
Your CITROËN dealer or a qualified
workshop carries out this operation after
each service.
However, if you carry out the service
yourself, the re-set procedure is as follows:
- switch off the ignition,
- press and hold the trip recorder reset
button,
- switch on the ignition.
The display begins a countdown.
When the display shows "=0"
, release the
button; the spanner disappears.
Engine oil level indicator
When the ignition is switched on, the engine
oil level is indicated for a few seconds, after
the service information.
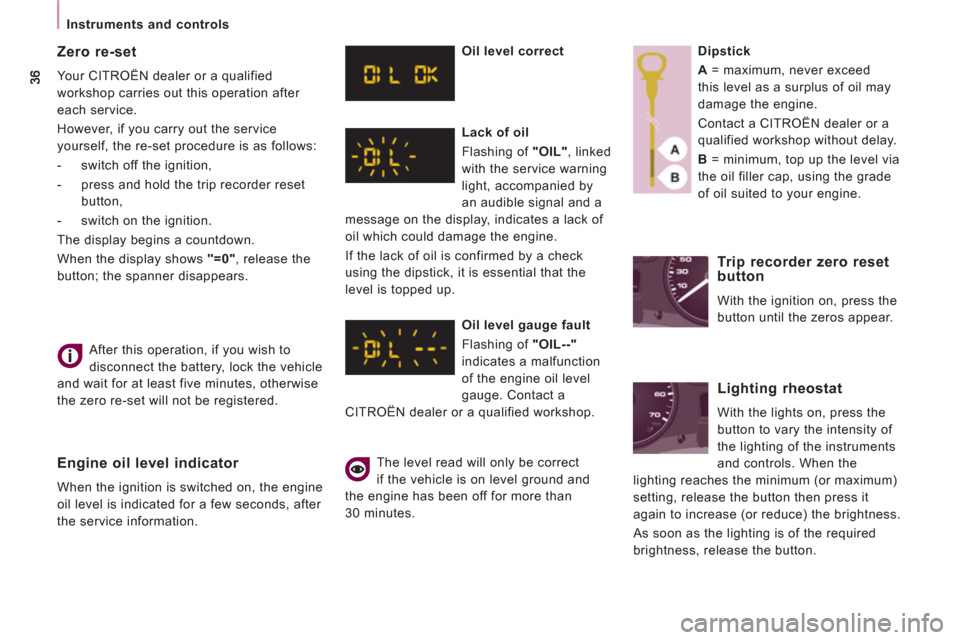
Oil level correct
Lack of oil
Flashing of "OIL"
, linked
with the service warning
light, accompanied by
an audible signal and a
message on the display, indicates a lack of
oil which could damage the engine.
If the lack of oil is confirmed by a check
using the dipstick, it is essential that the
level is topped up.
Oil level gauge fault
Flashing of "OIL--"
indicates a malfunction
of the engine oil level
gauge. Contact a
CITROËN dealer or a qualified workshop.
The level read will only be correct
if the vehicle is on level ground and
the engine has been off for more than
30 minutes.
Dipstick
A
= maximum, never exceed
this level as a surplus of oil may
damage the engine.
Contact a CITROËN dealer or a
qualified workshop without delay.
B
= minimum, top up the level via
the oil filler cap, using the grade
of oil suited to your engine.
Trip recorder zero reset
button
With the ignition on, press the
button until the zeros appear.
Lighting rheostat
With the lights on, press the
button to vary the intensity of
the lighting of the instruments
and controls. When the
lighting reaches the minimum (or maximum)
setting, release the button then press it
again to increase (or reduce) the brightness.
As soon as the lighting is of the required
brightness, release the button.
Page 40 of 260
38
Gearboxes and steering wheel
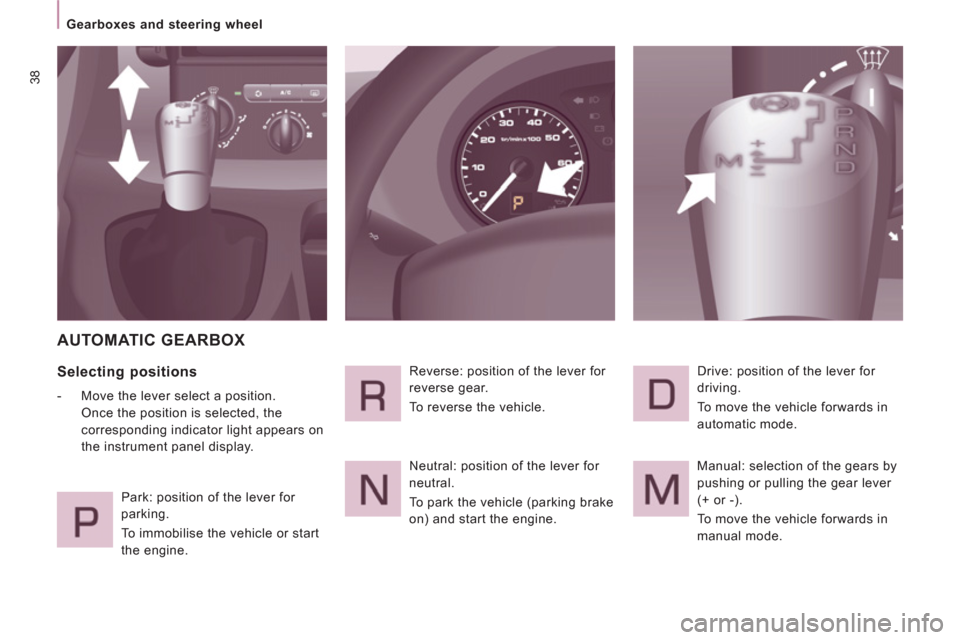
AUTOMATIC GEARBOX
Selecting positions
- Move the lever select a position.
Once the position is selected, the
corresponding indicator light appears on
the instrument panel display.
Park: position of the lever for
parking.
To immobilise the vehicle or start
the engine. Reverse: position of the lever for
reverse gear.
To reverse the vehicle.
Neutral: position of the lever for
neutral.
To park the vehicle (parking brake
on) and start the engine. Drive: position of the lever for
driving.
To move the vehicle forwards in
automatic mode.
Manual: selection of the gears by
pushing or pulling the gear lever
(+ or -).
To move the vehicle forwards in
manual mode.
Page 45 of 260
43
Steering mounted controls
EASE OF USE
and COMFOR
T
3
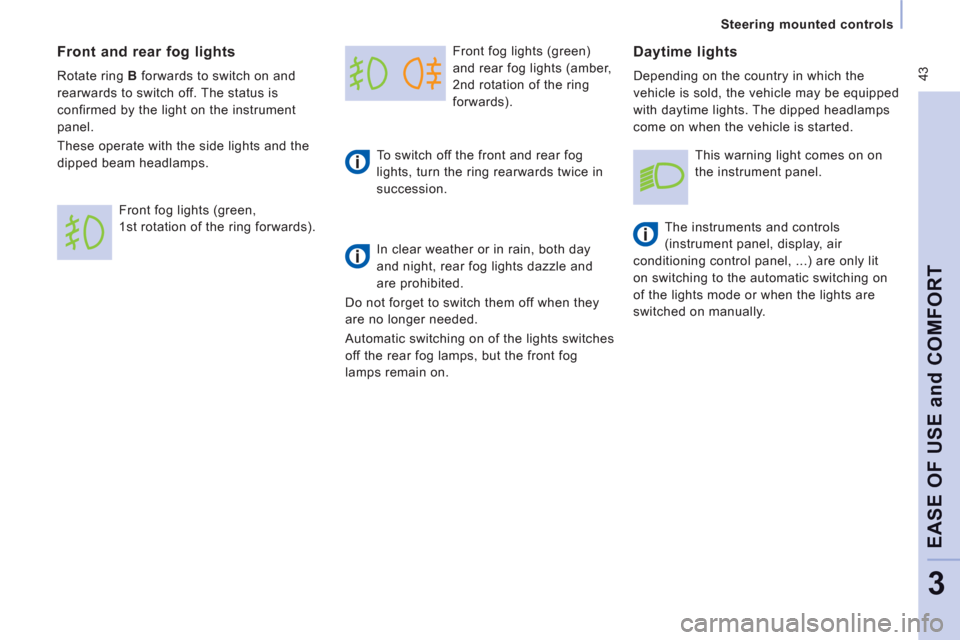
Front fog lights (green)
and rear fog lights (amber,
2nd rotation of the ring
forwards).
To switch off the front and rear fog
lights, turn the ring rearwards twice in
succession.
In clear weather or in rain, both day
and night, rear fog lights dazzle and
are prohibited.
Do not forget to switch them off when they
are no longer needed.
Automatic switching on of the lights switches
off the rear fog lamps, but the front fog
lamps remain on.
Daytime lights
Depending on the country in which the
vehicle is sold, the vehicle may be equipped
with daytime lights. The dipped headlamps
come on when the vehicle is started.
The instruments and controls
(instrument panel, display, air
conditioning control panel, ...) are only lit
on switching to the automatic switching on
of the lights mode or when the lights are
switched on manually.
Front and rear fog lights
Rotate ring B
forwards to switch on and
rearwards to switch off. The status is
confirmed by the light on the instrument
panel.
These operate with the side lights and the
dipped beam headlamps.
Front fog lights (green,
1st rotation of the ring forwards). This warning light comes on on
the instrument panel.