run flat Citroen JUMPY 2013 2.G Owner's Manual
[x] Cancel search | Manufacturer: CITROEN, Model Year: 2013, Model line: JUMPY, Model: Citroen JUMPY 2013 2.GPages: 248, PDF Size: 8.07 MB
Page 31 of 248

29
Instruments and controls
READY TO GO
2
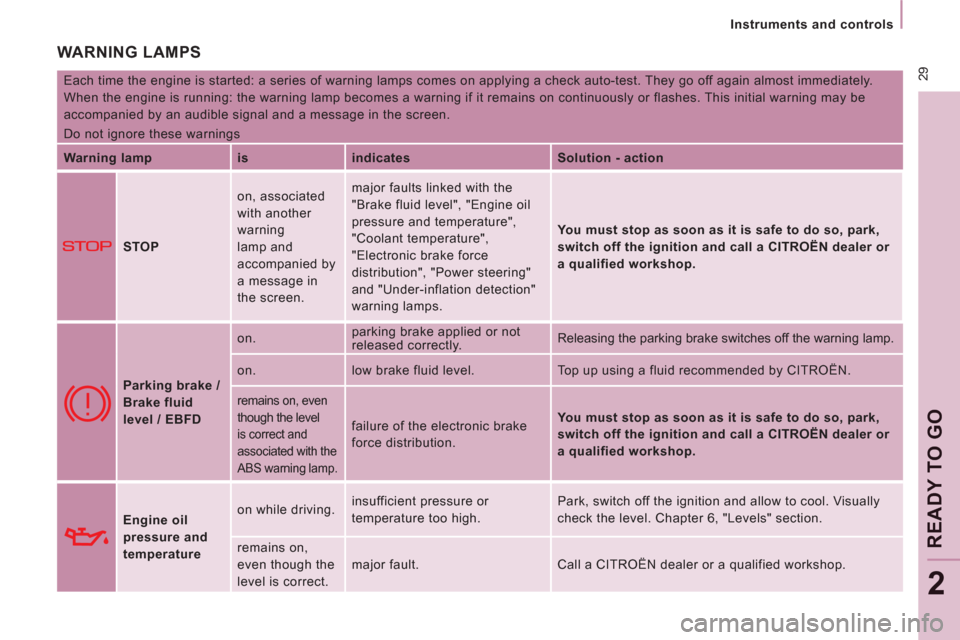
WARNING LAMPS
Each time the engine is started: a series of warning lamps comes on applying a check auto-test. They go off again almost immediately.
When the engine is running: the warning lamp becomes a warning if it remains on continuously or flashes. This initial warning may be
accompanied by an audible signal and a message in the screen.
Do not ignore these warnings
Warning lamp
is
indicates
Solution - action
STOP on, associated
with another
warning
lamp and
accompanied by
a message in
the screen. major faults linked with the
"Brake fluid level", "Engine oil
pressure and temperature",
"Coolant temperature",
"Electronic brake force
distribution", "Power steering"
and "Under-inflation detection"
warning lamps.
You must stop as soon as it is safe to do so, park,
switch off the ignition and call a CITROËN dealer or
a qualified workshop.
Parking brake /
Brake fluid
level / EBFD on. parking brake applied or not
released correctly. Releasing the parking brake switches off the warning lamp.
on. low brake fluid level. Top up using a fluid recommended by CITROËN.
remains on, even
though the level
is correct and
associated with the
ABS warning lamp.
failure of the electronic brake
force distribution.
You must stop as soon as it is safe to do so, park,
switch off the ignition and call a
CITROËN dealer or
a qualified workshop.
Engine oil
pressure and
temperature on while driving. insufficient pressure or
temperature too high. Park, switch off the ignition and allow to cool. Visually
check the level. Chapter 6, "Levels" section.
remains on,
even though the
level is correct. major fault. Call a CITROËN dealer or a qualified workshop.
Page 44 of 248

42
Gearboxes and steering wheel
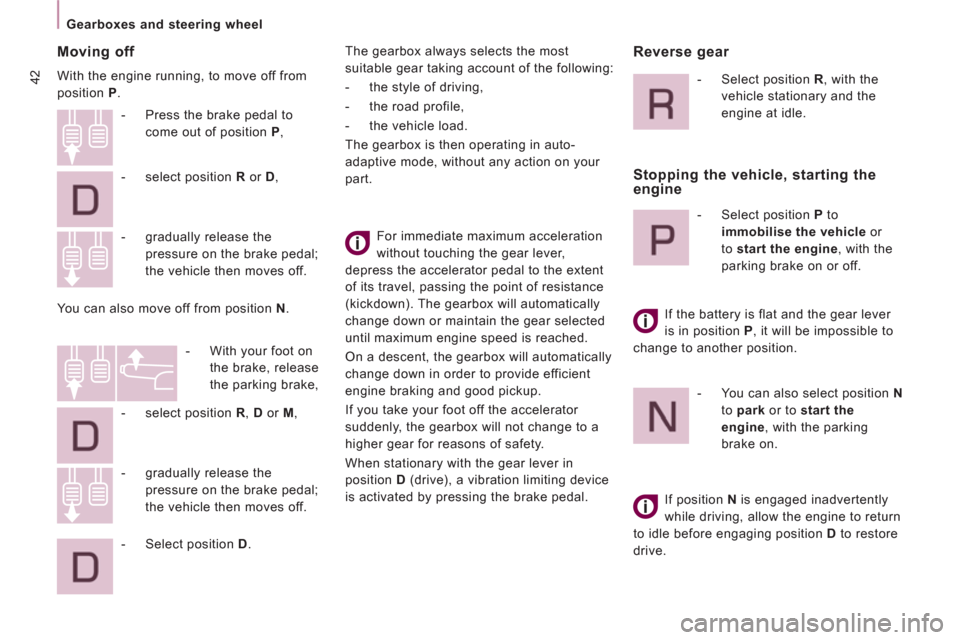
Moving off
With the engine running, to move off from
position P
.
For immediate maximum acceleration
without touching the gear lever,
depress the accelerator pedal to the extent
of its travel, passing the point of resistance
(kickdown). The gearbox will automatically
change down or maintain the gear selected
until maximum engine speed is reached.
On a descent, the gearbox will automatically
change down in order to provide efficient
engine braking and good pickup.
If you take your foot off the accelerator
suddenly, the gearbox will not change to a
higher gear for reasons of safety.
When stationary with the gear lever in
position D
(drive), a vibration limiting device
is activated by pressing the brake pedal.
- gradually release the
pressure on the brake pedal;
the vehicle then moves off.
- Press the brake pedal to
come out of position P
,
- select position R
or D
,
- gradually release the
pressure on the brake pedal;
the vehicle then moves off.
You can also move off from position N
.
- With your foot on
the brake, release
the parking brake,
- select position R
, D
or M
,
- Select position D
. The gearbox always selects the most
suitable gear taking account of the following:
- the style of driving,
- the road profile,
- the vehicle load.
The gearbox is then operating in auto-
adaptive mode, without any action on your
part.
Reverse gear
- Select position R
, with the
vehicle stationary and the
engine at idle.
Stopping the vehicle, starting the
engine
- Select position P
to
immobilise the vehicle
or
to start the engine
, with the
parking brake on or off.
If the battery is flat and the gear lever
is in position P
, it will be impossible to
change to another position.
- You can also select position N
to park
or to start the
engine
, with the parking
brake on.
If position N
is engaged inadvertently
while driving, allow the engine to return
to idle before engaging position D
to restore
drive.
Page 122 of 248

120
Battery
ECONOMY MODE
After the engine has stopped, with the key in the
ignition position, certain functions (windscreen
wiper, electric windows, courtesy lamps,
audio equipment, etc.) can only be used for a
cumulative duration of thirty minutes, to prevent
discharging of the battery.
Once the thirty minutes are over, the active
functions are put on standby and the battery
warning lamp flashes accompanied by a
message in the screen.
To resume the use of these functions
immediately, start the engine and let it run
for a few minutes.
The time available will then be double the
time for which the engine was left running.
However, this time will always be between
five and thirty minutes.
A flat battery will prevent the engine from
starting.
Page 124 of 248

122
Repairing a wheel
Warning, the sealant cartridge contains
ethylene-glycol, this product is harmful
if swallowed and causes irritation to the
eyes. Keep this product out of reach of
children.
The expiry date of the sealant is indicated
under the cartridge.
The cartridge is intended for a single use;
once opened, it must be replaced.
After use, do not discard the cartridge into
the environment, take it to a CITROËN
dealer or to a specialised waste disposal
site.
Do not forget to obtain a new sealant
cartridge, available from a CITROËN dealer
or a qualified workshop.
- connect the compressor pipe directly to
the valve of the repaired wheel.
- connect the compressor's electrical plug
to the vehicle's 12V socket again,
- start the vehicle again and let the engine
run,
- adjust the pressure using the
compressor (to inflate: switch A
in
position " 1
"; to deflate: switch A
in
position " 0
" and press button B
), in
accordance with the vehicle's tyre
pressure label (located on the door
aperture, on the driver's side), then
remember to check that the leak has
been sealed correctly (no further
loss of pressure after several miles
(kilometres)),
- remove the compressor, then stow the
complete kit,
- drive at reduced speed (50 mph (80 km/h)
max) limiting the distance travelled to
approximately 125 miles (200 km),
- visit a CITROËN dealer or a qualified
workshop as soon as possible to have
the tyre repaired or replaced by a
technician.
Page 130 of 248

128
Snow chains
Snow chains
In wintry conditions, snow chains improve
traction as well as the behaviour of the
vehicle when braking.
The snow chains must be fitted only to
the driving wheels. They must never be
fitted to "space-saver" type spare wheels.
Take account of the legislation in force
in your country on the use of snow
chains and the maximum running speed
authorised.
Advice on installation
�)
If you have to fit the chains during
a journey, stop the vehicle on a flat
surface on the side of the road.
�)
Apply the parking brake and position any
wheel chocks to prevent movement of
your vehicle.
�)
Fit the chains following the instructions
provided by the manufacturer.
�)
Move off gently and drive for a few
moments, without exceeding 30 mph
(50 km/h).
�)
Stop your vehicle and check that the
snow chains are correctly tightened.
Avoid driving on roads that have been
cleared of snow, to avoid damaging
your vehicle's tyres and the road surface. It
is recommended that before you leave, you
practise fitting the snow chains on a level
and dry surface. If your vehicle is fitted with
alloy wheels, check that no part of the chain
or its fixings is in contact with the wheel rim.
Use only the chains designed to be fitted to
the type of wheel fitted to your vehicle:
Original tyre size
Maximum link size.
215/65 R15
12 mm
215/60 R16
MICHELIN
215/60 R16
BRIDGESTONE
For more information on snow chains,
contact a CITROËN dealer or a qualified
workshop.