jump start Citroen JUMPY 2016 2.G Owner's Manual
[x] Cancel search | Manufacturer: CITROEN, Model Year: 2016, Model line: JUMPY, Model: Citroen JUMPY 2016 2.GPages: 595, PDF Size: 12.47 MB
Page 368 of 595

366
Jumpy_en_Chap10b_NAC-1_ed01-2016
Towards GPS coordinates
Towards a point on the map
Press Navigation to display the
primary page. Press Navigation
to display the
primary page.
Explore the map by sliding a finger on the
screen. Explore the map by sliding a finger on the
screen.
Tap the screen to place a marker and
display the sub-menu.
Or Or
Or
And
Select the destination by pressing on the map.
Press this button to start navigation. Press this button to start navigation.
Press this button to display the world
map.
Using the grid, select by zoom the
desired country or region.
Press this button to save the address
displayed Press this button to save the address
displayed.
Press this button to enter the GPS
coordinates. Press this button to enter the value
for "Latitude " using the virtual
keypad.
Press this button to enter the value
for " Longitude " using the virtual
keypad. A marker is displayed in the middle of
the screen, with the " Latitude" and
" Longitude " coordinates.
A long press on a point opens a list of
POIs nearby.
Audio and Telematics
Page 381 of 595

379
1
1
1
1
6
7
8
2
3
4
5
Jumpy_en_Chap10b_NAC-1_ed01-2016
Level 2Level 3 Comments
Connectivity
Secondary page Bluetooth
connection All
Display all telephones, connected or
disconnected.
Connected Display all connected telephones.
Search Start a search for a device to connect.
Connectivity
Secondary page Wi- Fi network connection Secured
Display secured Wi-Fi networks.
Not secured Display non-secured Wi-Fi networks.
Stored Display remembered Wi-Fi networks.
Connectivity
Secondary page
Manage connection Display the state of the subscription to connected
services, the state of the network connection and
the connection mode.
Connectivity
Secondary page Share Wi- Fi connection Activation
Activate or deactivating the sharing of the Wi-Fi
connection.
Settings Select a Wi-Fi network found by the system and
connect to it.
Save settings.
Functionalities available according to equipment.
.
Audio and Telematics
Page 383 of 595

381
11
1
7
8
Jumpy_en_Chap10b_NAC-1_ed01-2016
Wi-Fi connectionSharing the Wi-Fi connectionManaging connections
To protect from any piracy and provide
maximum security for your systems,
it is recommended that you use a
security code or complex password.
The Wi-Fi connection and the sharing
of the Wi-Fi connection are exclusive. Press "
Confirm ".
Press " Confirm " to start the
connection. Press " Connectivity " to display the
primary page.
Network connection by the smartphone Wi-Fi. Creation of a local Wi-Fi network by the
system.
Press Connectivity to display the
primary page. Press Connectivity
to display the
primary page.
Press the " OPTIONS" button to go to
the secondary page. Press the "
OPTIONS" button to go to
the secondary page. Press the "
OPTIONS" button to go to
the secondary page.
Select " Wi-Fi network connection ".Select "Share Wi-Fi connection ".Select "
Manage connection ".
And / Or
Select the "
Secured", "Not secured "
or " Stored " tab. Select the "
Activation" tab to
activate or deactivate sharing of the
Wi-Fi connection.
Select the " Settings" to change the
name of the system network and the
password. With this function you can view the access
to connected services, the availability of
connected services and modify the connection
mode.
Using the virtual keypad, enter the
" Key " for the Wi-Fi network and the
" Password ".
Select a network.
.
Audio and Telematics
Page 385 of 595
383
Jumpy_en_Chap10b_NAC-1_ed01-2016
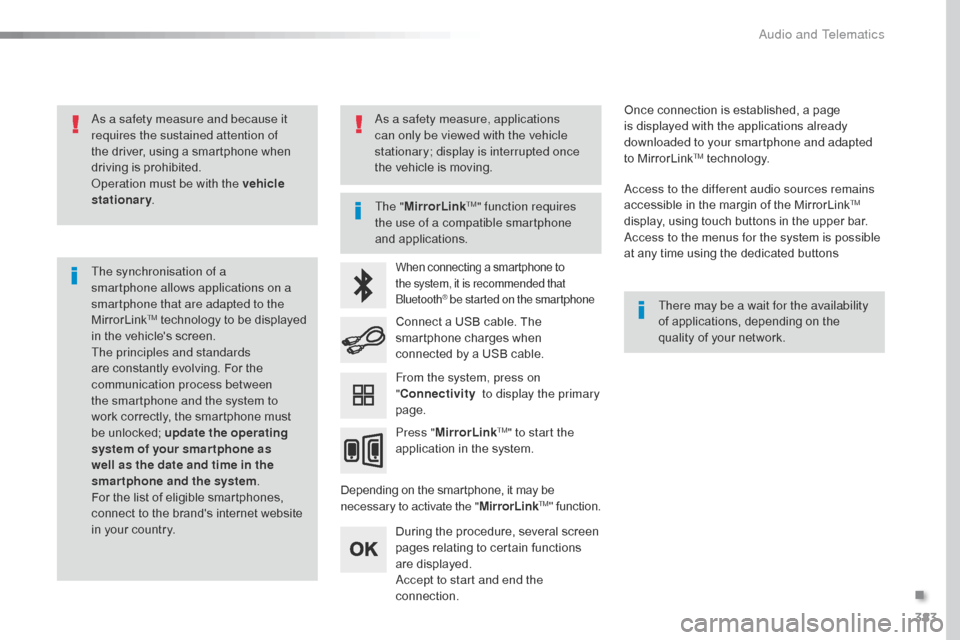
As a safety measure and because it
requires the sustained attention of
the driver, using a smartphone when
driving is prohibited.
Operation must be with the vehicle
stationary.
The synchronisation of a
smartphone allows applications on a
smartphone that are adapted to the
MirrorLink
TM technology to be displayed
i
n the vehicle's screen.
The principles and standards
are constantly evolving. For the
communication process between
the smartphone and the system to
work correctly, the smartphone must
be unlocked; update the operating
system of your smar tphone as
well as the date and time in the
smartphone and the system .
For the list of eligible smartphones,
connect to the brand's internet website
in your country. The "
MirrorLink
TM" function requires
the use of a compatible smartphone
and applications.
There may be a wait for the availability
of applications, depending on the
quality of your network.
When connecting a smartphone to
the system, it is recommended that
Bluetooth
® be started on the smartphone
Depending on the smartphone, it may be
necessary to activate the "MirrorLinkTM" function.
During the procedure, several screen
pages relating to certain functions
are displayed.
Accept to start and end the
connection. Connect a USB cable. The
smartphone charges when
connected by a USB cable.
Press " MirrorLink
TM" to start the
application in the system. Once connection is established, a page
is displayed with the applications already
downloaded to your smartphone and adapted
to MirrorLink
TM technology.
Access to the different audio sources remains
accessible in the margin of the MirrorLink
TM
display, using touch buttons in the upper bar.
Access to the menus for the system is possible
at any time using the dedicated buttons
From the system, press on
" Connectivity to display the primary
page.
As a safety measure, applications
can only be viewed with the vehicle
stationary; display is interrupted once
the vehicle is moving.
.
Audio and Telematics
Page 400 of 595
398
Jumpy_en_Chap10b_NAC-1_ed01-2016
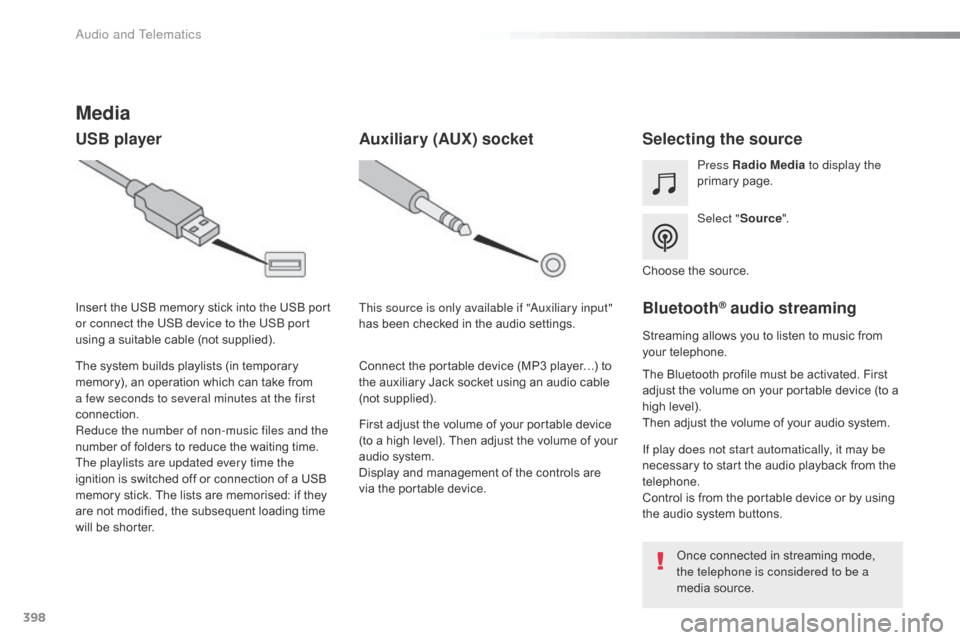
Media
USB playerSelecting the source
Select "Source".
Press Radio Media
to display the
primary page.
The system builds playlists (in temporary
memory), an operation which can take from
a few seconds to several minutes at the first
connection.
Reduce the number of non-music files and the
number of folders to reduce the waiting time.
The playlists are updated every time the
ignition is switched off or connection of a USB
memory stick. The lists are memorised: if they
are not modified, the subsequent loading time
will be shorter. Insert the USB memory stick into the USB port
or connect the USB device to the USB port
using a suitable cable (not supplied).
Auxiliary (AUX) socket
First adjust the volume of your portable device
(to a high level). Then adjust the volume of your
audio system.
Display and management of the controls are
via the portable device. This source is only available if "Auxiliary input"
has been checked in the audio settings.
Connect the portable device (MP3 player…) to
the auxiliary Jack socket using an audio cable
(not supplied). Choose the source.
Bluetooth® audio streaming
Streaming allows you to listen to music from
your telephone.
The Bluetooth profile must be activated. First
adjust the volume on your portable device (to a
high level).
Then adjust the volume of your audio system.
If play does not start automatically, it may be
necessary to start the audio playback from the
telephone.
Control is from the portable device or by using
the audio system buttons.
Once connected in streaming mode,
the telephone is considered to be a
media source.
Audio and Telematics
Page 401 of 595
399
Jumpy_en_Chap10b_NAC-1_ed01-2016
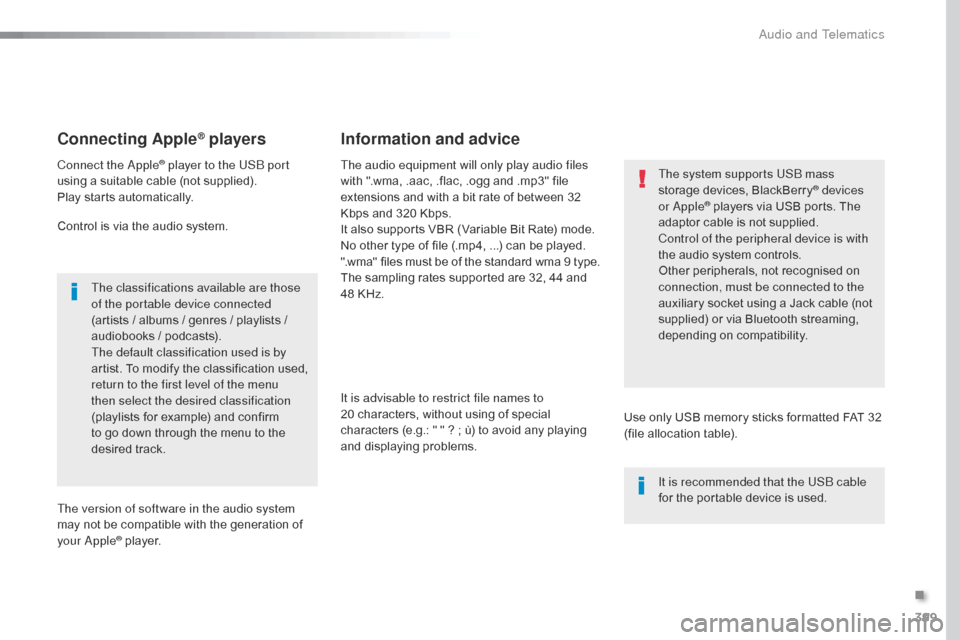
Connecting Apple® players
Connect the Apple® player to the USB port
using a suitable cable (not supplied).
Play starts automatically.
Control is via the audio system.
The classifications available are those
of the portable device connected
(artists / albums / genres / playlists /
audiobooks / podcasts).
The default classification used is by
artist. To modify the classification used,
return to the first level of the menu
then select the desired classification
(playlists for example) and confirm
to go down through the menu to the
desired track.
The version of software in the audio system
may not be compatible with the generation of
your Apple
® player. The audio equipment will only play audio files
with ".wma, .aac, .flac, .ogg and .mp3" file
extensions and with a bit rate of between 32
Kbps and 320 Kbps.
It also supports VBR (Variable Bit Rate) mode.
No other type of file (.mp4,
...) can be played.
".wma" files must be of the standard wma 9 type.
The sampling rates supported are 32, 44 and
48 KHz.
It is advisable to restrict file names to
20 characters, without using of special
characters (e.g.: " " ? ; ù) to avoid any playing
and displaying problems.
Information and advice
Use only USB memory sticks formatted FAT 32
(file allocation table). The system supports USB mass
storage devices, BlackBerry
® devices
or Apple® players via USB ports. The
adaptor cable is not supplied.
Control of the peripheral device is with
the audio system controls.
Other peripherals, not recognised on
connection, must be connected to the
auxiliary socket using a Jack cable (not
supplied) or via Bluetooth streaming,
depending on compatibility.
It is recommended that the USB cable
for the portable device is used.
.
Audio and Telematics
Page 403 of 595

401
14
12
13
3
2
5
6
7
4
8
9
10
11
Jumpy_en_Chap10b_NAC-1_ed01-2016
Level 1Level 2 Level 3 Comments
Telephone Bluetooth Contact All
View contacts according to presentation choices.
Select a contact or a favourite saved in the
system via the profile selected to start the call.
Telephone
Address
Favourites
Sort the contacts by Surname-First name or First
name-Surname.
Update the contacts from the telephone.
Search ConfirmSearch for a contact in the directory.
Create Telephone
Create a new contact in the system.
Address
Email
Confirm
Telephone Bluetooth Calls All
View calls according to choice of presentation.
Select a contact to start the call.
Incoming
Outgoing
Missed
View details for the contact.
.
Audio and Telematics
Page 405 of 595
403
1
1
1
19
20
21
22
15
16
17
18
Jumpy_en_Chap10b_NAC-1_ed01-2016
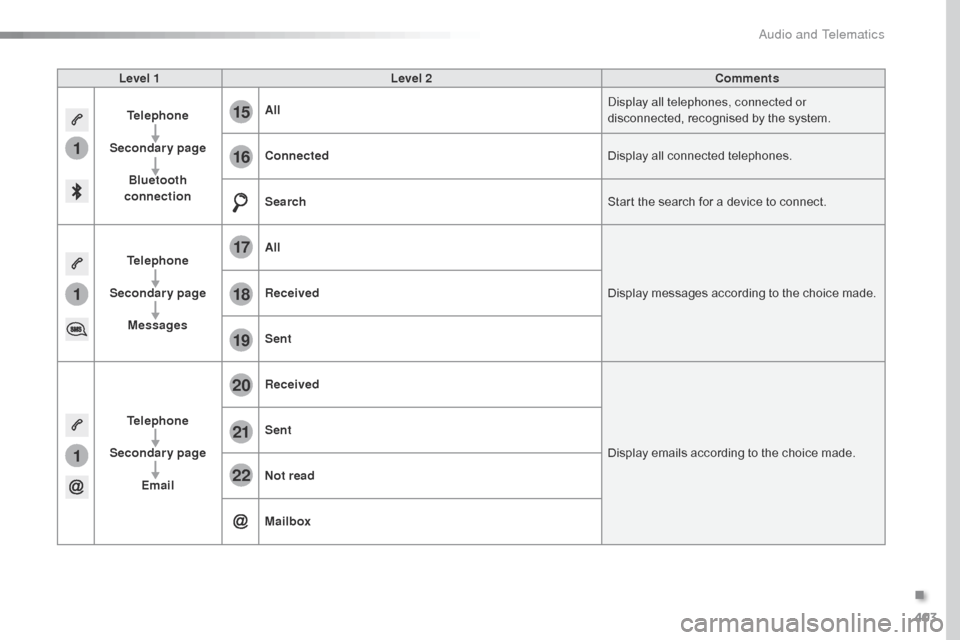
Level 1Level 2 Comments
Telephone
Secondary page Bluetooth
connection All
Display all telephones, connected or
disconnected, recognised by the system.
Connected Display all connected telephones.
Search Start the search for a device to connect.
Telephone
Secondary page Messages All
Display messages according to the choice made.
Received
Sent
Telephone
Secondary page Email Received
Display emails according to the choice made.
Sent
Not read
Mailbox
.
Audio and Telematics
Page 411 of 595
409
2
3
Jumpy_en_Chap10b_NAC-1_ed01-2016
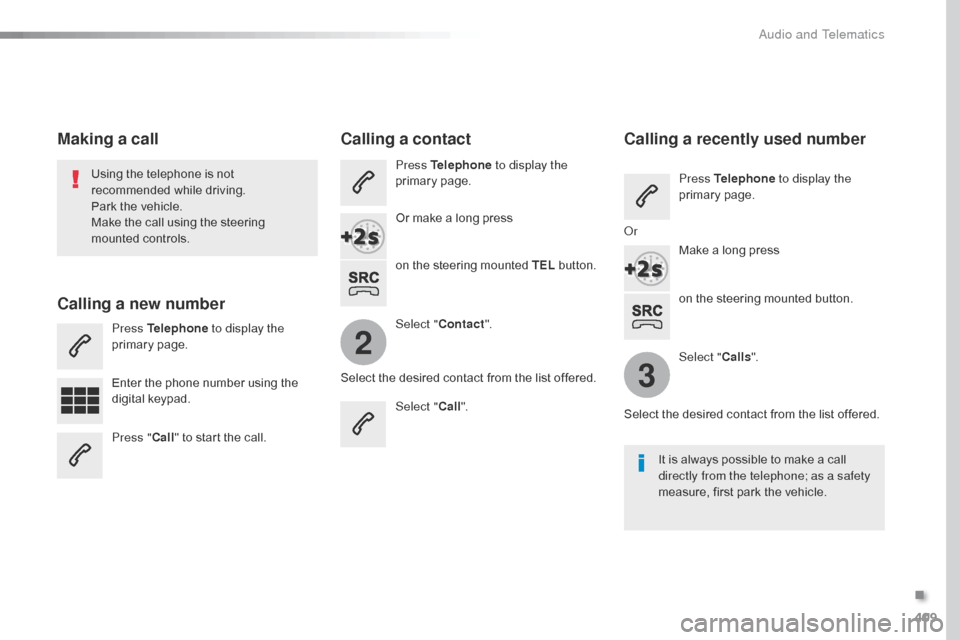
on the steering mounted button.
Using the telephone is not
recommended while driving.
Park the vehicle.
Make the call using the steering
mounted controls.
Making a call
Calling a new number
Press Telephone
to display the
primary page.
Enter the phone number using the
digital keypad.
Press " Call" to start the call.
Calling a contact
Press Telephone to display the
primary page.
Or make a long press
on the steering mounted TEL button.
Select " Contact ".
Select the desired contact from the list offered. Select "Call".
Calling a recently used number
Press Telephone to display the
primary page.
Make a long press
Select " Calls".
Select the desired contact from the list offered. It is always possible to make a call
directly from the telephone; as a safety
measure, first park the vehicle.
Or
.
Audio and Telematics
Page 412 of 595
410
2
12
13
14
1
Jumpy_en_Chap10b_NAC-1_ed01-2016
The access to "Messages" depends on
the compatibility of the smartphone and
the integral system.
Depending on the smartphone, access
to your messages or email may be
slow.
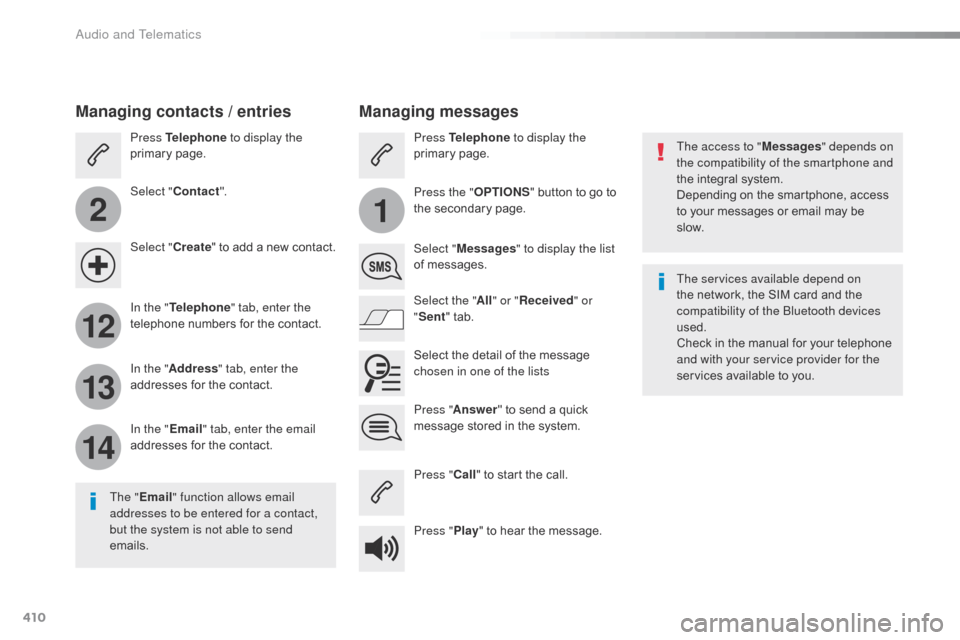
Managing messages
The " Email " function allows email
addresses to be entered for a contact,
but the system is not able to send
emails.
Managing contacts / entries
Press Telephone to display the
primary page.
Select " Contact ".
Select " Create" to add a new contact.
In the " Telephone " tab, enter the
telephone numbers for the contact.
In the " Address " tab, enter the
addresses for the contact.
In the " Email" tab, enter the email
addresses for the contact. Press "
Answer " to send a quick
message stored in the system. Press Telephone to display the
primary page.
Press the " OPTIONS" button to go to
the secondary page.
Select " Messages " to display the list
of messages.
Select the " All" or " Received " or
" Sent " tab.
Select the detail of the message
chosen in one of the lists
Press " Call" to start the call.
Press " Play" to hear the message. The services available depend on
the network, the SIM card and the
compatibility of the Bluetooth devices
used.
Check in the manual for your telephone
and with your service provider for the
services available to you.
Audio and Telematics