air condition CITROEN JUMPY 2021 Owner's Manual
[x] Cancel search | Manufacturer: CITROEN, Model Year: 2021, Model line: JUMPY, Model: CITROEN JUMPY 2021Pages: 324, PDF Size: 10.05 MB
Page 108 of 324
106
Safety
Airbags
General information
System designed to help improve the safety
of the occupants sitting in the front seats and
the rear outer seats, in the event of a violent
collision. The airbags supplement the action
of the seat belts equipped with a force limiting
system.
Electronic detectors record and analyse the
front and side impacts sustained in the impact
detection zones:
–
In the event of violent impact, the airbags
deploy instantly and help better protect the
occupants of the vehicle; immediately after the
impact, the airbags deflate rapidly in order not
to hinder the visibility or the possible exit of the
occupants.
–
In the event of a slight impact, a rear impact
and under certain rollover conditions, the airbags
may not deploy; only the seat belt helps to
protect you in these situations.
The seriousness of the impact depends on the
nature of the obstacle and the speed of the
vehicle at the moment of collision.
The airbags do not operate when the
ignition is switched off.
This equipment will only deploy once. If a
second impact occurs (during the same or a
* For more information on Deactivating the front passenger airbag, refer t\
o the corresponding section.
subsequent accident), the airbag will not be
deployed again.
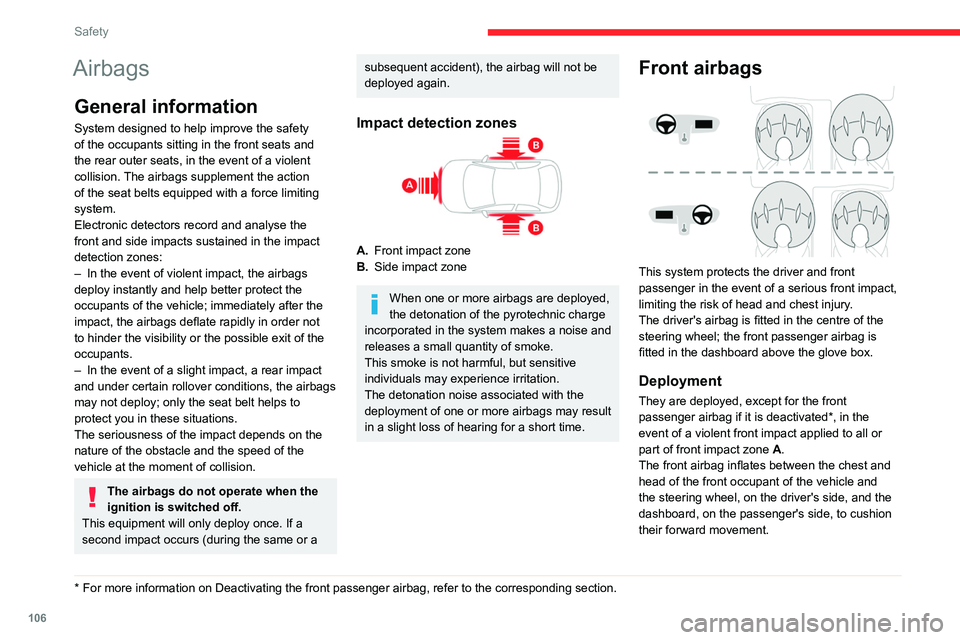
Impact detection zones
A. Front impact zone
B. Side impact zone
When one or more airbags are deployed,
the detonation of the pyrotechnic charge
incorporated in the system makes a noise and
releases a small quantity of smoke.
This smoke is not harmful, but sensitive
individuals may experience irritation.
The detonation noise associated with the
deployment of one or more airbags may result
in a slight loss of hearing for a short time.
Front airbags
This system protects the driver and front
passenger in the event of a serious front impact,
limiting the risk of head and chest injury.
The driver's airbag is fitted in the centre of the
steering wheel; the front passenger airbag is
fitted in the dashboard above the glove box.
Deployment
They are deployed, except for the front
passenger airbag if it is deactivated*, in the
event of a violent front impact applied to all or
part of front impact zone A.
The front airbag inflates between the chest and
head of the front occupant of the vehicle and
the steering wheel, on the driver's side, and the
dashboard, on the passenger's side, to cushion
their forward movement.
Page 137 of 324

135
Driving
6
If the vehicle absolutely must drive through a
flooded section of road:
►
Check that the depth of the water does not
exceed 15
cm, taking account of waves that
might be generated by other users.
►
Deactivate the Stop & Start function.
►
Drive as slowly as possible without stalling. In
all cases, do not exceed 6 mph (10
km/h).
►
Do not stop and do not switch off the engine.
On leaving the flooded road, as soon as safety
conditions allow
, make several light brake
applications to dry the brake discs and pads.
If in doubt about the state of your vehicle,
contact a CITROËN dealer or a qualified
workshop.
Noise (Electric)
On the outside
Due to the vehicle’s quiet operation when
driving, the driver must pay particular attention.
When manoeuvring, the driver must always
check the vehicle's immediate surroundings.
At speeds of up to 19 mph (30 km/h), the
pedestrian horn warns other road users of the
vehicle’s presence.
Cooling the traction battery
The cooling fan comes on during
charging to cool the on-board charger and the
traction battery.
On the inside
During use, you may hear certain perfectly
normal noises specific to electric vehicles, such
as:
–
T
raction battery relay when starting.
–
V
acuum pump when braking.
–
V
ehicle tyres or aerodynamics when driving.
–
Jolting and knocking noise during hill starts.
Towing
Driving with a trailer places greater
demands on the towing vehicle and
particular care must be taken.
Do not exceed the maximum towable
weights.
At altitude: reduce the maximum load by
10% per 1,000 metres of altitude; the lower
air density at high altitudes decreases engine
performance.
New vehicle: do not tow a trailer until the
vehicle has driven at least 620 miles
(1,000 kilometres).
If the outside temperature is high, let the
engine idle for 1 to 2 minutes after the
vehicle comes to a stop, to help it to cool.
Before setting off
Nose weight
► Distribute the load in the trailer so that the
heaviest items are located as close as possible
to the axle, and the nose weight (at the point
where it joins your vehicle) approaches the
maximum permitted, without exceeding it.
Tyres
► Check the tyre pressures of the towing
vehicle and of the trailer , observing the
recommended pressures.
Lighting
► Check the electrical signalling on the trailer
and the headlamp beam height of your vehicle.
If a genuine CITROËN towing device is
used, the rear parking sensors will be
deactivated automatically to avoid activating
the audible signal.
When driving
Cooling
Towing a trailer uphill causes the coolant
temperature to increase. The maximum towable
load depends on the gradient and the exterior
Page 151 of 324
149
Driving
6When starting the vehicle, no mode can be
selected until the READY indicator lamp is
displayed.
When the message disappears, the selected
mode is activated and remains indicated on the
instrument panel (except Normal mode).
Each time the ignition is switched on, Normal
mode is selected by default.
Normal
This optimises the driving range and dynamic
performance.
To obtain maximum torque and power, depress
the accelerator pedal fully.
Eco
Optimises energy consumption, by reducing
the output of the heating and air conditioning
(without actually deactivating them) and limiting
both motor torque and power.
Power
Provides equivalent vehicle performance when
fully laden (GVW) to when the vehicle is in
Normal mode and when unladen.
Stop & Start
The Stop & Start function puts the engine temporarily into standby - STOP mode - during
phases when the vehicle is stationary (e.g.
red
lights, traffic jams). The engine automatically
restarts - START mode - as soon as the driver
indicates the intention of moving off again.
Primarily designed for urban use, the function
is intended to reduce fuel consumption and
exhaust emissions as well as the noise level
when stationary.
The function does not affect the functionalities of
the vehicle, in particular the braking.
Driving on flooded roads
Before entering into a flooded area, it is
strongly recommended that you deactivate
the Stop & Start system.
For more information on Driving
recommendations, particularly on flooded
roads, refer to the corresponding section.
Deactivation/Reactivation
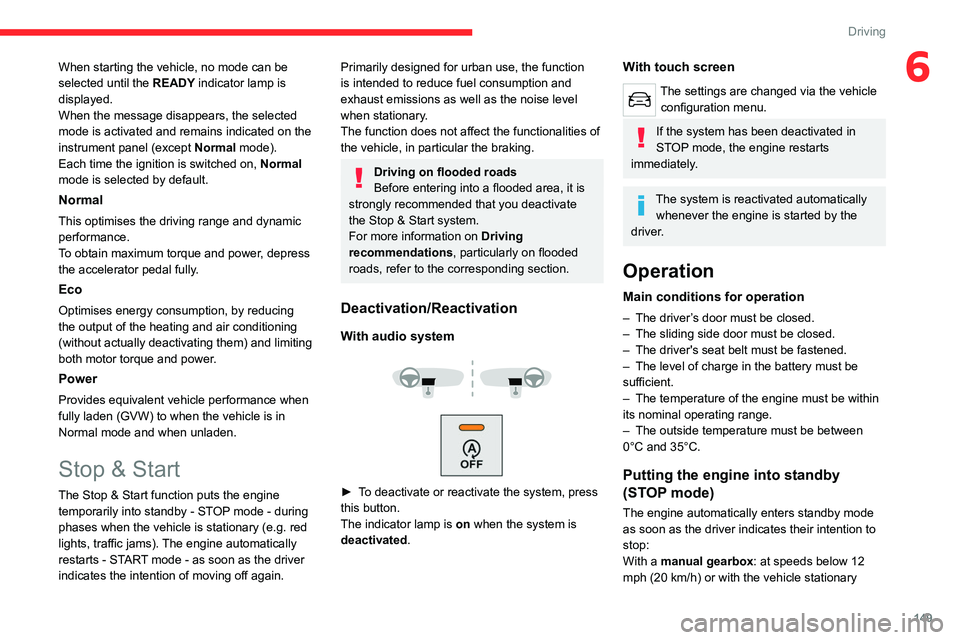
With audio system
► To deactivate or reactivate the system, press
this button.
The indicator lamp is on when the system is
deactivated.
With touch screen
The settings are changed via the vehicle configuration menu.
If the system has been deactivated in
STOP mode, the engine restarts
immediately.
The system is reactivated automatically whenever the engine is started by the
driver.
Operation
Main conditions for operation
– The driver ’s door must be closed.
– The sliding side door must be closed.
–
The driver's seat belt must be fastened.
–
The level of charge in the battery must be
sufficient.
–
The temperature of the engine must be within
its nominal operating range.
–
The outside temperature must be between
0°C and 35°C.
Putting the engine into standby
(STOP mode)
The engine automatically enters standby mode
as soon as the driver indicates their intention to
stop:
With a manual gearbox: at speeds below 12
mph (20
km/h) or with the vehicle stationary
Page 153 of 324

151
Driving
6The system triggers an alert as soon as it
detects a drop in the inflation pressure of one or
more tyres.
Under-inflation detection does not
replace the need for vigilance on the part
of the driver.
This system does not avoid the need to
regularly check the tyre pressures (including
the spare wheel) as well as before a long
journey.
Driving with under-inflated tyres, particularly
in adverse conditions (heavy load, high
speed, long journey):
–
worsens road-holding,
–
lengthens braking distances,
–
causes premature wear of the tyres,
–
increases fuel consumption.
The inflation pressures specified for the vehicle can be found on the tyre pressure
label.
For more information on the Identification
markings, refer to the corresponding section.
Checking tyre pressures
This check should be done when the
tyres are "cold" (vehicle stopped for 1 hour or
after a journey of less than 6 miles (10
km) at
moderate speeds).
Otherwise, add 0.3
bar to the pressures
shown on the label.
Snow chains
The system does not have to be
reinitialised after fitting or removing snow
chains.
Spare wheel
The steel spare wheel does not have an
under-inflation detection sensor.
Under-inflation alert
This is signalled by the fixed illumination of this warning lamp, accompanied by an
audible signal and, depending on equipment, the
display of a message.
►
Reduce speed immediately
, avoid excessive
steering movements and avoid sudden braking.
►
Stop the vehicle as soon as it is safe to do
so.
The loss of pressure detected may not always cause visible deformation of the
tyre.
Do not rely on just a visual check.
►
Using a compressor
, such as the one in
the temporary puncture repair kit, check the
pressures of all four tyres when cold.
►
If it is not possible to carry out this check
immediately
, drive carefully at reduced speed.
►
In the event of a puncture, use the
temporary puncture repair kit or the spare wheel
(depending on equipment).
Driving too slowly may not ensure
optimum monitoring.
The alert is not immediately triggered in the
event of a sudden loss of pressure or tyre
blow-out. This is because analysis of the
values read by the wheel's speed sensors
can take several minutes.
The alert may be delayed at speeds below
25 mph (40 km/h), or when adopting a sporty
driving mode.
The alert is kept active until the system is reinitialised.
Reinitialisation
► The system must be reinitialised after any
adjustment to the pressure of one or more tyres,
and after changing one or more wheels.
Before reinitialising the system, make
sure that the pressures of the four tyres
are correct for the conditions of use of the
vehicle and conform to the values written on
the tyre pressure label.
Check the pressures of the four tyres before
performing the reinitialisation.
The system does not advise if a pressure is
incorrect at the time of reinitialisation.
Page 154 of 324

152
Driving
With dashboard button
► With the vehicle stationary , press this
button for about 3 seconds then release it.
Reinitialisation is confirmed by an audible signal.
Without dashboard button
With the vehicle stationary, the
system is reinitialised via the
vehicle configuration menu.
Malfunction
In the event of a malfunction,
these warning lamps light up on
the instrument panel.
In this case, the tyre under-inflation monitoring
function is no longer performed.
Have it checked by a CITROËN dealer or a
qualified workshop.
Driving and manoeuvring
aids - General
recommendations
Driving and manoeuvring aids cannot, in
any circumstances, replace the need for
vigilance on the part of the driver.
The driver must comply with the Highway
Code, must remain in control of the vehicle in
all circumstances and must be able to retake
control of it at all times. The driver must adapt
the speed to climatic conditions, traffic and
the state of the road.
It is the driver's responsibility to constantly
monitor traffic conditions, assess the distance
and relative speed of other vehicles, and
anticipate their manoeuvres before using the
direction indicator and changing lanes.
These systems do not make it possible to
exceed the laws of physics.
Driving aids
You should hold the steering wheel with
both hands, always use the door and interior
mirrors, always leave your feet close to the
pedals and take a break every 2 hours.
Manoeuvring aids
The driver must always check the
surroundings of the vehicle before and during
the whole manoeuvre, in particular using the
mirrors.
Radar(s)
The operation of the radar(s), along with
any associated functions, may be affected
by the accumulation of dirt (e.g.
mud, ice),
in poor weather conditions (e.g.
heavy rain,
snow), or if the bumpers are damaged.
If the front bumper is to be repainted, contact
a CITROËN dealer or a qualified workshop;
certain types of paint could interfere with the
operation of the radar(s).
Driving aids camera
This camera and its associated functions
may be impaired or not work if the windscreen
area in front of the camera is dirty, misty,
frosty, covered with snow, damaged or
masked by a sticker.
In humid and cold weather, demist the
windscreen regularly.
Poor visibility (inadequate street lighting,
heavy rain, thick fog, snowfall), dazzle
(headlamps of an oncoming vehicle, low sun,
reflections on a damp road, leaving a tunnel,
alternating shade and light) can also impair
detection performance.
Page 165 of 324

163
Driving
6(without automatic regulation of the inter-
vehicle safety distance).
►
Press buttons
2-SET- or 3-SET+: the current
speed becomes the
speed setting (minimum
25
mph (40 km/h)) and the cruise control is
immediately activated.
►
Press
3 to increase or 2 to decrease the
speed setting (in steps of 5 mph (5 km/h) if the
button is kept depressed).
Pressing and holding either button
2-SET- or 3-SET+ results in a rapid
change in the speed of the vehicle.
Pausing/resuming cruise control
► Press 4-II or depress the brake pedal. To
pause cruise control, it is also possible to: •
Shift from mode
D to N,
•
Depress the clutch pedal for more than 10
seconds.
•
Press the electric parking brake control.
►
Press
4-II to restart cruise control. Cruise
control may have been paused automatically: •
When the inter-vehicle distance threshold is
reached.
•
When the distance between your vehicle and
the one in front becomes too short.
•
When the vehicle starts moving too slowly or
the vehicle in front starts moving too slowly
.
•
When the ESC system is triggered.
When the driver attempts to reactivate
cruise control, after the function has been
paused, the message "Activation not possible,
unsuitable conditions" is briefly displayed if
reactivation is not possible (safety conditions
not met).
Using the Road signs recognition function
or speed limit sign memorisation to
modify the speed setting.
► Press 5-MEM to accept the speed setting
proposed by the system on the instrument panel
or touch screen, then press again to confirm.
To prevent any sudden acceleration or deceleration of the vehicle, select a
speed setting fairly close to the current speed
of your vehicle.
Changing the inter-vehicle distance
► Press 6 to display the distance setting
thresholds ("Distant", "Normal" or "Close"), then
press again to select a threshold.
After a few seconds, the option is accepted and
will be memorised when the ignition is switched
off.
Temporarily exceeding the speed setting
► Depress the accelerator pedal. Distance
monitoring and cruise control are deactivated as
long as you continue to accelerate.
The speed
on the instrument panel flashes.
Deactivating the system
► Turn the knob 1 upwards into position 0
(OFF).
Information displayed on
the instrument panel
Head-up display
7. Cruise control pause/resume indication.
8. Indication of selection of cruise control mode,
or vehicle speed adjustment phase.
9. Speed setting value.
Page 179 of 324
177
Practical information
7
FILL UP WITH
CONFIDENCE
WITH QUARTZ LUBRICA\BNT\f
* 1L & 5L produced in Europe
Part\bers for more tha\b 50 years, Citroën &
TotalEnergies share \fommon values\b te\fhnology,
\freativity, innovation. TotalEnergies equips Citroën
vehi\fles with Quartz lubrica\bts from their first filling
in the fa\ftory to approved maintenan\fe networks to
guarantee them optimal performan\fe on a daily basis.
Espe\fially designed for Citroën vehi\fles, Quartz
lubri\fants make them even more powerful, more fuel
effi\fient and more environmentally friendly. For your
\far maintenan\fe, fill up with \fonfiden\fe with Quartz
lubri\fants !Keep your e\bgi\be you\B\bger for lo\bger !
Quartz I\beo Xtra First 0W-20 is a very high
performan\fe lubri\fant resulting from the joint work of
the Citroën and TotalEnergies R&D teams. Its innovative
te\fhnology extends your engine’s life while rea\fhing
signifi\fant fuel savings and thus limiting CO
2 emissions.
The produ\ft is now available in new pa\fkaging* made
of 50% re\fy\fled mate\hrial and 100% re\fy\fl\hable.
Compatibility of fuels
Diesel fuels conforming to the EN590, EN16734
and EN16709 standards and containing up to
7%, 10%, 20% and 30% fatty acid methyl ester
respectively. The use of B20 or B30 fuels, even
occasionally, imposes special maintenance
conditions referred to as "Arduous conditions".
Paraffinic Diesel fuel conforming to the EN15940
standard.
The use of any other type of (bio) fuel
(e.g. pure or diluted vegetable or animal
oils, domestic fuel) is strictly prohibited - risk
of damaging the engine and fuel system!
The only Diesel fuel additives authorised for use are those that meet the B715000
standard.
Diesel at low temperature
At temperatures below 0 °C (+32 °F), the
formation of paraffins in summer-type Diesel
fuels could prevent the engine from operating
correctly
. In these temperature conditions, use
winter-type Diesel fuel and keep the fuel tank
more than 50
% full.
At temperatures below -15 °C (+5 °F) to avoid
problems starting, it is best to park the vehicle
under shelter (heated garage).
Travelling abroad
Certain fuels could damage your vehicle’s
engine.
In certain countries, the use of a particular
fuel may be required (specific octane rating,
specific trade name, etc.) to ensure correct
operation of the engine.
For all additional information, consult a dealer.
Refuelling
Fuel tank capacity: approximately 69 litres.
Reserve level: approximately 6 litres.
Low fuel level
When the low fuel level is reached,
one of these warning lamps lights
up on the instrument panel, accompanied by the
display of a message and an audible signal.
When it first comes on, about 8 litres of fuel
remain.
You must refuel as soon as possible to avoid
running out of fuel.
For more information on Running out of fuel
(Diesel), refer to the corresponding section.
A small arrow by the warning lamp indicates which side of the vehicle the
fuel filler flap is located on.
Stop & Start
Never refuel with the engine in STOP
mode; you must switch off the ignition.
Refuelling
At least 8 litres of fuel must be added, in order to
be registered by the fuel gauge.
Opening the filler cap may create a noise caused
by an inrush of air. This is entirely normal and
results from the sealing of the fuel system.
To refuel in complete safety:
►
Always switch off the engine.
►
Unlock the vehicle using the Keyless Entry
and Start.
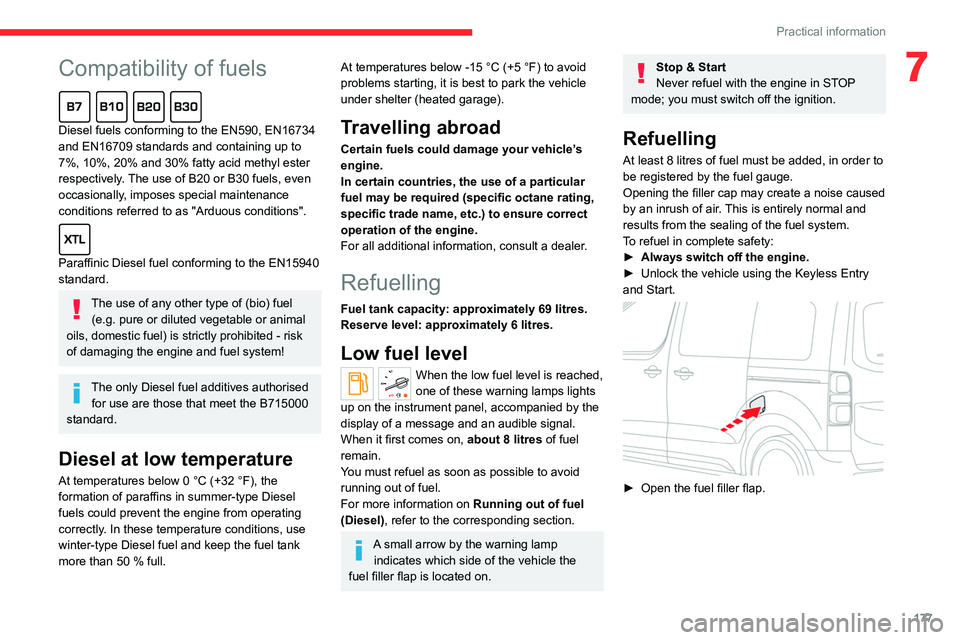
► Open the fuel filler flap.
Page 185 of 324

183
Practical information
7Standard charging, mode 2
Domestic socket
(standard charging - alternating current (AC))
Mode 2 with a standard socket: 8 A maximum
charging current.
Mode 2 with a Green'Up socket: 16 A
maximum charging current.
To have this type of socket installed, call a professional installer.
Specific domestic charging cable - mode 2 (AC)
Identification label C on the charging
connector (vehicle side).
Specific domestic charging cable
(mode 2)
You must not damage the cable.
In the event of damage, do not use it and
contact a CITROËN dealer or a qualified
workshop to replace it.
Control unit (mode 2)
POWER
Green: electrical connection established;
charging can begin.
CHARGE
Flashing green: charging in progress or
temperature pre-conditioning activated.
Fixed green: charging complete.
FAULT
Red: fault; charging not permitted or must
be stopped immediately. Check that everything
is connected correctly and that the electrical
system is not faulty. If the indicator lamp does not go off, contact a
CITROËN dealer or a qualified workshop.
Upon plugging the charging cable into a
domestic socket, all of the indicator lamps come
on briefly.
If no indicator lamps come on, check the
domestic socket's circuit-breaker:
–
If the circuit-breaker has tripped, contact a
professional to check that the electrical system
is compatible and/or carry out any necessary
repairs.
–
If the circuit-breaker has not tripped, stop
using the charging cable and contact a
CITROËN dealer or a qualified workshop.
Control unit label - Recommendations
Refer to the handbook before use.
1. Incorrect use of this charging cable may
result in fire, property damage and serious
injury or death by electrocution!
2. Always use a correctly earthed power
socket, protected by a 30
mA residual
current device.
3. Always use an electrical socket protected
by a circuit-breaker appropriate for the
electrical circuit’s current rating.
Page 192 of 324
190
Practical information
When charging is complete, the green
charging indicator lamp in the flap goes
out after about 2 minutes.
Domestic charging, mode 2
The end of charging is confirmed when the green
CHARGE indicator lamp on the control unit and
the green charging indicator lamp in the flap
come on fixed.
►
Replace the protective cover on the charging
nozzle and close the charging flap.
►
Disconnect the control unit end of the
charging cable from the domestic socket.
Accelerated charging, mode 3
The end of charging is indicated by the charging
control unit and by the fixed lighting of the green
indicator lamp in the flap.
►
Hang up the nozzle on the charging unit and
close the charging flap.
Superfast charging, mode 4
The end of charging is indicated by the charger
and by the fixed lighting of the green indicator
lamp in the flap.
► You can also pause charging by
pressing this button in the flap (in mode 4
only).
►
Hang up the nozzle on the charger
.
►
Depending on version, replace the protective
cover on the lower section and close the
charging flap.
When the charging nozzle is
disconnected, a message on the
instrument panel indicates that charging is
complete, even if the charging nozzle was
disconnected before full charging was
completed.
Energy economy mode
This system manages the duration of use of
certain functions, in order to conserve a sufficient
level of charge in the battery with the ignition off.
After switching off the engine and for a maximum
cumulative period of around 30 minutes, you can
continue to use functions such as the audio and
telematics system, dipped beam headlamps or
courtesy lamps.
Selecting the mode
A confirmation message is displayed when
energy economy mode is entered, and the active
functions are placed on standby.
If a telephone call is in progress at the
time, it will be maintained for around 10
minutes via the audio system’s hands-free
system.
Exiting the mode
These functions are automatically reactivated the
next time the vehicle is used.
To restore the use of these functions
immediately, start the engine and let it run:
–
For less than 10 minutes, to use the
equipment for approximately 5 minutes.
–
For more than 10 minutes, to use the
equipment for approximately 30 minutes.
Let the engine run for the specified duration to
ensure that the battery charge is sufficient.
T
o recharge the battery, avoid repeatedly or
continuously restarting the engine.
A flat battery prevents the engine from starting.
For more information on the 12
V battery,
refer to the corresponding section.
Load reduction mode
This system manages the use of certain
functions according to the level of charge
remaining in the battery.
When the vehicle is being driven, the load
reduction function temporarily deactivates certain
functions, such as the air conditioning and the
heated rear screen.
The deactivated functions are reactivated
automatically as soon as conditions permit.
Snow chains
In wintry conditions, snow chains improve
traction as well as the behaviour of the vehicle
when braking.
Page 195 of 324
193
Practical information
7or in certain moving components - risk of
strangulation and serious injury!
Electric motor
Take care with objects or clothing that
could be caught in the blades of the cooling
fan or in certain moving components - risk of
strangulation and serious injury!
Before carrying out any work under the
bonnet, you must switch off the ignition, check
that the READY indicator lamp is off on the
instrument panel and disconnect the nozzle
from the charging connector if it is connected.
The location of the interior bonnet release lever prevents the bonnet being
opened when the left-hand front door is
closed.
When the engine is hot, handle the
exterior safety catch and the bonnet stay
with care (risk of burns), using the protected
area.
When the bonnet is open, take care not to
damage the safety catch.
Do not open the bonnet under very windy
conditions.
Cooling of the engine when stopped
The engine cooling fan may start after
the engine has been switched off.
Take care with objects or clothing that
could be caught in the blades of the fan!
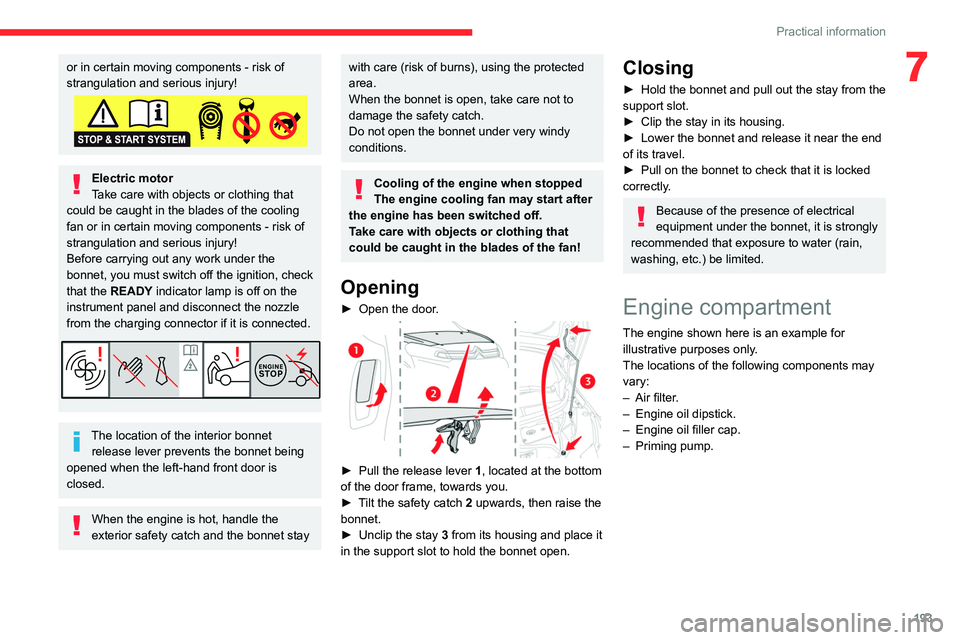
Opening
► Open the door .
► Pull the release lever 1 , located at the bottom
of the door frame, towards you.
►
T
ilt the safety catch 2 upwards, then raise the
bonnet.
►
Unclip the stay
3 from its housing and place it
in the support slot to hold the bonnet open.
Closing
► Hold the bonnet and pull out the stay from the
support slot.
►
Clip the stay in its housing.
►
Lower the bonnet and release it near the end
of its travel.
►
Pull on the bonnet to check that it is locked
correctly
.
Because of the presence of electrical
equipment under the bonnet, it is strongly
recommended that exposure to water (rain,
washing, etc.) be limited.
Engine compartment
The engine shown here is an example for
illustrative purposes only.
The locations of the following components may
vary:
–
Air filter
.
–
Engine oil dipstick.
–
Engine oil filler cap.
–
Priming pump.