ECU CITROEN JUMPY 2022 Owner's Guide
[x] Cancel search | Manufacturer: CITROEN, Model Year: 2022, Model line: JUMPY, Model: CITROEN JUMPY 2022Pages: 324, PDF Size: 10.05 MB
Page 209 of 324
207
In the event of a breakdown
8
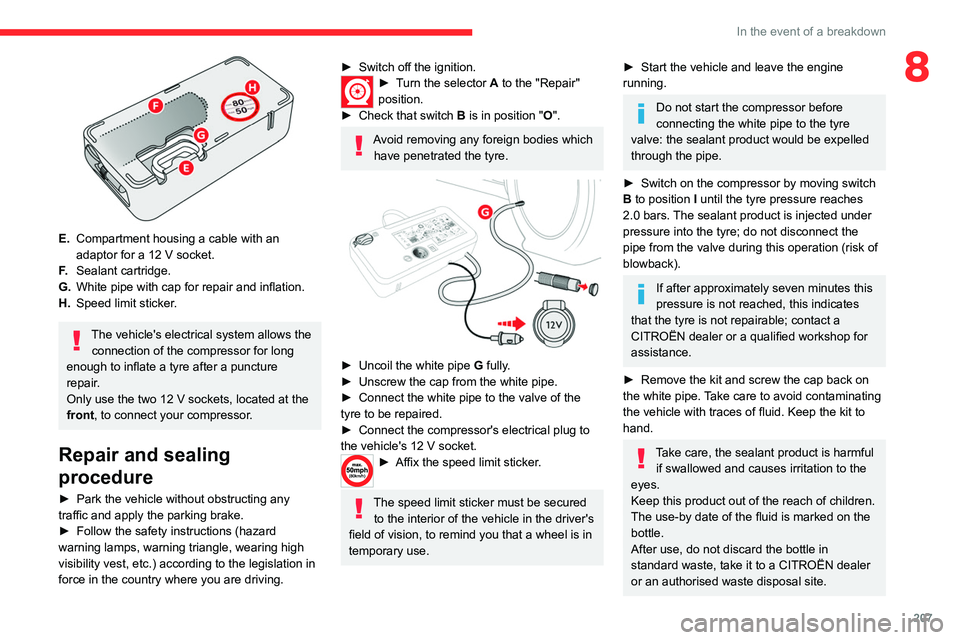
E.Compartment housing a cable with an
adaptor for a 12
V socket.
F. Sealant cartridge.
G. White pipe with cap for repair and inflation.
H. Speed limit sticker.
The vehicle's electrical system allows the
connection of the compressor for long
enough to inflate a tyre after a puncture
repair.
Only use the two 12 V sockets, located at the
front, to connect your compressor.
Repair and sealing
procedure
► Park the vehicle without obstructing any
traffic and apply the parking brake.
►
Follow the safety instructions (hazard
warning lamps, warning triangle, wearing high
visibility vest, etc.) according to the legislation in
force in the country where you are driving.
► Switch off the ignition.► Turn the selector A to the "Repair"
position.
►
Check that switch
B is in position " O".
Avoid removing any foreign bodies which
have penetrated the tyre.
► Uncoil the white pipe G fully.
► Unscrew the cap from the white pipe.
►
Connect the white pipe to the valve of the
tyre to be repaired.
►
Connect the compressor's electrical plug to
the vehicle's 12 V socket.
► Affix the speed li mit sticker.
The speed limit sticker must be secured
to the interior of the vehicle in the driver's
field of vision, to remind you that a wheel is in
temporary use.
► Start the vehicle and leave the engine
running.
Do not start the compressor before
connecting the white pipe to the tyre
valve: the sealant product would be expelled
through the pipe.
►
Switch on the compressor by moving switch
B
to position I until the tyre pressure reaches
2.0 bars. The sealant product is injected under
pressure into the tyre; do not disconnect the
pipe from the valve during this operation (risk of
blowback).
If after approximately seven minutes this
pressure is not reached, this indicates
that the tyre is not repairable; contact a
CITROËN dealer or a qualified workshop for
assistance.
►
Remove the kit and screw the cap back on
the white pipe.
Take care to avoid contaminating
the vehicle with traces of fluid. Keep the kit to
hand.
Take care, the sealant product is harmful if swallowed and causes irritation to the
eyes.
Keep this product out of the reach of children.
The use-by date of the fluid is marked on the
bottle.
After use, do not discard the bottle in
standard waste, take it to a CITROËN dealer
or an authorised waste disposal site.
Page 213 of 324
2 11
In the event of a breakdown
8Refit the spare wheel in the carrier
► Position the wheel facing the carrier.
► Progressively return the wheel to the carrier
by pushing alternately at the left and right until it
is clear of the hook fixing area.
►
Engage the carrier on the hook, then tighten
the bolt using the wheelbrace
until the bolt is fully
tightened.
Tyre in the carrier
You can change the size of the tyre on the spare
wheel by following the instructions below.
Original tyre
size XS-M
XL
215/65 R16 Placing a 225 wheel in the carrier is prohibited. There is no
restriction.
215/60 R17
215/60 R17
M&S
225/55 R17 Placing a 215 wheel in the
carrier is not
recommended (risk of noise).
A punctured tyre of size 215 or 225 can be placed in the carrier.
Removing a wheel
Parking the vehicle
Immobilise the vehicle where it does
not obstruct traffic: the ground must be level,
stable and non-slippery.
With a manual gearbox, engage first gear
then switch off the ignition to block the
wheels.
With an automatic gearbox, place the gear
selector in position P then switch off the
ignition to block the wheels.
With a drive selector, place the gear selector
in position P then switch off the ignition to
block the wheels.
Apply the parking brake, unless it is
programmed to automatic mode (for an
electric parking brake), and check that the
indicator lamp lights up on
the instrument
panel.
Ensure that the occupants have left the
vehicle and are located in a safe place.
Never go underneath a vehicle raised using a
jack; use an axle stand.
With an electric parking brake, place a chock
against the wheel diagonally opposite to the
one being replaced.
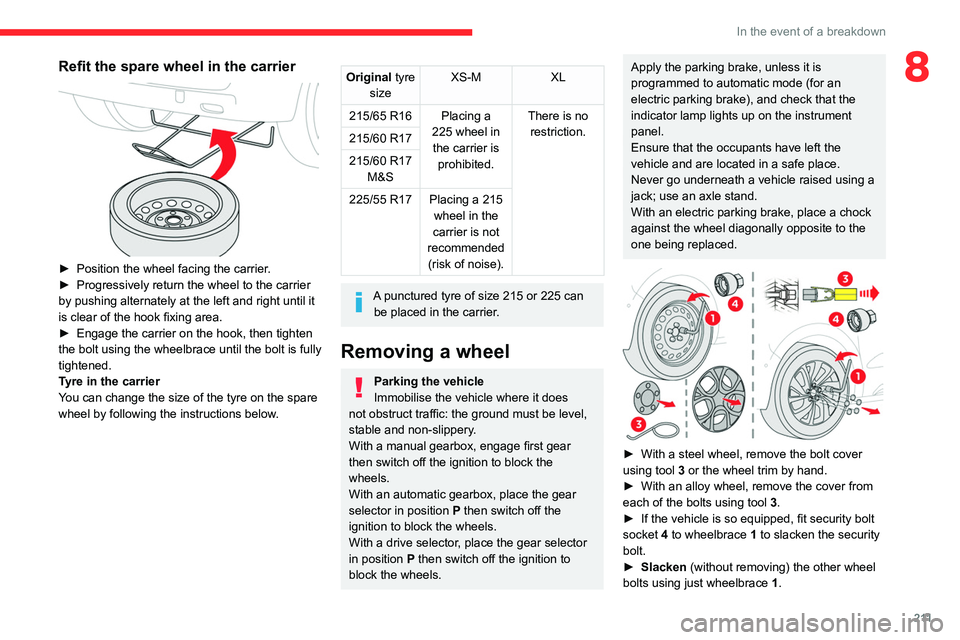
► With a steel wheel, remove the bolt cover
using tool 3
or the wheel trim by hand.
►
With an alloy wheel, remove the cover from
each of the bolts using tool 3
.
►
If the vehicle is so equipped, fit security bolt
socket
4 to wheelbrace 1 to slacken the security
bolt.
►
Slacken
(without removing) the other wheel
bolts using just wheelbrace 1.
Page 219 of 324
217
In the event of a breakdown
8
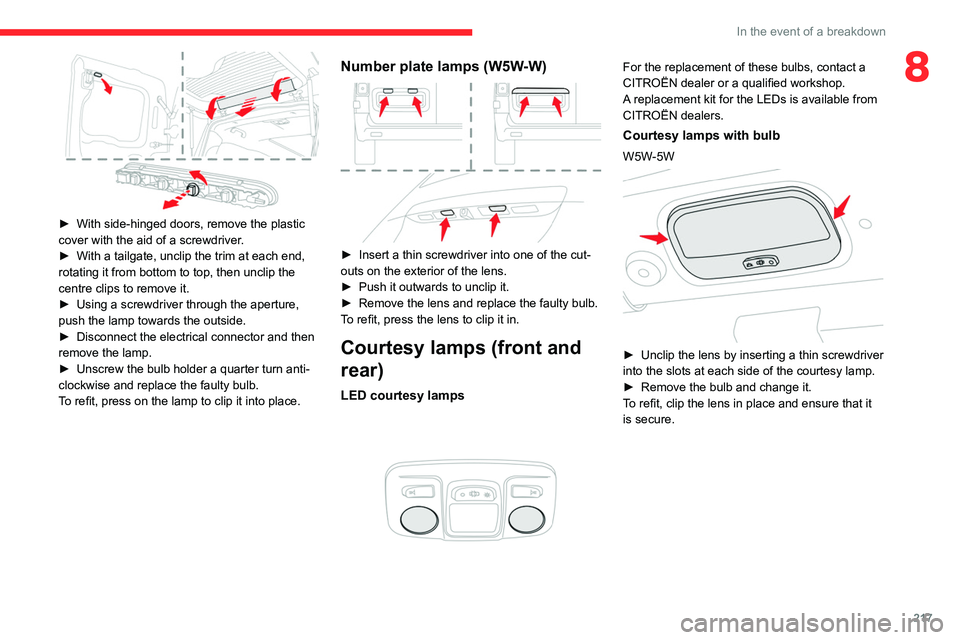
► With side-hinged doors, remove the plastic
cover with the aid of a screwdriver .
►
With a tailgate, unclip the trim at each end,
rotating it from bottom to top, then unclip the
centre clips to remove it.
►
Using a screwdriver through the aperture,
push the lamp towards the outside.
►
Disconnect the electrical connector and then
remove the lamp.
►
Unscrew the bulb holder a quarter turn anti-
clockwise and replace the faulty bulb.
T
o refit, press on the lamp to clip it into place.
Number plate lamps (W5W-W)
► Insert a thin screwdriver into one of the cut-
outs on the exterior of the lens.
►
Push it outwards to unclip it.
►
Remove the lens and replace the faulty bulb.
T
o refit, press the lens to clip it in.
Courtesy lamps (front and
rear)
LED courtesy lamps
For the replacement of these bulbs, contact a
CITROËN dealer or a qualified workshop.
A replacement kit for the LEDs is available from
CITROËN dealers.
Courtesy lamps with bulb
W5W-5W
► Unclip the lens by inserting a thin screwdriver
into the slots at each side of the courtesy lamp.
►
Remove the bulb and change it.
T
o refit, clip the lens in place and ensure that it
is secure.
Page 221 of 324
219
In the event of a breakdown
8Symbols
No sparks or naked flames, no smoking.
Always protect your eyes. Explosive gases can cause blindness and injury.
Keep the vehicle's battery out of the reach
of children.
The vehicle's battery contains sulphuric acid which can make you go blind or
cause severe burns.
For more information, refer to the
handbook.
Explosive gases can be present close to
the battery.
Always replace the battery with one of equivalent specification.
Access to the battery
The battery is located under the bonnet.
► Open the bonnet using the interior release
lever
, then the exterior safety catch.
►
Secure the bonnet stay
.
► Remove the plastic cover to access the (+)
terminal, if your vehicle has one.
The battery (-) terminal is not accessible.
There is a remote earth point near the battery
.
For more information on the Bonnet and
the Engine , refer to the corresponding
sections.
Starting using another
battery
If the vehicle's battery is flat, the engine can be
started using a backup battery (either external or
from another vehicle) and jump leads or using a
battery booster.
Never start the engine by connecting a
battery charger.
Never use a 24
V or higher battery booster.
Check beforehand that the backup battery
has a nominal voltage of 12
V and a capacity
at least equal to that of the discharged
battery.
The two vehicles must not be in contact with
each other.
Switch off all electricity-consuming equipment
on both vehicles (audio system, wipers,
lighting, etc.).
Make sure that the jump leads are well away
from the engine’s moving parts (fan, belt,
etc.).
Do not disconnect the (+) terminal while the
engine is running.
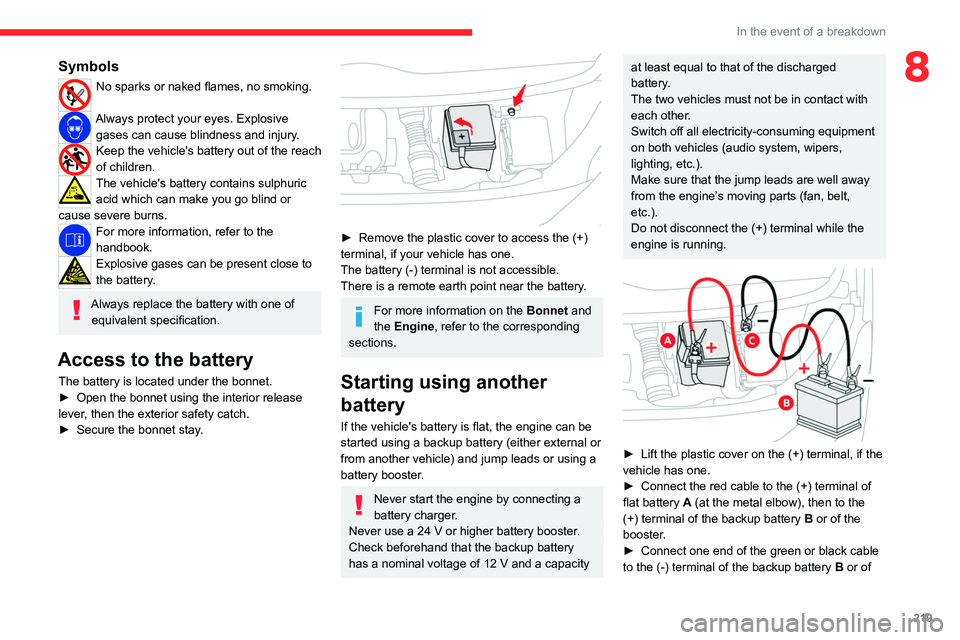
► Lift the plastic cover on the (+) terminal, if the
vehicle has one.
►
Connect the red cable to the (+) terminal of
flat battery
A (at the metal elbow), then to the
(+) terminal of the backup battery
B or of the
booster.
►
Connect one end of the green or black cable
to the (-) terminal of the backup battery
B or of
Page 273 of 324
271
MyCitroën Drive
12legislation and subscription to the
corresponding service.
Connected navigation
Connected navigation
connection
Depending on version, vehicle trim level and
subscription to online services and options.
Network connection provided by the
vehicle
With the Citroën Connect Box solution,
the system is automatically connected to
the Internet and connected services, and does
not require the user to provide a connection via
their smartphone.
OR
Network connection provided by the
user
For the list of compatible smartphones,
visit the Brand's website in your country.
Activate and enter settings for sharing the
smartphone connection.
As processes and standards are constantly changing, we recommend you
update the smartphone operating system
as well as the date and time on the
smartphone and system, to ensure that the
communication process between the
smartphone and the system functions
correctly.
USB connection
Connect the USB cable.
The smartphone charges when
connected by the USB cable.
Bluetooth connection
Activate the Bluetooth function on the telephone and ensure that it is visible to
all (see the "Connect-App" section).
Wi-Fi connection
Select a Wi-Fi network detected by the
system and connect to it.
This function is only available if it has been activated either via the
"Notifications" or via the "Applications" menu.
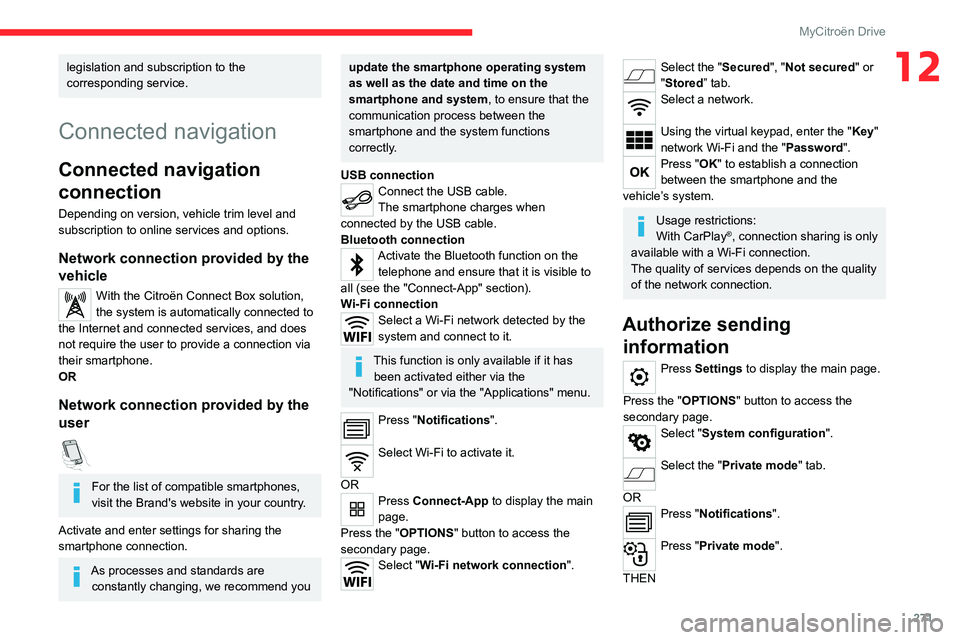
Press "Notifications".
Select Wi-Fi to activate it.
OR
Press Connect-App to display the main
page.
Press the "OPTIONS " button to access the
secondary page.
Select "Wi-Fi network connection".
Select the "Secured", "Not secured" or
"Stored” tab.
Select a network.
Using the virtual keypad, enter the "Key"
network Wi-Fi and the "Password".
Press "OK" to establish a connection
between the smartphone and the
vehicle’s system.
Usage restrictions:
With CarPlay®, connection sharing is only
available with a Wi-Fi connection.
The quality of services depends on the quality
of the network connection.
Authorize sending information
Press Settings to display the main page.
Press the "OPTIONS " button to access the
secondary page.
Select "System configuration".
Select the "Private mode" tab.
OR
Press "Notifications".
Press "Private mode".
THEN
Page 277 of 324
275
MyCitroën Drive
12Procedure from the smartphone
Select the name of the system in the list
of detected devices.
In the system, accept the connection request
from the smartphone.
Procedure from the system
Press Connect-App to display the main
page.
Press the "OPTIONS " button to access the
secondary page.
Press "Bluetooth connection".
Select "Search".
The list of detected smartphones is
displayed.
Select the name of the chosen
smartphone in the list.
Depending on the type of smartphone,
you may by prompted to accept the
transfer of contacts and messages.
Connection sharing
The system offers to connect the smartphone
with 3 profiles:
–
"Telephone" (hands-free kit, telephone only),
–
“Streaming" (streaming: wireless playing of
audio files on the smartphone),
–
"Mobile internet data ".
The "Mobile internet data " profile must
be activated for connected navigation (if
the vehicle does not have "Emergency and
assistance call" services), after first activating
smartphone connection sharing.
Select one or more profiles.
Press "OK" to confirm.
Wi-Fi connection
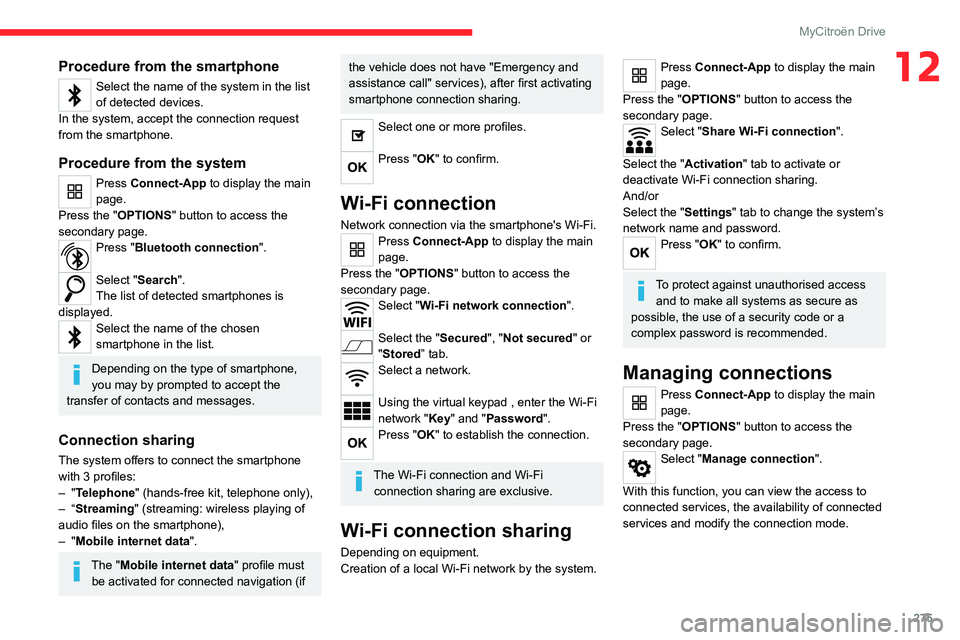
Network connection via the smartphone's Wi-Fi.Press Connect-App to display the main
page.
Press the "OPTIONS " button to access the
secondary page.
Select "Wi-Fi network connection".
Select the "Secured", "Not secured" or
"Stored” tab.
Select a network.
Using the virtual keypad , enter the Wi-Fi
network "Key" and "Password".
Press "OK" to establish the connection.
The Wi-Fi connection and Wi-Fi connection sharing are exclusive.
Wi-Fi connection sharing
Depending on equipment.
Creation of a local Wi-Fi network by the system.
Press Connect-App to display the main
page.
Press the "OPTIONS " button to access the
secondary page.
Select "Share Wi-Fi connection".
Select the "Activation" tab to activate or
deactivate Wi-Fi connection sharing.
And/or
Select the "Settings" tab to change the system’s
network name and password.
Press "OK" to confirm.
To protect against unauthorised access and to make all systems as secure as
possible, the use of a security code or a
complex password is recommended.
Managing connections
Press Connect-App to display the main
page.
Press the "OPTIONS " button to access the
secondary page.
Select "Manage connection".
With this function, you can view the access to
connected services, the availability of connected
services and modify the connection mode.
Page 290 of 324
288
Event data recorders
Depending on the vehicle's equipment level, this
may include:
–
Seat and steering wheel position settings.
–
Chassis and air conditioning settings.
–
Personalised settings such as the interior
lighting.
Y
ou can enter your own data into the functions
of your vehicle's audio and telematic system, as
part of the selected functionalities.
Depending on the vehicle's equipment level,
this
may
include:
–
Multimedia data such as music, videos or
photos to be read by an integrated multimedia
system.
–
Address book data to be used with an
integrated hands-free system or with an
integrated navigation system.
–
Entered destinations.
–
Data regarding the use of online services.
This data for the comfort and infotainment
functions may be stored locally in the vehicle
or saved to a device that you have connected
to the vehicle (e.g.
smartphone, USB memory
stick or MP3 player). Data that you have entered
yourself may be deleted at any time.
This data may also be transmitted outside the
vehicle at your request, particularly when using
online services in line with the settings that you
have selected. Smartphone integration
(e.g.
Android
Auto
® or
Apple
®CarPlay®)
If your vehicle is equipped accordingly, you can
connect your smartphone or another mobile
device to the vehicle in order to operate it using
the vehicle's integrated controls. Images and
sounds from the smartphone can be transmitted
through the audio and telematics system.
Specific information is simultaneously sent
to your smartphone. Depending on the type
of
integration, this includes data such as location,
day/night mode and other general information
about the vehicle. For more information, please
refer to the user instructions for the vehicle or the
audio and telematics system.
Integrating a smartphone allows you to use
its applications, such as a navigation app or
music player. No other
integration between
the smartphone and the vehicle is possible, in
particular active access to vehicle data. How the
data is processed subsequently is determined
by the supplier of the application being used.
The ability the change settings depends on the
application in question and on the operating
system installed on your smartphone.
Online services
If your vehicle is connected to a wireless
network, data can be exchanged between
your vehicle and other systems. Connection
to a wireless network is made possible
via a transmitter located in your vehicle or a mobile
device that you have provided (e.g.
smartphone).
The online services can be used via this wireless
connection.
These include online services and
applications (apps) provided to you by the
Manufacturer or other suppliers.
Exclusive services
As regards the Manufacturer's online services,
the corresponding functions are described by
the Manufacturer in an appropriate medium
(e.g.
handbook, Manufacturer's website) and the
information about data protection is provided.
Personal data may be used for online services.
The exchange of data for this purpose takes
place over a secure connection, using for
example the Manufacturer's dedicated computer
systems. The collection, processing and use of
personal data for the development of services
are carried out solely on the basis of a legal
authorisation, for example in the case of a
legal emergency call system or a contractual
agreement or else under a consent agreement.
You can activate or deactivate the services and
functions (some may be chargeable) and, in
some cases, the vehicle's entire connection to
the wireless network. This does not include the
statutory functions and services such as the
emergency or assistance call system.
Third-party services
If you use online services provided by other
(third-party) suppliers, these services are subject