ECO mode CITROEN JUMPY 2023 Owner's Guide
[x] Cancel search | Manufacturer: CITROEN, Model Year: 2023, Model line: JUMPY, Model: CITROEN JUMPY 2023Pages: 324, PDF Size: 10.05 MB
Page 158 of 324
156
Driving
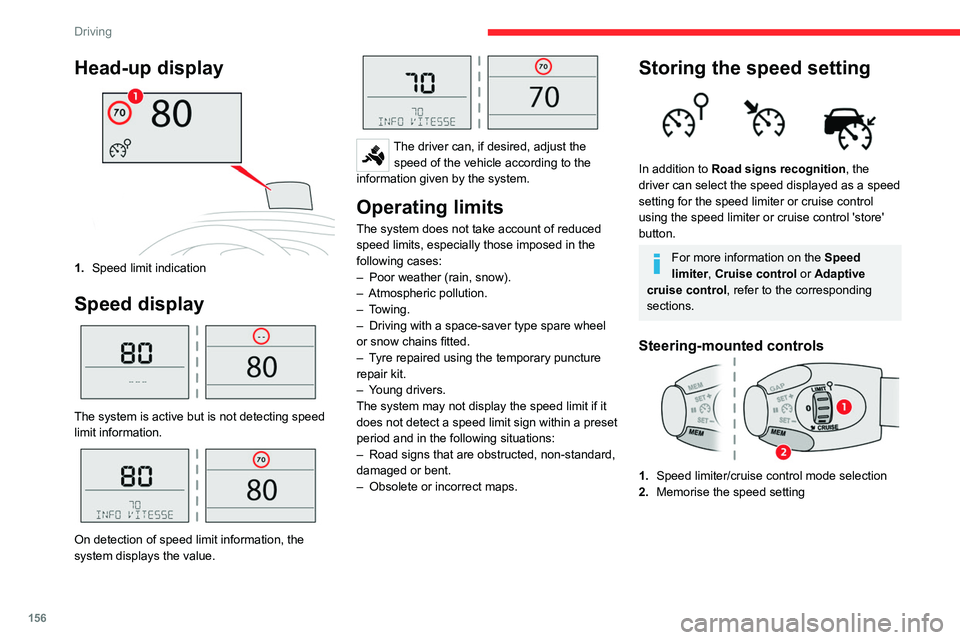
Head-up display
1.Speed limit indication
Speed display
The system is active but is not detecting speed
limit information.
On detection of speed limit information, the
system displays the value.
The driver can, if desired, adjust the
speed of the vehicle according to the
information given by the system.
Operating limits
The system does not take account of reduced
speed limits, especially those imposed in the
following cases:
–
Poor weather (rain, snow).
–
Atmospheric pollution.
–
Towing.
–
Driving with a space-saver type spare wheel
or snow chains fitted.
–
T
yre repaired using the temporary puncture
repair kit.
–
Y
oung drivers.
The system may not display the speed limit if it
does not detect a speed limit sign within a preset
period and in the following situations:
–
Road signs that are obstructed, non-standard,
damaged or bent.
–
Obsolete or incorrect maps.
Storing the speed setting
In addition to Road signs recognition , the
driver can select the speed displayed as a speed
setting for the speed limiter or cruise control
using the speed limiter or cruise control 'store'
button.
For more information on the Speed
limiter, Cruise control or Adaptive
cruise control, refer to the corresponding
sections.
Steering-mounted controls
1. Speed limiter/cruise control mode selection
2. Memorise the speed setting
Page 160 of 324
158
Driving
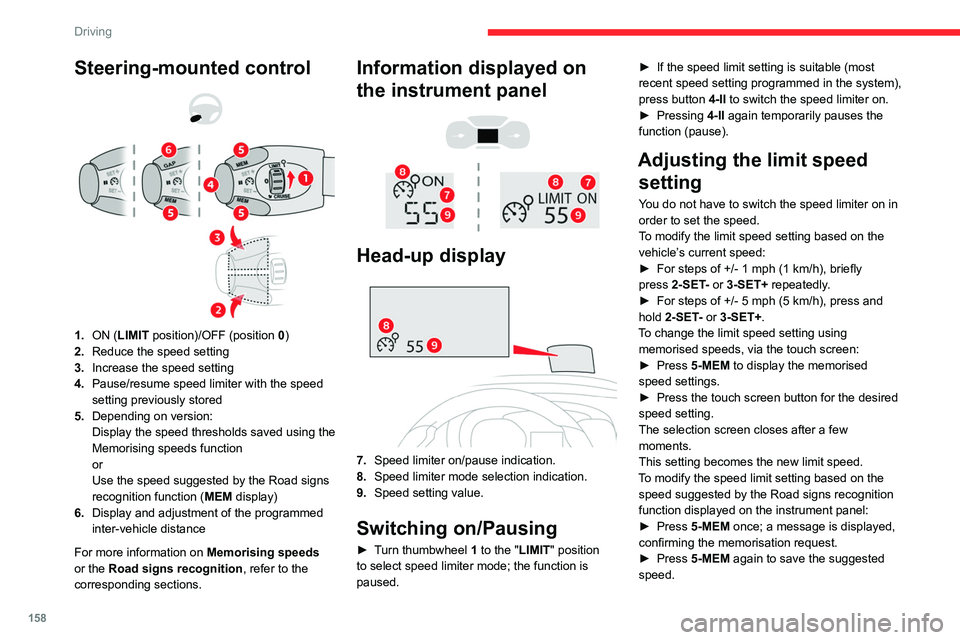
Steering-mounted control
1. ON (LIMIT position)/OFF (position 0)
2. Reduce the speed setting
3. Increase the speed setting
4. Pause/resume speed limiter with the speed
setting previously stored
5. Depending on version:
Display the speed thresholds saved using the
Memorising speeds function
or
Use the speed suggested by the Road signs
recognition function ( MEM display)
6. Display and adjustment of the programmed
inter-vehicle distance
For more information on Memorising speeds
or the Road signs recognition , refer to the
corresponding sections.
Information displayed on
the instrument panel
Head-up display
7. Speed limiter on/pause indication.
8. Speed limiter mode selection indication.
9. Speed setting value.
Switching on/Pausing
► Turn thumbwheel 1 to the "LIMIT" position
to select speed limiter mode; the function is
paused. ►
If the speed limit setting is suitable (most
recent speed setting programmed in the system),
press button
4-II to switch the speed limiter on.
►
Pressing
4-II again temporarily pauses the
function (pause).
Adjusting the limit speed setting
You do not have to switch the speed limiter on in
order to set the speed.
To modify the limit speed setting based on the
vehicle’s current speed:
►
For steps of +/- 1
mph (1 km/h), briefly
press
2-SET- or 3-SET+ repeatedly.
►
For steps of +/- 5
mph (5 km/h), press and
hold
2-SET- or 3-SET+.
To change the limit speed setting using memorised speeds, via the touch screen:
►
Press
5-MEM to display the memorised
speed settings.
►
Press the touch screen button for the desired
speed setting.
The selection screen closes after a few
moments.
This setting becomes the new limit speed.
T
o modify the speed limit setting based on the
speed suggested by the Road signs recognition
function displayed on the instrument panel:
►
Press
5-MEM once; a message is displayed,
confirming the memorisation request.
►
Press
5-MEM again to save the suggested
speed.
Page 162 of 324
160
Driving
Cruise control - Specific
recommendations.
This system automatically maintains the vehicle’s speed at the value programmed
by the driver (speed setting), without the use of
the accelerator pedal.
Cruise control is switched on manually.
It requires a minimum vehicle speed of 25 mph
(40
km/h).
With a manual gearbox, third gear or higher must
be engaged.
With an automatic gearbox, mode
D
or second
gear or higher in mode
M
must be engaged.
With a drive selector, mode
D or B must be
engaged.
Cruise control remains active after
changing gear, regardless of the gearbox
type, on engines fitted with the Stop & Start
function.
Switching off the ignition cancels any
speed setting.
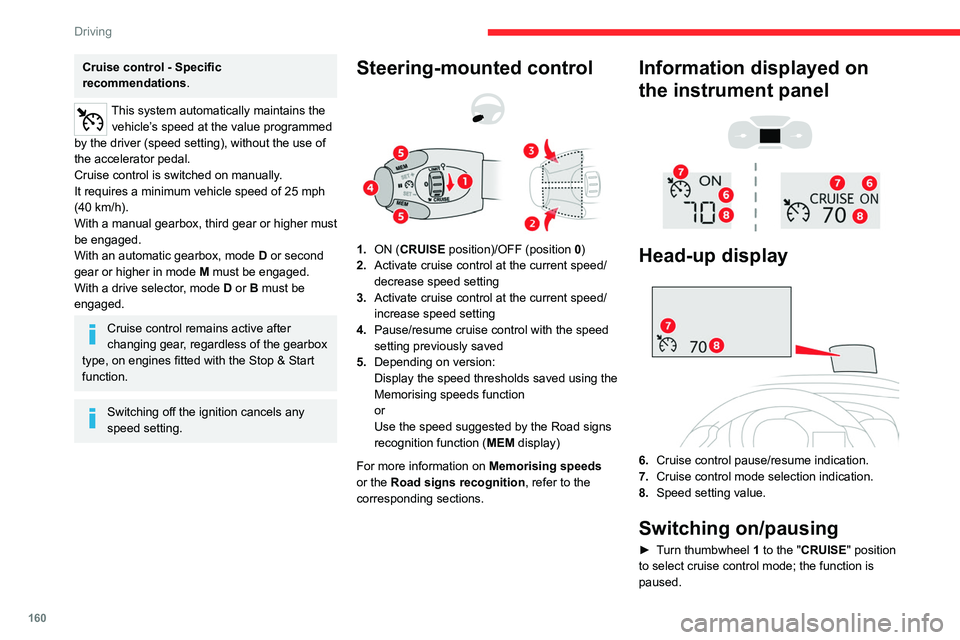
Steering-mounted control
1. ON (CRUISE position)/OFF (position 0)
2. Activate cruise control at the current speed/
decrease speed setting
3. Activate cruise control at the current speed/
increase speed setting
4. Pause/resume cruise control with the speed
setting previously saved
5. Depending on version:
Display the speed thresholds saved using the
Memorising speeds function
or
Use the speed suggested by the Road signs
recognition function ( MEM display)
For more information on Memorising speeds
or the Road signs recognition , refer to the
corresponding sections.
Information displayed on
the instrument panel
Head-up display
6. Cruise control pause/resume indication.
7. Cruise control mode selection indication.
8. Speed setting value.
Switching on/pausing
► Turn thumbwheel 1 to the "CRUISE" position
to select cruise control mode; the function is
paused.
Page 164 of 324

162
Driving
Adaptive cruise control
Refer to the General recommendations
on the use of driving and
manoeuvring aids and to Cruise control
- particular recommendations.
This system automatically maintains the speed of your vehicle at a value which
you set (speed setting), while keeping a safe
distance from the vehicle in front (target vehicle),
and which has been set beforehand by the
driver. The system controls the vehicle's
acceleration and deceleration automatically
using only engine braking (as if the driver had
pressed the "-" minus button).
To do this, it uses a radar located in the front
bumper.
Primarily designed for driving on main
roads and motorways, this system only
works with moving vehicles driving in the
same direction as your vehicle.
If the driver operates a direction indicator
to overtake a slower vehicle, the cruise
control allows the vehicle to temporarily
approach the vehicle in front to assist the
overtaking manoeuvre, without ever
exceeding the speed setting.
Some vehicles present on the road may
not be properly seen or may be
misinterpreted by the radar (e.g. a lorry),
which may lead to a poor assessment of
distance and lead to the vehicle accelerating
or braking inappropriately.
Steering-mounted controls
1. ON (CRUISE position)/OFF (position 0)
2. Activation of cruise control at the current
speed/decrease speed setting
3. Activation of cruise control at the current
speed/increase speed setting
4. Pause/resume cruise control with the speed
setting previously saved
5.Depending on version:
Display the speed thresholds saved using the
Memorising speeds function
or
Use the speed suggested by the Road signs
recognition function ( MEM display)
6. Display and adjustment of the distance
setting to the vehicle in front
Use
Activating the system (paused)
The adaptive cruise control must be selected in
the "Driving/Vehicle" menu.
►
T
urn the knob 1 downwards into the CRUISE
position with the engine running. The cruise
control is ready for operation.
Starting cruise control and selecting a
speed
The vehicle speed must be between 25 and
93 mph (40 and 150 km/h).
With a manual gearbox, third or fourth gear or
higher must be engaged.
With an automatic gearbox, mode
D
or second
gear or higher in mode
M
must be engaged.
With a drive selector, mode
D or B must be
engaged.
If the speed setting is above 93 mph
(150 km/h), the adaptive cruise control
switches to standard cruise control mode
Page 165 of 324

163
Driving
6(without automatic regulation of the inter-
vehicle safety distance).
►
Press buttons
2-SET- or 3-SET+: the current
speed becomes the
speed setting (minimum
25
mph (40 km/h)) and the cruise control is
immediately activated.
►
Press
3 to increase or 2 to decrease the
speed setting (in steps of 5 mph (5 km/h) if the
button is kept depressed).
Pressing and holding either button
2-SET- or 3-SET+ results in a rapid
change in the speed of the vehicle.
Pausing/resuming cruise control
► Press 4-II or depress the brake pedal. To
pause cruise control, it is also possible to: •
Shift from mode
D to N,
•
Depress the clutch pedal for more than 10
seconds.
•
Press the electric parking brake control.
►
Press
4-II to restart cruise control. Cruise
control may have been paused automatically: •
When the inter-vehicle distance threshold is
reached.
•
When the distance between your vehicle and
the one in front becomes too short.
•
When the vehicle starts moving too slowly or
the vehicle in front starts moving too slowly
.
•
When the ESC system is triggered.
When the driver attempts to reactivate
cruise control, after the function has been
paused, the message "Activation not possible,
unsuitable conditions" is briefly displayed if
reactivation is not possible (safety conditions
not met).
Using the Road signs recognition function
or speed limit sign memorisation to
modify the speed setting.
► Press 5-MEM to accept the speed setting
proposed by the system on the instrument panel
or touch screen, then press again to confirm.
To prevent any sudden acceleration or deceleration of the vehicle, select a
speed setting fairly close to the current speed
of your vehicle.
Changing the inter-vehicle distance
► Press 6 to display the distance setting
thresholds ("Distant", "Normal" or "Close"), then
press again to select a threshold.
After a few seconds, the option is accepted and
will be memorised when the ignition is switched
off.
Temporarily exceeding the speed setting
► Depress the accelerator pedal. Distance
monitoring and cruise control are deactivated as
long as you continue to accelerate.
The speed
on the instrument panel flashes.
Deactivating the system
► Turn the knob 1 upwards into position 0
(OFF).
Information displayed on
the instrument panel
Head-up display
7. Cruise control pause/resume indication.
8. Indication of selection of cruise control mode,
or vehicle speed adjustment phase.
9. Speed setting value.
Page 166 of 324

164
Driving
For more information on the Head-up
display, refer to the corresponding
section.
Messages and alerts
The display of these messages or alerts is not sequential.
“Cruise control paused” or “Cruise control
suspended” following a brief acceleration
by the driver.
“Cruise control active”, no vehicle
detected.
“Cruise control active”, vehicle detected.
“Cruise control active and speed
adjusted”, vehicle detected too close or at
a slower speed.
“Cruise control active and speed
adjusted”, automatic deactivation
imminent following a cruise control limit being
reached.
“Cruise control paused”, automatic
deactivation following speed limit
adjustment being exceeded and no reaction from
the driver.
Operating limits
The regulation range is limited to a maximum
difference of 19 mph (30 km/h) between the
cruise speed setting and the speed of the
vehicle in front. Above this, the system pauses itself if the safety
distance becomes too short.
The adaptive cruise control uses only engine
braking to slow the vehicle. Consequently the
vehicle loses speed slowly, as when releasing
the accelerator pedal.
The system is paused automatically:
–
if the vehicle in front slows down too much or
too suddenly
, and the driver does not brake,
–
if a vehicle comes between your vehicle and
the vehicle in front,
–
if the system does not slow the vehicle enough
to continue to maintain a safe distance, for
example when descending a steep hill.
Cases of non-detection by the radar:
–
Stationary vehicles (traffic jam, breakdown,
etc.).
–
V
ehicles driving in the opposite direction.
When the driver must suspend the cruise
control system:
– When following a narrow vehicle.
– Vehicles not running in the middle of the lane.
– Vehicles entering a corner.
– V ehicles changing lane at the last moment.
Reactivate cruise control when conditions permit.
Cases where the driver is urged to take back
control immediately:
–
When a vehicle cuts in sharply between your
vehicle and the one in front.
–
Excessively sharp deceleration of the vehicle
in front of you.
The adaptive cruise control operates by day and night, in fog or moderate rainfall.
The system does not act on the braking system, but works only with engine
braking.
The regulation range is limited: there will
no longer be any adjustment of speed if the
difference between the programmed speed
Page 170 of 324
168
Driving
The brake pedal may feel hard and vibrate slightly while the function is
operating.
If the vehicle comes to a complete stop,
automatic braking is maintained for 1 to 2
seconds.
Deactivation/Activation
By default, the system is automatically activated
at every engine start.
The settings are changed via the vehicle configuration menu.
Deactivation of the system is signalled by
the illumination of this warning lamp,
accompanied by the display of a message.
Malfunction
This warning lamp lights up on the instrument panel with the message
"Sensor blind " in certain cases.
Version with camera only: the system is
deactivated.
Version with camera and radar: the system
may continue to operate in a degraded mode.
This may be caused by a reduced visibility
(e.g.
rain, fog, snow, blinding by low sun) or by
a real sensor blockage. In this case, stop the
vehicle and verify if the front camera or the front
radar is covered by dirt, snow, ice or anything
preventing the sensing.
In the event of a malfunction, this warning
lamp lights up on the instrument panel,
accompanied by the display of a message and
an audible signal.
Have it checked by a CITROËN dealer or a
qualified workshop.
If these warning lamps come on after the
engine has been switched off and then
restarted, contact a CITROËN dealer or a
qualified workshop to have the system checked.
These warning lamps light up on the instrument panel and/or in the
warning lamp display for seat belts and front
passenger airbag to indicate that the driver's
and/or front passenger's seat belt is not fastened
(depending on version). The automatic braking
system is deactivated until the seat belts are
fastened.
Lane departure warning
system
For more information, refer to the
General recommendations on the use
of driving and manoeuvring aids .
System that uses a camera to recognise
continuous or broken lines on traffic lanes and
triggers an alert if the vehicle wanders off line.
If the direction indicator is not used at speeds
above 50 mph (80
km/h) and there is a risk of
one of these lines on the road surface being
crossed, the system triggers the alert.
This system is particularly useful on motorways
and main roads.
Detection - Alert
You are alerted by the flashing of this warning lamp in the instrument panel,
accompanied by an audible signal.
No warning is transmitted while the
direction indicator is active and for
approximately 20 seconds after the direction
indicator is switched off.
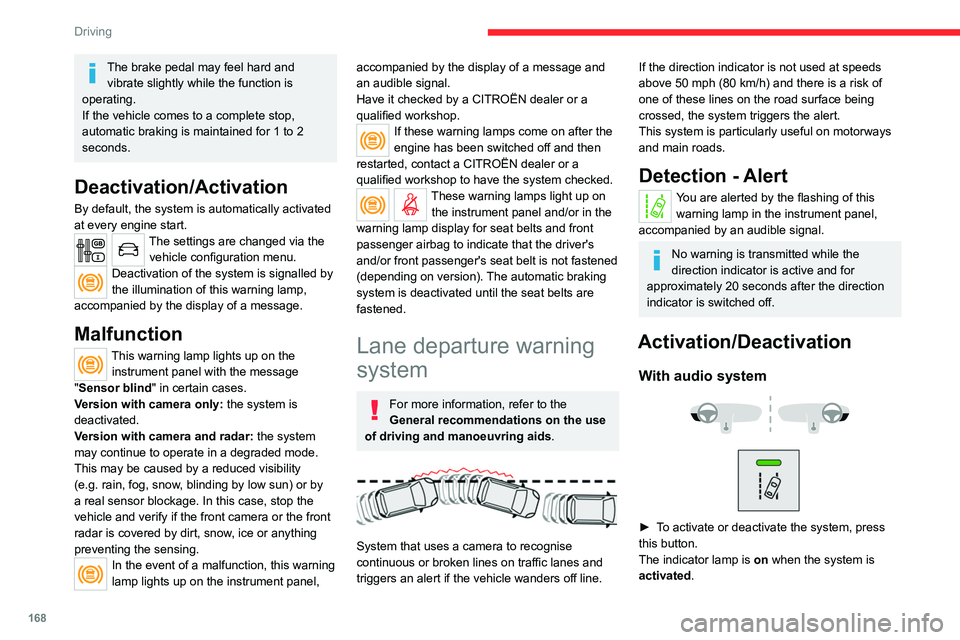
Activation/Deactivation
With audio system
► To activate or deactivate the system, press
this button.
The indicator lamp is on when the system is
activated.
Page 175 of 324

173
Driving
6Operating limits
If the boot is heavily loaded, the vehicle may tilt,
affecting distance measurements.
Malfunction
In the event of a malfunction when
changing into reverse gear, this warning
lamp lights up on the instrument panel,
accompanied by the display of a message and
an audible signal (short beep).
Have it checked by a CITROËN dealer or a
qualified workshop.
Top Rear Vision
For more information, refer to the
General recommendations on the use
of driving and manoeuvring aids .
As soon as reverse gear is engaged with the
engine running, this system displays views of
your vehicle’s close surroundings on the touch screen using a camera located at the rear of the
vehicle.
The screen is divided into two parts with a
contextual view and a view from above the
vehicle in its close surroundings.
The parking sensors supplement the information
on the view from above the vehicle.
Various contextual views may be displayed:
–
Standard view
.
–
180° view
.
–
Zoom view
.
AUTO mode is activated by default.
In this mode, the system chooses the best view
to display
(standard or zoom).
You can change the type of view at any time
during a manoeuvre.
The system status is not saved when the ignition
is switched off.
Principle of operation
Using the rear camera, the vehicle's close
surroundings are recorded during manoeuvres
at low speed.
An image from above your vehicle in its close
surroundings is reconstructed (represented
between the brackets) in real time and as the
manoeuvre progresses.
It facilitates the alignment of your vehicle when
parking and allows obstacles close to the vehicle
to be seen. It is automatically deleted if the
vehicle remains stationary for too long.
The display disappears above approximately 6 mph (10 km/h).
The system is automatically deactivated
about 7 seconds after coming out of reverse
or on opening a door or the boot.
Activation
Activation is automatic on engaging reverse gear
at a speed lower than 6 mph (10 km/h).
Page 176 of 324
174
Driving
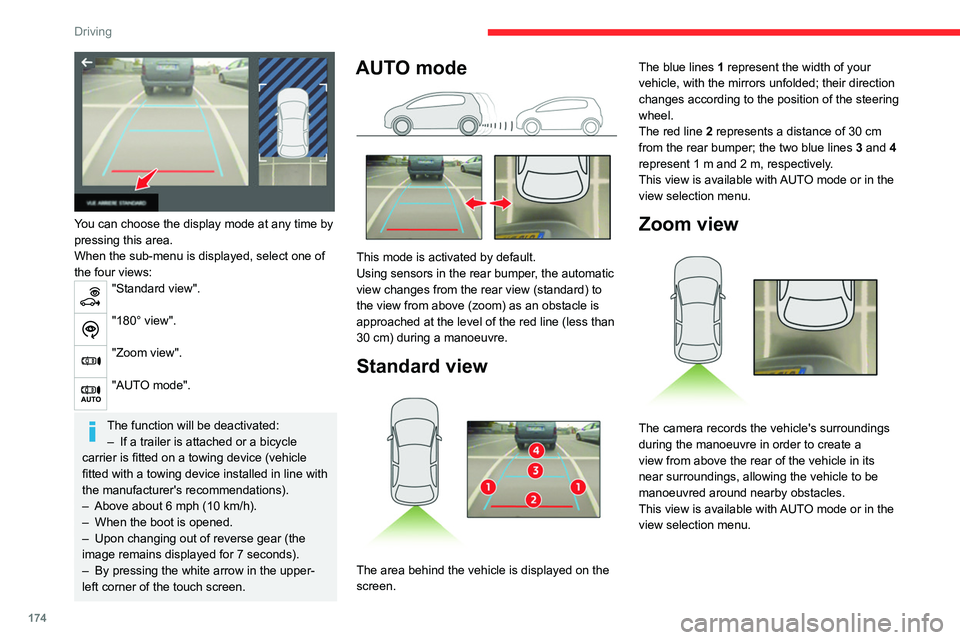
You can choose the display mode at any time by
pressing this area.
When the sub-menu is displayed, select one of
the four views:
"Standard view".
"180° view".
"Zoom view".
"AUTO mode".
The function will be deactivated:– If a trailer is attached or a bicycle
carrier is fitted on a towing device (vehicle
fitted with a towing device installed in line with
the manufacturer's recommendations).
–
Above about 6
mph (10 km/h).
–
When the boot is opened.
–
Upon changing out of reverse gear (the
image remains displayed for 7
seconds).
–
By pressing the white arrow in the upper-
left corner of the touch screen.
AUTO mode
This mode is activated by default.
Using sensors in the rear bumper, the automatic
view changes from the rear view (standard) to
the view from above (zoom) as an obstacle is
approached at the level of the red line (less than
30
cm) during a manoeuvre.
Standard view
The area behind the vehicle is displayed on the
screen. The blue lines
1 represent the width of your
vehicle, with the mirrors unfolded; their direction
changes according to the position of the steering
wheel.
The red line 2 represents a distance of 30 cm
from the rear bumper; the two blue lines 3 and 4
represent 1 m and 2 m, respectively.
This view is available with AUTO mode or in the
view selection menu.
Zoom view
The camera records the vehicle's surroundings
during the manoeuvre in order to create a
view from above the rear of the vehicle in its
near surroundings, allowing the vehicle to be
manoeuvred around nearby obstacles.
This view is available with AUTO mode or in the
view selection menu.
Page 177 of 324

175
Driving
6Obstacles may appear further away than
they actually are.
It is important to monitor the sides of the
vehicle during the manoeuvre, using the
mirrors.
Parking sensors also provide additional
information about the area around the vehicle.
180° view
The 180° view facilitates reversing out of a
parking space, making it possible to see the
approach of vehicles, pedestrians and cyclists.
This view is not recommended for carrying out a
complete manoeuvre.
It features 3 areas: left A, centre B and right C. This view is only available via the view selection
menu.
Quick start mode
This mode displays, as quickly as possible, the
contextual view (left-hand part) and the overhead
view of the vehicle.
A message is displayed advising you to check
your vehicle's surroundings before starting the
manoeuvre.