start stop button CITROEN JUMPY 2023 Owners Manual
[x] Cancel search | Manufacturer: CITROEN, Model Year: 2023, Model line: JUMPY, Model: CITROEN JUMPY 2023Pages: 324, PDF Size: 10.05 MB
Page 6 of 324
4
Overview
Presentation
Instruments and controls
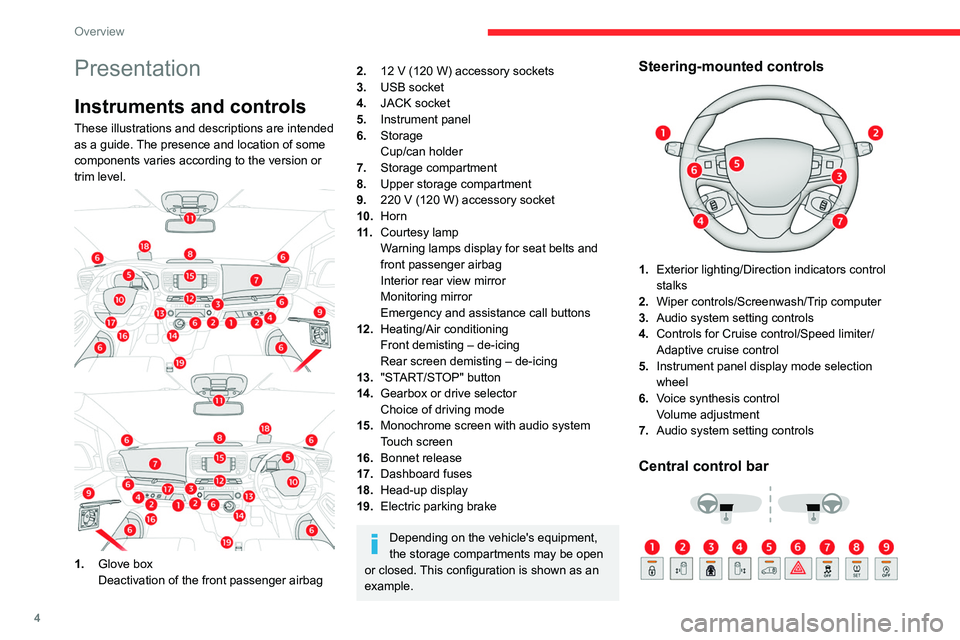
These illustrations and descriptions are intended
as a guide. The presence and location of some
components varies according to the version or
trim level.
1.Glove box
Deactivation of the front passenger airbag
2.12 V (120 W) accessory sockets
3. USB socket
4. JACK socket
5. Instrument panel
6. Storage
Cup/can holder
7. Storage compartment
8. Upper storage compartment
9. 220
V (120 W) accessory socket
10.Horn
11
.Courtesy lamp
Warning lamps display for seat belts and
front passenger airbag
Interior rear view mirror
Monitoring mirror
Emergency and assistance call buttons
12. Heating/Air conditioning
Front demisting – de-icing
Rear screen demisting – de-icing
13. "START/STOP" button
14. Gearbox or drive selector
Choice of driving mode
15. Monochrome screen with audio system
Touch screen
16. Bonnet release
17. Dashboard fuses
18. Head-up display
19. Electric parking brake
Depending on the vehicle's equipment,
the storage compartments may be open
or closed. This configuration is shown as an
example.
Steering-mounted controls
1. Exterior lighting/Direction indicators control
stalks
2. Wiper controls/Screenwash/Trip computer
3. Audio system setting controls
4. Controls for Cruise control/Speed limiter/
Adaptive cruise control
5. Instrument panel display mode selection
wheel
6. Voice synthesis control
Volume adjustment
7. Audio system setting controls
Central control bar
Page 25 of 324
23
Dashboard instruments
1
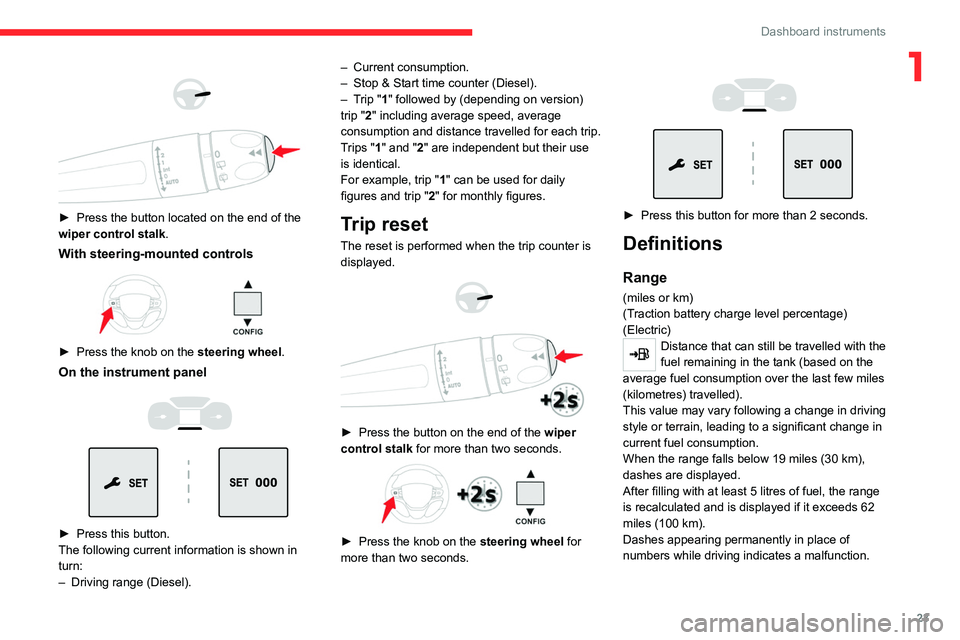
► Press the button located on the end of the
wiper control stalk .
With steering-mounted controls
► Press the knob on the steering wheel.
On the instrument panel
► Press this button.
The following current information is shown in
turn:
–
Driving range (Diesel). –
Current consumption.
–
Stop & Start time counter (Diesel).
–
T
rip "1" followed by (depending on version)
trip "2" including average speed, average
consumption and distance travelled for each trip.
Trips "1" and "2" are independent but their use
is identical.
For example, trip "1" can be used for daily
figures and trip " 2" for monthly figures.
Trip reset
The reset is performed when the trip counter is
displayed.
► Press the button on the end of the wiper
control stalk for more than two seconds.
► Press the knob on the steering wheel for
more than two seconds.
► Press this button for more than 2 seconds.
Definitions
Range
(miles or km)
(Traction battery charge level percentage)
(Electric)
Distance that can still be travelled with the
fuel remaining in the tank (based on the
average fuel consumption over the last few miles
(kilometres) travelled).
This value may vary following a change in driving
style or terrain, leading to a significant change in
current fuel consumption.
When the range falls below 19 miles (30
km),
dashes are displayed.
After filling with at least 5 litres of fuel, the range
is recalculated and is displayed if it exceeds 62
miles (100
km).
Dashes appearing permanently in place of
numbers while driving indicates a malfunction.
Page 26 of 324
24
Dashboard instruments
Contact a CITROËN dealer or a qualified
workshop.
Current consumption
(mpg or l/100 km or km/l)
(miles/kWh or kWh/100 km or km/kWh) (Electric)
/Calculated during the last few
seconds.
This function is only displayed at speeds above
19 mph (30
km/h) (Diesel).
Average consumption
(mpg or l/100 km or km/l)
(miles/kWh or kWh/100 km or km/kWh) (Electric)
/Calculated since the last trip
computer reset.
Average speed
(mph or km/h)Calculated since the last trip computer
reset.
Distance travelled
(miles or km)Calculated since the last trip computer
reset.
Stop & Start time counter
(minutes/seconds or hours/minutes)
If your vehicle is fitted with the Stop & Start
function, a time counter calculates the time spent
in STOP mode during a journey.
The time counter is reset each time the ignition is
switched on.
Touch screen
This system gives access to the following elements:
–
Permanent display of the time and outside
temperature (a blue warning lamp appears if
there is a risk of ice).
–
V
ehicle functions and equipment setting
menus.
–
Audio system and telephone controls and
display of related information.
–
Display of visual manoeuvring aid functions
–
Internet services and display of
related
information.
–
Navigation system controls and
display
of related information (depending on
version).
For safety reasons, always stop the
vehicle before performing operations
that require sustained attention.
Some functions are not accessible while
driving.
Recommendations
This screen uses capacitive sensing technology.
– Do not use pointed objects on the touch
screen.
–
Do not touch the touch screen with wet hands.
– Use a soft, clean cloth to clean the touch
screen.
Principles
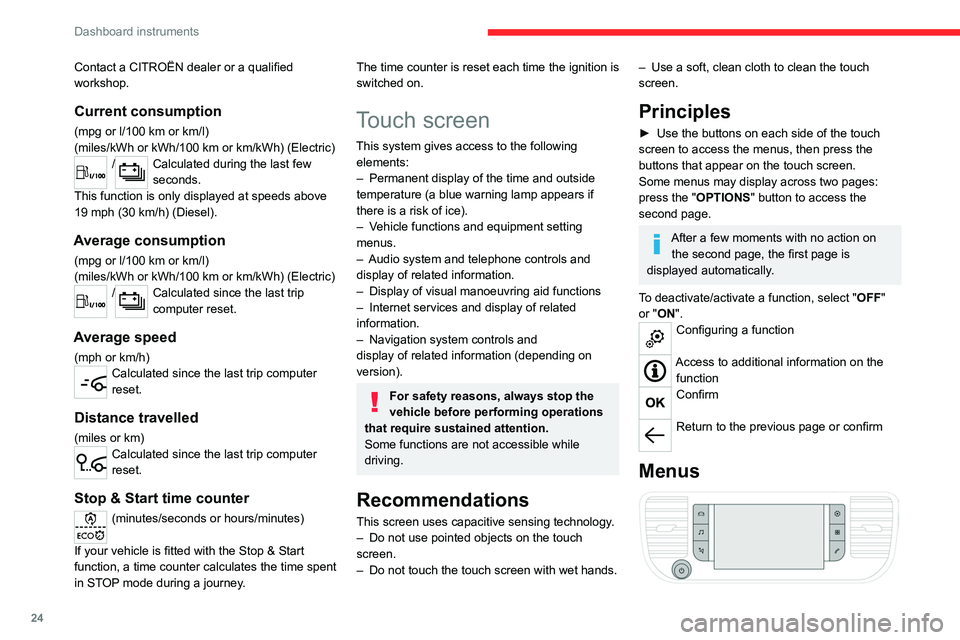
► Use the buttons on each side of the touch
screen to access the menus, then press the
buttons that appear on the touch screen.
Some menus may display across two pages:
press the "
OPTIONS" button to access the
second page.
After a few moments with no action on the second page, the first page is
displayed automatically.
To deactivate/activate a function, select " OFF"
or "ON".
Configuring a function
Access to additional information on the function
Confirm
Return to the previous page or confirm
Menus
Page 31 of 324
29
Access
2
► Keep this button 1 pulled while removing
key 2 from the housing.
If the alarm is activated, the audible
signal triggered on opening a door with
the key (integral with the remote control) will
stop when the ignition is switched on.
Once the built-in key is ejected, always
keep it with you to be able to carry out
the corresponding back-up procedures.
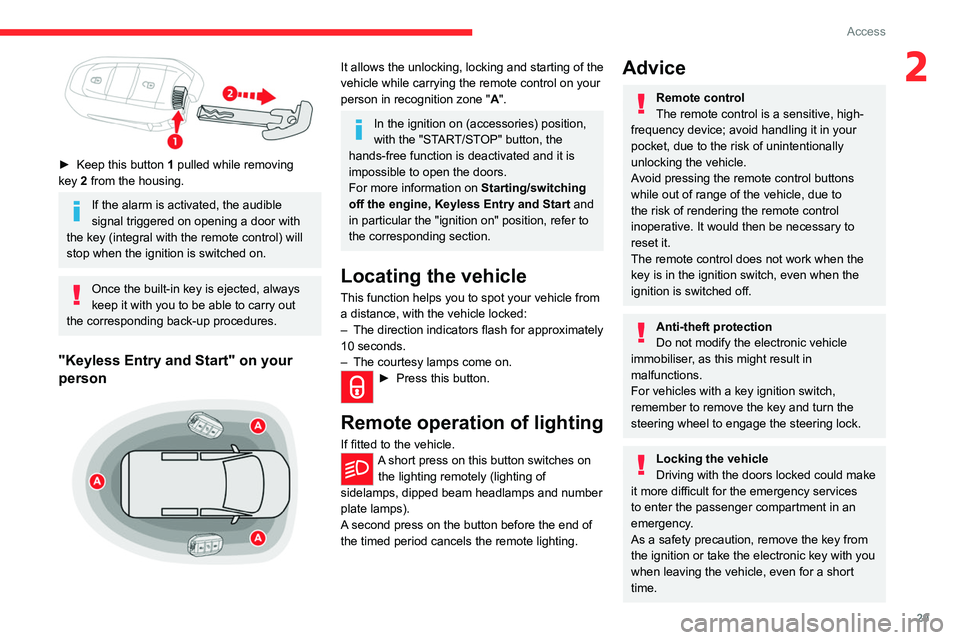
"Keyless Entry and Start" on your
person
It allows the unlocking, locking and starting of the
vehicle while carrying the remote control on your
person in recognition zone " A".
In the ignition on (accessories) position,
with the "START/STOP" button, the
hands-free function is deactivated and it is
impossible to open the doors.
For more information on Starting/switching
off the engine,
Keyless Entry and Start and
in particular the "ignition on" position, refer to
the corresponding section.
Locating the vehicle
This function helps you to spot your vehicle from
a distance, with the vehicle locked:
–
The direction indicators flash for approximately
10 seconds.
–
The courtesy lamps come on.
► Press this button.
Remote operation of lighting
If fitted to the vehicle.A short press on this button switches on
the lighting remotely (lighting of
sidelamps, dipped beam headlamps and number
plate lamps).
A second press on the button before the end of
the timed period cancels the remote lighting.
Advice
Remote control
The remote control is a sensitive, high-
frequency device; avoid handling it in your
pocket, due to the risk of unintentionally
unlocking the vehicle.
Avoid pressing the remote control buttons
while out of range of the vehicle, due to
the risk of rendering the remote control
inoperative. It would then be necessary to
reset it.
The remote control does not work
when the
key is in the ignition switch, even when the
ignition is switched off.
Anti-theft protection
Do not modify the electronic vehicle
immobiliser, as this might result in
malfunctions.
For vehicles with a key ignition switch,
remember to remove the key and turn the
steering wheel to engage the steering lock.
Locking the vehicle
Driving with the doors locked could make
it more difficult for the emergency services
to enter the passenger compartment in an
emergency.
As a safety precaution, remove the key from
the ignition or take the electronic key with you
when leaving the vehicle, even for a short
time.
Page 33 of 324
31
Access
2Unlocking/Complete
unlocking
Unlocking is signalled by rapid flashing of
the direction indicators for a few
seconds.
Depending on version, the door mirrors unfold
and the alarm is deactivated.
With the key
► To unlock the vehicle fully, turn the key in the
front left-hand door lock towards the front of the
vehicle.
If the vehicle has an alarm, it will not be
deactivated. Opening a door will trigger the
alarm, which can be stopped by switching the
ignition on.
With the remote control
► Depending on equipm ent,
press one of these buttons to
unlock the vehicle.
Using the remote control with electric
sliding side door(s)
► To fully unlock the vehicle and open
the side door, press and hold this button
until the door has opened.
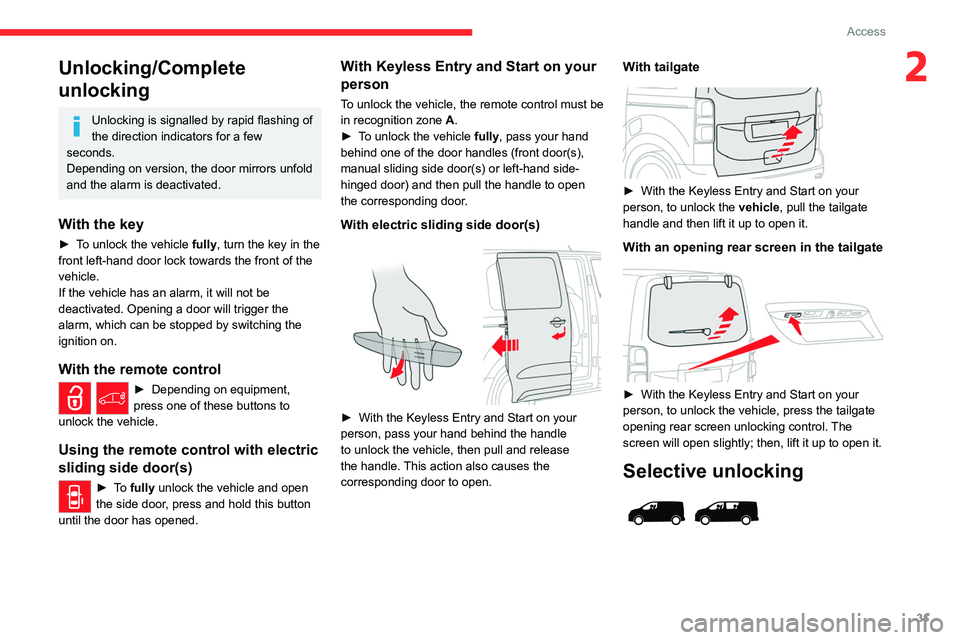
With Keyless Entry and Start on your
person
To unlock the vehicle, the remote control must be
in recognition zone A.
►
T
o unlock the vehicle fully, pass your hand
behind one of the door handles (front door(s),
manual sliding side door(s) or left-hand side-
hinged door) and then pull the handle to open
the corresponding door.
With electric sliding side door(s)
► With the Keyless Entry and Start on your
person, pass your hand behind the handle
to unlock the vehicle, then pull and release
the handle.
This action also causes the
corresponding door to open.
With tailgate
► With the Keyless Entry and Start on your
person, to unlock the vehicle, pull the tailgate
handle and then lift it up to open it.
With an opening rear screen in the tailgate
► With the Keyless Entry and Start on your
person, to unlock the vehicle, press the tailgate
opening rear screen unlocking control.
The
screen will open slightly; then, lift it up to open it.
Selective unlocking
Page 35 of 324
33
Access
2Locking
With the key
► To lock the vehicle fully, turn the key in the
front left-hand door lock towards the rear of the
vehicle.
If your vehicle has an alarm, it will not be
activated.
With the remote control
► To lock the vehicle completely, press
this button.
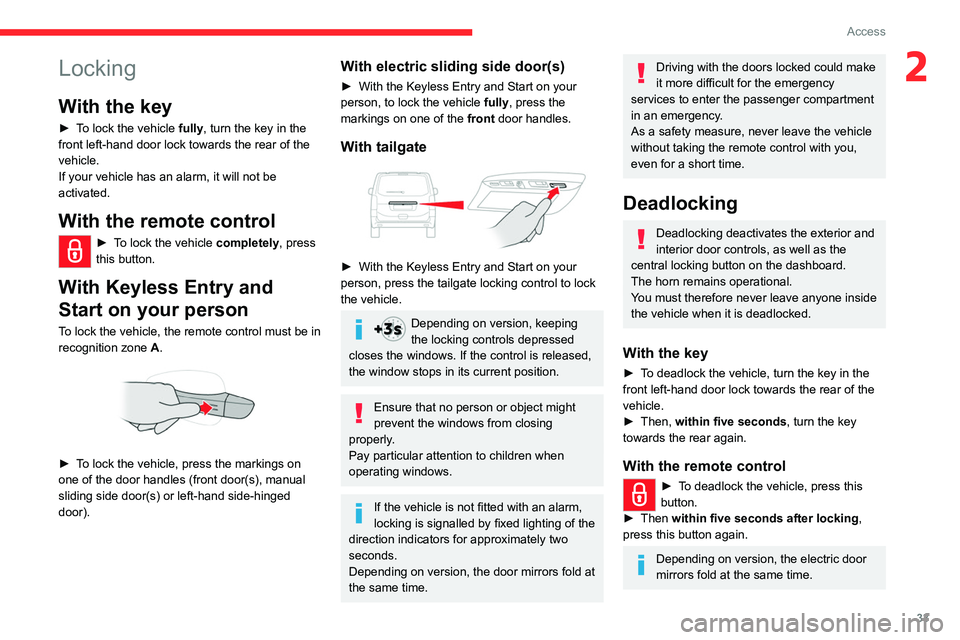
With Keyless Entry and
Start on your person
To lock the vehicle, the remote control must be in
recognition zone A.
► To lock the vehicle, press the markings on
one of the door handles (front door(s), manual
sliding side door(s) or left-hand side-hinged
door).
With electric sliding side door(s)
► With the Keyless Entry and Start on your
person, to lock the vehicle fully , press the
markings on one of the front
door handles.
With tailgate
► With the Keyless Entry and Start on your
person, press the tailgate locking control to lock
the vehicle.
Depending on version, keeping
the locking controls depressed
closes the windows. If the control is released,
the window stops in its current position.
Ensure that no person or object might
prevent the windows from closing
properly.
Pay particular attention to children when
operating windows.
If the vehicle is not fitted with an alarm,
locking is signalled by fixed lighting of the
direction indicators for approximately two
seconds.
Depending on version, the door mirrors fold at
the same time.
Driving with the doors locked could make
it more difficult for the emergency
services to enter the passenger compartment
in an emergency.
As a safety measure, never leave the vehicle
without taking the remote control with you,
even for a short time.
Deadlocking
Deadlocking deactivates the exterior and
interior door controls, as well as the
central locking button on the dashboard.
The horn remains operational.
You must therefore never leave anyone inside
the vehicle when it is deadlocked.
With the key
► To deadlock the vehicle, turn the key in the
front left-hand door lock towards the rear of the
vehicle.
►
Then,
within five seconds , turn the key
towards the rear again.
With the remote control
► To deadlock the vehicle, press this
button.
►
Then
within five seconds after locking ,
press this button again.
Depending on version, the electric door
mirrors fold at the same time.
Page 38 of 324
36
Access
Changing the battery
If the battery is flat, this warning lamp
comes on, accompanied by an audible
signal and the display of a message.
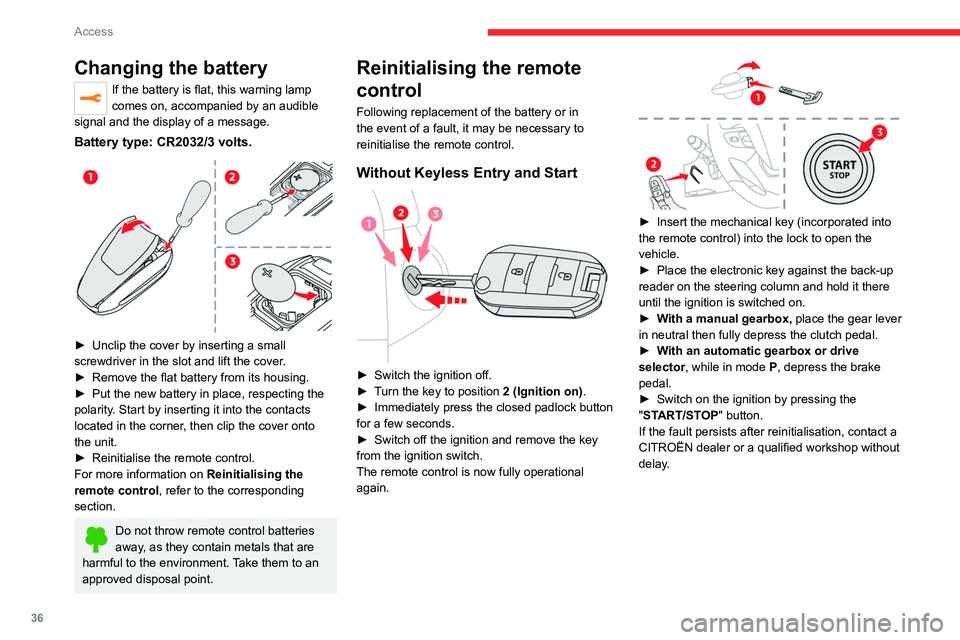
Battery type: CR2032/3 volts.
► Unclip the cover by inserting a small
screwdriver in the slot and lift the cover .
►
Remove the flat battery from its housing.
►
Put the new battery in place, respecting the
polarity
. Start by inserting it into the contacts
located in the corner, then clip the cover onto
the unit.
►
Reinitialise the remote control.
For more information on Reinitialising the
remote control
, refer to the corresponding
section.
Do not throw remote control batteries
away, as they contain metals that are
harmful to the environment. Take them to an
approved disposal point.
Reinitialising the remote
control
Following replacement of the battery or in
the event of a fault, it may be necessary to
reinitialise the remote control.
Without Keyless Entry and Start
► Switch the ignition off.
► T urn the key to position 2 (Ignition on) .
►
Immediately press the closed padlock button
for a few seconds.
►
Switch off the ignition and remove the key
from the ignition switch.
The remote control is now fully operational
again.
► Insert the mechanical key (incorporated into
the remote control) into the lock to open the
vehicle.
►
Place the electronic key against the back-up
reader on the steering column and hold it there
until the ignition is switched on.
►
W
ith a manual gearbox, place the gear lever
in neutral then fully depress the clutch pedal.
►
W
ith an automatic gearbox or drive
selector, while in mode
P
, depress the brake
pedal.
►
Switch on the ignition by pressing the
"
START/STOP" button.
If the fault persists after reinitialisation, contact a
CITROËN dealer or a qualified workshop without
delay.
Page 48 of 324
46
Access
Deactivation
► Press the remote control unlocking
button.
or
►
Unlock the vehicle with the Keyless Entry and
Start system.
The monitoring system is deactivated: the
indicator lamp in the button goes off and the
direction indicators flash for about 2 seconds.
If the vehicle automatically locks itself
again (as happens if a door or the boot is
not opened within 30 seconds of unlocking),
the monitoring system is automatically
reactivated.
Triggering of the alarm
This is indicated by sounding of the siren
and flashing of the direction indicators for 30
seconds.
The monitoring functions remain active until
the alarm has been triggered ten times in
succession.
When the vehicle is unlocked, rapid flashing of
the indicator lamp in the button indicates that the
alarm was triggered during your absence. When
the ignition is switched on, this flashing stops
immediately.
Locking the vehicle
with exterior perimeter
monitoring only
Deactivate the interior volumetric monitoring to
avoid the unwanted triggering of the alarm, in
certain cases such as:
–
Slightly open window
.
–
W
ashing the vehicle.
–
Changing a wheel.
–
T
owing the vehicle.
–
T
ransport on a ship or ferry.
Deactivating interior volumetric
monitoring
► Switch off the ignition and within 10 seconds
press the alarm button until the indicator lamp is
on fixed.
►
Exit the vehicle.
►
Immediately lock the vehicle using the remote
control or the "Keyless Entry and Start" system.
Only exterior perimeter monitoring is activated;
the red indicator lamp in the button flashes every
second.
T
o take effect, this deactivation must be
performed whenever the ignition is switched
off.
Reactivating interior volumetric
monitoring
► Deactivate exterior perimeter monitoring by
unlocking the vehicle using the remote control or
the "Keyless Entry and Start" system.
The indicator lamp in the button goes off.
►
Reactivate the full alarm system by locking
the vehicle using the remote control or the
"Keyless Entry and Start" system.
The red indicator lamp in the button once again
flashes every second.
Locking the vehicle without
activating the alarm
► Lock or deadlock the vehicle using the key
(integral to the remote control) in the driver's
door lock.
Failure of the remote control
To deactivate the monitoring functions:
► unlock the vehicle using the key (integral to
the remote control) in the driver's door lock,
►
Open the door; this sets off the alarm.
►
Upon switching on the ignition the alarm
stops.
The button indicator lamp goes off.
Malfunction
When the ignition is switched on, the fixed
lighting of the red indicator lamp in the button
indicates a system malfunction.
Have it checked by a CITROËN dealer or a
qualified workshop.
Page 49 of 324
47
Access
2Automatic activation
(Depending on version)
The system is activated automatically 2 minutes
after the last door or the boot is closed.
►
T
o avoid triggering the alarm on entering the
vehicle, first press the unlocking button on the
remote control or unlock the vehicle using the
"Keyless Entry and Start" system.
Electric windows
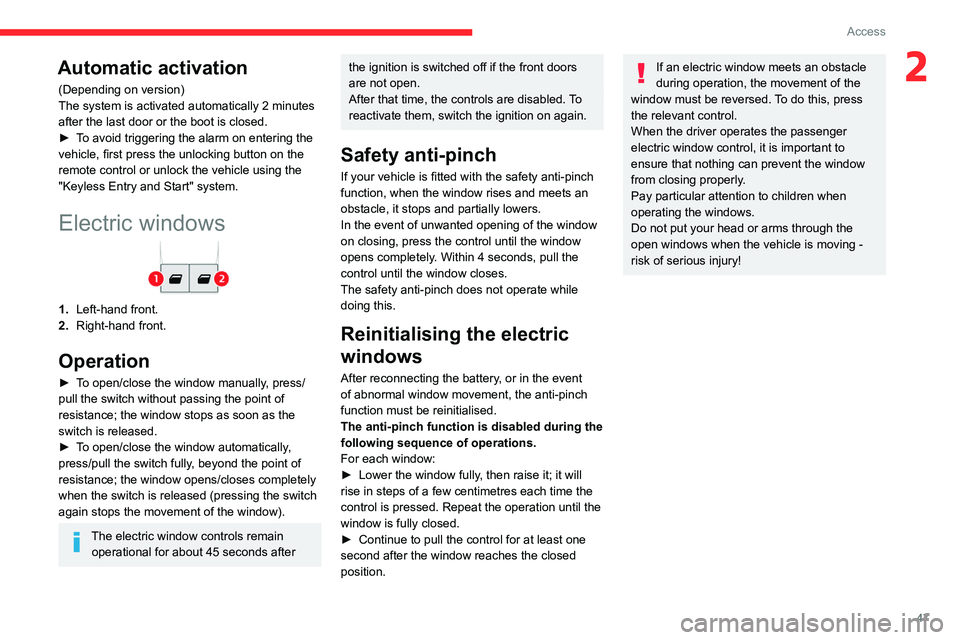
1. Left-hand front.
2. Right-hand front.
Operation
► To open/close the window manually, press/
pull the switch without passing the point of
resistance; the window stops as soon as the
switch is released.
►
T
o open/close the window automatically,
press/pull the switch fully, beyond the point of
resistance; the window opens/closes completely
when the switch is released (pressing the switch
again stops the movement of the window).
The electric window controls remain operational for about 45 seconds after
the ignition is switched off if the front doors
are not open.
After that time, the controls are disabled. To
reactivate them, switch the ignition on again.
Safety anti-pinch
If your vehicle is fitted with the safety anti-pinch
function, when the window rises and meets an
obstacle, it stops and partially lowers.
In the event of unwanted opening of the window
on closing, press the control until the window
opens completely. Within 4 seconds, pull the
control until the window closes.
The safety anti-pinch does not operate while
doing this.
Reinitialising the electric
windows
After reconnecting the battery, or in the event
of abnormal window movement, the anti-pinch
function must be reinitialised.
The anti-pinch function is disabled during the
following sequence of operations.
For each window:
►
Lower the window fully
, then raise it; it will
rise in steps of a few centimetres each time the
control is pressed. Repeat the operation until the
window is fully closed.
►
Continue to pull the control for at least one
second after the window reaches the closed
position.
If an electric window meets an obstacle
during operation, the movement of the
window must be reversed. To do this, press
the relevant control.
When the driver operates the passenger
electric window control, it is important to
ensure that nothing can prevent the window
from closing properly.
Pay particular attention to children when
operating the windows.
Do not put your head or arms through the
open windows when the vehicle is moving -
risk of serious injury!
Page 54 of 324
52
Ease of use and comfort
This function provides lumbar massage; it only
operates when the engine is running as well as
in STOP mode of the Stop & Start system.
Activation/Deactivation
► Press this button to activate/deactivate
the function.
Upon activation, the indicator lamp comes on.
The massage function is activated for a period
of one hour
.
During this time, massage is performed in
6
cycles of 10 minutes (6 minutes of massage
followed by a 4-minute break).
After one hour, the function is deactivated; the
indicator lamp goes off.
Adjustment of intensity
Press this button to adjust the intensity of
the massage.
Two levels of massage are available.
Steering wheel
adjustment
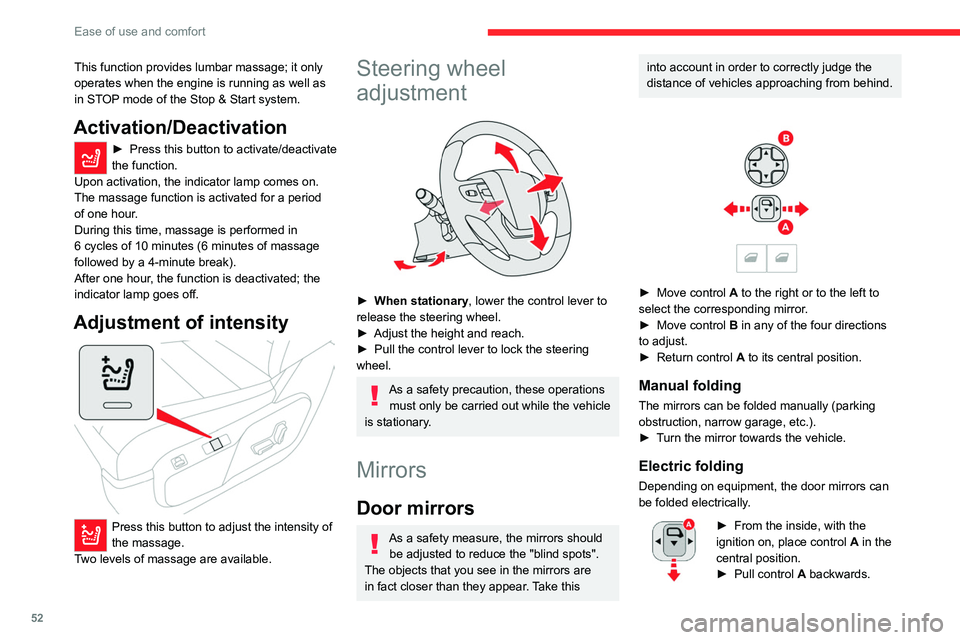
► When stationary , lower the control lever to
release the steering wheel.
►
Adjust the height and reach.
►
Pull the control lever to lock the steering
wheel.
As a safety precaution, these operations must only be carried out while the vehicle
is stationary.
Mirrors
Door mirrors
As a safety measure, the mirrors should be adjusted to reduce the "blind spots".
The objects that you see in the mirrors are
in fact closer than they appear. Take this
into account in order to correctly judge the
distance of vehicles approaching from behind.
► Move control A to the right or to the left to
select the corresponding mirror.
►
Move control
B in any of the four directions
to adjust.
►
Return control A
to its central position.
Manual folding
The mirrors can be folded manually (parking
obstruction, narrow garage, etc.).
►
T
urn the mirror towards the vehicle.
Electric folding
Depending on equipment, the door mirrors can
be folded electrically.
► From the inside, with the
ignition on, place control A
in the
central position.
►
Pull control A
backwards.