child lock Citroen JUMPY MULTISPACE 2013 2.G Owner's Manual
[x] Cancel search | Manufacturer: CITROEN, Model Year: 2013, Model line: JUMPY MULTISPACE, Model: Citroen JUMPY MULTISPACE 2013 2.GPages: 260, PDF Size: 8.79 MB
Page 4 of 260
2
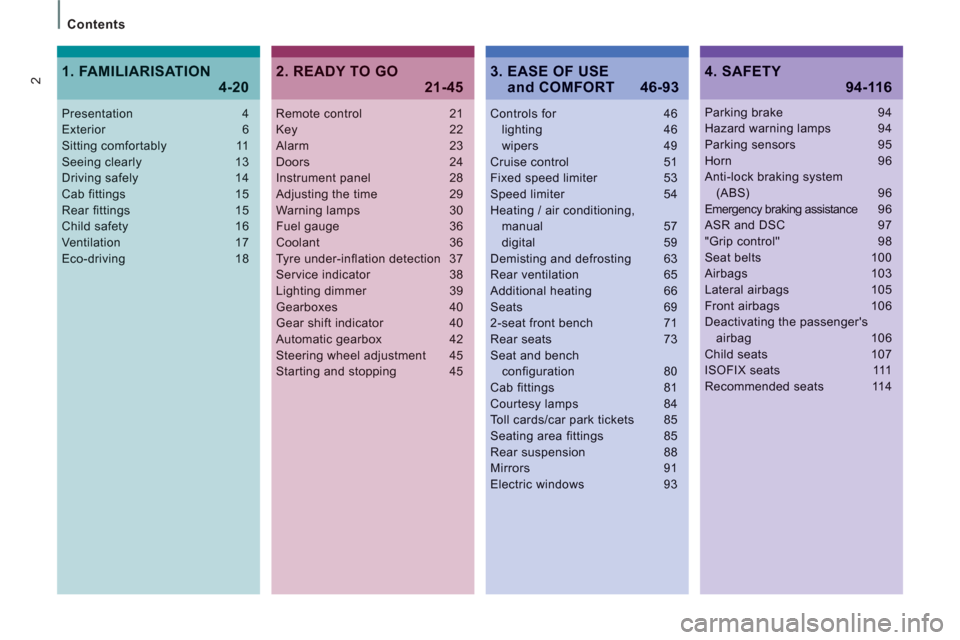
Contents
Remote control 21Key 22Alarm 23Doors 24Instrument panel 28Adjusting the time 29Warning lamps 30Fuel gauge 36Coolant 36Tyre under-inflation detection 37Service indicator 38Lighting dimmer 39Gearboxes 40Gear shift indicator 40Automatic gearbox 42Steering wheel adjustment 45Starting and stopping 45
Controls for 46lighting 46wipers 49Cruise control 51Fixed speed limiter 53Speed limiter 54Heating / air conditioning,manual 57digital 59Demisting and defrosting 63Rear ventilation 65Additional heating 66Seats 692-seat front bench 71Rear seats 73Seat and bench configuration 80Cab fittings 81Courtesy lamps 84Toll cards/car park tickets 85
Seating area fittings 85Rear suspension 88Mirrors 91Electric windows 93
Presentation 4Exterior 6Sitting comfortably 11Seeing clearly 13Driving safely 14Cab fittings 15Rear fittings 15Child safety 16Ventilation 17Eco-driving 18
Parking brake 94Hazard warning lamps 94Parking sensors 95Horn 96Anti-lock braking system(ABS) 96Emergency braking assistance96ASR and DSC 97"Grip control" 98Seat belts 100Airbags 103Lateral airbags 105Front airbags 106Deactivating the passenger'sairbag 106Child seats 107ISOFIX seats 111Recommended seats 114
2. READY TO GO
21-45
4. SAFETY
94-116
1. FAMILIARISATION
4-203. EASE OF USE and COMFORT 46-93
Page 12 of 260
Interior
10
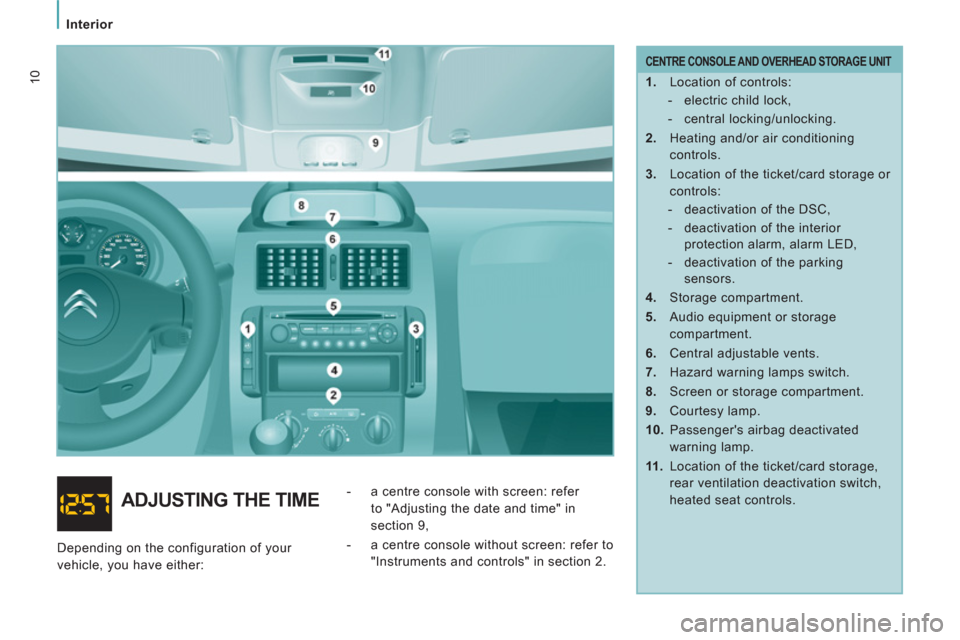
CENTRE CONSOLE AND OVERHEAD STORAGE UNIT
1.
Location of controls:
- electric child lock,
- central locking/unlocking.
2.
Heating and/or air conditioning
controls.
3.
Location of the ticket/card storage or
controls:
- deactivation of the DSC,
- deactivation of the interior
protection alarm, alarm LED,
- deactivation of the parking
sensors.
4.
Storage compartment.
5.
Audio equipment or storage
compartment.
6.
Central adjustable vents.
7.
Hazard warning lamps switch.
8.
Screen or storage compartment.
9.
Courtesy lamp.
10.
Passenger's airbag deactivated
warning lamp.
11 .
Location of the ticket/card storage,
rear ventilation deactivation switch,
heated seat controls.
ADJUSTING THE TIME
- a centre console with screen: refer
to "Adjusting the date and time" in
section 9,
- a centre console without screen: refer to
"Instruments and controls" in section 2.
Depending on the configuration of your
vehicle, you have either:
Page 18 of 260
3
33
23
4
Interior
16
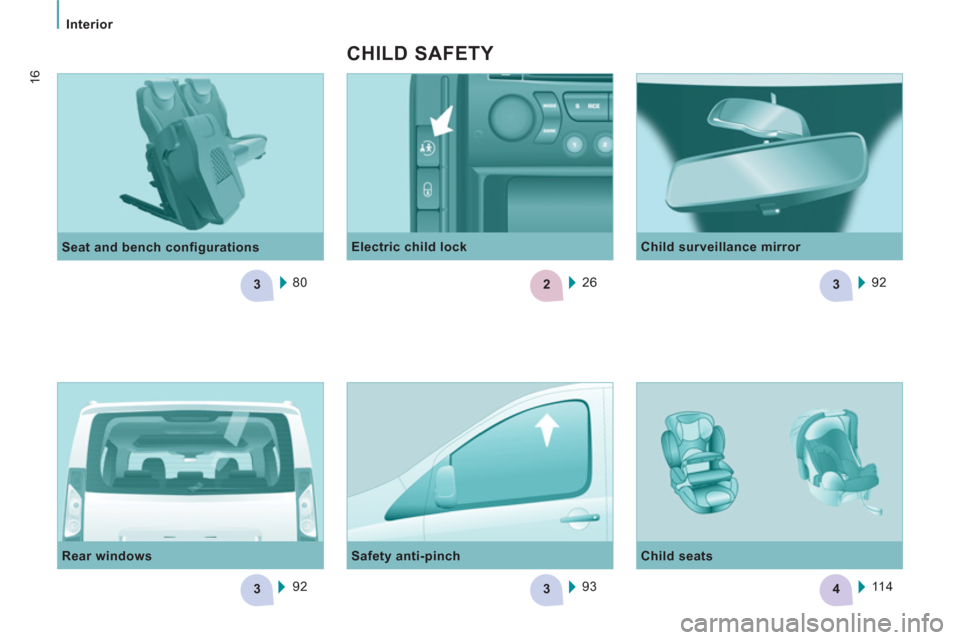
80
Seat and bench configurations
92
Rear windows
Safety anti-pinch
93
Electric child lock
26
CHILD SAFETY
Child surveillance mirror
92
Child seats
11 4
Page 25 of 260
23
Access
REA
DY
TO GO
2
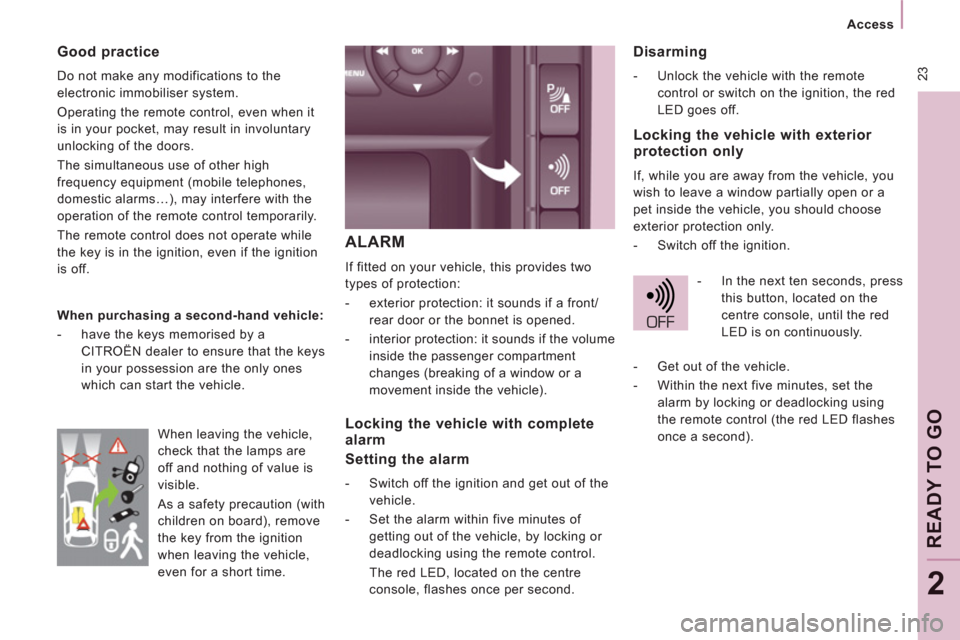
ALARM
If fitted on your vehicle, this provides two
types of protection:
- exterior protection: it sounds if a front/
rear door or the bonnet is opened.
- interior protection: it sounds if the volume
inside the passenger compartment
changes (breaking of a window or a
movement inside the vehicle).
Disarming
- Unlock the vehicle with the remote
control or switch on the ignition, the red
LED goes off.
Good practice
Do not make any modifications to the
electronic immobiliser system.
Operating the remote control, even when it
is in your pocket, may result in involuntary
unlocking of the doors.
The simultaneous use of other high
frequency equipment (mobile telephones,
domestic alarms…), may interfere with the
operation of the remote control temporarily.
The remote control does not operate while
the key is in the ignition, even if the ignition
is off.
When purchasing a second-hand vehicle:
- have the keys memorised by a
CITROËN dealer to ensure that the keys
in your possession are the only ones
which can start the vehicle.
Locking the vehicle with complete
alarm
Setting the alarm
- Switch off the ignition and get out of the
vehicle.
- Set the alarm within five minutes of
getting out of the vehicle, by locking or
deadlocking using the remote control.
The red LED, located on the centre
console, flashes once per second.
Locking the vehicle with exterior
protection only
If, while you are away from the vehicle, you
wish to leave a window partially open or a
pet inside the vehicle, you should choose
exterior protection only.
- Switch off the ignition.
- In the next ten seconds, press
this button, located on the
centre console, until the red
LED is on continuously.
When leaving the vehicle,
check that the lamps are
off and nothing of value is
visible.
As a safety precaution (with
children on board), remove
the key from the ignition
when leaving the vehicle,
even for a short time.
- Get out of the vehicle.
- Within the next five minutes, set the
alarm by locking or deadlocking using
the remote control (the red LED flashes
once a second).
Page 27 of 260
25
Access
REA
DY
TO GO
2
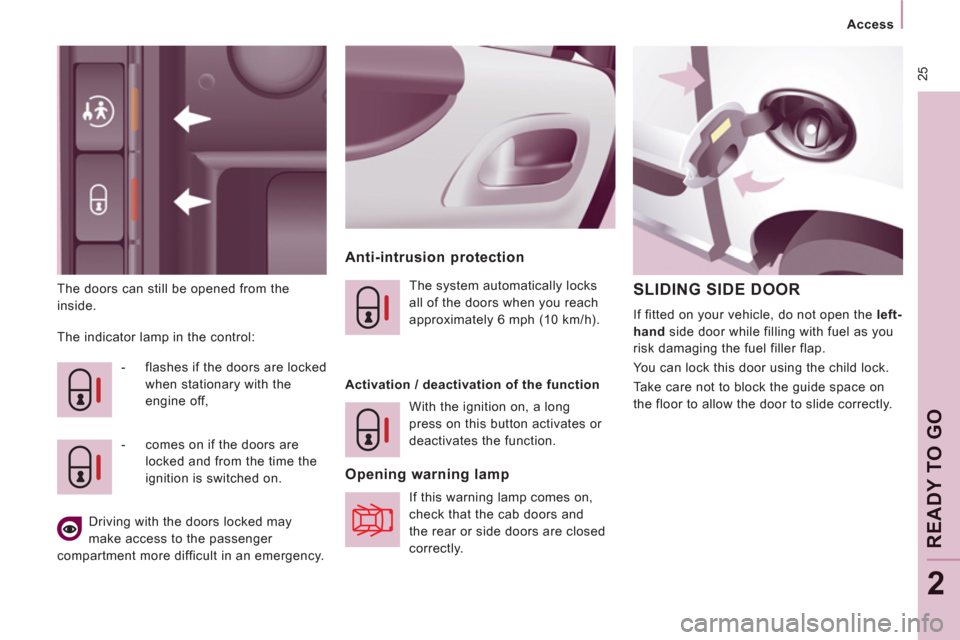
The doors can still be opened from the
inside.
Anti-intrusion protection
The indicator lamp in the control:
- flashes if the doors are locked
when stationary with the
engine off,
- comes on if the doors are
locked and from the time the
ignition is switched on. The system automatically locks
all of the doors when you reach
approximately 6 mph (10 km/h).
Activation / deactivation of the function
With the ignition on, a long
press on this button activates or
deactivates the function.
Opening warning lamp
If this warning lamp comes on,
check that the cab doors and
the rear or side doors are closed
correctly.
SLIDING SIDE DOOR
If fitted on your vehicle, do not open the left-
hand
side door while filling with fuel as you
risk damaging the fuel filler flap.
You can lock this door using the child lock.
Take care not to block the guide space on
the floor to allow the door to slide correctly.
Driving with the doors locked may
make access to the passenger
compartment more difficult in an emergency.
Page 28 of 260
26
Access
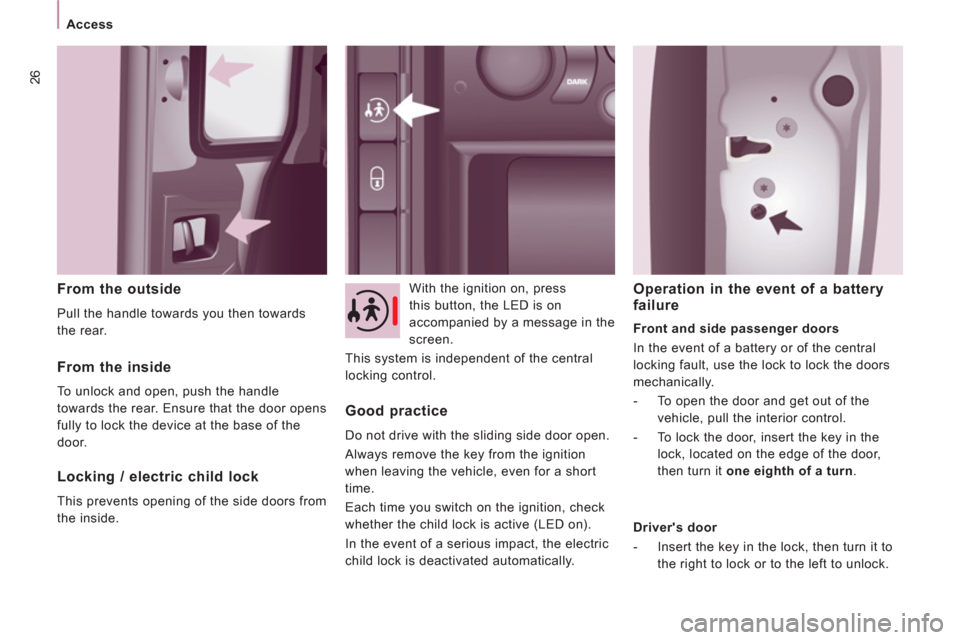
From the outside
Pull the handle towards you then towards
the rear. With the ignition on, press
this button, the LED is on
accompanied by a message in the
screen.
This system is independent of the central
locking control.
From the inside
To unlock and open, push the handle
towards the rear. Ensure that the door opens
fully to lock the device at the base of the
door.
Locking / electric child lock
This prevents opening of the side doors from
the inside.
Good practice
Do not drive with the sliding side door open.
Always remove the key from the ignition
when leaving the vehicle, even for a short
time.
Each time you switch on the ignition, check
whether the child lock is active (LED on).
In the event of a serious impact, the electric
child lock is deactivated automatically.
Operation in the event of a battery
failure
Front and side passenger doors
In the event of a battery or of the central
locking fault, use the lock to lock the doors
mechanically.
- To open the door and get out of the
vehicle, pull the interior control.
- To lock the door, insert the key in the
lock, located on the edge of the door,
then turn it one eighth of a turn
.
Driver's door
- Insert the key in the lock, then turn it to
the right to lock or to the left to unlock.
Page 46 of 260
44
Gearboxes and steering wheel
Manual mode
Manual sequential gear changing.
- Select gear lever position M
,
- push the gear lever towards the + sign
to change up, from 1 through to 6,
- conversely, push the gear lever towards
the - sign to change down.
In manual mode, it is only possible to
change from one gear to another if the
vehicle speed and engine speed permit.
If they do not, the vehicle will operate
temporarily in automatic mode.
When the vehicle is stationary or moving
very slowly, the gearbox automatically
selects first gear.
You can change from position D
(automatic mode) to position M
(manual mode) at any time.
Good practice
Never select position N
when the vehicle is
moving.
Never select positions P
or R
unless the
vehicle is stationary.
Never change between positions to optimise
braking on a slippery surface.
There is a risk of damage to the gearbox:
- if you press the accelerator and brake
pedals at the same time,
- if you force the gear lever from
position P
to another position in the
event of a battery failure.
When the engine is at idle, brakes not
applied, if position R
, D
or M
is selected the
vehicle moves even without the accelerator
being pressed.
For this reason, do not leave children
unsupervised inside the vehicle, with the
engine running
.
Operating fault
Any operating fault is indicated by an
audible signal, accompanied by the
message "Automatic gear fault"
in the
screen.
In this situation the gearbox operates in
downgrade mode (locked in 3rd gear). You
may feel a substantial knock when changing
from P
to R
and from N
to R
(this will not
cause any damage to the gearbox).
Do not exceed 60 mph (100 km/h), keeping
within the limit of local speed restrictions.
Contact a CITROËN dealer or a qualified
workshop as soon as possible.
Page 103 of 260
101
Seat belts
SAFETY
4
The force limiter reduces the pressure of the
seat belt against the body of the occupants.
The pretensioning seat belts are active when
the ignition is switched on.
The inertia reels are fitted with a device
which automatically locks the strap in the
event of a collision or emergency braking or
if the vehicle rolls over.
You can unfasten the seat belt by pressing
the red button on the buckle. Guide the seat
belt after unfastening.
The airbag warning lamp comes on if the
pretensioners are deployed. Contact a
CITROËN dealer or a qualified workshop.
Recommendations for children:
- use a suitable child seat if the
passenger is less than 12 years old or
shorter than one metre fifty,
- never allow a child to travel on your lap,
even with the seat belt fastened.
FRONT SEAT BELTS
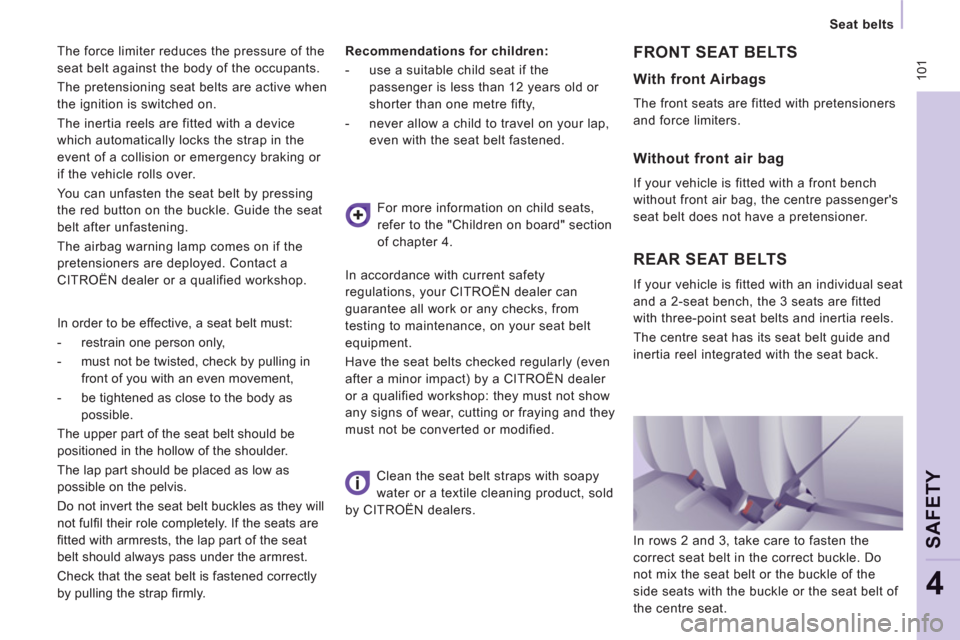
REAR SEAT BELTS
If your vehicle is fitted with an individual seat
and a 2-seat bench, the 3 seats are fitted
with three-point seat belts and inertia reels.
The centre seat has its seat belt guide and
inertia reel integrated with the seat back. For more information on child seats,
refer to the "Children on board" section
of chapter 4.
In accordance with current safety
regulations, your CITROËN dealer can
guarantee all work or any checks, from
testing to maintenance, on your seat belt
equipment.
Have the seat belts checked regularly (even
after a minor impact) by a CITROËN dealer
or a qualified workshop: they must not show
any signs of wear, cutting or fraying and they
must not be converted or modified.
Clean the seat belt straps with soapy
water or a textile cleaning product, sold
by CITROËN dealers.
In order to be effective, a seat belt must:
- restrain one person only,
- must not be twisted, check by pulling in
front of you with an even movement,
- be tightened as close to the body as
possible.
The upper part of the seat belt should be
positioned in the hollow of the shoulder.
The lap part should be placed as low as
possible on the pelvis.
Do not invert the seat belt buckles as they will
not fulfi l their role completely. If the seats are
fi tted with armrests, the lap part of the seat
belt should always pass under the armrest.
Check that the seat belt is fastened correctly
by pulling the strap fi rmly.
With front Airbags
The front seats are fitted with pretensioners
and force limiters.
Without front air bag
If your vehicle is fitted with a front bench
without front air bag, the centre passenger's
seat belt does not have a pretensioner.
In rows 2 and 3, take care to fasten the
correct seat belt in the correct buckle. Do
not mix the seat belt or the buckle of the
side seats with the buckle or the seat belt of
the centre seat.
Page 118 of 260

11 6
Child safety
Deactivate the passenger's airbag when a
"rear facing" child seat is installed on the
front seat.
Otherwise, the child would risk being
seriously injured or killed if the airbag were
to inflate.
Installing a booster seat
The chest part of the seat belt must be
positioned on the child's shoulder without
touching the neck.
Ensure that the lap part of the seat belt
passes correctly over the child's thighs.
CITROËN recommends the use of a booster
seat which has a back, fitted with a seat belt
guide at shoulder level.
ADVICE ON CHILD SEATS
The incorrect installation of a child seat in a
vehicle compromises the child's protection in
the event of an accident.
Remember to fasten the seat belts or the
child seat harnesses keeping the slack
in
relation to the child's body to a minimum
,
even for short journeys.
For optimum installation of the "forward
facing" child seat, ensure that the back of
the child seat is in contact with the back of
the vehicle's seat and that the head restraint
does not cause any discomfort.
If the head restraint has to be removed,
ensure that it is stored or attached securely
to prevent it from being thrown around the
vehicle in the event of sharp braking.
Children under the age of 10 must not travel
in the "forward facing" position on the front
passenger seat, unless the rear seats are
already occupied by other children, cannot
be used or are absent.
As a safety precaution, do not leave:
- one or more children alone and
unsupervised in a vehicle,
- a child or an animal in a vehicle which
is exposed to the sun, with the windows
closed,
- the keys within reach of children inside
the vehicle.
To prevent accidental opening of the doors,
use the "Child Lock".
Take care not to open the rear windows by
more than one third.
To protect young children from the rays of
the sun, fit side blinds to the rear windows.
Page 130 of 260
128
Fuel
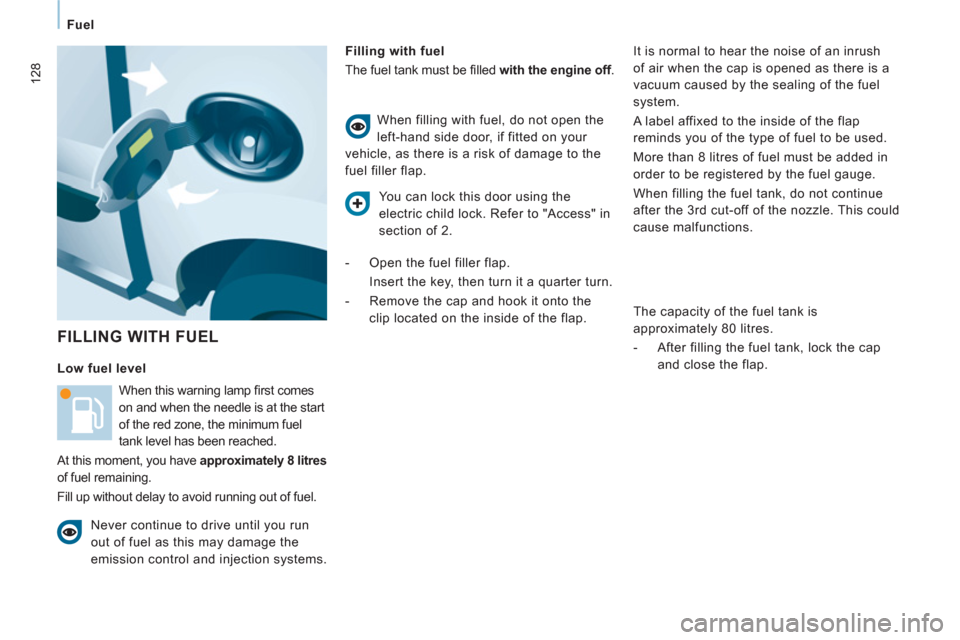
FILLING WITH FUEL
Filling with fuel
The fuel tank must be fi lled with the engine off
.
When this warning lamp fi rst comes
on and when the needle is at the start
of the red zone, the minimum fuel
tank level has been reached.
At this moment, you have approximately 8 litres
of fuel remaining.
Fill up without delay to avoid running out of fuel. When filling with fuel, do not open the
left-hand side door, if fitted on your
vehicle, as there is a risk of damage to the
fuel filler flap.
Never continue to drive until you run
out of fuel as this may damage the
emission control and injection systems.
Low fuel level
It is normal to hear the noise of an inrush
of air when the cap is opened as there is a
vacuum caused by the sealing of the fuel
system.
A label affixed to the inside of the flap
reminds you of the type of fuel to be used.
More than 8 litres of fuel must be added in
order to be registered by the fuel gauge.
When filling the fuel tank, do not continue
after the 3 rd cut-off of the nozzle. This could
cause malfunctions.
The capacity of the fuel tank is
approximately 80 litres.
- After filling the fuel tank, lock the cap
and close the flap.
You can lock this door using the
electric child lock. Refer to "Access" in
section of 2.
- Open the fuel filler flap.
Insert the key, then turn it a quarter turn.
- Remove the cap and hook it onto the
clip located on the inside of the flap.