door Citroen JUMPY MULTISPACE 2014 2.G Owner's Guide
[x] Cancel search | Manufacturer: CITROEN, Model Year: 2014, Model line: JUMPY MULTISPACE, Model: Citroen JUMPY MULTISPACE 2014 2.GPages: 260, PDF Size: 13.41 MB
Page 106 of 260

104
Airbags
JUMPY-ATLANTE-VP_EN_CHAP04_SECURITE_ED01-2014
Good practice
Sit in a normal upright position.
Wear a correctly adjusted seat belt.
Do not leave anything between the
occupants and the airbags (a child, pet,
object...). This could hinder the operation of
the airbags or injure the occupants.
After an accident or if the vehicle has been
stolen or broken into, have the airbag
systems checked.
All work on the airbag system is strictly
forbidden unless it is carried out by qualified
personnel at a CITROËN dealer or a
qualified workshop. Lateral airbags
Only put recommended covers on the seats.
These will not hinder inflation of the lateral
airbags. Contact a CITROËN dealer or a
qualified workshop.
Do not fix or attach anything to the seat
backs. This could cause injury to the chest
or arms when the lateral airbag inflates.
Do not sit with the upper part of the body
any nearer to the door than necessary.
Front airbags
Do not drive holding the steering wheel
by its spokes or resting your hands on the
centre part of the wheel.
Do not allow passengers to place their feet
on the dashboard, they risk serious injury if
the airbag is deployed.
Smoke as little as possible as deployment
of the airbags can cause burns or the risk of
injury from a cigarette or pipe.
Never remove or pierce the steering wheel
or hit it violently.
Even if all of the precautions mentioned are
observed, a risk of injury or of minor burns
to the head, chest or arms when an airbag
is deployed cannot be ruled out. In fact, the
bag inflates almost instantly (within a few
milliseconds) then deflates within the same
time discharging the hot gas via openings
provided for this purpose. Curtain airbags
Do not fix or attach anything to the roof. This
could cause injury to the head when the
curtain airbag inflates.
Do not remove the grab handles installed
on the roof, they play a part in securing the
curtain airbags.
Page 107 of 260

105
Airbags
SAFETY
4
JUMPY-ATLANTE-VP_EN_CHAP04_SECURITE_ED01-2014
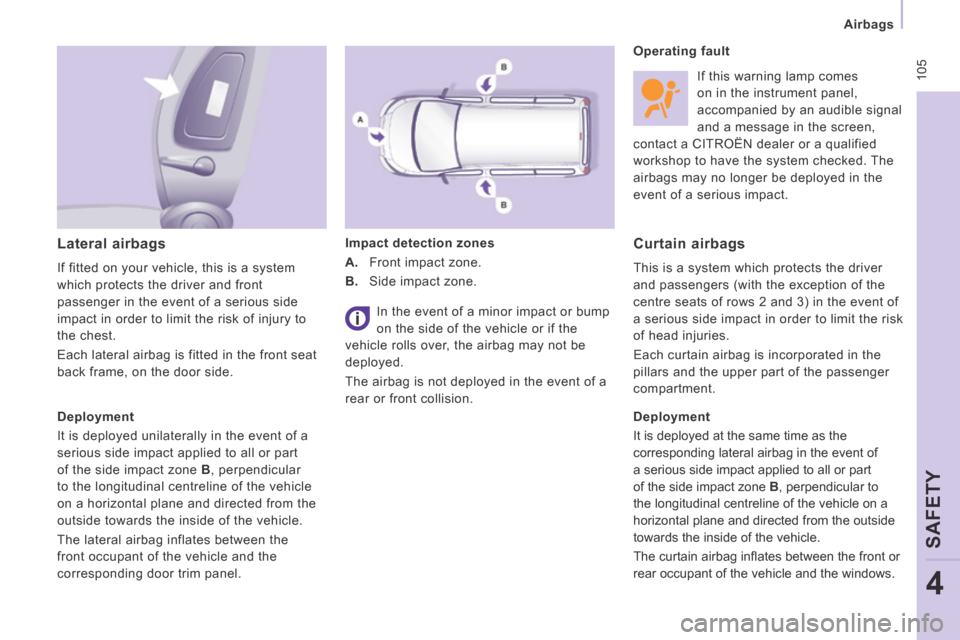
Lateral airbags
If fitted on your vehicle, this is a system
which protects the driver and front
passenger in the event of a serious side
impact in order to limit the risk of injury to
the chest.
Each lateral airbag is fitted in the front seat
back frame, on the door side. Impact detection zones
A. Front impact zone.
B. Side impact zone. If this warning lamp comes
on in the instrument panel,
accompanied by an audible signal
and a message in the screen,
contact a CITROËN dealer or a qualified
workshop to have the system checked. The
airbags may no longer be deployed in the
event of a serious impact.
Deployment
It is deployed unilaterally in the event of a
serious side impact applied to all or part
of the side impact zone B , perpendicular
to the longitudinal centreline of the vehicle
on a horizontal plane and directed from the
outside towards the inside of the vehicle.
The lateral airbag inflates between the
front occupant of the vehicle and the
corresponding door trim panel.
Curtain airbags
This is a system which protects the driver
and passengers (with the exception of the
centre seats of rows 2 and 3) in the event of
a serious side impact in order to limit the risk
of head injuries.
Each curtain airbag is incorporated in the
pillars and the upper part of the passenger
compartment.
Deployment
It is deployed at the same time as the
corresponding lateral airbag in the event of
a serious side impact applied to all or part
of the side impact zone B , perpendicular to
the longitudinal centreline of the vehicle on a
horizontal plane and directed from the outside
towards the inside of the vehicle.
The curtain airbag infl ates between the front or
rear occupant of the vehicle and the windows.
In the event of a minor impact or bump
on the side of the vehicle or if the
vehicle rolls over, the airbag may not be
deployed.
The airbag is not deployed in the event of a
rear or front collision. Operating fault
Page 120 of 260

11 8
Child safety
JUMPY-ATLANTE-VP_EN_CHAP04_SECURITE_ED01-2014
For the optimum installation of a "forward
facing" child seat, ensure that the back of
the child seat is as close as possible to the
backrest of the vehicle's seat, or in contact
if possible.
The head restraint must be removed before
installing a child seat with a backrest on the
passenger seat.
Ensure that the head restraint is stowed or
attached securely so that it is not thrown
around the vehicle in the event of sharp
braking.
Refit the head restraint as soon as the child
seat is removed. Installing a booster seat
The chest part of the seat belt must be
positioned on the child's shoulder without
touching the neck.
Ensure that the lap part of the seat belt
passes correctly over the child's thighs.
CITROËN recommends the use of a booster
seat which has a back, fitted with a seat belt
guide at shoulder level.
ADVICE ON CHILD SEATS
The incorrect installation of a child seat in a
vehicle compromises the child's protection in
the event of an accident.
Check that there is no seat belt or seat belt
buckle under the child seat, as this could
destabilise the seat.
Remember to fasten the seat belts or the
child seat harnesses keeping the slack in
relation to the child's body to a minimum ,
even for short journeys.
For the installation of a child seat using
the seat belt, ensure that the seat belt is
well tensioned on the child seat and that
it is holding the child seat firmly against
the vehicle's seat. If the passenger seat is
adjustable, move it forward if necessary.
At the rear, always leave sufficient space
between the front seat and:
- a "rearward facing" child seat,
- the feet of a child seated in a "forward facing" child seat.
For this, move the front seat forward and, if
necessary, straighten its backrest as well.
Children at the front
The legislation on carrying a child on the
front passenger seat is specific to each
country. Refer to the legislation in force in
your country.
Deactivate the passenger's airbag when a
"rearward facing" child seat is installed on
the front seat.
Otherwise, the child would risk being
seriously injured or killed if the airbag were
deployed. As a safety precaution, do not leave:
- one or more children alone and
unsupervised in a vehicle,
- a child or an animal in a vehicle which is exposed to the sun, with the windows
closed,
- the keys within reach of children inside the vehicle.
To prevent accidental opening of the doors,
use the "Child Lock".
Take care not to open the rear windows by
more than one third.
To protect young children from the rays of
the sun, fit side blinds to the rear windows.
Page 132 of 260

130
Fuel
JUMPY-ATLANTE-VP_EN_CHAP06_VERIFICATIONS_ED01-2014
FILLING WITH FUEL
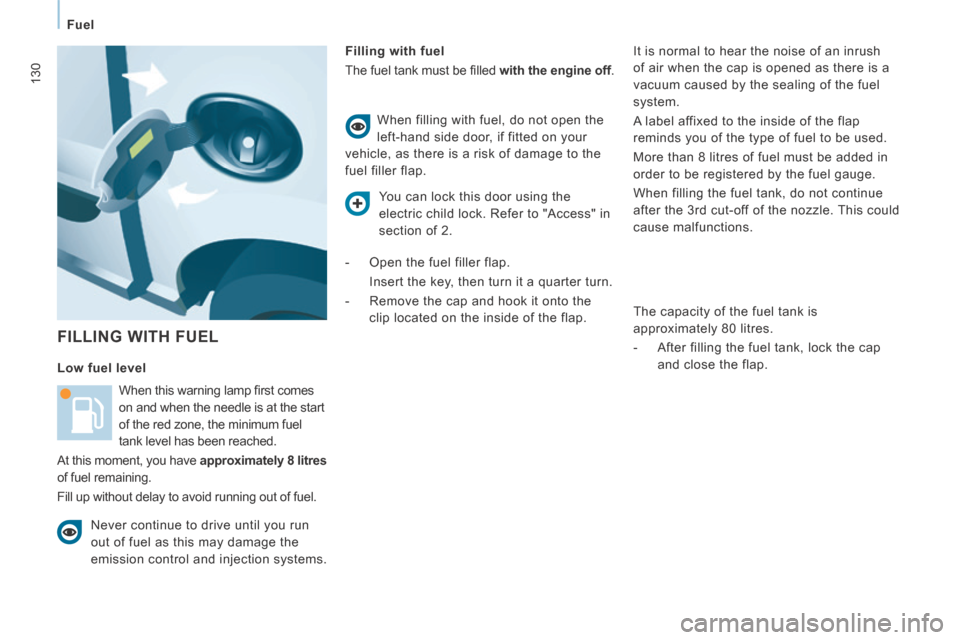
Filling with fuel
The fuel tank must be fi lled with the engine off .
When this warning lamp fi rst comes
on and when the needle is at the start
of the red zone, the minimum fuel
tank level has been reached.
At this moment, you have approximately 8 litres
of fuel remaining.
Fill up without delay to avoid running out of fuel. When filling with fuel, do not open the
left-hand side door, if fitted on your
vehicle, as there is a risk of damage to the
fuel filler flap.
Never continue to drive until you run
out of fuel as this may damage the
emission control and injection systems.
Low fuel level It is normal to hear the noise of an inrush
of air when the cap is opened as there is a
vacuum caused by the sealing of the fuel
system.
A label affixed to the inside of the flap
reminds you of the type of fuel to be used.
More than 8 litres of fuel must be added in
order to be registered by the fuel gauge.
When filling the fuel tank, do not continue
after the 3 rd cut-off of the nozzle. This could
cause malfunctions.
The capacity of the fuel tank is
approximately 80 litres.
- After filling the fuel tank, lock the cap
and close the flap.
You can lock this door using the
electric child lock. Refer to "Access" in
section of 2.
- Open the fuel filler flap.
Insert the key, then turn it a quarter turn.
- Remove the cap and hook it onto the clip located on the inside of the flap.
Page 138 of 260

136
Repairing a wheel
JUMPY-ATLANTE-VP_EN_CHAP07_AIDE RAPIDE_ED01-2014
- connect the compressor pipe directly to the valve of the repaired wheel.
- connect the compressor's electrical plug to the vehicle's 12V socket again,
- start the vehicle again and let the engine run, Warning, the sealant cartridge contains
ethylene-glycol, this product is harmful
if swallowed and causes irritation to
the eyes. Keep this product out of reach of
children.
The expiry date of the sealant is indicated
under the cartridge.
The cartridge is intended for a single use;
once opened, it must be replaced.
After use, do not discard the cartridge into the
environment, take it to a CITROËN dealer or
to a specialised waste disposal site.
Do not forget to obtain a new sealant
cartridge, available from a CITROËN dealer
or a qualified workshop.
- adjust the pressure using the
compressor (to inflate: switch A in
position " 1 "; to deflate: switch A in
position " 0 " and press button B ), in
accordance with the vehicle's tyre
pressure label (located on the door
aperture, on the driver's side), then
remember to check that the leak has
been sealed correctly (no further
loss of pressure after several miles
(kilometres)),
- remove the compressor, then stow the complete kit,
- drive at reduced speed (50 mph (80 km/h) max) limiting the distance
travelled to approximately 125 miles
(200 km),
- visit a CITROËN dealer or a qualified workshop as soon as possible to have
the tyre repaired or replaced by a
technician.
Page 140 of 260

138
Changing a wheel
JUMPY-ATLANTE-VP_EN_CHAP07_AIDE RAPIDE_ED01-2014
- Open the cover, located on the sill, to access the carrier bolt.
- Unscrew the bolt using the wheelbrace until the carrier is lowered fully. - Detach the carrier from the hook and
place the spare wheel near the wheel to
be changed. 3. SPARE WHEEL
- Gain access to the spare wheel from the rear.
- Open the rear doors. You can switch on the courtesy lamp to
improve visibility.
Page 148 of 260

146
Changing a bulb
JUMPY-ATLANTE-VP_EN_CHAP07_AIDE RAPIDE_ED01-2014
REAR LAMPS
For more information on bulbs, refer to the
"Types of bulb". - Identify the faulty bulb then open the
rear doors to 180°. Refer to the "Access"
section of chapter 2.
- Remove the two fixing nuts.
Pull the lens unit from the outside.
- Holding the lamp unit, disconnect the electrical connector. - Move aside the 8 tabs then extract the
bulb holder.
- Remove the failed bulb by pressing it lightly while turning it anticlockwise.
- Change the bulb.
1. Brake lamps / sidelamps
Type B , P21/5W - 21/5W
2. Direction indicators
Type B , PY21W - 21W (amber)
3. Reversing lamps
Type B , P21W - 21W
4. Foglamps
Type B , P21W - 21W When refitting, take care to correctly
reposition:
- the 8 tabs,
- the two white lugs in the two rubber
holes to maintain the sealing of the lamp
unit,
- the supply wire to avoid trapping it.
Page 149 of 260

147
Changing a bulb
QUICK HELP
7
JUMPY-ATLANTE-VP_EN_CHAP07_AIDE RAPIDE_ED01-2014
THIRD BRAKE LAMP
Type A , W5W - 5W Type B , P21W - 21W
NUMBER PLATE LAMPS
Type A , W5W - 5W
With tailgate
- Move aside the plastic lens using a
screwdriver, on the point indicated by
the arrow.
- Change the bulb.
- Replace the plastic lens and press on it.
With hinged doors
- Unclip the interior trim.
- Disconnect the connector by moving aside its tab.
- Remove the plastic cover.
- Turn the bulb holder a quarter turn anticlockwise.
- Change the bulb. Lamp located on the outside (hinged
doors)
- Unscrew the two screws using a Torx
TM
20 screwdriver.
- Remove the lamp.
- Change the bulb. Lamp located on the inside (tailgate)
- Unscrew the two screws using a Torx
TM
20 screwdriver.
- Remove the plastic cover.
- Remove the bulb holder moving aside the two tabs.
- Remove the failedbulb by pressing it lightly while turning it anticlockwise.
- Change the bulb.
Page 152 of 260

150
Changing a fuse
JUMPY-ATLANTE-VP_EN_CHAP07_AIDE RAPIDE_ED01-2014
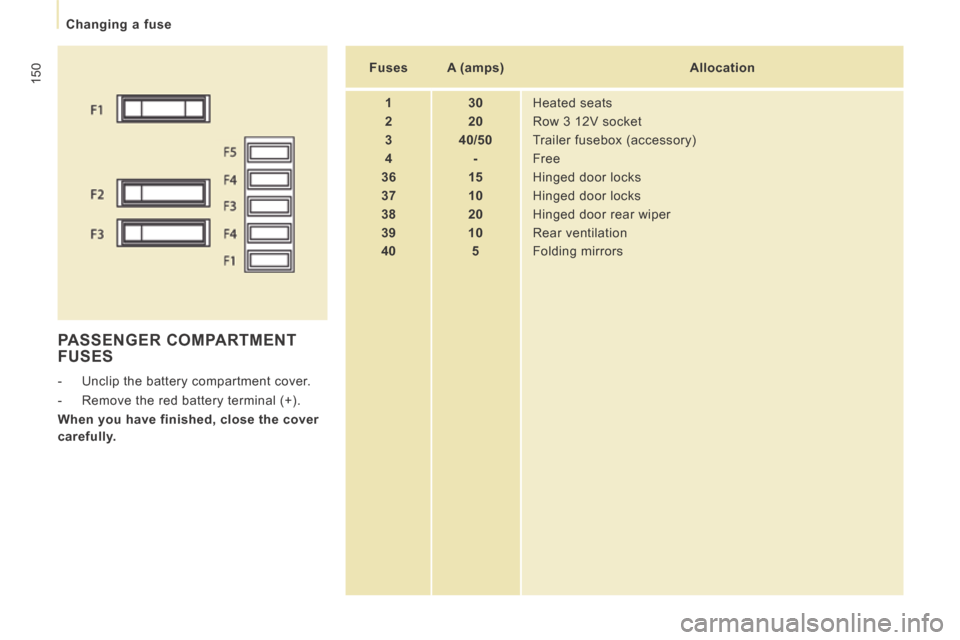
PASSENGER COMPARTMENT FUSES
- Unclip the battery compartment cover.
- Remove the red battery terminal (+).
When you have finished, close the cover
carefully. Fuses
A (amps) Allocation
1 30 Heated seats
2 20 Row 3 12V socket
3 40/50 Trailer fusebox (accessory)
4 - Free
36 15 Hinged door locks
37 10 Hinged door locks
38 20 Hinged door rear wiper
39 10 Rear ventilation
40 5 Folding mirrors
Page 160 of 260

158
Dimensions
JUMPY-ATLANTE-VP_EN_CHAP08_CARACTERISTIQUES TECHNIQUES_ED01-2014
REAR DOORS (mm)
L1 L2
H1
N Usable height 1 272
O Usable width 1 237