jump start Citroen JUMPY MULTISPACE 2014 2.G Owner's Manual
[x] Cancel search | Manufacturer: CITROEN, Model Year: 2014, Model line: JUMPY MULTISPACE, Model: Citroen JUMPY MULTISPACE 2014 2.GPages: 260, PDF Size: 13.41 MB
Page 4 of 260

2
Contents
JUMPY-ATLANTE-VP_EN_CHAP00A_SOMMAIRE_ED01-2014
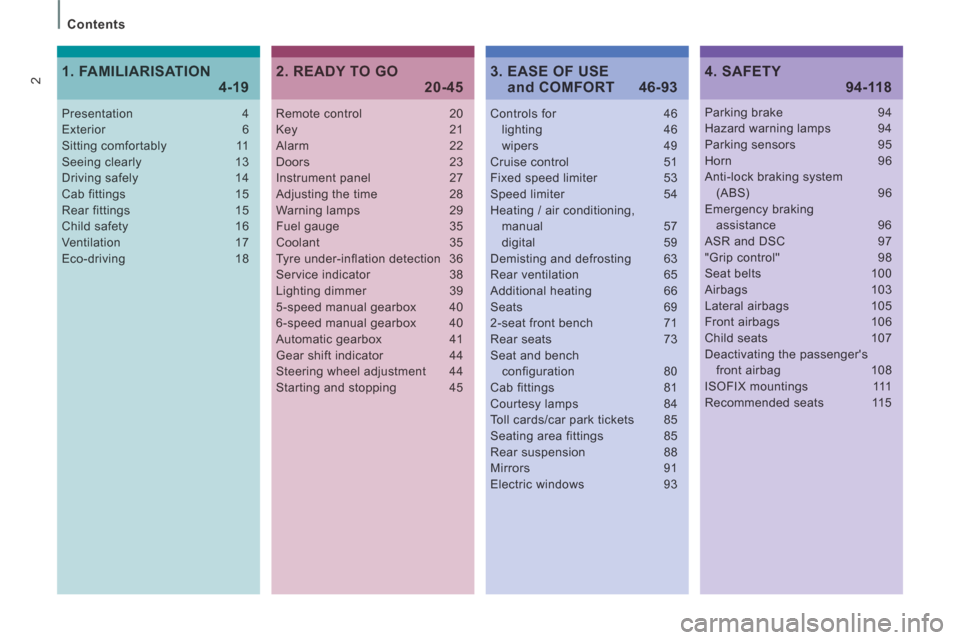
Remote control 20Key 21Alarm 22Doors 23Instrument panel 27Adjusting the time 28Warning lamps 29
Fuel gauge 35Coolant 35Tyre under-inflation detection 36Service indicator 38Lighting dimmer 395-speed manual gearbox 406-speed manual gearbox 40Automatic gearbox 41Gear shift indicator 44Steering wheel adjustment 44Starting and stopping 45
Controls for 46 lighting 46 wipers 49Cruise control 51Fixed speed limiter 53Speed limiter 54Heating / air conditioning,
manual 57 digital 59Demisting and defrosting 63Rear ventilation 65Additional heating 66Seats 692-seat front bench 71Rear seats 73Seat and bench configuration 80Cab fittings 81Courtesy lamps 84Toll cards/car park tickets 85Seating area fittings 85Rear suspension 88Mirrors 91Electric windows 93
Presentation 4Exterior 6Sitting comfortably 11Seeing clearly 13Driving safely 14Cab fittings 15Rear fittings 15
Child safety 16Ventilation 17Eco-driving 18
Parking brake 94Hazard warning lamps 94Parking sensors 95Horn 96Anti-lock braking system (ABS) 96Emergency braking assistance 96ASR and DSC 97"Grip control" 98Seat belts 100Airbags 103Lateral airbags 105Front airbags 106Child seats 107Deactivating the passenger's front airbag 108ISOFIX mountings 111Recommended seats 115
2. READY TO GO 20-454. SAFETY 94-1181. FAMILIARISATION 4-193. EASE OF USE and COMFORT 46-93
Page 22 of 260

20
Access
JUMPY-ATLANTE-VP_EN_CHAP02_PRET A PARTIR_ED01-2014
Central locking
REMOTE CONTROL
ACCESS
Central unlocking
Press this button to unlock your
vehicle, cab and rear doors.
The direction indicators flash
twice and the door mirrors unfold
(unless folding was selected using the
interior control, refer to the "Mirrors and
windows" section of chapter 3). Press this button to lock your
vehicle, cab and rear doors.
The direction indicators flash
once and the door mirrors fold.
If one of the doors is open or is not closed
correctly, the central locking will not work.
Deadlocking
If your vehicle is fitted with deadlocking,
a second press on the closed padlock on
the remote control within five seconds after
locking changes the locking to deadlocking.
This is confirmed by fixed lighting of the
direction indicators for approximately
two seconds.
Deadlocking renders the exterior and interior
door opening handles inoperative: do not
leave anyone inside the vehicle when it is
deadlocked.
If deadlocking is activated from inside the
vehicle, it will change to normal locking
when the vehicle is started.
Folding / unfolding the key
Press this button to release the
key from its housing.
To fold the key, press the
chromed button then fold the key
into the housing. If you do not press the
button, the mechanism may be damaged.
Good practice
Take care not to allow the remote control to
come into contact with grease, dust, rain or
a damp environment.
A heavy object attached to the key (key
ring, ...) weighing on the shaft of the key in
the switch, may cause a malfunction.
Page 23 of 260

21
Access
READ
Y T
O GO
2
JUMPY-ATLANTE-VP_EN_CHAP02_PRET A PARTIR_ED01-2014
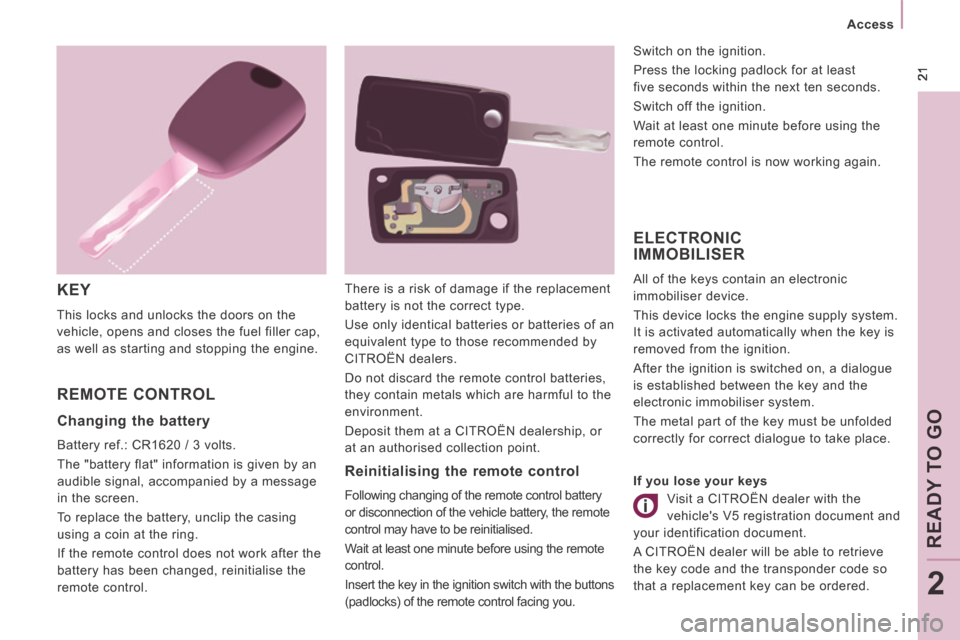
KEY
This locks and unlocks the doors on the
vehicle, opens and closes the fuel filler cap,
as well as starting and stopping the engine.
REMOTE CONTROL
ELECTRONIC IMMOBILISER
All of the keys contain an electronic
immobiliser device.
This device locks the engine supply system.
It is activated automatically when the key is
removed from the ignition.
After the ignition is switched on, a dialogue
is established between the key and the
electronic immobiliser system.
The metal part of the key must be unfolded
correctly for correct dialogue to take place.
Reinitialising the remote control
Following changing of the remote control battery
or disconnection of the vehicle battery, the remote
control may have to be reinitialised.
Wait at least one minute before using the remote
control.
Insert the key in the ignition switch with the buttons
(padlocks) of the remote control facing you. Switch on the ignition.
Press the locking padlock for at least
five seconds within the next ten seconds.
Switch off the ignition.
Wait at least one minute before using the
remote control.
The remote control is now working again.
There is a risk of damage if the replacement
battery is not the correct type.
Use only identical batteries or batteries of an
equivalent type to those recommended by
CITROËN dealers.
Do not discard the remote control batteries,
they contain metals which are harmful to the
environment.
Deposit them at a CITROËN dealership, or
at an authorised collection point.
Changing the battery
Battery ref.: CR1620 / 3 volts.
The "battery flat" information is given by an
audible signal, accompanied by a message
in the screen.
To replace the battery, unclip the casing
using a coin at the ring.
If the remote control does not work after the
battery has been changed, reinitialise the
remote control. If you lose your keys
Visit a CITROËN dealer with the
vehicle's V5 registration document and
your identification document.
A CITROËN dealer will be able to retrieve
the key code and the transponder code so
that a replacement key can be ordered.
Page 24 of 260

22
Access
JUMPY-ATLANTE-VP_EN_CHAP02_PRET A PARTIR_ED01-2014
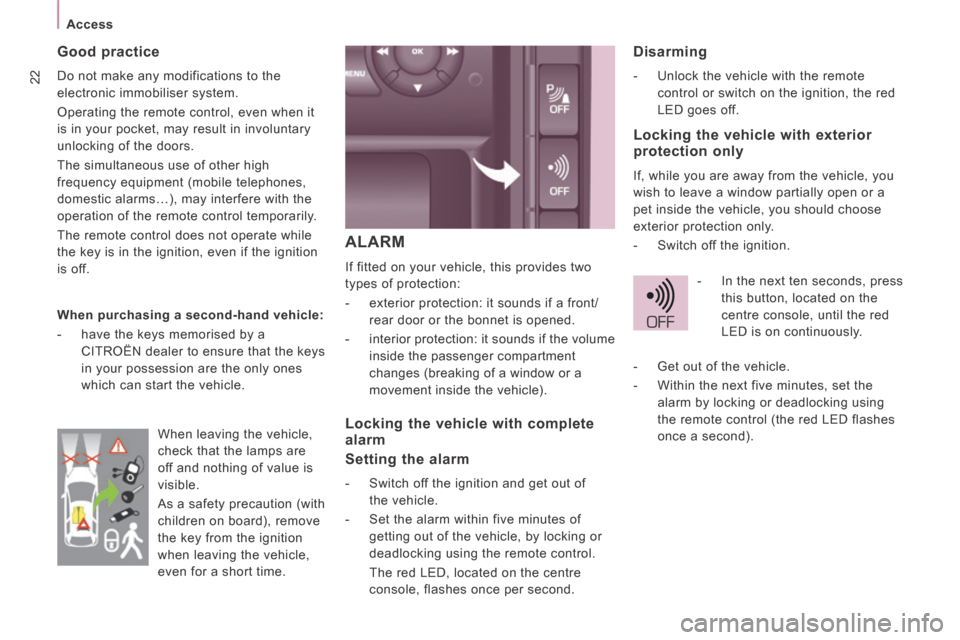
ALARM
If fitted on your vehicle, this provides two
types of protection:
- exterior protection: it sounds if a front/rear door or the bonnet is opened.
- interior protection: it sounds if the volume inside the passenger compartment
changes (breaking of a window or a
movement inside the vehicle).
Disarming
- Unlock the vehicle with the remote control or switch on the ignition, the red
LED goes off.
Good practice
Do not make any modifications to the
electronic immobiliser system.
Operating the remote control, even when it
is in your pocket, may result in involuntary
unlocking of the doors.
The simultaneous use of other high
frequency equipment (mobile telephones,
domestic alarms…), may interfere with the
operation of the remote control temporarily.
The remote control does not operate while
the key is in the ignition, even if the ignition
is off.
When purchasing a second-hand vehicle:
- have the keys memorised by a CITROËN dealer to ensure that the keys
in your possession are the only ones
which can start the vehicle.
Locking the vehicle with complete
alarm
Setting the alarm
- Switch off the ignition and get out of the vehicle.
- Set the alarm within five minutes of getting out of the vehicle, by locking or
deadlocking using the remote control.
The red LED, located on the centre console, flashes once per second.
Locking the vehicle with exterior
protection only
If, while you are away from the vehicle, you
wish to leave a window partially open or a
pet inside the vehicle, you should choose
exterior protection only.
- Switch off the ignition.
- In the next ten seconds, press this button, located on the
centre console, until the red
LED is on continuously.
When leaving the vehicle,
check that the lamps are
off and nothing of value is
visible.
As a safety precaution (with
children on board), remove
the key from the ignition
when leaving the vehicle,
even for a short time. - Get out of the vehicle.
- Within the next five minutes, set the
alarm by locking or deadlocking using
the remote control (the red LED flashes
once a second).
Page 28 of 260

26
Access
JUMPY-ATLANTE-VP_EN_CHAP02_PRET A PARTIR_ED01-2014
HINGED REAR DOORS
When parked with the rear
doors open to 90°, the doors
mask the rear lamps.
To signal your position to road
users travelling in the same
direction who may not have
noticed that you have stopped,
use a warning triangle or any
other device stipulated by the
legislation and regulations of
your country.
TAILGATE
From the outside
The two hinged doors open to 90°.
To open, pull the handle towards you then
pull the lever to open the left-hand door.
To close, start with the left-hand door then
close the right-hand door.
Opening to 180°
A retractable check strap system permits
extension of the opening from 90° to 180°.
Disengage the check strap towards you
when the door is partially open.
The check strap will re-attach automatically
on closing.
From the outside
If fitted on your vehicle, locking/unlocking is
via the remote control.
To open, press the control then raise the
tailgate.
A strap is provided to secure the tailgate in
the upper position.
From inside
Emergency control
In the event of a central unlocking operating
fault, this permits unlocking of the tailgate
from the inside.
Fold the rear seats to gain access to
the lock.
Insert a small screwdriver in this opening to
unlock the tailgate.
Page 31 of 260

29
Instruments and controls
READ
Y T
O GO
2
JUMPY-ATLANTE-VP_EN_CHAP02_PRET A PARTIR_ED01-2014
WARNING LAMPS
Each time the engine is started: a series of warning lamps comes on appl\
ying a check auto-test. They go off again almost immediately.
When the engine is running: the warning lamp becomes a warning if it rem\
ains on continuously or flashes. This initial warning may be
accompanied by an audible signal and a message in the screen.
Do not ignore these warnings .
Warning lamp is indicates Solution - action
STOP on, associated
with another
warning
lamp and
accompanied by
a message in the
screen. major faults linked with the
"Brake fluid level", "Engine oil
pressure and temperature",
"Coolant temperature",
"Electronic brake force
distribution" or "Power steering"
warning lamps.
You must stop as soon as it is safe to do so. Park,
switch off the ignition and call a CITROËN dealer or
a qualified workshop.
Parking brake /
Brake fl uid level /
EBFD
on.
parking brake applied or not
released correctly. Releasing the parking brake switches off the warning lamp.
on. low brake fluid level. Top up using a fluid recommended by CITROËN.
remains on, even
though the level
is correct and
associated with the
ABS warning lamp. failure of the electronic brake
force distribution.
You must stop as soon as it is safe to do so. Park,
switch off the ignition and call a CITROËN dealer or
a qualified workshop.
Engine oil
pressure and
temperature
on while driving.
insufficient pressure or
temperature too high. Park, switch off the ignition and allow to cool. Visually
check the level. Chapter 6, "Levels" section.
remains on, even
though the level
is correct. major fault.
Call a CITROËN dealer or a qualified workshop.
Page 34 of 260

ABS
32
Instruments and controls
JUMPY-ATLANTE-VP_EN_CHAP02_PRET A PARTIR_ED01-2014
Warning lamp is indicates Solution-action
Power steering on. system malfunction. The vehicle retains conventional steering without
assistance. Have the system checked by a CITROËN
dealer or a qualified workshop.
Opening
detection
on and accompanied
by a message in the
screen.
door not closed correctly. Check that the cab doors, the rear and side doors and
the bonnet are closed (if your vehicle is fitted with an
alarm).
Rear
suspension
with pneumatic
height
correction
flashing.
abnormal difference between
the detected sill height and the
optimum sill height. I n automatic correction mode: drive slowly (approximately 6 mph
(10 km/h)) until the warning lamp goes off.
In manual correction mode: return the sill which is still at
the upper or lower limit to an optimum height. Chapter 3,
"Rear suspension" section.
on when starting
or while driving. malfunction of the pneumatic
height correction. You must stop as soon as it is safe to do so. Contact a
CITROËN dealer or a qualified workshop.
ABS remains on. malfunction of the anti-lock
braking system. The vehicle retains conventional braking without
assistance but you are advised to stop. Contact a
CITROËN dealer or a qualified workshop.
DSC flashing.
DSC regulation triggered. The system optimises drive and permits improvement of
the directional stability of the vehicle. Chapter 4, "Driving
safety" section.
remains on with
the LED in the
button (in the
dashboard) on. system malfunction. E.g.: under-
inflation of the tyres.
E.g. Check the pressure of the tyres. Have them
checked by a CITROËN dealer or a qualified workshop.
Page 36 of 260

34
Instruments and controls
JUMPY-ATLANTE-VP_EN_CHAP02_PRET A PARTIR_ED01-2014
Screen is indicates Solution-action
Cruise control on. cruise control selected. Manual selection. Chapter 3, "Steering mounted
controls" section.
Speed limiter on. speed limiter selected. Manual selection. Chapter 3, "Steering mounted
controls" section.
Gear shift
indicat or
on. a recommendation that is
independent of the traffic
configuration and density. To reduce fuel consumption, engage the gear
recommended with a manual gearbox.
The driver retains responsibility for following this
indication or not.
Diesel pre-
heating
on. climatic conditions requiring
pre-heating. Wait until the warning lamp goes off before operating
the starter.
Particle
emissions filter
on. a malfunction of the particle
emissions filter (Diesel additive
level, risk of clogging, ...). Have the filter checked by a CITROËN dealer or a
qualified workshop.
Chapter 6, "Checks" section.
Presence of
water in the
Diesel filter
on and
accompanied by
a message in the
screen.
water in the Diesel filter.
Have the filter bled by a CITROËN dealer or a qualified
workshop without delay.
Chapter 6, "Checks" section.
Service spanner on. service due shortly. Refer to the list of checks in maintenance and warranty
guide. Have the service carried out by a CITROËN
dealer or a qualified workshop.
Time on. adjustment of the time. Use the left-hand button on the instrument panel.
Chapter 2, at the beginning of the "Instruments and
controls" section.
Page 42 of 260

40
Gearboxes and steering wheel
JUMPY-ATLANTE-VP_EN_CHAP02_PRET A PARTIR_ED01-2014
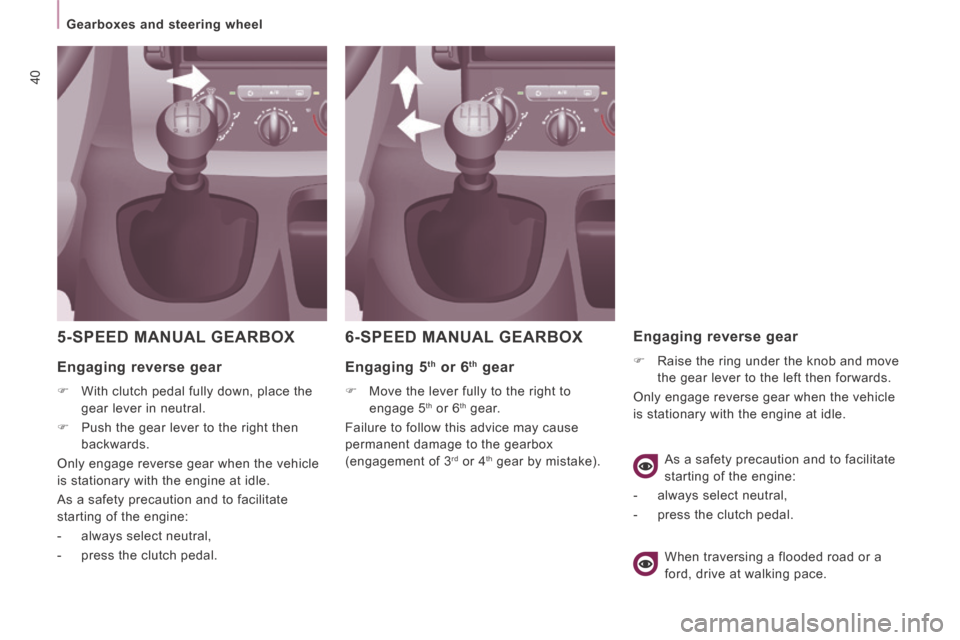
5-SPEED MANUAL GEARBOX
Engaging reverse gear
With clutch pedal fully down, place the
gear lever in neutral.
Push the gear lever to the right then
backwards.
Only engage reverse gear when the vehicle
is stationary with the engine at idle.
As a safety precaution and to facilitate
starting of the engine:
- always select neutral,
- press the clutch pedal.
6-SPEED MANUAL GEARBOX
Engaging 5 th or 6 th gear
Move the lever fully to the right to
engage 5 th or 6 th gear.
Failure to follow this advice may cause
permanent damage to the gearbox
(engagement of 3
rd or 4 th gear by mistake).
Engaging reverse gear
Raise the ring under the knob and move
the gear lever to the left then forwards.
Only engage reverse gear when the vehicle
is stationary with the engine at idle.
When traversing a flooded road or a
ford, drive at walking pace. As a safety precaution and to facilitate
starting of the engine:
- always select neutral,
- press the clutch pedal.
Page 43 of 260

41
Gearboxes and steering wheel
READ
Y T
O GO
2
JUMPY-ATLANTE-VP_EN_CHAP02_PRET A PARTIR_ED01-2014
AUTOMATIC GEARBOX
Selecting positions
- Move the lever select a position. Once the position is selected, the
corresponding indicator lamp appears in
the instrument panel screen.
Park: position of the lever for
parking.
To immobilise the vehicle or start
the engine. Reverse: position of the lever for
reverse gear.
To reverse the vehicle.
Neutral: position of the lever for
neutral.
To park the vehicle (parking brake
on) and start the engine. Drive: position of the lever for
driving.
To move the vehicle forwards in
automatic mode.
Manual: selection of the gears by
pushing or pulling the gear lever
(+ or -).
To move the vehicle forwards in
manual mode.