change lamp Citroen NEMO 2015 1.G User Guide
[x] Cancel search | Manufacturer: CITROEN, Model Year: 2015, Model line: NEMO, Model: Citroen NEMO 2015 1.GPages: 192, PDF Size: 7.84 MB
Page 113 of 192
111
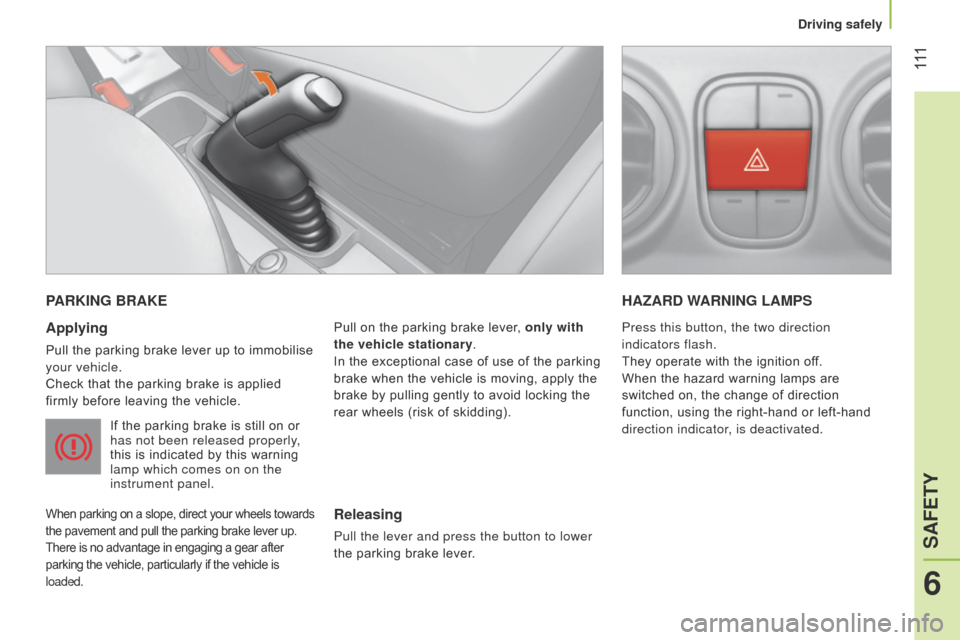
PARKING BRAKE
Applying
Pull the parking brake lever up to immobilise
your vehicle.
Check that the parking brake is applied
firmly before leaving the vehicle.
If the parking brake is still on or
has not been released properly,
this is indicated by this warning
lamp which comes on on the
instrument panel.
When parking on a slope, direct your wheels towards
the pavement and pull the parking brake lever up.
There is no advantage in engaging a gear after
parking the vehicle, particularly if the vehicle is
loaded.
Pull on the parking brake lever, only with
the vehicle stationary.
In the exceptional case of use of the parking
brake when the vehicle is moving, apply the
brake by pulling gently to avoid locking the
rear wheels (risk of skidding).
HAZARD WARNING LAMPS
Releasing
Pull the lever and press the button to lower
the parking brake lever. Press this button, the two direction
indicators flash.
They operate with the ignition off.
When the hazard warning lamps are
switched on, the change of direction
function, using the right-hand or left-hand
direction indicator, is deactivated.
6
SAFETY
Driving safely
Page 115 of 192
11 3
Emergency braking assistance*
System which, in an emergency, enables
you to reach the optimum braking pressure
more quickly, thus reducing the stopping
distance. The emergency braking assistance
is an integral part of the DSC system.
Activation
It is brought into play by the speed at which
the brake pedal is pressed.
The effect of this is a reduction in the
resistance of the pedal and an increase in
braking efficiency.
When braking in an emergency, press firmly
without releasing the pressure.
Good practice
This system cannot be deactivated by the
driver.
* Depending on country of sale.
TRAJECTORY CONTROL SYSTEMS
Dynamic stability control
(DSC)
The dynamic stability control system acts on
the brake of one or more wheels and on the
engine to keep the vehicle on the trajectory
required by the driver, within the limits of the
laws of physics.
Activation
This system is activated automatically each
time the vehicle is started and cannot be
deactivated.
It comes into operation in the event of a grip
or trajectory problem.
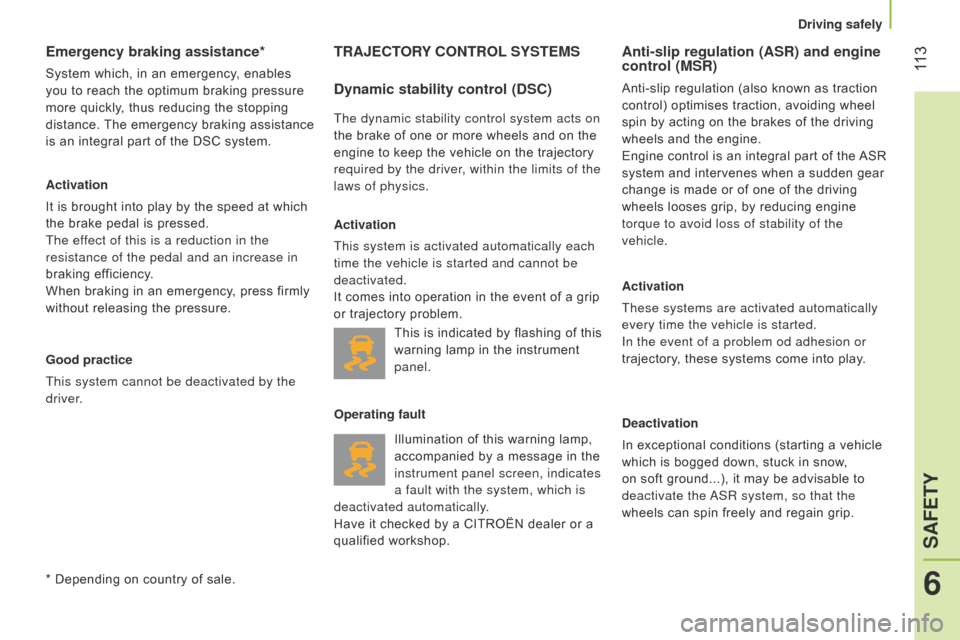
Illumination of this warning lamp,
accompanied by a message in the
instrument panel screen, indicates
a fault with the system, which is
deactivated automatically.
Have it checked by a CITROËN dealer or a
qualified workshop.
Anti-slip regulation (ASR) and engine
control (MSR)
Anti-slip regulation (also known as traction
control) optimises traction, avoiding wheel
spin by acting on the brakes of the driving
wheels and the engine.
Engine control is an integral part of the ASR
system and intervenes when a sudden gear
change is made or of one of the driving
wheels looses grip, by reducing engine
torque to avoid loss of stability of the
vehicle.
Activation
These systems are activated automatically
every time the vehicle is started.
In the event of a problem od adhesion or
trajectory, these systems come into play.
Deactivation
In exceptional conditions (starting a vehicle
which is bogged down, stuck in snow,
on soft ground...), it may be advisable to
deactivate the
a
SR system, so that the
wheels can spin freely and regain grip.
This is indicated by flashing of this
warning lamp in the instrument
panel.
Operating fault
6
SAFETY
Driving safely
Page 118 of 192
11 6
TYRE UNDER-INFLATION DETECTION
System which automatically checks the
pressure of the tyres while driving.
The system monitors the pressures on the
four tyres, once the vehicle is moving.
It compares the information given by the
four wheel speed sensors with reference
values, which must be reinitialised every
time the tyre pressures are adjusted or a
wheel changed.
The system triggers an alert as soon as it
detects a drop in the inflation pressure of
one or more tyres.
The under-inflation detection system
does not replace the vigilance or the
responsibility of the driver.
This system does not avoid the need to
check the tyre pressures (including the
spare wheel) every month as well as before
a long journey.
Driving with under-inflated tyres impairs
road holding, extends braking distances and
causes premature tyre wear, particularly
under arduous condition (high loading, high
speed, long journey).
Driving with under-inflated tyres increases
fuel consumption.
The inflation pressures defined for
your vehicle can be found on the tyre
pressure label.
See the "Identification markings" section.
Tyre pressures should be checked when the
tyres are "cold" (vehicle stopped for 1 hour
or after a journey of less than 6 miles
(10 km) at moderate speeds).
Otherwise (when hot), add 0.3 bar to the
pressures shown on the label.
Under-inflation alert
This is given by fixed
illumination of this warning lamp,
accompanied the display of a
message,depending on equipment.
F
Reduce speed immediately
, avoid
excessive steering movements and
sudden braking
F
Stop the vehicle as soon as it is safe to
do so.
The loss of pressure detected does
not always cause visible bulging of the
tyre. Do not satisfy yourself with just a visual
check.
F
In the event of a puncture, use the
temporary puncture repair kit or the spare
wheel (depending on equipment),
or
F
if you have a compressor
, such as the
one in the temporary puncture repair kit,
check the pressures of the four tyres
when cold,
or
F
if it is not possible to make this check
immediately, drive carefully at reduced
speed.
The alert is maintained until the system
is reinitialised.
Driving safely
Page 121 of 192

11 9
Good practice
The driver must ensure that all passengers
fasten their seat belts correctly.
Wherever you are seated in the vehicle,
always fasten your seat belt, even for short
journeys.
The seat belts are fitted with an inertia reel
which automatically adjusts the length of the
strap to your size. The seat belt is reeled in
automatically when not in use.
Ensure that the seat belt has reeled in
correctly after use.
After folding or moving a seat, ensure that
the seat belt has reeled in correctly into its
compartment and that the buckle is ready to
accommodate the tongue.The force limiter reduces the pressure of the
seat belt against the body of the occupants.
The equipment fitted to these seat belts is
operational when the ignition is switched on.
The inertia reels are fitted with a device
which automatically locks the strap in the
event of a collision or emergency braking or
if the vehicle rolls over.
The airbag warning lamp comes
on if the pretensioners are
deployed. Contact a CITR
o Ë n or
a qualified workshop.
Depending on the nature and seriousness
of any impact, the pretensioning device may
be deployed before and independently of
inflation of the airbags. It instantly tightens
the seat belts against the body of the
occupants.
The deployment of the pretensioners is
accompanied by a slight discharge of
harmless smoke and a noise, due to the
activation of the pyrotechnic cartridge
incorporated in the system. In order to be effective, a seat belt must:
-
restrain one person only
,
-
must not be twisted, check by pulling in
front of you with an even movement,
-
be tightened as close to the body as
possible.
The upper part of the seat belt should be
positioned in the hollow of the shoulder.
The lap part should be placed as low as
possible on the pelvis.
Do not interchange the seat belt buckles as
they will not fulfil their role completely. If the
seats are fitted with armrests, the lap part of
the seat belt should always pass under the
armrest.
Check that the seat belt is fastened correctly
by pulling the strap firmly. Recommendations for children:
-
use a suitable child seat if the passenger
is less than 12 years old or less than one
and a half metres tall,
-
never allow a child to travel on your lap,
even with the seat belt fastened.
For more information on child seats,
refer to the "Safety - Children on
board" section.
In accordance with current safety
regulations, for all work on your vehicle,
refer to a qualified workshop that has the
skills an equipment needed, all of which can
be provided by a CITR
o Ë n dealer.
Have the seat belts checked regularly (even
after a minor impact) by a CITR
o Ë n dealer
or a qualified workshop: they must not show
any signs of wear, cutting or fraying and they
must not be transformed or modified.
Clean the seat belt straps with soapy
water or a textile cleaning product,
available from CITR
o Ë n dealers.
6
SAFETY
Seat belts
Page 140 of 192
138
In certain cases of particularly arduous
use (towing the maximum load up a steep
slope in high temperatures), the engine
automatically limits its power. In this case,
automatic cutting off of the air conditioning
allows the engine power to be saved.If the coolant temperature
warning lamp comes on, stop the
vehicle and switch off the engine
as soon as possible.
ChecksSee the "Levels" section of
chapter 7.
Tyres: check the tyre pressures on the
towing vehicle and the trailer, observing the
recommended pressures.
Brakes: towing increases the braking
distance.
d rive at a moderate speed,
change down early and brake gradually. Side wind: sensitivity to side wind is
increased.
d rive smoothly and at a
moderate speed.
ABS: the system only controls the vehicle,
not the trailer.
Distribution of loads
distribute the load in the trailer so that the
heaviest objects are as close as possible
to the axle and the nose weight is close to
the maximum authorised without, however,
exceeding it. The air density decreases with
altitude, so reducing the performance of the
engine. The maximum towed load must be
reduced by 10 % for each 1 000 metres of
altitude.
Refer to the "Technical data -
Identification markings" section. Rear parking sensors: the sensors will be
deactivated automatically when an genuine
CITR
o Ë n towbar is used.
Towbar
We recommend the use of genuine
CITR
o Ë n towbars and their harnesses,
which have been tested and approved from
the design stage of your vehicle, and that
the fitting of this equipment is entrusted to a
CITROËN dealer or a qualified workshop.
If this equipment is not fitted by a CITR
o Ë n
dealer
, it is essential that it is fitted using
the electrical pre-equipment located at
the rear of the vehicle and following the
manufacturer's instructions.
The operation of the rear parking sensors is
deactivated automatically when the trailer
cable connector is inserted in the towbar
socket.
When the trailer cable is removed, the rear
parking sensors are re-activated.
Refer to the "Technology on board -
Parking sensors" section.
For information on the maximum
weights and towed loads applicable to
your vehicle, refer to the "Technical data -
Weights" section.
Towing a trailer
Page 149 of 192
147These regular maintenance operations will
keep your vehicle in good working order.
Ask for advice from a CITROËN dealer
or a qualified workshop or refer to the
maintenance and warranty guide provided in
the handbook pack.
LEVELS
Oil level
Check the level regularly and top up
between changes. The maximum oil
consumption is 0.5 litre per 600 miles
(1 000
km). Check the level with the vehicle
level, engine cold, using the dipstick.
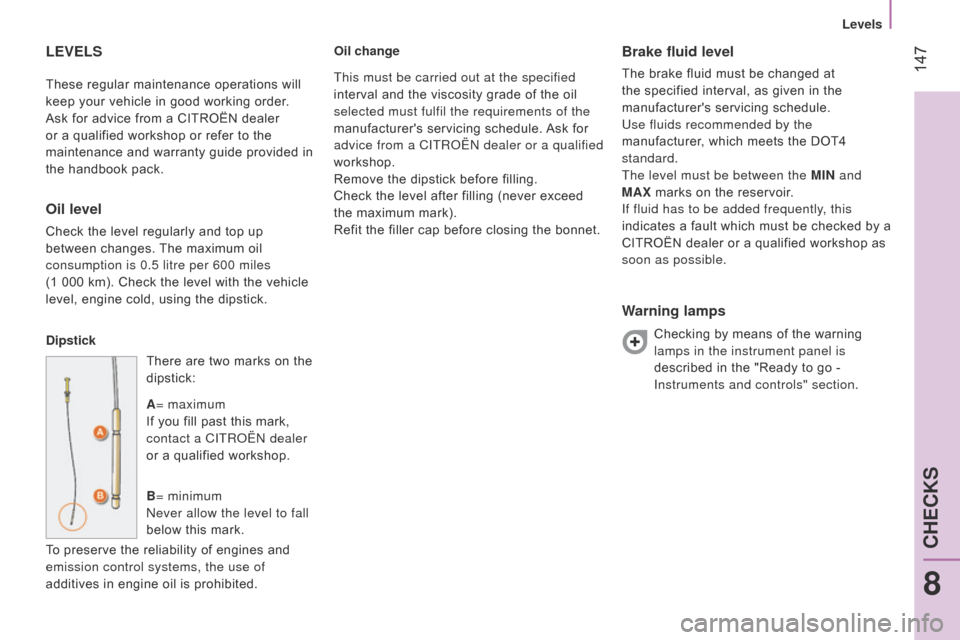
Dipstick There are two marks on the
dipstick:
A= maximum
If you fill past this mark,
contact a CITR
o Ë n dealer
or a qualified workshop.
B = minimum
n
ever allow the level to fall
below this mark.
To preserve the reliability of engines and
emission control systems, the use of
additives in engine oil is prohibited. Oil change
Brake fluid level
The brake fluid must be changed at
the specified interval, as given in the
manufacturer's servicing schedule.
Use fluids recommended by the
manufacturer, which meets the DOT4
standard.
The level must be between the MIN and
MAX marks on the reservoir.
If fluid has to be added frequently, this
indicates a fault which must be checked by a
CITROËN dealer or a qualified workshop as
soon as possible.
Warning lamps
Checking by means of the warning
lamps in the instrument panel is
described in the "Ready to go -
Instruments and controls" section.
This must be carried out at the specified
interval and the viscosity grade of the oil
selected must fulfil the requirements of the
manufacturer's servicing schedule. Ask for
advice from a CITR
o
Ë
n
dealer or a qualified
workshop.
Remove the dipstick before filling.
Check the level after filling (never exceed
the maximum mark).
Refit the filler cap before closing the bonnet.
8
CHECKS
Levels
Page 151 of 192
149
CHECKS
Bleeding water from the Diesel
filter
If this warning lamp comes
on, you must bleed the filter;
otherwise bleed the filter
regularly, every time the engine
oil is changed.
To remove the water, unscrew the bleed
screw or the water in
d iesel sensor, located
at the base of the filter.
o perate until all of
the water has flowed out. Then tighten the
bleed screw or the water sensor.
Battery
at the start of winter, have your battery
checked by a CITROËN dealer or a qualified
workshop.
Air filter and passenger compartment filter
A blocked passenger compartment filter
may reduce the performance of the
air conditioning system and generate
undesirable odours. The replacement
intervals for these components are indicated
in the maintenance and warranty guide.
Depending on the environment (dusty
atmosphere...) and the use of the vehicle
(urban driving...), change them twice as
often if necessary.
Brake pads
Brake pad wear depends on the type of
driving, in particular for vehicles which are
used in town, over short distances. It may
be necessary to check the brake pad wear,
even between services.
Unless there is a leak on the system, a drop
in the brake fluid level indicates that the
brake pads are worn.
Brake disc / drum wear
For all information on checking the brake
disc / drum wear, contact a CITROËN dealer
or a qualified workshop.
Parking brake
Where the parking brake travel is too great
or there is a reduction in the performance
of the system, the parking brake should be
adjusted, even between services.
Have the system checked by a CITROËN
dealer or a qualified workshop.
Oil filter
Change the filter regularly, in accordance
with the manufacturer's servicing schedule.
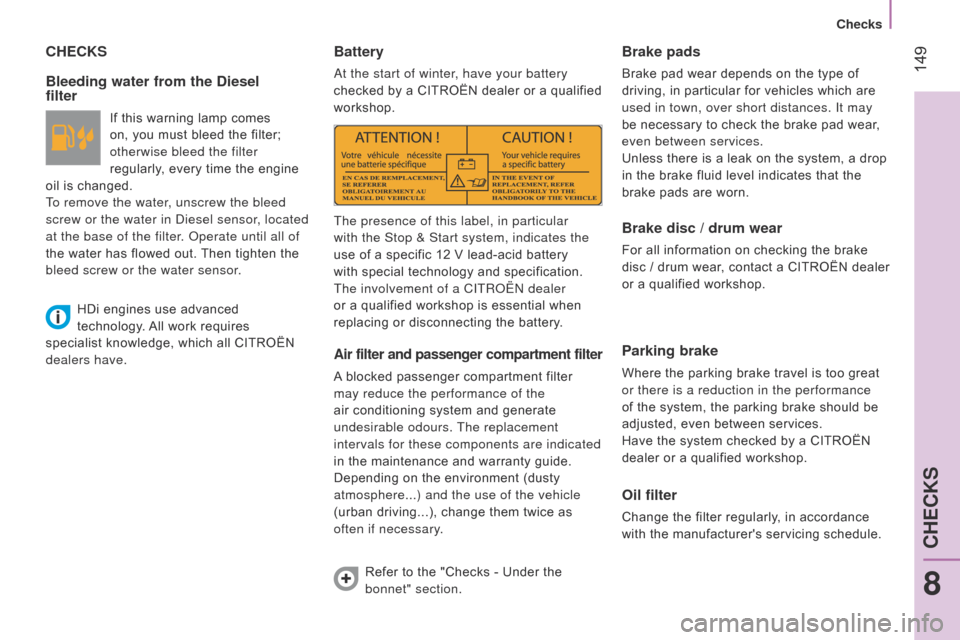
The presence of this label, in particular
with the Stop & Start system, indicates the
use of a specific 12 V lead-acid battery
with special technology and specification.
The involvement of a CITR
o
Ë
n
dealer
or a qualified workshop is essential when
replacing or disconnecting the battery.
Refer to the "Checks - Under the
bonnet" section.
HDi engines use advanced
technology. All work requires
specialist knowledge, which all CITROËN
dealers have.
8
CHECKS
Checks
Page 164 of 192
162
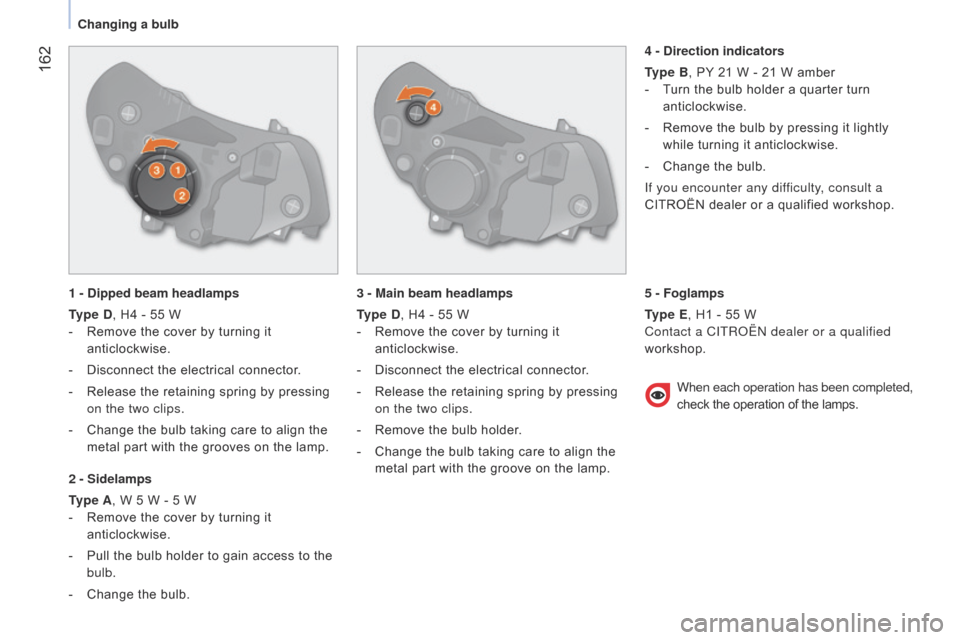
1 - Dipped beam headlamps
Type D, H4 - 55 W
-
Remove the cover by turning it
anticlockwise.
-
Disconnect the electrical connector
.
-
Release the retaining spring by pressing
on the two clips.
-
Change the bulb taking care to align the
metal part with the grooves on the lamp.
2 - Sidelamps
Type A, W 5 W - 5 W
-
Remove the cover by turning it
anticlockwise.
-
Pull the bulb holder to gain access to the
bulb.
-
Change the bulb. 3 - Main beam headlamps
T
ype D, H4 - 55 W
-
Remove the cover by turning it
anticlockwise.
-
Disconnect the electrical connector
.
-
Release the retaining spring by pressing
on the two clips.
-
Remove the bulb holder
.
-
Change the bulb taking care to align the
metal part with the groove on the lamp. 4 - Direction indicators
Type B, PY 21 W - 21 W amber
-
T
urn the bulb holder a quarter turn
anticlockwise.
-
Remove the bulb by pressing it lightly
while turning it anticlockwise.
-
Change the bulb.
If you encounter any dif
ficulty, consult a
CITROËN dealer or a qualified workshop.
When each operation has been completed,
check the operation of the lamps.
5 - Foglamps
Type E, H1 - 55 W
Contact a CITR
o Ë n dealer or a qualified
workshop.
Changing a bulb
Page 165 of 192
163
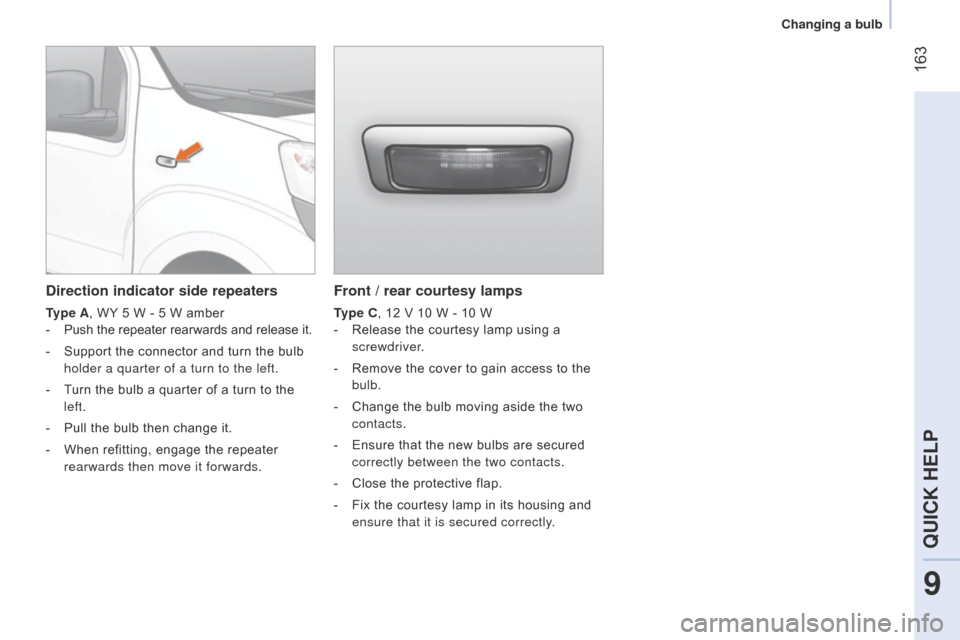
Front / rear courtesy lamps
Type C, 12 V 10 W - 10 W
-
Release the courtesy lamp using a
screwdriver.
-
Remove the cover to gain access to the
bulb.
-
Change the bulb moving aside the two
contacts.
-
Ensure that the new bulbs are secured
correctly between the two contacts.
-
Close the protective flap.
-
Fix the courtesy lamp in its housing and
ensure that it is secured correctly.
Direction indicator side repeaters
Type A, WY 5 W - 5 W amber
-
Push the repeater rearwards and
release it.
-
Support the connector and turn the bulb
holder a quarter of a turn to the left.
-
T
urn the bulb a quarter of a turn to the
left.
-
Pull the bulb then change it.
-
When refitting, engage the repeater
rearwards then move it forwards.
9
QUICK HELP
Changing a bulb
Page 166 of 192
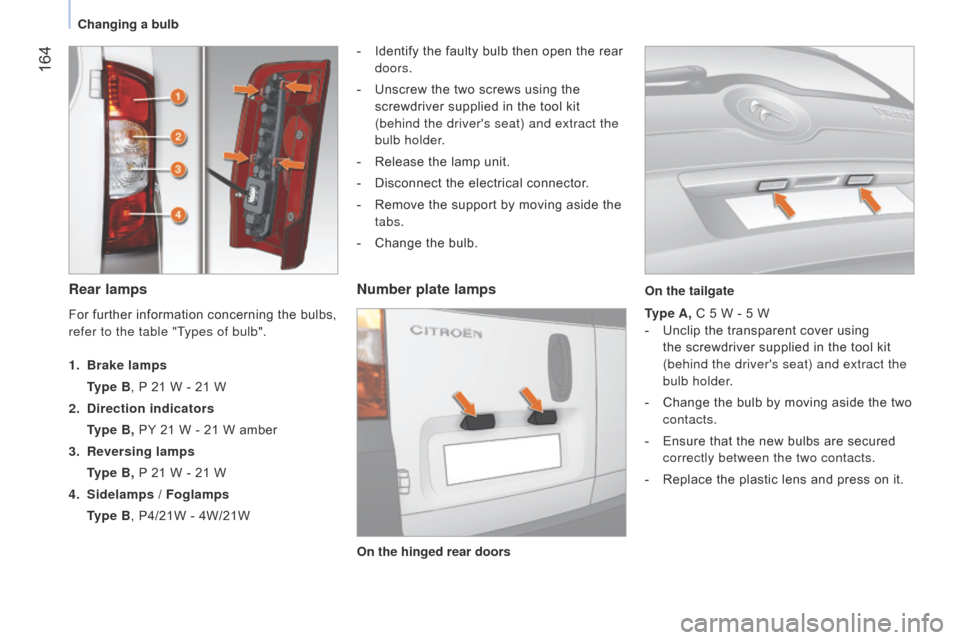
164
Rear lamps
- Identify the faulty bulb then open the rear
doors.
-
Unscrew the two screws using the
screwdriver supplied in the tool kit
(behind the driver's seat) and extract the
bulb holder.
-
Release the lamp unit.
-
Disconnect the electrical connector
.
-
Remove the support by moving aside the
tabs.
-
Change the bulb.
Number plate lamps
Type A, C 5 W - 5 W
-
Unclip the transparent cover using
the screwdriver supplied in the tool kit
(behind the driver's seat) and extract the
bulb holder.
-
Change the bulb by moving aside the two
contacts.
-
Ensure that the new bulbs are secured
correctly between the two contacts.
-
Replace the plastic lens and press on it.
For further information concerning the bulbs,
refer to the table "Types of bulb".
1.
Brake lamps
T
ype B, P 21 W - 21 W
2.
Direction indicators
T
ype B, PY 21 W - 21 W amber
3.
Reversing lamps
T
ype B, P 21 W - 21 W
4.
Sidelamps / Foglamps
T
ype B, P4/21W - 4W/21W On the hinged rear doors On the tailgate
Changing a bulb