ABS Citroen NEMO 2015 1.G Owner's Manual
[x] Cancel search | Manufacturer: CITROEN, Model Year: 2015, Model line: NEMO, Model: Citroen NEMO 2015 1.GPages: 192, PDF Size: 7.84 MB
Page 42 of 192
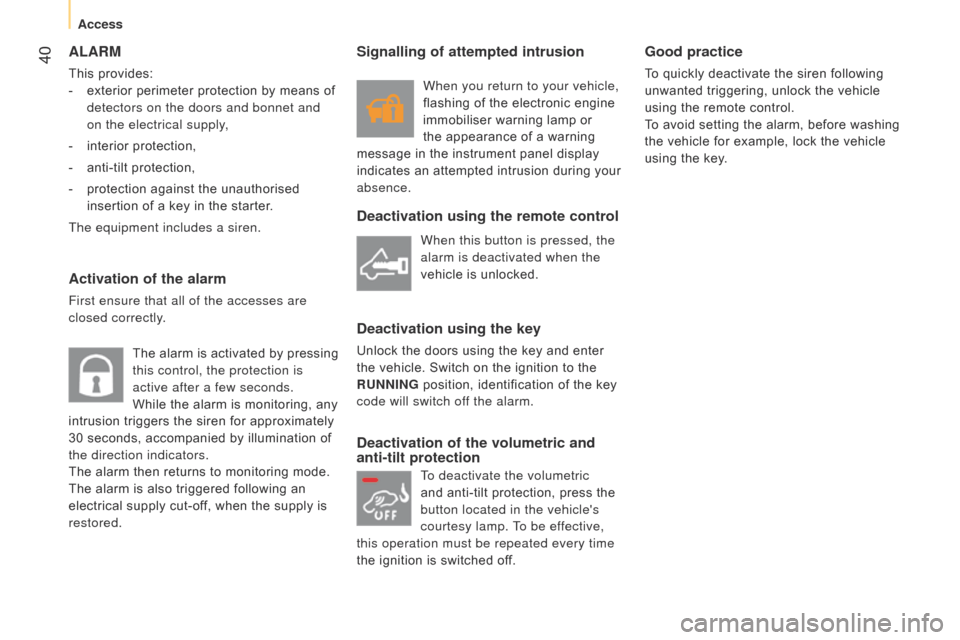
40ALARM
This provides:
-
exterior perimeter protection by means of
detectors on the doors and bonnet and
on the electrical supply,
-
interior protection,
-
anti-tilt protection,
-
protection against the unauthorised
insertion of a key in the starter.
The equipment includes a siren.
Activation of the alarm
First ensure that all of the accesses are
closed correctly.
The alarm is activated by pressing
this control, the protection is
active after a few seconds.
While the alarm is monitoring, any
intrusion triggers the siren for approximately
30 seconds, accompanied by illumination of
the direction indicators.
The alarm then returns to monitoring mode.
The alarm is also triggered following an
electrical supply cut-off, when the supply is
restored.
Deactivation using the remote control
Deactivation using the key
Unlock the doors using the key and enter
the vehicle. Switch on the ignition to the
RUNNING position, identification of the key
code will switch off the alarm.
Deactivation of the volumetric and
anti-tilt protection Good practice
To quickly deactivate the siren following
unwanted triggering, unlock the vehicle
using the remote control.
To avoid setting the alarm, before washing
the vehicle for example, lock the vehicle
using the key.
When this button is pressed, the
alarm is deactivated when the
vehicle is unlocked.
Signalling of attempted intrusion
When you return to your vehicle,
flashing of the electronic engine
immobiliser warning lamp or
the appearance of a warning
message in the instrument panel display
indicates an attempted intrusion during your
absence.
To deactivate the volumetric
and anti-tilt protection, press the
button located in the vehicle's
courtesy lamp. To be effective,
this operation must be repeated every time
the ignition is switched off.
Access
Page 51 of 192
49
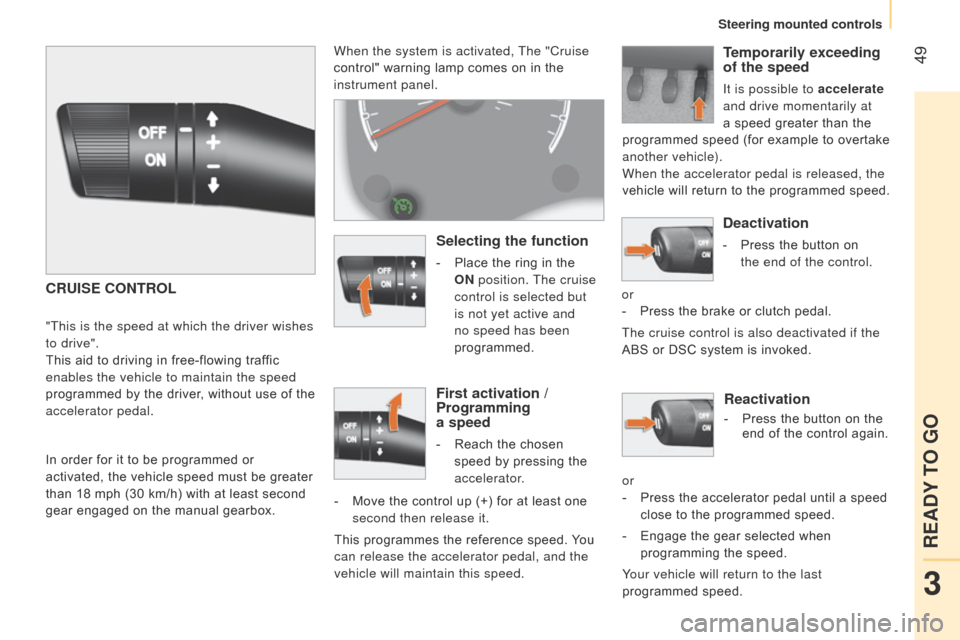
Reactivation
- Press the button on the
end of the control again.
or
-
Press the accelerator pedal until a speed
close to the programmed speed.
-
Engage the gear selected when
programming the speed.
Your vehicle will return to the last
programmed speed.
When the system is activated, The "Cruise
control" warning lamp comes on in the
instrument panel.
CRUISE CONTROL
"This is the speed at which the driver wishes
to drive".
This aid to driving in free-flowing traffic
enables the vehicle to maintain the speed
programmed by the driver, without use of the
accelerator pedal.
In order for it to be programmed or
activated, the vehicle speed must be greater
than 18 mph (30 km/h) with at least second
gear engaged on the manual gearbox.
Selecting the function
- Place the ring in the
ON position. The cruise
control is selected but
is not yet active and
no speed has been
programmed.
First activation /
Programming
a speed
- Reach the chosen
speed by pressing the
accelerator.
-
Move the control up (+) for at least one
second then release it.
This programmes the reference speed. You
can release the accelerator pedal, and the
vehicle will maintain this speed.
Temporarily exceeding
of the speed
It is possible to accelerate
and drive momentarily at
a speed greater than the
programmed speed (for example to overtake
another vehicle).
When the accelerator pedal is released, the
vehicle will return to the programmed speed.
Deactivation
- Press the button on
the end of the control.
or
-
Press the brake or clutch pedal.
The cruise control is also deactivated if the
ABS or DSC system is invoked.
3
READY TO GO
Steering mounted controls
Page 78 of 192
76
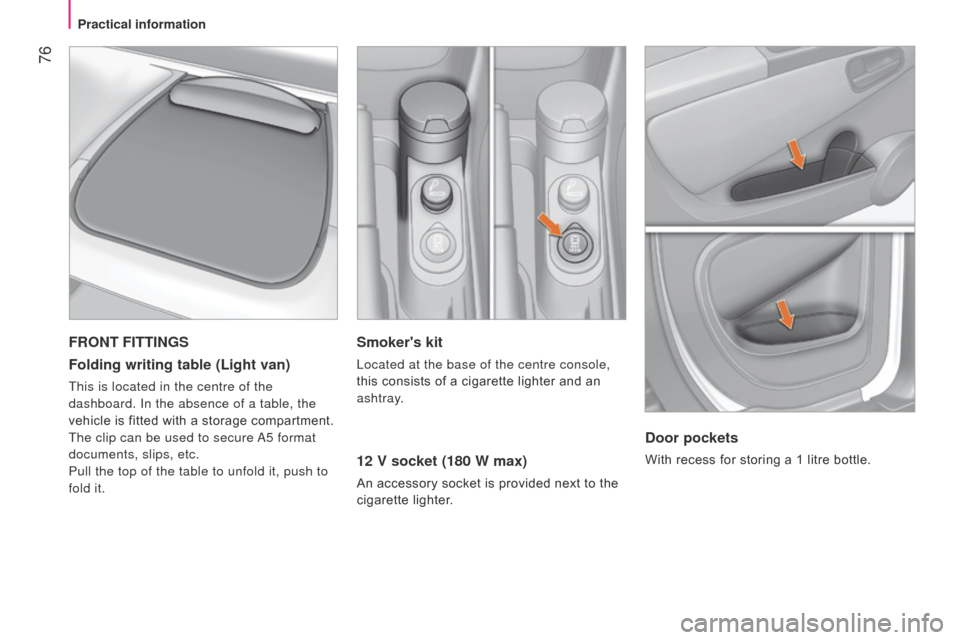
Smoker's kit
Located at the base of the centre console,
this consists of a cigarette lighter and an
ashtray.
12 V socket (180 W max)
An accessory socket is provided next to the
cigarette lighter.
FRONT FITTINGS
Folding writing table (Light van)
This is located in the centre of the
dashboard. In the absence of a table, the
vehicle is fitted with a storage compartment.
The clip can be used to secure
a
5 format
documents, slips, etc.
Pull the top of the table to unfold it, push to
fold it.
Door pockets
With recess for storing a 1 litre bottle.
Practical information
Page 114 of 192
11 2
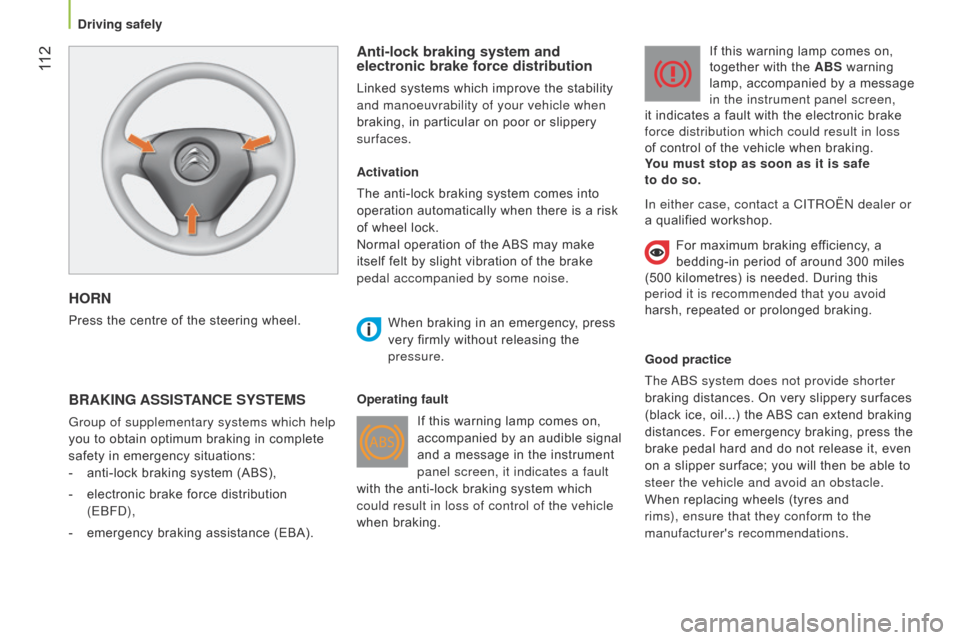
HORN
Press the centre of the steering wheel.
Anti-lock braking system and
electronic brake force distribution
Linked systems which improve the stability
and manoeuvrability of your vehicle when
braking, in particular on poor or slippery
surfaces.
BRAKING ASSISTANCE SYSTEMS
Group of supplementary systems which help
you to obtain optimum braking in complete
safety in emergency situations:
-
anti-lock braking system (ABS),
-
electronic brake force distribution
(E
b F d ),
-
emergency braking assistance (EBA). Activation
The anti-lock braking system comes into
operation automatically when there is a risk
of wheel lock.
Normal operation of the ABS may make
itself felt by slight vibration of the brake
pedal accompanied by some noise.
When braking in an emergency
, press
very firmly without releasing the
pressure.
Operating fault If this warning lamp comes on,
accompanied by an audible signal
and a message in the instrument
panel screen, it indicates a fault
with the anti-lock braking system which
could result in loss of control of the vehicle
when braking. If this warning lamp comes on,
together with the ABS warning
lamp, accompanied by a message
in the instrument panel screen,
it indicates a fault with the electronic brake
force distribution which could result in loss
of control of the vehicle when braking.
You must stop as soon as it is safe
to do so.
Good practice
The
ab
S system does not provide shorter
braking distances. On very slippery surfaces
(black ice, oil...) the ABS can extend braking
distances. For emergency braking, press the
brake pedal hard and do not release it, even
on a slipper surface; you will then be able to
steer the vehicle and avoid an obstacle.
When replacing wheels (tyres and
rims), ensure that they conform to the
manufacturer's recommendations. In either case, contact a CITR o Ë n dealer or
a qualified workshop.
For maximum braking efficiency, a
bedding-in period of around 300 miles
(500 kilometres) is needed. During this
period it is recommended that you avoid
harsh, repeated or prolonged braking.
Driving safely
Page 140 of 192
138
In certain cases of particularly arduous
use (towing the maximum load up a steep
slope in high temperatures), the engine
automatically limits its power. In this case,
automatic cutting off of the air conditioning
allows the engine power to be saved.If the coolant temperature
warning lamp comes on, stop the
vehicle and switch off the engine
as soon as possible.
ChecksSee the "Levels" section of
chapter 7.
Tyres: check the tyre pressures on the
towing vehicle and the trailer, observing the
recommended pressures.
Brakes: towing increases the braking
distance.
d rive at a moderate speed,
change down early and brake gradually. Side wind: sensitivity to side wind is
increased.
d rive smoothly and at a
moderate speed.
ABS: the system only controls the vehicle,
not the trailer.
Distribution of loads
distribute the load in the trailer so that the
heaviest objects are as close as possible
to the axle and the nose weight is close to
the maximum authorised without, however,
exceeding it. The air density decreases with
altitude, so reducing the performance of the
engine. The maximum towed load must be
reduced by 10 % for each 1 000 metres of
altitude.
Refer to the "Technical data -
Identification markings" section. Rear parking sensors: the sensors will be
deactivated automatically when an genuine
CITR
o Ë n towbar is used.
Towbar
We recommend the use of genuine
CITR
o Ë n towbars and their harnesses,
which have been tested and approved from
the design stage of your vehicle, and that
the fitting of this equipment is entrusted to a
CITROËN dealer or a qualified workshop.
If this equipment is not fitted by a CITR
o Ë n
dealer
, it is essential that it is fitted using
the electrical pre-equipment located at
the rear of the vehicle and following the
manufacturer's instructions.
The operation of the rear parking sensors is
deactivated automatically when the trailer
cable connector is inserted in the towbar
socket.
When the trailer cable is removed, the rear
parking sensors are re-activated.
Refer to the "Technology on board -
Parking sensors" section.
For information on the maximum
weights and towed loads applicable to
your vehicle, refer to the "Technical data -
Weights" section.
Towing a trailer
Page 166 of 192
164
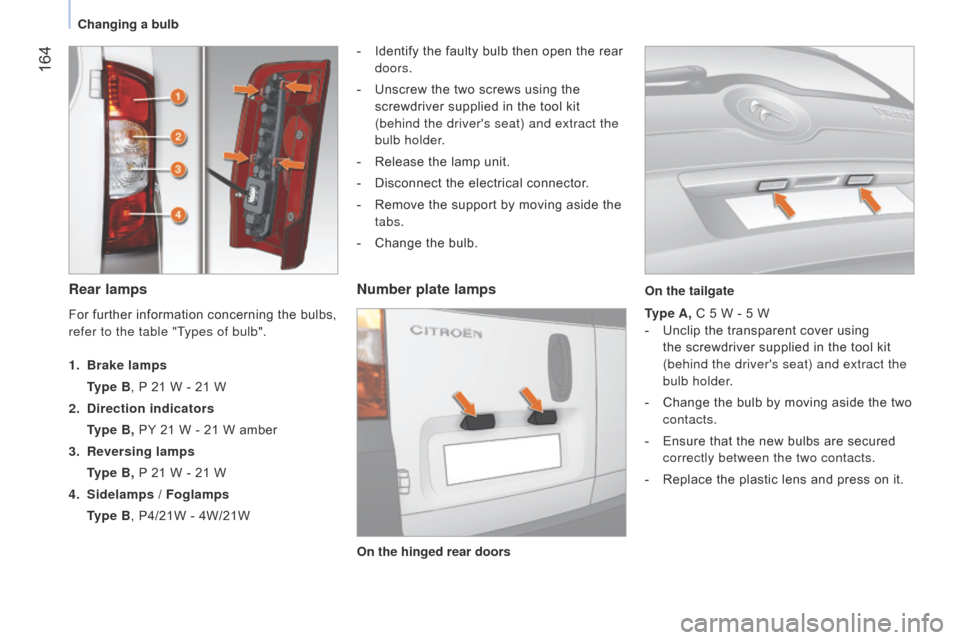
Rear lamps
- Identify the faulty bulb then open the rear
doors.
-
Unscrew the two screws using the
screwdriver supplied in the tool kit
(behind the driver's seat) and extract the
bulb holder.
-
Release the lamp unit.
-
Disconnect the electrical connector
.
-
Remove the support by moving aside the
tabs.
-
Change the bulb.
Number plate lamps
Type A, C 5 W - 5 W
-
Unclip the transparent cover using
the screwdriver supplied in the tool kit
(behind the driver's seat) and extract the
bulb holder.
-
Change the bulb by moving aside the two
contacts.
-
Ensure that the new bulbs are secured
correctly between the two contacts.
-
Replace the plastic lens and press on it.
For further information concerning the bulbs,
refer to the table "Types of bulb".
1.
Brake lamps
T
ype B, P 21 W - 21 W
2.
Direction indicators
T
ype B, PY 21 W - 21 W amber
3.
Reversing lamps
T
ype B, P 21 W - 21 W
4.
Sidelamps / Foglamps
T
ype B, P4/21W - 4W/21W On the hinged rear doors On the tailgate
Changing a bulb
Page 167 of 192
165
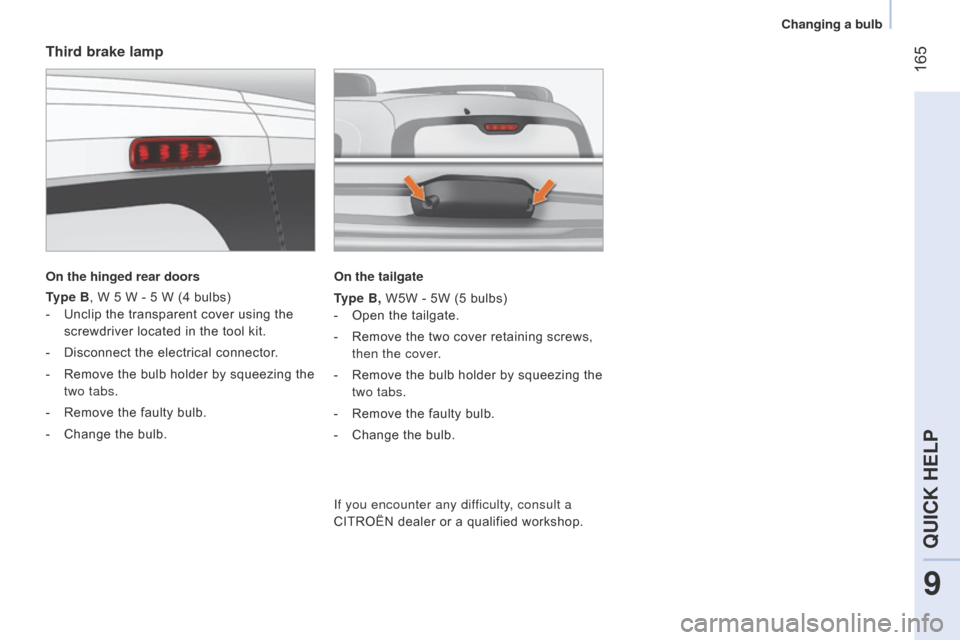
Third brake lamp
On the hinged rear doors
Type B, W 5 W - 5 W (4 bulbs)
-
Unclip the transparent cover using the
screwdriver located in the tool kit.
-
Disconnect the electrical connector
.
-
Remove the bulb holder by squeezing the
two tabs.
-
Remove the faulty bulb.
-
Change the bulb. On the tailgate
T
ype B, W5W - 5W (5 bulbs)
-
Open the tailgate.
-
Remove the two cover retaining screws,
then the cover.
-
Remove the bulb holder by squeezing the
two tabs.
-
Remove the faulty bulb.
-
Change the bulb.
If you encounter any dif
ficulty, consult a
CITROËN dealer or a qualified workshop.
9
QUICK HELP
Changing a bulb
Page 172 of 192
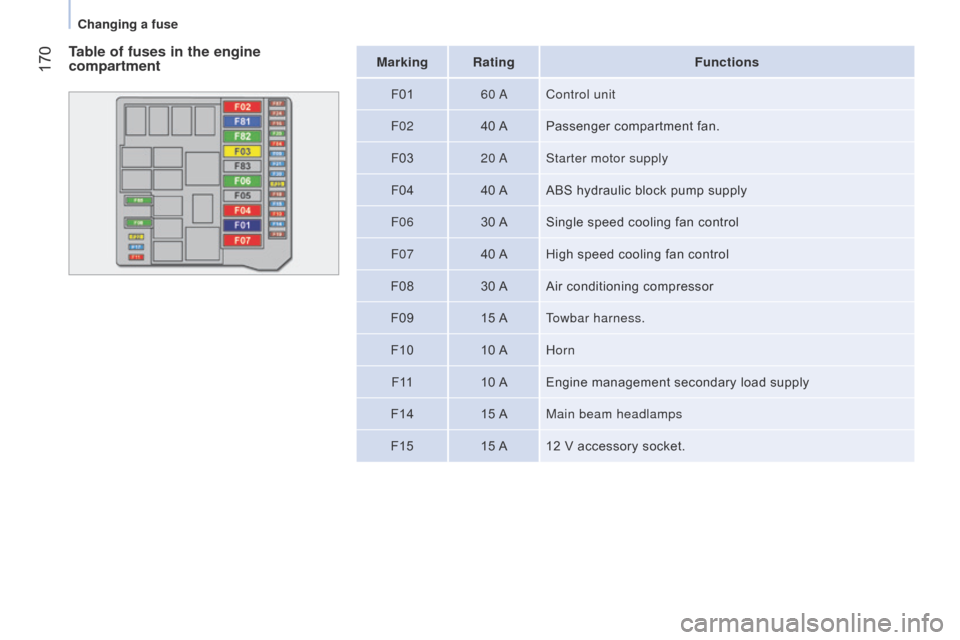
170Marking RatingFunctions
F01 60
a
Control unit
F02 40
A Passenger compartment fan.
F03 20
a
Starter motor supply
F04 40
A ABS hydraulic block pump supply
F06 30 A Single speed cooling fan control
F07 40 A High speed cooling fan control
F08 30 A Air conditioning compressor
F09 15 ATowbar harness.
F10 10 AHorn
F 11 10 A Engine management secondary load supply
F14 15 AMain beam headlamps
F15 15 A 12 V accessory socket.Table of fuses in the engine
compartment
Changing a fuse
Page 173 of 192
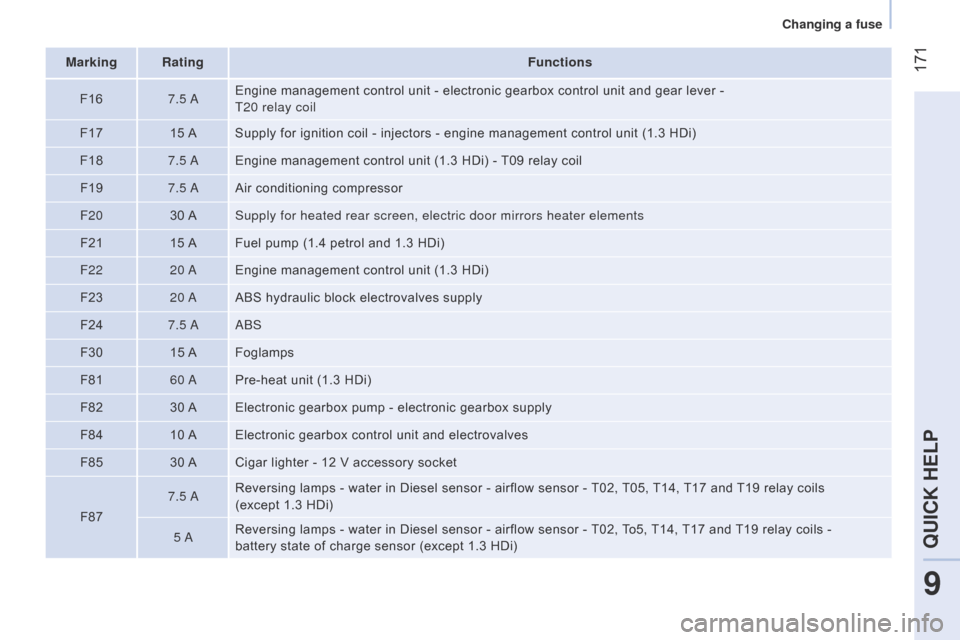
171Marking RatingFunctions
F16 7.5
a
Engine management control unit - electronic gearbox control uni
t and gear lever -
T20 relay coil
F17 15 A Supply for ignition coil - injectors - engine management control unit (1.3 HDi)
F18 7.5
a
Engine management control unit (1.3 HDi) -
T09 relay coil
F19 7.5
a
Air conditioning compressor
F20 30
ASupply for heated rear screen, electric door mirrors heater elements
F21 15 A Fuel pump (1.4 petrol and 1.3 HDi)
F22 20
a
Engine management control unit (1.3 HDi)
F23 20
a
ABS hydraulic block electrovalves supply
F24 7.5
aab
S
F30 15 A Foglamps
F81 60
a
Pre-heat unit (1.3 HDi)
F82 30
A Electronic gearbox pump - electronic gearbox supply
F84 10 A Electronic gearbox control unit and electrovalves
F85 30 A Cigar lighter - 12 V accessory socket
F87 7.5
a
Reversing lamps - water in Diesel sensor - airflow sensor -
T02, T05, T14, T17 and T19 relay coils
(except 1.3 HDi)
5
a
Reversing lamps - water in Diesel sensor - airflow sensor -
T02, To5, T14, T17 and T19 relay coils -
battery state of charge sensor (except 1.3 HDi)
9
QUICK HELP
Changing a fuse
Page 174 of 192
172 172
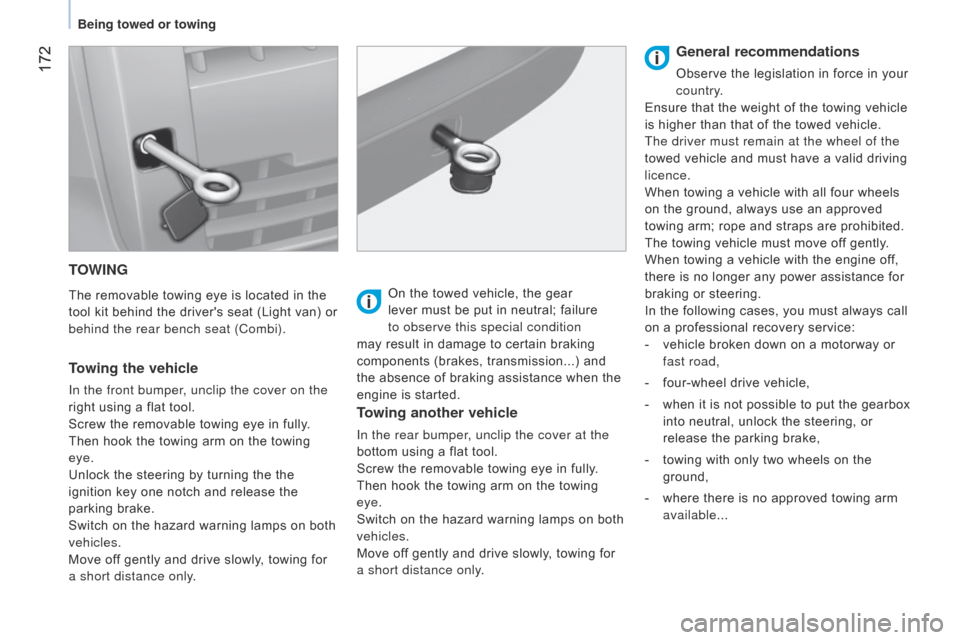
TOWING
The removable towing eye is located in the
tool kit behind the driver's seat (Light van) or
behind the rear bench seat (Combi).
Towing the vehicle
In the front bumper, unclip the cover on the
right using a flat tool.
Screw the removable towing eye in fully.
Then hook the towing arm on the towing
eye.
Unlock the steering by turning the the
ignition key one notch and release the
parking brake.
Switch on the hazard warning lamps on both
vehicles.
Move off gently and drive slowly, towing for
a short distance only.On the towed vehicle, the gear
lever must be put in neutral; failure
to observe this special condition
may result in damage to certain braking
components (brakes, transmission...) and
the absence of braking assistance when the
engine is started.
Towing another vehicle
In the rear bumper, unclip the cover at the
bottom using a flat tool.
Screw the removable towing eye in fully.
Then hook the towing arm on the towing
eye.
Switch on the hazard warning lamps on both
vehicles.
Move off gently and drive slowly, towing for
a short distance only.
General recommendations
Observe the legislation in force in your
country.
Ensure that the weight of the towing vehicle
is higher than that of the towed vehicle.
The driver must remain at the wheel of the
towed vehicle and must have a valid driving
licence.
When towing a vehicle with all four wheels
on the ground, always use an approved
towing arm; rope and straps are prohibited.
The towing vehicle must move off gently.
When towing a vehicle with the engine off,
there is no longer any power assistance for
braking or steering.
In the following cases, you must always call
on a professional recovery service:
-
vehicle broken down on a motorway or
fast road,
-
four-wheel drive vehicle,
-
when it is not possible to put the gearbox
into neutral, unlock the steering, or
release the parking brake,
-
towing with only two wheels on the
ground,
-
where there is no approved towing arm
available...
Being towed or towing