child lock Citroen NEMO 2015 1.G Owner's Manual
[x] Cancel search | Manufacturer: CITROEN, Model Year: 2015, Model line: NEMO, Model: Citroen NEMO 2015 1.GPages: 192, PDF Size: 7.84 MB
Page 7 of 192

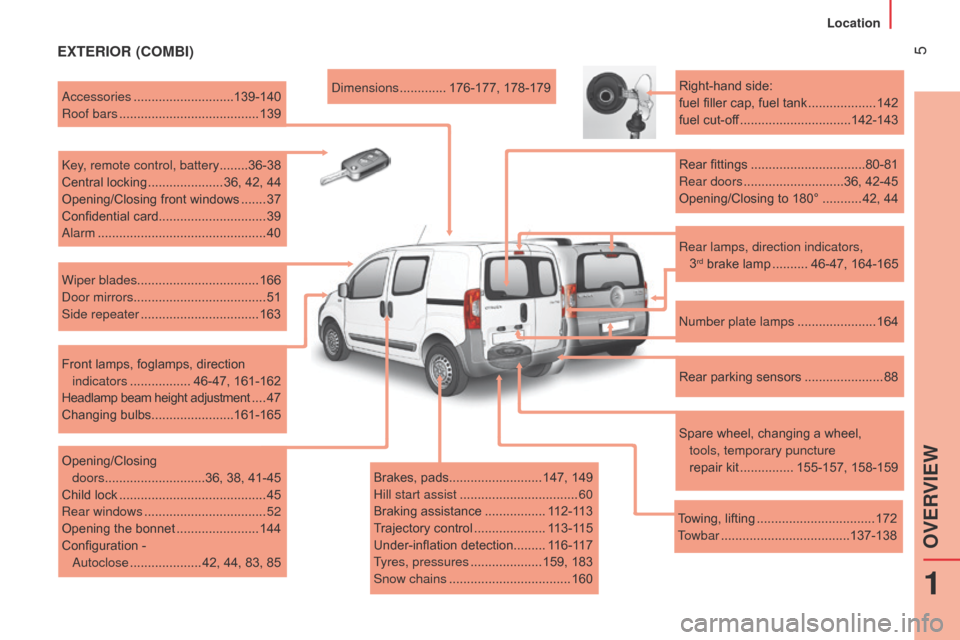
5EXTERIOR (COMBI)
Brakes, pads.......................... 147, 149
Hill start assist ................................. 60
Braking assistance
.................112-113
Trajectory control
....................113-115
Under-inflation detection .........116-117
Tyres, pressures
....................159, 183
Snow chains
.................................. 160
d
imensions
.............
176-177, 178-179
a
ccessories
............................
139-140
Roof bars
.......................................
139
k
ey, remote control, battery
........
36-38
Central locking
.....................
36, 42, 44
Opening/Closing front windows
....... 37
Confidential card .............................. 39
a
larm
...............................................
40
Wiper blades.................................. 166
d
oor mirrors
.....................................
51
Side repeater
................................. 163
Front lamps, foglamps, direction indicators
.................
46-47, 161-162
Headlamp beam height adjustment
....
47
Changing bulbs .......................161-165
Opening/Closing
doors
........
.................... 36, 38, 41-45
Child lock
......................................... 45
Rear windows
.................................. 52
Opening the bonnet
....................... 144
Configuration -
a
utoclose
.................... 42, 44, 83, 85 Right-hand side:
fuel filler cap, fuel tank
...................
142
fuel cut-off ...............................
142-143
Rear fittings ................................
80-81
Rear doors
............................
36, 42-45
Opening/Closing to 180°
...........
42, 44
n
umber plate lamps
......................
164
Rear parking sensors
......................
88
Spare wheel, changing a wheel,
tools, temporary puncture
repair kit ...............
155-157, 158-159
Towing, lifting
................................. 172
T
owbar
....................................137-13
8
Rear lamps, direction indicators,
3
rd brake lamp ..........46-47, 164-165
1
OVERVIEW
Location
Page 41 of 192

39ELECTRONIC IMMOBILISER
All of the keys contain an electronic
immobiliser device.
This device locks the engine supply system.
It is activated automatically when the key is
removed from the ignition.
After the ignition is switched on, a dialogue
is established between the key and the
electronic immobiliser system.This warning lamp is switched off
after the ignition is switched on
and the key has been recognised,
the engine can be started.
If the key is not recognised, the engine
cannot be started. Use another key and
have the faulty key checked by a CITROËN
dealer.
Good practice
Do not make any modifications to the
electronic immobiliser system.
Operating the remote control, even when it
is in your pocket, may result in involuntary
unlocking of the doors.
The simultaneous use of other high
frequency equipment (mobile telephones,
domestic alarms…), may interfere with the
operation of the remote control temporarily.
When purchasing a second-hand vehicle:
-
ensure that you are given the confidential
card,
-
have the keys memorised by a CITROËN
dealer to ensure that the keys in your
possession are the only ones which can
start the vehicle.
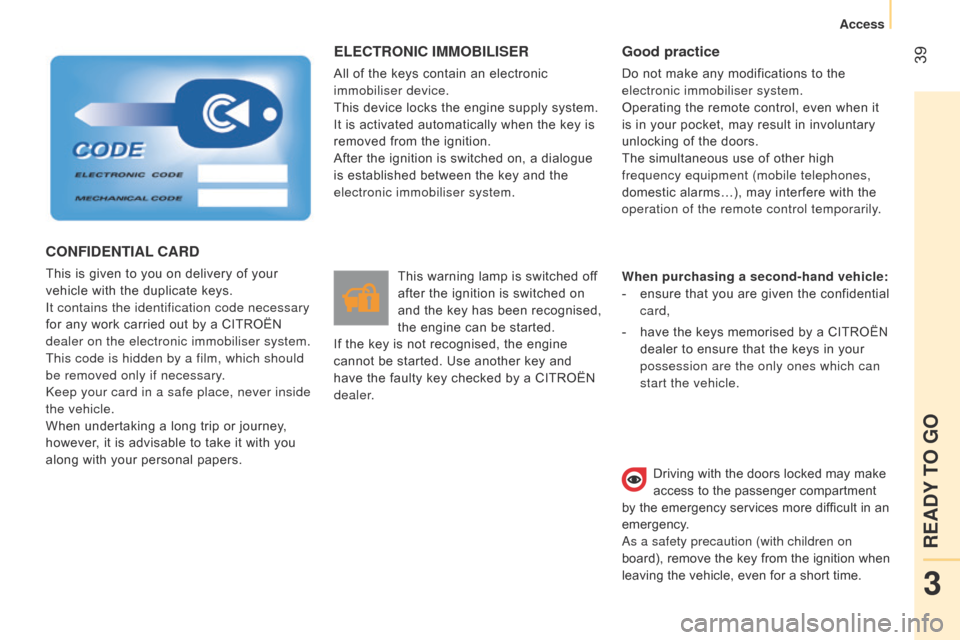
CONFIDENTIAL CARD
This is given to you on delivery of your
vehicle with the duplicate keys.
It contains the identification code necessary
for any work carried out by a CITROËN
dealer on the electronic immobiliser system.
This code is hidden by a film, which should
be removed only if necessary.
k
eep your card in a safe place, never inside
the vehicle.
When undertaking a long trip or journey,
however, it is advisable to take it with you
along with your personal papers. Driving with the doors locked may make
access to the passenger compartment
by the emergency services more difficult in an
emergency.
a
s a safety precaution (with children on
board), remove the key from the ignition when
leaving the vehicle, even for a short time.
3
READY TO GO
Access
Page 54 of 192

52
ELECTRIC WINDOWS
Electric controls
on the driver's side, the electric window
has a safety anti-pinch function and is
associated with one-touch controls for
lowering and raising.
From the driver's seat, the controls placed
on the door operate the vehicle's front
windows.
On the passenger's side, the control
operates the passenger's front window.
One-touch control
an extended press on the control for the
driver's window raises or lowers the window
completely.
Press the control again to stop the window.
Press the control briefly to start the
movement of the window.
Manual controls
Turn the window winder located on the door
trim panel.
Good practice
Always remove the key from the ignition
when leaving the vehicle, even for a short
time.
If the electric window meets an obstacle
during operation, you must reverse the
movement of the window. To do this, press
the control concerned.
When the driver operates the passenger
electric window controls, they must ensure
that no one is preventing correct closing of
the windows.
The driver must ensure that the passenger
uses the electric window correctly.
Be aware of children when operating the
windows.
REAR WINDOWS (COMBI)
To partially open the rear windows, tilt the
lever and push it fully to lock the windows in
the open position.
Mirrors and windows
Page 121 of 192

11 9
Good practice
The driver must ensure that all passengers
fasten their seat belts correctly.
Wherever you are seated in the vehicle,
always fasten your seat belt, even for short
journeys.
The seat belts are fitted with an inertia reel
which automatically adjusts the length of the
strap to your size. The seat belt is reeled in
automatically when not in use.
Ensure that the seat belt has reeled in
correctly after use.
After folding or moving a seat, ensure that
the seat belt has reeled in correctly into its
compartment and that the buckle is ready to
accommodate the tongue.The force limiter reduces the pressure of the
seat belt against the body of the occupants.
The equipment fitted to these seat belts is
operational when the ignition is switched on.
The inertia reels are fitted with a device
which automatically locks the strap in the
event of a collision or emergency braking or
if the vehicle rolls over.
The airbag warning lamp comes
on if the pretensioners are
deployed. Contact a CITR
o Ë n or
a qualified workshop.
Depending on the nature and seriousness
of any impact, the pretensioning device may
be deployed before and independently of
inflation of the airbags. It instantly tightens
the seat belts against the body of the
occupants.
The deployment of the pretensioners is
accompanied by a slight discharge of
harmless smoke and a noise, due to the
activation of the pyrotechnic cartridge
incorporated in the system. In order to be effective, a seat belt must:
-
restrain one person only
,
-
must not be twisted, check by pulling in
front of you with an even movement,
-
be tightened as close to the body as
possible.
The upper part of the seat belt should be
positioned in the hollow of the shoulder.
The lap part should be placed as low as
possible on the pelvis.
Do not interchange the seat belt buckles as
they will not fulfil their role completely. If the
seats are fitted with armrests, the lap part of
the seat belt should always pass under the
armrest.
Check that the seat belt is fastened correctly
by pulling the strap firmly. Recommendations for children:
-
use a suitable child seat if the passenger
is less than 12 years old or less than one
and a half metres tall,
-
never allow a child to travel on your lap,
even with the seat belt fastened.
For more information on child seats,
refer to the "Safety - Children on
board" section.
In accordance with current safety
regulations, for all work on your vehicle,
refer to a qualified workshop that has the
skills an equipment needed, all of which can
be provided by a CITR
o Ë n dealer.
Have the seat belts checked regularly (even
after a minor impact) by a CITR
o Ë n dealer
or a qualified workshop: they must not show
any signs of wear, cutting or fraying and they
must not be transformed or modified.
Clean the seat belt straps with soapy
water or a textile cleaning product,
available from CITR
o Ë n dealers.
6
SAFETY
Seat belts
Page 135 of 192

133
ADVICE ON CHILD SEATS
Children
at the front
The legislation on carrying a child on the
front passenger seat is specific to each
country. Refer to the legislation in force in
your country.
Deactivate the passenger's airbag when a
"rearward facing" child seat is installed on
the front seat.
Otherwise, the child would risk being
seriously injured or killed if the airbag were
deployed.
The incorrect installation of a child seat in a
vehicle compromises the child's protection in
the event of an accident.
Check that there is no seat belt or seat belt
buckle under the child seat, as this could
destabilise the seat.
Remember to fasten the seat belts or the
child seat harnesses keeping the slack
relative to the child's body to a minimum,
even for short journeys.
For the installation of a child seat using
the seat belt, ensure that the seat belt is
well tensioned on the child seat and that
it is holding the child seat firmly against
the vehicle's seat. If the passenger seat is
adjustable, move it forward if necessary.
Installing a booster seat
The chest part of the seat belt must be
positioned on the child's shoulder without
touching the neck.
Ensure that the lap part of the seat belt
passes correctly over the child's thighs.
CITR
o Ë n recommends the use of a booster
seat which has a back, fitted with a seat belt
guide at shoulder level.
For the optimum installation of a "forward
facing" child seat, ensure that the back of
the child seat is as close as possible to the
backrest of the vehicle's seat, or in contact
if possible.
The head restraint must be removed before
installing a child seat with a backrest on the
passenger seat.
Ensure that the head restraint is stowed or
attached securely so that it is not thrown
around the vehicle in the event of sharp
braking.
Refit the head restraint as soon as the child
seat is removed.
As a safety precaution, never leave:
-
one or more children alone and
unsupervised in a vehicle,
-
a child or an animal in a vehicle which
is exposed to the sun, with the windows
closed,
-
the keys within reach of children inside
the vehicle.
To prevent accidental opening of the doors,
use the "Child Lock".
Take care not to open the rear windows by
more than one third.
To protect young children from the rays of
the sun, fit side blinds to the rear windows.
a
t the rear, always leave sufficient space
between the front seat and:
-
a "rearward facing" child seat,
-
the feet of a child seated in a "forward
facing" child seat.
For this, move the front seat forward and, if
necessary, straighten its backrest as well.
6
SAFETY
Child safety
Page 161 of 192

159
- If a pressure of at least 1.5 bars is not
reached within 5 minutes:
●
disconnect the compressor from the
valve and from the 12 V accessory
socket,
●
move the vehicl
e forward by
approximately 10 metres to distribute the
filling fluid inside the tyre,
●
then repeat the inflation operation
.
-
If a pressure of at least
1.8 bars is not
reached within 10 minutes:
●
stop the repair p
rocedure; the tyre has
suffered too much damage and cannot
be repaired,
●
contact a CITRO
ËN dealer or a qualified
workshop.
-
If the tyre has been inflated to a pressure
of 3 bars, set off again immediately.
After driving for approximately 10 minutes,
stop and check the pressure of the tyre
again.
Adjust the tyre pressure if necessary and
contact a CITR
o Ë n dealer or a qualified
workshop as soon as possible.
You must inform the technician that you
have repaired the tyre using the temporary
puncture repair kit and show him its
instructions.
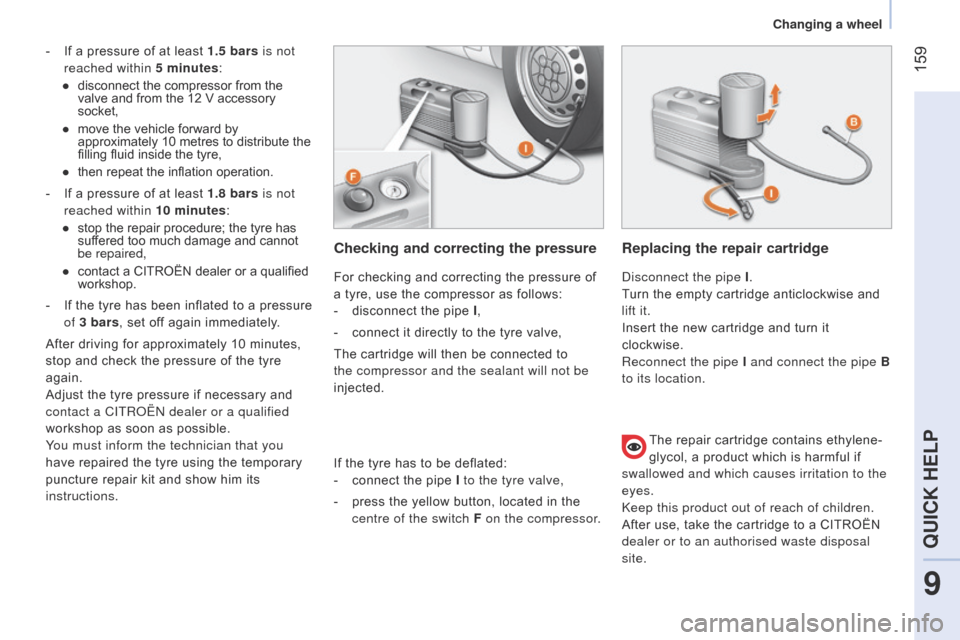
Checking and correcting the pressure
For checking and correcting the pressure of
a tyre, use the compressor as follows:
-
disconnect the pipe
I,
-
connect it directly to the tyre valve,
The cartridge will then be connected to
the compressor and the sealant will not be
injected.
Replacing the repair cartridge
disconnect the pipe I .
T urn the empty cartridge anticlockwise and
lift it.
Insert the new cartridge and turn it
clockwise.
Reconnect the pipe I and connect the pipe B
to its location.
The repair cartridge contains ethylene-
glycol, a product which is harmful if
swallowed and which causes irritation to the
eyes.
k
eep this product out of reach of children.
After use, take the cartridge to a CITROËN
dealer or to an authorised waste disposal
site.
If the tyre has to be deflated:
-
connect the pipe
I to the tyre valve,
-
press the yellow button, located in the
centre of the switch F on the compressor.
9
QUICK HELP
Changing a wheel