dashboard CITROEN RELAY 2019 Handbook (in English)
[x] Cancel search | Manufacturer: CITROEN, Model Year: 2019, Model line: RELAY, Model: CITROEN RELAY 2019Pages: 232, PDF Size: 8.21 MB
Page 28 of 232

26
Menu…Press…Sub-menu… Press…Choose… Confirm
and quitAllows you to…
12
Service Service (Miles/
Km before
service)Display the miles/kilometres remaining
before the next ser vice.
Oil change
(Miles/Km before
oil change)Display the miles/kilometres before the
next oil change.
13
Daytime
running lamps ON
Activate/Deactivate daytime running lamps.
OFF
14
Automatic
headlamp
dipping ON
Activate/Deactivate automatic headlamp
dipping.
OFF
15
Passenger
airbag (BAG
P) ON
Ye sActivate the passenger airbag.
No
OFF Ye sDeactivate the passenger airbag.
No
16
Quit menu Quit the menu.
Press the arrow at the bottom to go to the
first menu.
Dashboard instruments
Page 29 of 232
27
Using the touch screen
audio system
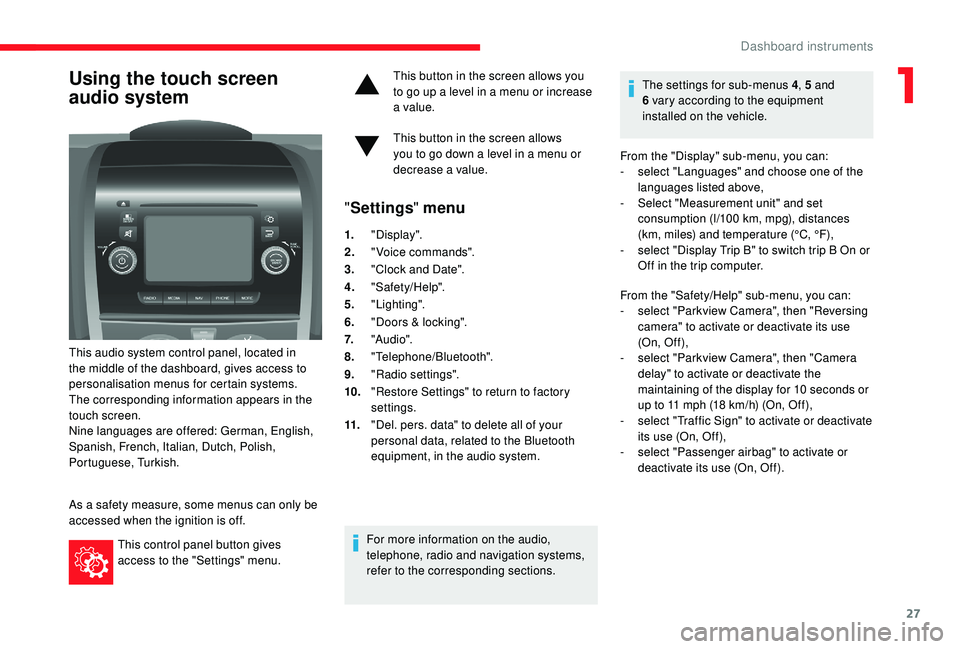
This audio system control panel, located in
the middle of the dashboard, gives access to
personalisation menus for certain systems.
The corresponding information appears in the
touch screen.
Nine languages are offered: German, English,
Spanish, French, Italian, Dutch, Polish,
Portuguese, Turkish.
As a
safety measure, some menus can only be
accessed when the ignition is off.
This control panel button gives
access to the "Settings" menu. This button in the screen allows you
to go up a
level in a menu or increase
a value.
This button in the screen allows
you to go down a level in a menu or
decrease a
value.
"
Settings " menu
1."Display".
2. "Voice commands".
3. "Clock and Date".
4. "Safety/Help".
5. "Lighting".
6. "Doors & locking".
7. "Audi o".
8. "Telephone/Bluetooth".
9. "Radio settings".
10. "Restore Settings" to return to factory
settings.
11. "Del. pers. data" to delete all of your
personal data, related to the Bluetooth
equipment, in the audio system.
For more information on the audio,
telephone, radio and navigation systems,
refer to the corresponding sections. The settings for sub-menus 4
, 5 and
6 vary according to the equipment
installed on the vehicle.
From the "Display" sub-menu, you can:
-
s
elect "Languages" and choose one of the
languages listed above,
-
S
elect "Measurement unit" and set
consumption (l/100 km, mpg), distances
(km, miles) and temperature (°C, °F),
- s elect "Display Trip B" to switch trip B On or
Off in the trip computer.
From the "Safety/Help" sub-menu, you can:
-
s
elect "Parkview Camera", then "Reversing
camera" to activate or deactivate its use
(On, Of f ),
-
s
elect "Parkview Camera", then "Camera
delay" to activate or deactivate the
maintaining of the display for 10
seconds or
up to 11
mph (18 km/h) (On, Off),
-
s
elect "Traffic Sign" to activate or deactivate
its use (On, Off),
-
s
elect "Passenger airbag" to activate or
deactivate its use (On, Off).
1
Dashboard instruments
Page 30 of 232
28
Setting the date and time
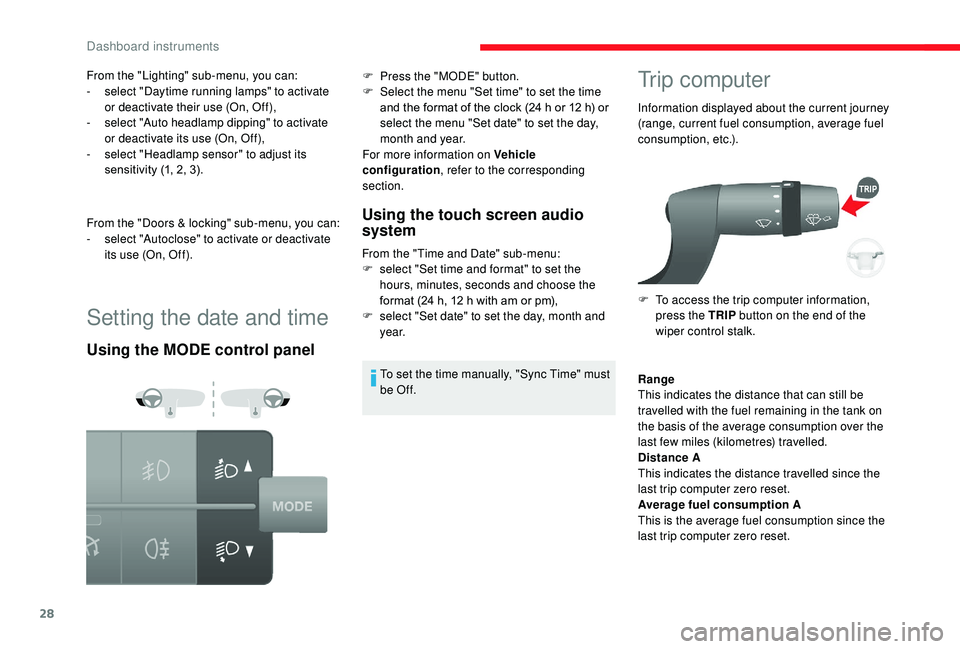
Using the MODE control panelUsing the touch screen audio
system
From the "Time and Date" sub-menu:
F
s elect "Set time and format" to set the
hours, minutes, seconds and choose the
format (24
h, 12 h with am or pm),
F
s
elect "Set date" to set the day, month and
ye a r.
To set the time manually, "Sync Time" must
be Of f.
Trip computer
Information displayed about the current journey
(range, current fuel consumption, average fuel
consumption, etc.).
F
T
o access the trip computer information,
press the TRIP button on the end of the
wiper control stalk.
From the "Lighting" sub-menu, you can:
-
s
elect "Daytime running lamps" to activate
or deactivate their use (On, Off),
-
s
elect "Auto headlamp dipping" to activate
or deactivate its use (On, Off),
-
s
elect "Headlamp sensor" to adjust its
sensitivity (1, 2, 3).
From the "Doors & locking" sub-menu, you can:
-
s
elect "Autoclose" to activate or deactivate
its use (On, Off). F
P
ress the "MODE" button.
F
S
elect the menu "Set time" to set the time
and the format of the clock (24
h or 12
h) or
select the menu "Set date" to set the day,
month and year.
For more information on Vehicle
configuration , refer to the corresponding
section.
Range
This indicates the distance that can still be
travelled with the fuel remaining in the tank on
the basis of the average consumption over the
last few miles (kilometres) travelled.
Distance A
This indicates the distance travelled since the
last trip computer zero reset.
Average fuel consumption A
This is the average fuel consumption since the
last trip computer zero reset.
Dashboard instruments
Page 31 of 232

29
Current fuel consumption A
This is the average fuel consumption during the
last few seconds.
Average speed A
This is the average speed calculated since the
last trip computer zero reset (with the ignition
o n).
Trip duration A
This indicates the total time since the last trip
computer zero reset.
If TRIP B is activated in the MODE menu:
-
D
istance B
-
A
verage fuel consumption B
-
A
verage speed B
-
T
rip duration B
Tachograph
When the card is inserted, all of the data can
be:
-
d
isplayed on the tachograph screen,
-
printed,
-
t
ransferred to external storage media via an
inter face.
For further information, refer to the documents
supplied by the manufacturer of the
tachograph.
If your vehicle is fitted with a
tachograph,
disconnection of the negative (-) terminal
of the battery (located under the floor
on the left-hand side, in the cab) is
recommended if the vehicle is not to be
used for a
period of more than 5 days.
If your vehicle is fitted with a
tachograph, this
permits storing of all of the data relating to the
vehicle in the unit and on a
card inserted in it.
Example: at the beginning of each journey or
change of team.
1
Dashboard instruments
Page 32 of 232
30
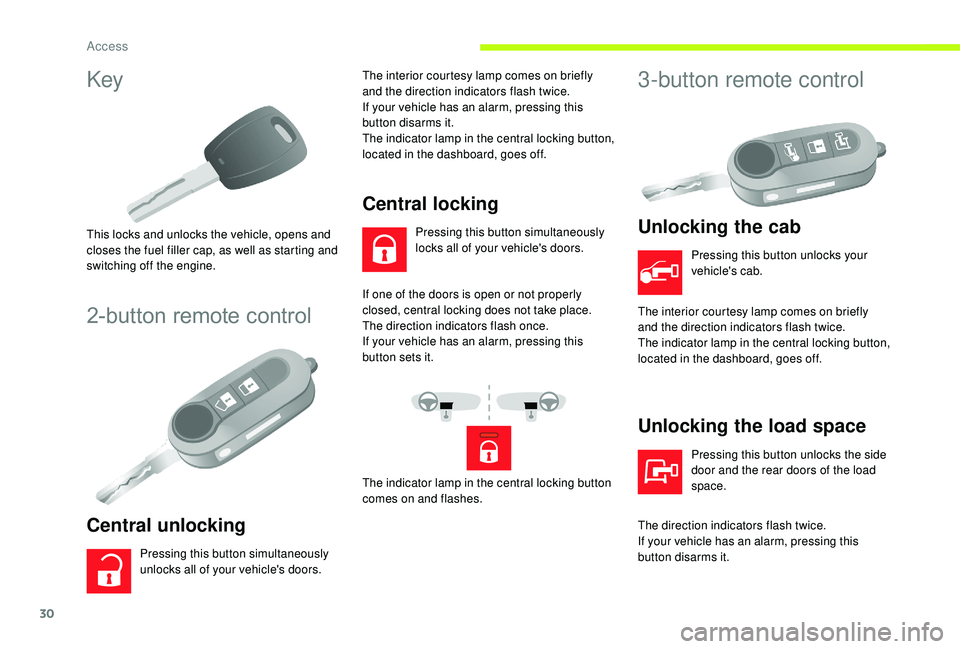
Key
This locks and unlocks the vehicle, opens and
closes the fuel filler cap, as well as starting and
switching off the engine.
2-button remote control
Central unlocking
Pressing this button simultaneously
unlocks all of your vehicle's doors.The interior courtesy lamp comes on briefly
and the direction indicators flash twice.
If your vehicle has an alarm, pressing this
button disarms it.
The indicator lamp in the central locking button,
located in the dashboard, goes off.
Central locking
Pressing this button simultaneously
locks all of your vehicle's doors.
If one of the doors is open or not properly
closed, central locking does not take place.
The direction indicators flash once.
If your vehicle has an alarm, pressing this
button sets it.
The indicator lamp in the central locking button
comes on and flashes.
3-button remote control
Unlocking the cab
Pressing this button unlocks your
vehicle's cab.
The interior courtesy lamp comes on briefly
and the direction indicators flash twice.
The indicator lamp in the central locking button,
located in the dashboard, goes off.
Unlocking the load space
Pressing this button unlocks the side
door and the rear doors of the load
space.
The direction indicators flash twice.
If your vehicle has an alarm, pressing this
button disarms it.
Access
Page 34 of 232
32
Main functions of the key
Type of keyUnlocking the cab Locking the doorsUnlocking the rear
doors
Mechanical key Turn anti-clockwise
(driver's side). Turn clockwise
(driver's side). -
Key with remote control -
Signalling
Direction indicators 2
flashes.1
flash.2
flashes.
Indicator lamp in
the central locking
control button on the dashboard Of f.
On fixed for about
3
seconds, then flashing. Flashing.
Using the mechanical key in the drivers' door lock barrel does not activate (set) or deactivate
the alarm.
Locking/Unlocking from
inside
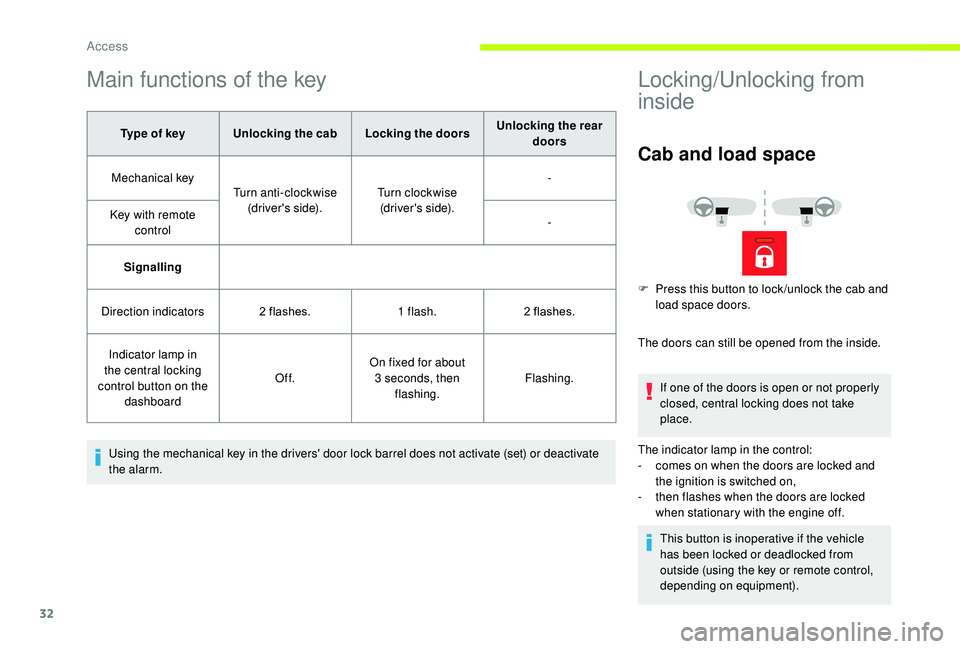
Cab and load space
The doors can still be opened from the inside. If one of the doors is open or not properly
closed, central locking does not take
place.
The indicator lamp in the control:
-
c
omes on when the doors are locked and
the ignition is switched on,
-
t
hen flashes when the doors are locked
when stationary with the engine off.
This button is inoperative if the vehicle
has been locked or deadlocked from
outside (using the key or remote control,
depending on equipment).
F
P
ress this button to lock /unlock the cab and
load space doors.
Access
Page 52 of 232
50
To avoid the risks of poisoning or
asphyxia, the additional heating must
not be used, even for short periods, in
a closed environment such as a garage or
workshop which are not equipped with an
exhaust gas extraction system.
The additional heating switches off when
the battery voltage is low, so as to allow
engine starting.
The additional heating is fed by the
vehicle's fuel tank. Ensure that the low fuel
warning lamp is not on.
Always switch off the additional heating
when refuelling to avoid any risk of fire or
explosion!
The temperature near the heating
system must not exceed 120°C. A higher
temperature (e.g. when baking the
paint) could damage the components of
electronic circuits.
The additional heating is fitted with
a
temperature limiter which cuts off
the combustion in the event of engine
overheating due to a
lack of coolant.
Check the level and top up if necessary.
For more information on Checking levels ,
refer to the corresponding section.
Then press the programme selection
button before switching the heating on
again.Recommendations for ventilation and air conditioning
In order for these systems to be fully effective,
follow the operation and maintenance
guidelines below:
F
T
o ensure that the air is distributed evenly,
keep the external air intake grilles at the
base of the windscreen, the nozzles, the
vents, the air outlets and the air extractor
in the boot free from obstructions.
F
D
o not cover the sunshine sensor,
located on the dashboard; this is used for
regulation of the automatic air conditioning
system.
F
O
perate the air conditioning system for
at least 5
to 10 minutes once or twice
a
month to keep it in per fect working order.
F
E
nsure that the passenger compartment
filter is in good condition and replace
the filter elements periodically. We
recommend the use of a
combined
passenger compartment filter. Thanks to
its special active additive, it helps both to
purify the air breathed by the occupants
and to keep the passenger compartment
clean (reduction of allergic symptoms, bad
odours and greasy deposits). F
T o ensure correct operation of the
air conditioning system, you are also
advised to have it checked regularly as
recommended in the Maintenance and
Warranty Guide.
F
I
f the system does not produce cold air,
switch it off and contact a
CITROËN
dealer or a
qualified workshop.
When towing the maximum load on a
steep
gradient in high temperatures, switching off
the air conditioning increases the available
engine power and so improves the towing
ability.
To avoid the windows misting up and
deterioration in the quality of the air:
-
d
o not drive for too long with the
ventilation switched off.
-
d
o not keep air recirculation set for an
extended period.
Ease of use and comfort
Page 57 of 232

55
Cooled glove box
This is located on the top of the dashboard,
passenger side.
The air delivered to the glove box is the same
as that from the vents.
USB port
12 Volt socketThe connection of an electrical device
not approved by CITROËN, such as
a USB charger, may adversely affect the
operation of vehicle electrical systems,
causing faults such as poor telephone
reception or inter ference with displays in
the screens.
Cigarette lighter
This port is used only to power or recharge the
portable device connected.
Maximum power: 180
W. F
P
ress and wait a few moments until the
lighter pops out automatically.
3
Ease of use and comfort
Page 58 of 232

56
Portable ashtray
F After opening the ashtray, pull it upwards then empty it into a bin.
Overhead storage
This is located above the sun visors.
Maximum load: approximately 20 kg.
Reading lamps
Controls located at the bottom
of the dashboard on the driver's
side allow the driver to switch
the passenger reading lamp on
or of f.
These are controlled by the switches.
The driver's switch controls both reading lamps
simultaneously.
The passenger switch controls either the
driver's reading lamp or the passenger's
reading lamp.
Courtesy lamp
It can be activated by means of:
-
t he switches on the courtesy lamp, with the
ignition on – MAR position,
-
o
pening or closing one of the front doors,
-
l
ocking/unlocking the vehicle.
It switches off automatically:
-
i
f the switch is not pressed to the right or to
the left,
-
i
n all cases after 15 minutes, if the doors
remain open,
-
o
r when the ignition is switched on.
Ease of use and comfort
Page 77 of 232

75
AirbagsThe airbags do not operate when the
engine is not running.
This equipment will only deploy once. If
a second impact occurs (during the same
or a
subsequent accident), the airbag will
not be deployed again.
The airbags have been designed to optimise
the safety of the occupants in the event of
a
serious collision; they work in conjunction
with the force limiting seat belts.
In the event of a
serious collision, electronic
detectors record and analyse any abrupt
deceleration of the vehicle:
-
i
n the event of a
serious collision, the
airbags are deployed instantly and
contribute towards better protection of
occupants of the vehicle; immediately after
the impact, the airbags deflate rapidly so as
not to hinder visibility or a
potential exit by
the occupants,
-
i
n the case of a
minor or rear impact or in
certain rollover conditions, the airbags are
not deployed; the seat belt alone contributes
towards ensuring your protection in these
situations. Deployment of the airbags is accompanied
by a
slight discharge of smoke and
a
noise, resulting from activation of the
pyrotechnic charge incorporated in the
system.
Although this smoke is not harmful,
sensitive individuals may experience slight
irritation.
The noise of the detonation may result in
a
slight loss of hearing for a short time.
Front airbags
System which protects the driver and
passenger(s) in the event of a serious front
impact in order to limit the risk of injury to the
head and thorax.
The driver's airbag is fitted in the centre of the
steering wheel; the front passenger(s) airbag is
fitted in the dashboard above the glove box.
Malfunction
If this warning lamp comes on,
contact a CITROËN dealer to have
the system checked.
Lateral airbags and curtain
airbags
If your vehicle is fitted with lateral airbags,
these are fitted to the front seat backrests on
the door side.
Curtain airbags are fitted to the door pillars and
the upper part of the passenger compartment,
in the roof over the front cab seats.
They inflate between the occupant and the
glazed area.
They are deployed independently of each other
depending on which side the collision occurs.
Malfunction
If this warning lamp comes on,
contact a CITROËN dealer to have
the system checked.
5
5
Safety