front bumper CITROEN RELAY 2020 Handbook (in English)
[x] Cancel search | Manufacturer: CITROEN, Model Year: 2020, Model line: RELAY, Model: CITROEN RELAY 2020Pages: 196, PDF Size: 34.07 MB
Page 46 of 196

44
Ease of use and comfort
Exterior fittings
Protective grille
Depending on the country of sale, a protective
grille, fixed inside the front bumper, protects the
engine parts against loose chippings, etc.
Very cold climate protectors
Depending on the country of sale, protective
foam is present to prevent the penetration of
cold or snow in the upper part of the engine
compartment.
Load stop
On the floor, behind the front seats, a horizontal
partition protects the driver and front passengers
against the risk of load movement.
Ladder-type vertical
partition
Depending on the country of sale, behind the
driver’s seat, a ladder-type vertical partition
protects the driver against the risk of load
movement.
Glass partition
Depending on the country of sale, a glass
partition isolates the cab from the loading area.
You can nevertheless use the control to open/
close its sliding glass.
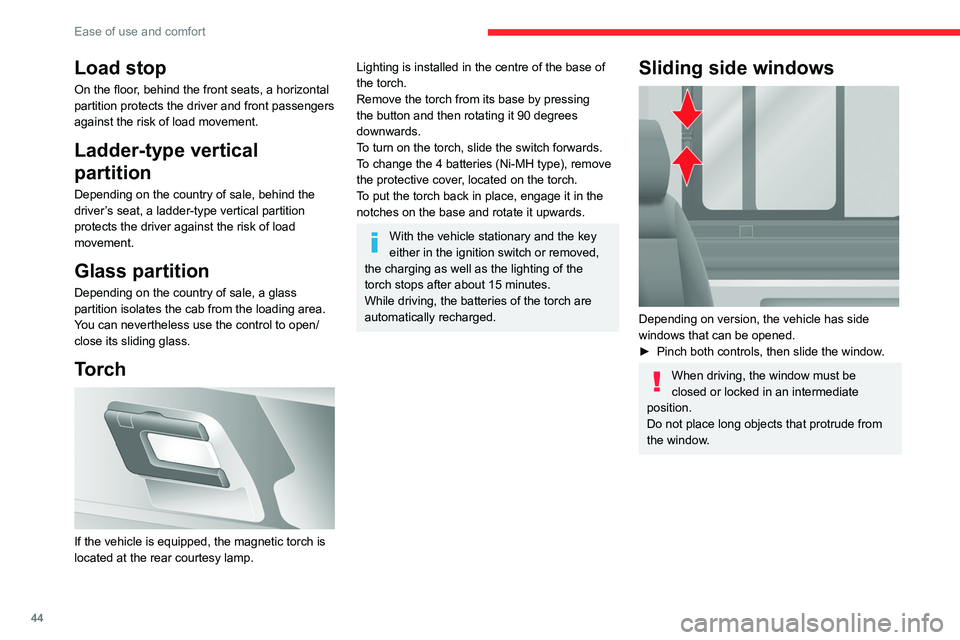
Torch
If the vehicle is equipped, the magnetic torch is
located at the rear courtesy lamp.
Lighting is installed in the centre of the base of
the torch.
Remove the torch from its base by pressing
the button and then rotating it 90 degrees
downwards.
To turn on the torch, slide the switch forwards.
To change the 4 batteries (Ni-MH type), remove
the protective cover, located on the torch.
To put the torch back in place, engage it in the
notches on the base and rotate it upwards.
With the vehicle stationary and the key
either in the ignition switch or removed,
the charging as well as the lighting of the
torch stops after about 15 minutes.
While driving, the batteries of the torch are
automatically recharged.
Sliding side windows
Depending on version, the vehicle has side
windows that can be opened.
► Pinch both controls, then slide the window.
When driving, the window must be
closed or locked in an intermediate
position.
Do not place long objects that protrude from
the window.
Page 47 of 196

45
Ease of use and comfort
3Exterior fittings
Protective grille
Depending on the country of sale, a protective
grille, fixed inside the front bumper, protects the
engine parts against loose chippings, etc.
Very cold climate protectors
Depending on the country of sale, protective
foam is present to prevent the penetration of
cold or snow in the upper part of the engine
compartment.
Located at the end of each headlamp unit, they
are fixed on the crossmember on the upper part
of the radiator.
To remove them, slide them sideways towards
the outside of the vehicle.
Retractable footboard
To facilitate the access and exit of the rear
passengers, the vehicle may be equipped with
a footboard, which unfolds at the opening of the
sliding side door.
Page 76 of 196

74
Driving
the whole manoeuvre, in particular using the
mirrors.
Radar
The operation of the radar as well as the
associated functions may be impaired through
the accumulation of dirt (mud, frost, etc.), in
certain difficult weather conditions (very heavy
rain, snow) or if the bumper is damaged.
If the front bumper is to be repainted, contact
a CITROËN dealer or a qualified workshop;
certain types of paint could interfere with the
operation of the radar.
Driving aids camera
This camera and its associated functions
may be impaired or not work if the windscreen
area in front of the camera is dirty, misty,
frosty, covered with snow, damaged or
masked by a sticker.
In humid and cold weather, demist the
windscreen regularly.
Poor visibility (inadequate street lighting,
heavy rain, thick fog, snowfall), dazzle
(headlamps of an oncoming vehicle, low sun,
reflections on a damp road, leaving a tunnel,
alternating shade and light) can also impair
detection performance.
In the event of a windscreen replacement,
contact a CITROËN dealer or a qualified
workshop to recalibrate the camera;
otherwise, the operation of the associated
driving aids may be disrupted.
Other cameras
The images from the camera(s)
displayed on the touch screen or on the
instrument panel may be distorted by the
relief.
In the presence of areas in shade, or in
conditions of bright sunlight or inadequate
lighting, the image may be darkened and with
lower contrast.
Obstacles may appear further away than they
actually are.
Sensors
The operation of the sensors as well as
the associated functions may be disturbed
by sound interference such as that emitted
by noisy vehicles and machinery (e.g. lorries,
pneumatic drills), by the accumulation of
snow or dead leaves on the road or in the
event of damaged bumpers and mirrors.
When reverse gear is engaged, an audible
signal (long beep) indicates that the sensors
may be dirty.
A front or rear impact to the vehicle can
upset the sensors’ settings, which is not
always detected by the system: distance
measurements may be distorted.
The sensors do not systematically detect
obstacles that are too low (pavements, studs)
or too thin (trees, posts, wire fences).
Certain obstacles located in the sensors’ blind
spots may not be detected or may no longer
be detected during the manoeuvre.
Certain materials (fabrics) absorb sound
waves: pedestrians may not be detected.
Maintenance
Clean the bumpers and door mirrors and
the field of vision of the cameras regularly.
When washing your vehicle at high pressure,
direct the spray from at least 30 cm away
from the radar, sensors and cameras.
Mats
The use of mats not approved by
CITROËN may interfere with the operation of
the speed limiter or cruise control.
To avoid any risk of jamming the pedals:
► ensure that the mat is secured correctly,
► never fit one mat on top of another.
Units of speed
Ensure that the units of speed displayed
on the instrument panel (mph or km/h) are
those for the country you are driving in.
If this is not the case, when the vehicle is
stationary, set the display to the required
units of speed so that it complies with what is
authorised locally.
In case of doubt, contact a CITROËN dealer
or a qualified workshop.
Speed Limit recognition
and recommendation
Refer to the General recommendations on the
use of driving and manoeuvring aids .
Using the camera located at the top of the
windscreen, this system detects the following
types of signs and displays the corresponding
information on the instrument panel:
– the maximum authorised speed,
– no overtaking,
– the end of the previous limitations /
restrictions.
Page 108 of 196

106
In the event of a breakdown
1 - Getting the tools
They are stored in a box under the front
passenger seat.
► Turn the button a quarter turn, then pull the
tool box.
► After use, press the button, then turn a
quarter turn to lock the tool box.
A. Extended socket
B. Wheel bar
C.Jack
D. Wheelbrace
E. Screwdriver (handle and bits)
F. Removable towing eye
2 - Removing the spare
wheel from its housing
To facilitate this, lift the rear of the
vehicle.
The spare wheel is specific to your vehicle, do not use it on vehicles of
different models.
Also, do not use spare wheels of a different
model to your vehicle.
These indications also apply to bolts.
With steel wheels:
H. Handle I.
Caliper
With alloy wheels:
H. Handle
I. Caliper
J. Bracket
K. Bolt
The spare wheel retaining bolt is located under
the rear bumper, on the right-hand side.
Page 125 of 196

123
In the event of a breakdown
8Towing constraints
Type of vehicle
(engine / gearbox)gearbox Font wheels on the
ground Rear wheels on the
ground Flatbed
4 wheels on the ground
with towbar
Internal combustion /
Manual
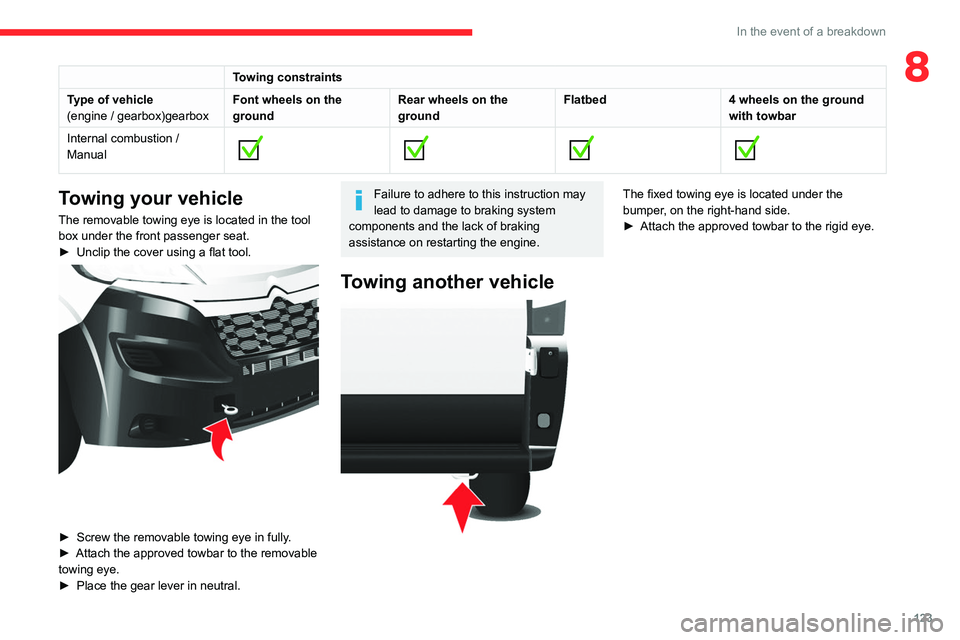
Towing your vehicle
The removable towing eye is located in the tool
box under the front passenger seat.
► Unclip the cover using a flat tool.
► Screw the removable towing eye in fully.
► Attach the approved towbar to the removable
towing eye.
► Place the gear lever in neutral.
Failure to adhere to this instruction may
lead to damage to braking system
components and the lack of braking
assistance on restarting the engine.
Towing another vehicle
The fixed towing eye is located under the
bumper, on the right-hand side.
► Attach the approved towbar to the rigid eye.
Page 134 of 196

132
Technical data
L1L2L3L4
H1 H2 H1H2H2 H3H2H3
P Height of the sliding side door 1,4851,755 1,4851,755 1,755
Q Width of the sliding side door 1,0751,250
Combi
L1H1 L2H2
A 751 8721,201 1,322
B 1,201 1,7431,6512,193
C -860 -860
Identification markings
A. Manufacturer's plate
This plate is located on the crossbar of the front
bumper, under the bonnet.
Page 135 of 196

133
Technical data
9Identification markings
A. Manufacturer's plate
This plate is located on the crossbar of the front
bumper, under the bonnet. 1 -
European whole vehicle type approval
number
2 - Vehicle identification number (VIN)
3 - Gross vehicle weight (GVW)
4 - Gross train weight (GTW)
5.1 - Maximum weight on the front axle
5.2 - Maximum weight on the rear axle
B. Serial number on the
bodywork
C. Tyres
This label (may differ from image shown), affixed
to the driver's side door pillar, indicates:
– the tyre sizes,
– the tyre pressures when laden.
The tyre pressures must be checked when
the tyres are cold, at least monthly.
D. Paint code
This reference number is located on the front
crossmember, under the bonnet.
E. Serial number on the
bodywork
This number is located under the plastic cover, at
the sill on the right-hand side.
Glossary of labels
This section contains all of the text written on the
labels present in the vehicle.
For the Identification markings , refer to
the corresponding section.