DACIA DUSTER 2016 1.G Repair Manual
Manufacturer: DACIA, Model Year: 2016, Model line: DUSTER, Model: DACIA DUSTER 2016 1.GPages: 254, PDF Size: 18.85 MB
Page 61 of 254
JauneNoir Noir texte
1.57
ENG_UD32128_1
Volant de direction/Direction assistée (H79 Ph2 - Dacia) ENG_NU_1079-6_H79Ph2_Dacia_1
STEERING WHEEL, POWER-ASSISTED STEERING
Power Assisted Steering
With the engine running, do not leave
the steering wheel at full lock while sta-
tionary as this may damage the power-
assisted steering pump.
With the engine switched off, or if there
is a system fault, it is still possible to
turn the steering wheel. The force re-
quired will be greater.
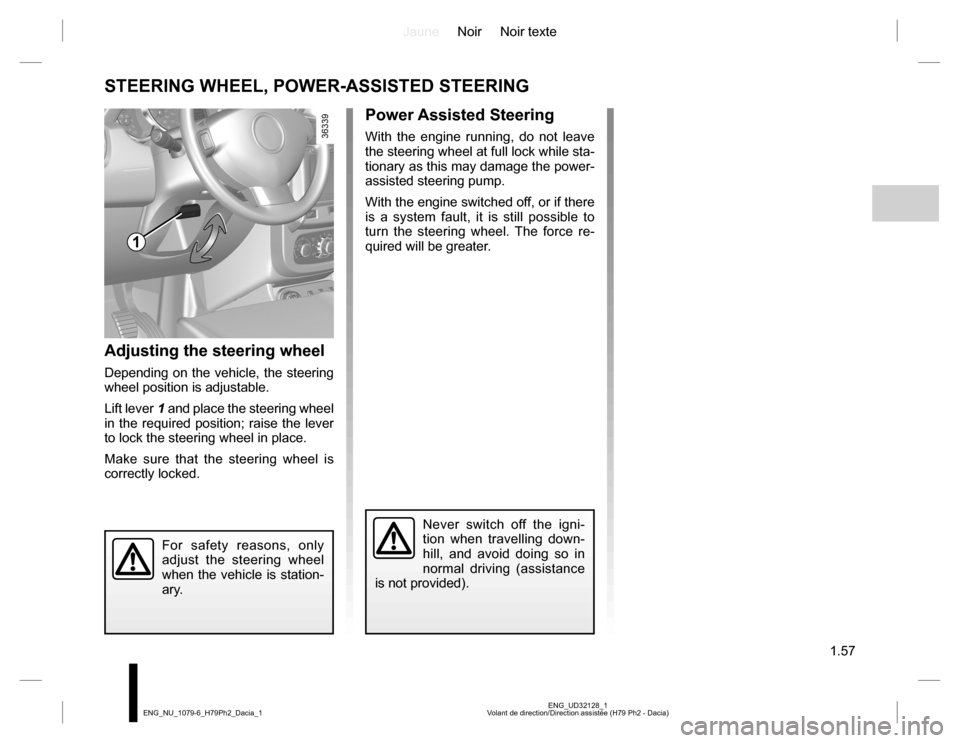
Adjusting the steering wheel
Depending on the vehicle, the steering
wheel position is adjustable.
Lift lever 1 and place the steering wheel
in the required position; raise the lever
to lock the steering wheel in place.
Make sure that the steering wheel is
correctly locked.
For safety reasons, only
adjust the steering wheel
when the vehicle is station-
ary.
Never switch off the igni-
tion when travelling down-
hill, and avoid doing so in
normal driving (assistance
is not provided).
1
Page 62 of 254
JauneNoir Noir texte
1.58
ENG_UD39236_2
Tableau de bord: heure (H79 - Dacia) ENG_NU_1079-6_H79Ph2_Dacia_1
CLOCK
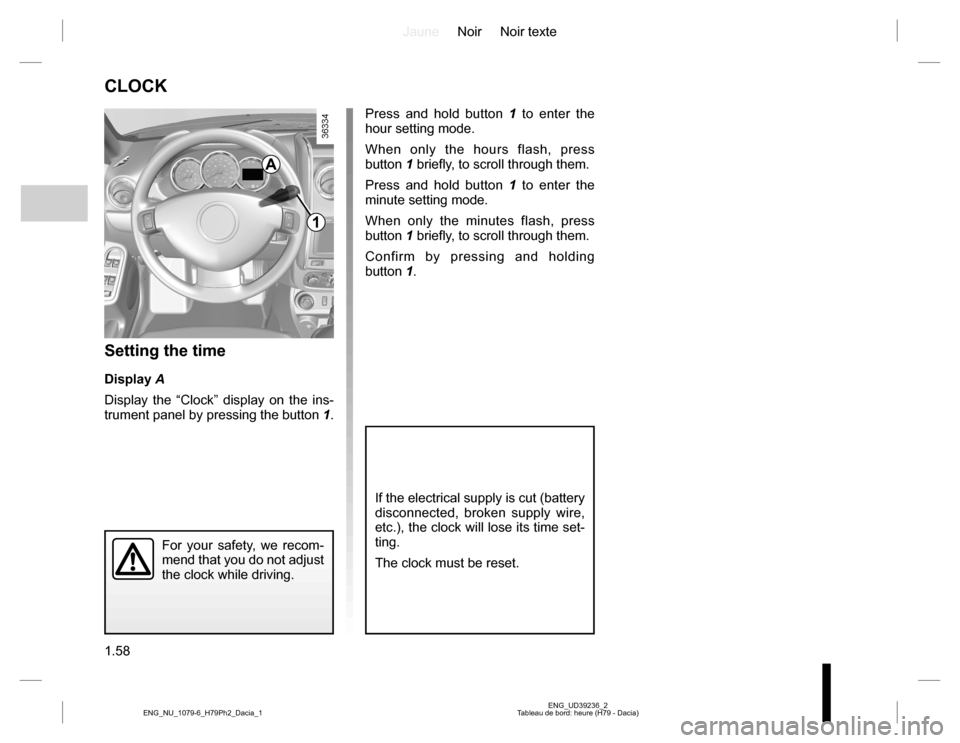
Setting the time
Display A
Display the “Clock” display on the ins-
trument panel by pressing the button 1.
If the electrical supply is cut (battery
disconnected, broken supply wire,
etc.), the clock will lose its time set-
ting.
The clock must be reset.
For your safety, we recom-
mend that you do not adjust
the clock while driving.
Press and hold button 1 to enter the
hour setting mode.
When only the hours flash, press
button 1 briefly, to scroll through them.
Press and hold button 1 to enter the
minute setting mode.
When only the minutes flash, press
button 1 briefly, to scroll through them.
Confirm by pressing and holding
button 1.
1
A
Page 63 of 254
JauneNoir Noir texte
1.59
ENG_UD39238_2
Avertisseurs sonore et lumineux (H79 Ph2 - Dacia) ENG_NU_1079-6_H79Ph2_Dacia_1
AUDIBLE AND VISUAL SIGNALS (1/2)
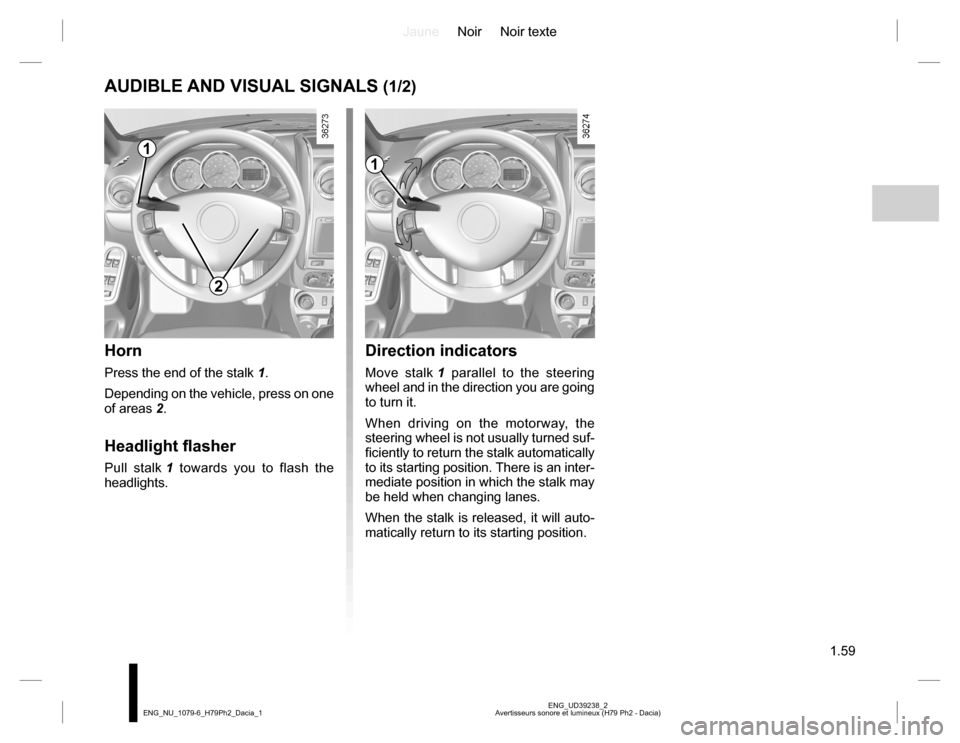
Horn
Press the end of the stalk 1.
Depending on the vehicle, press on one
of areas 2.
Headlight flasher
Pull stalk 1 towards you to flash the
headlights.
Direction indicators
Move stalk 1 parallel to the steering
wheel and in the direction you are going
to turn it.
When driving on the motorway, the
steering wheel is not usually turned suf-
ficiently to return the stalk automatically
to its starting position. There is an inter-
mediate position in which the stalk may
be held when changing lanes.
When the stalk is released, it will auto-
matically return to its starting position.
1
2
1
Page 64 of 254
JauneNoir Noir texte
1.60
ENG_UD39238_2
Avertisseurs sonore et lumineux (H79 Ph2 - Dacia) ENG_NU_1079-6_H79Ph2_Dacia_1
AUDIBLE AND VISUAL SIGNALS (2/2)
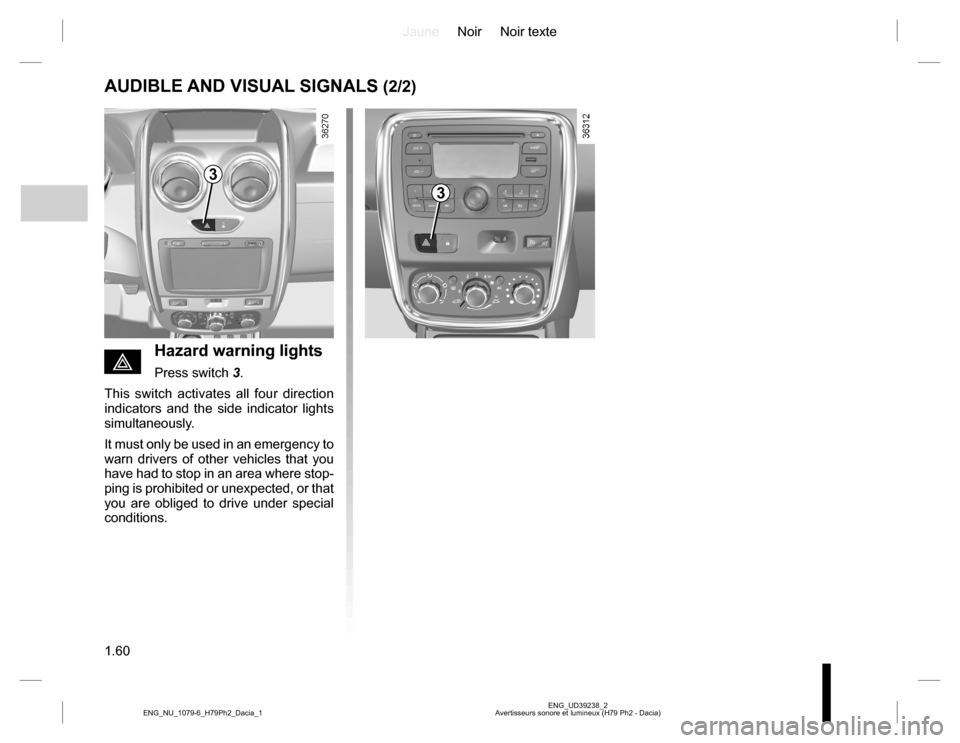
éHazard warning lights
Press switch 3.
This switch activates all four direction
indicators and the side indicator lights
simultaneously.
It must only be used in an emergency to
warn drivers of other vehicles that you
have had to stop in an area where stop-
ping is prohibited or unexpected, or that
you are obliged to drive under special
conditions.
3
3
Page 65 of 254
JauneNoir Noir texte
1.61
ENG_UD39239_4
Éclairages et signalisations extérieures (H79 - H79 Ph2 - Dacia) ENG_NU_1079-6_H79Ph2_Dacia_1
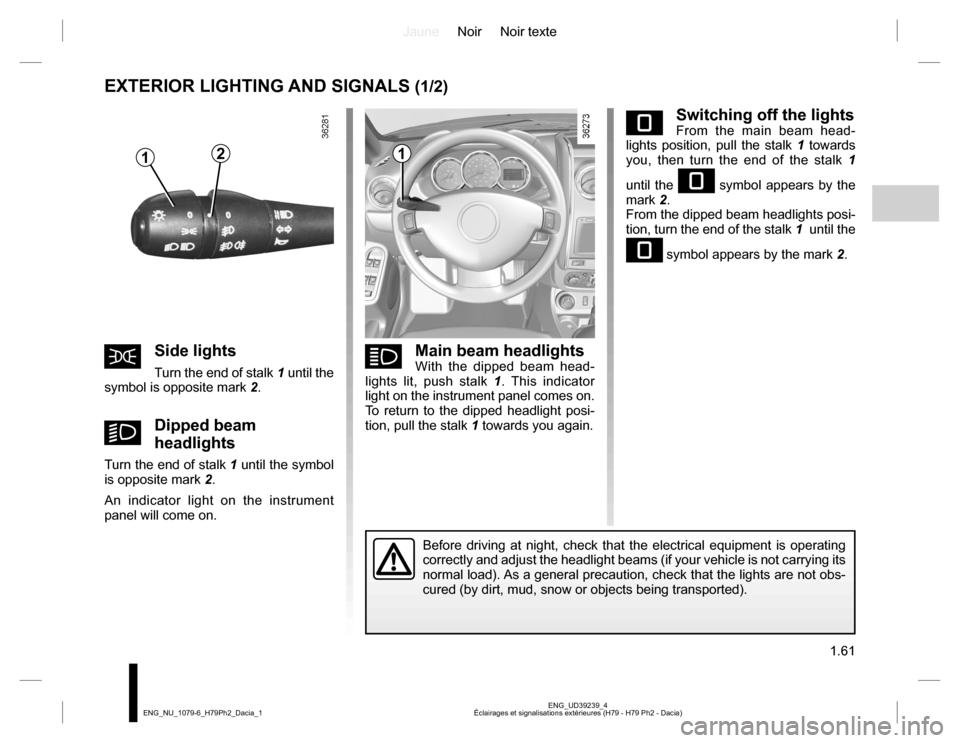
eSwitching off the lightsFrom the main beam head-
lights position, pull the stalk 1 towards
you, then turn the end of the stalk 1
until the
e symbol appears by the
mark 2.
From the dipped beam headlights posi-
tion, turn the end of the stalk 1 until the
e symbol appears by the mark 2.
EXTERIOR LIGHTING AND SIGNALS (1/2)
šSide lights
Turn the end of stalk 1 until the
symbol is opposite mark 2.
kDipped beam
headlights
Turn the end of stalk 1 until the symbol
is opposite mark 2.
An indicator light on the instrument
panel will come on.
áMain beam headlightsWith the dipped beam head-
lights lit, push stalk 1. This indicator
light on the instrument panel comes on.
To return to the dipped headlight posi-
tion, pull the stalk 1 towards you again.
Before driving at night, check that the electrical equipment is operating
correctly and adjust the headlight beams (if your vehicle is not carrying its
normal load). As a general precaution, check that the lights are not obs-
cured (by dirt, mud, snow or objects being transported).
112
Page 66 of 254
JauneNoir Noir texte
1.62
ENG_UD39239_4
Éclairages et signalisations extérieures (H79 - H79 Ph2 - Dacia) ENG_NU_1079-6_H79Ph2_Dacia_1
EXTERIOR LIGHTING AND SIGNALS (2/2)
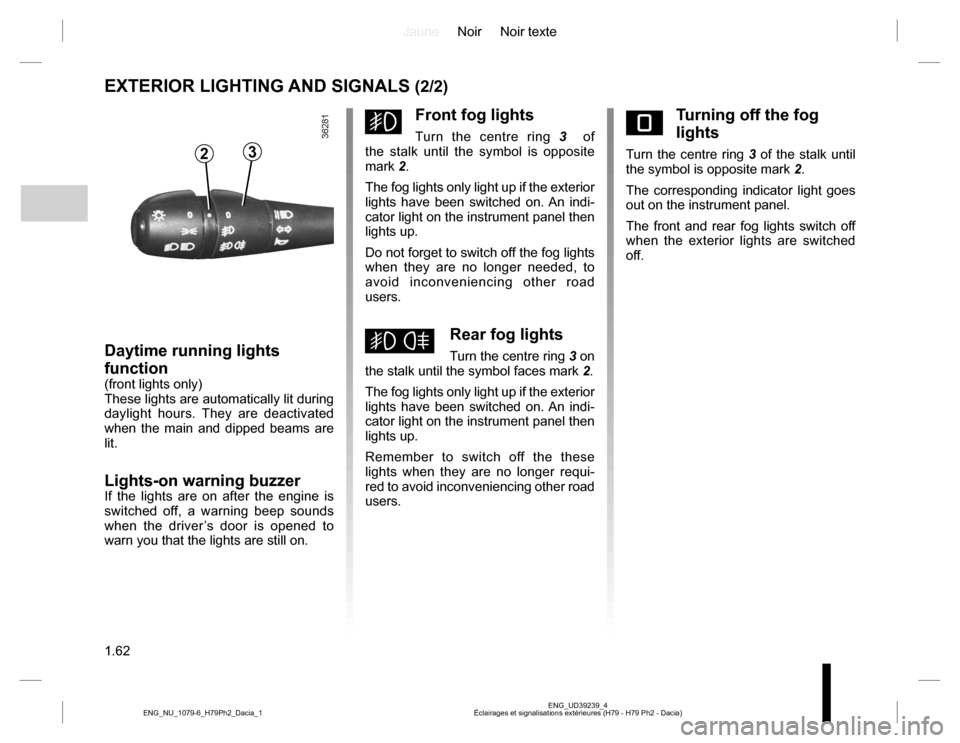
gFront fog lights
Turn the centre ring 3 of
the stalk until the symbol is opposite
mark 2.
The fog lights only light up if the exterior
lights have been switched on. An indi-
cator light on the instrument panel then
lights up.
Do not forget to switch off the fog lights
when they are no longer needed, to
avoid inconveniencing other road
users.
hRear fog lights
Turn the centre ring 3 on
the stalk until the symbol faces mark 2.
The fog lights only light up if the exterior
lights have been switched on. An indi-
cator light on the instrument panel then
lights up.
Remember to switch off the these
lights when they are no longer requi-
red to avoid inconveniencing other road
users.
eTurning off the fog
lights
Turn the centre ring 3 of the stalk until
the symbol is opposite mark 2.
The corresponding indicator light goes
out on the instrument panel.
The front and rear fog lights switch off
when the exterior lights are switched
off.23
Daytime running lights
function
(front lights only)
These lights are automatically lit during
daylight hours. They are deactivated
when the main and dipped beams are
lit.
Lights-on warning buzzer
If the lights are on after the engine is
switched off, a warning beep sounds
when the driver’s door is opened to
warn you that the lights are still on.
Page 67 of 254
JauneNoir Noir texte
1.63
ENG_UD39240_3
Réglage de la hauteur des faisceaux (H79 - H79 Ph2 - Dacia) ENG_NU_1079-6_H79Ph2_Dacia_1
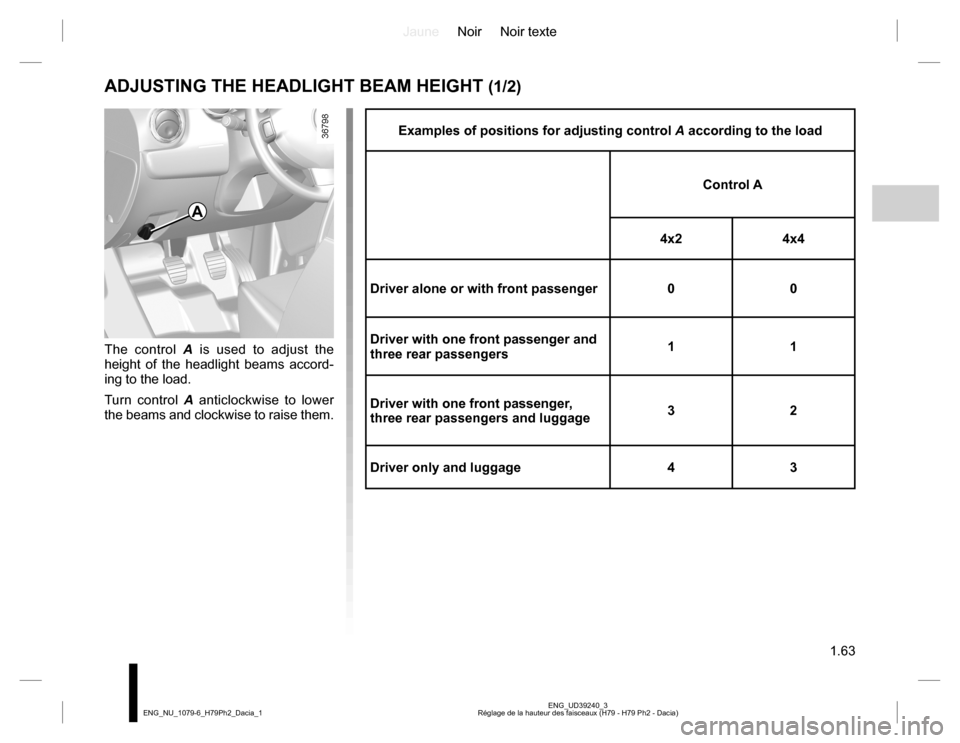
Examples of positions for adjusting control A according to the load
Control A
4x2 4x4
Driver alone or with front passenger 0 0
Driver with one front passenger and
three rear passengers11
Driver with one front passenger,
three rear passengers and luggage32
Driver only and luggage 4 3
The control A is used to adjust the
height of the headlight beams accord-
ing to the load.
Turn control A anticlockwise to lower
the beams and clockwise to raise them.
ADJUSTING THE HEADLIGHT BEAM HEIGHT (1/2)
A
Page 68 of 254
JauneNoir Noir texte
1.64
ENG_UD39240_3
Réglage de la hauteur des faisceaux (H79 - H79 Ph2 - Dacia) ENG_NU_1079-6_H79Ph2_Dacia_1
ADJUSTING THE HEADLIGHT BEAM HEIGHT (2/2)
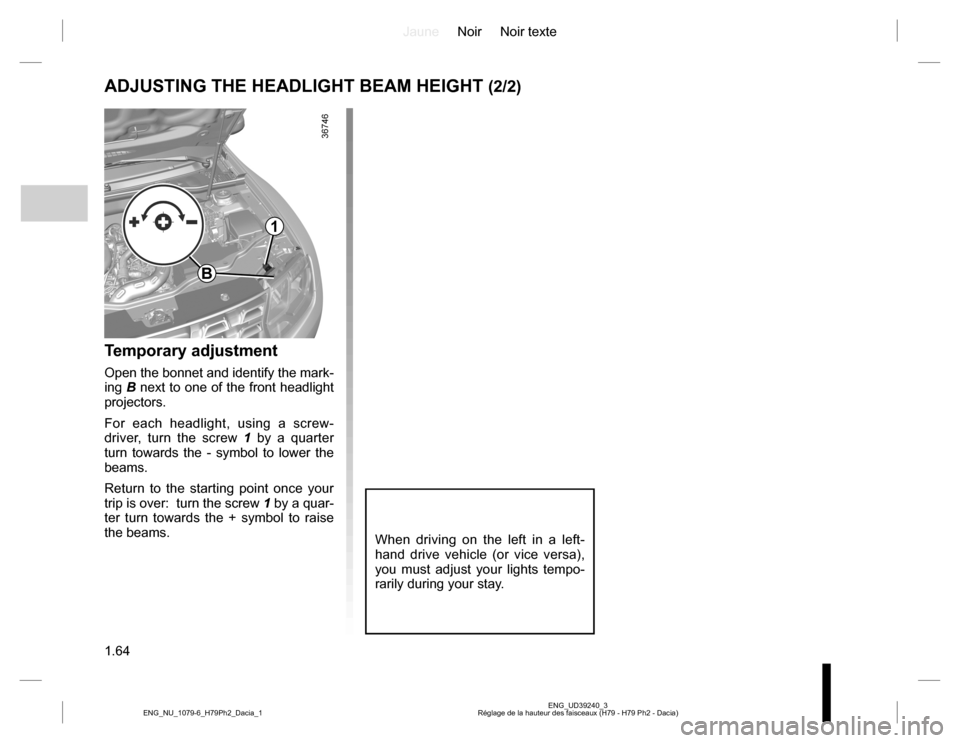
Temporary adjustment
Open the bonnet and identify the mark-
ing B next to one of the front headlight
projectors.
For each headlight, using a screw-
driver, turn the screw 1 by a quarter
turn towards the - symbol to lower the
beams.
Return to the starting point once your
trip is over: turn the screw 1 by a quar-
ter turn towards the + symbol to raise
the beams.
When driving on the left in a left-
hand drive vehicle (or vice versa),
you must adjust your lights tempo-
rarily during your stay.
1
B
Page 69 of 254
JauneNoir Noir texte
1.65
ENG_UD32133_1
Essuie-vitre /Lave-vitre/Dégivrage (H79 - Dacia) ENG_NU_1079-6_H79Ph2_Dacia_1
WINDSCREEN WASH, WIPE (1/2)
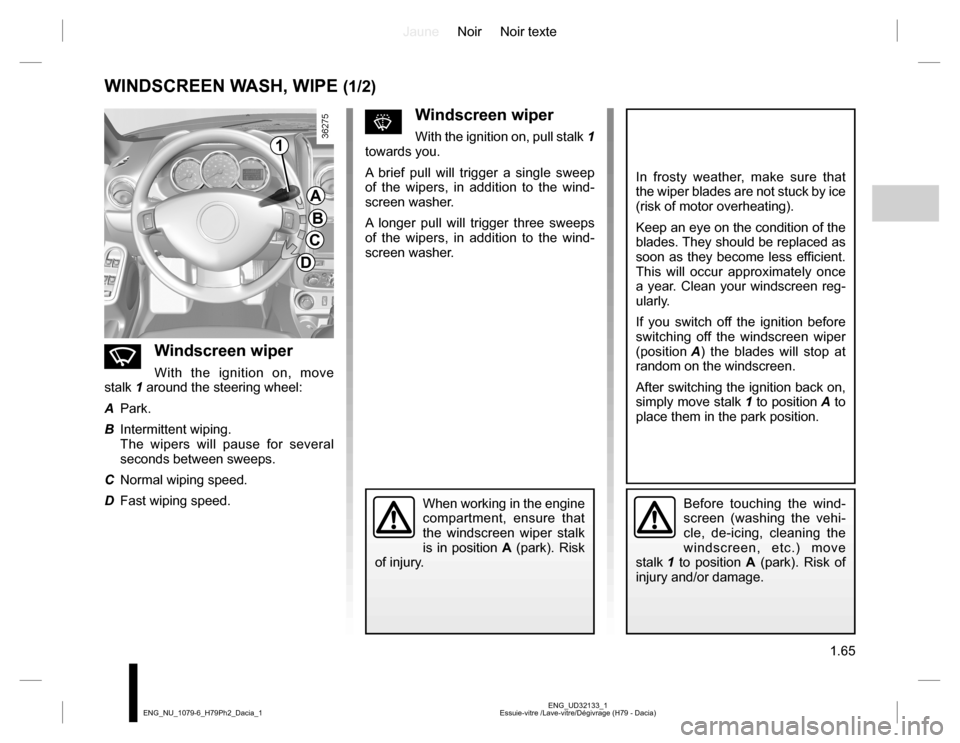
nWindscreen wiper
With the ignition on, move
stalk 1 around the steering wheel:
A Park.
B Intermittent wiping.
The wipers will pause for several
seconds between sweeps.
C Normal wiping speed.
D Fast wiping speed.
sWindscreen wiper
With the ignition on, pull stalk 1
towards you.
A brief pull will trigger a single sweep
of the wipers, in addition to the wind-
screen washer.
A longer pull will trigger three sweeps
of the wipers, in addition to the wind-
screen washer.
In frosty weather, make sure that
the wiper blades are not stuck by ice
(risk of motor overheating).
Keep an eye on the condition of the
blades. They should be replaced as
soon as they become less efficient.
This will occur approximately once
a year. Clean your windscreen reg-
ularly.
If you switch off the ignition before
switching off the windscreen wiper
(position A) the blades will stop at
random on the windscreen.
After switching the ignition back on,
simply move stalk 1 to position A to
place them in the park position.
Before touching the wind-
screen (washing the vehi-
cle, de-icing, cleaning the
windscreen, etc.) move
stalk 1 to position A (park). Risk of
injury and/or damage.When working in the engine
compartment, ensure that
the windscreen wiper stalk
is in position A (park). Risk
of injury.
1
A
B
C
D
Page 70 of 254
JauneNoir Noir texte
1.66
ENG_UD32133_1
Essuie-vitre /Lave-vitre/Dégivrage (H79 - Dacia) ENG_NU_1079-6_H79Ph2_Dacia_1
WINDSCREEN WASH, WIPE (2/2)
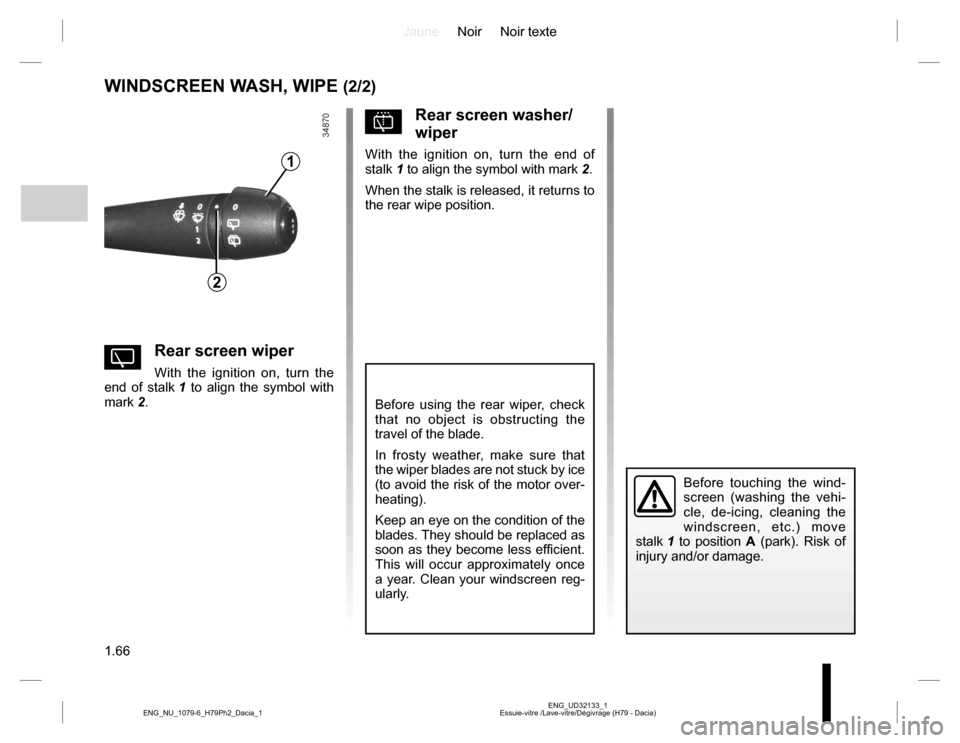
YRear screen wiper
With the ignition on, turn the
end of stalk 1 to align the symbol with
mark 2.
Before using the rear wiper, check
that no object is obstructing the
travel of the blade.
In frosty weather, make sure that
the wiper blades are not stuck by ice
(to avoid the risk of the motor over-
heating).
Keep an eye on the condition of the
blades. They should be replaced as
soon as they become less efficient.
This will occur approximately once
a year. Clean your windscreen reg-
ularly.
pRear screen washer/
wiper
With the ignition on, turn the end of
stalk 1 to align the symbol with mark 2.
When the stalk is released, it returns to
the rear wipe position.
Before touching the wind-
screen (washing the vehi-
cle, de-icing, cleaning the
windscreen, etc.) move
stalk 1 to position A (park). Risk of
injury and/or damage.
1
2