window DAEWOO LACETTI 2004 Service Manual PDF
[x] Cancel search | Manufacturer: DAEWOO, Model Year: 2004, Model line: LACETTI, Model: DAEWOO LACETTI 2004Pages: 2643, PDF Size: 80.54 MB
Page 2571 of 2643
6–6 FRAME DOOR OPENING, DOOR AND SIDE PANEL OUTER NUBIRA/LACETTI
2. DOOR
2–1. REPAIR PROCEDURE
1. Remove the related parts.
S Door trim and related parts.
S Wiring harness and solenoid valve.
S Glass and window lifter.
S Linkage, lock set and handle.
S Others.
Note : Inspection and choose the usable parts.
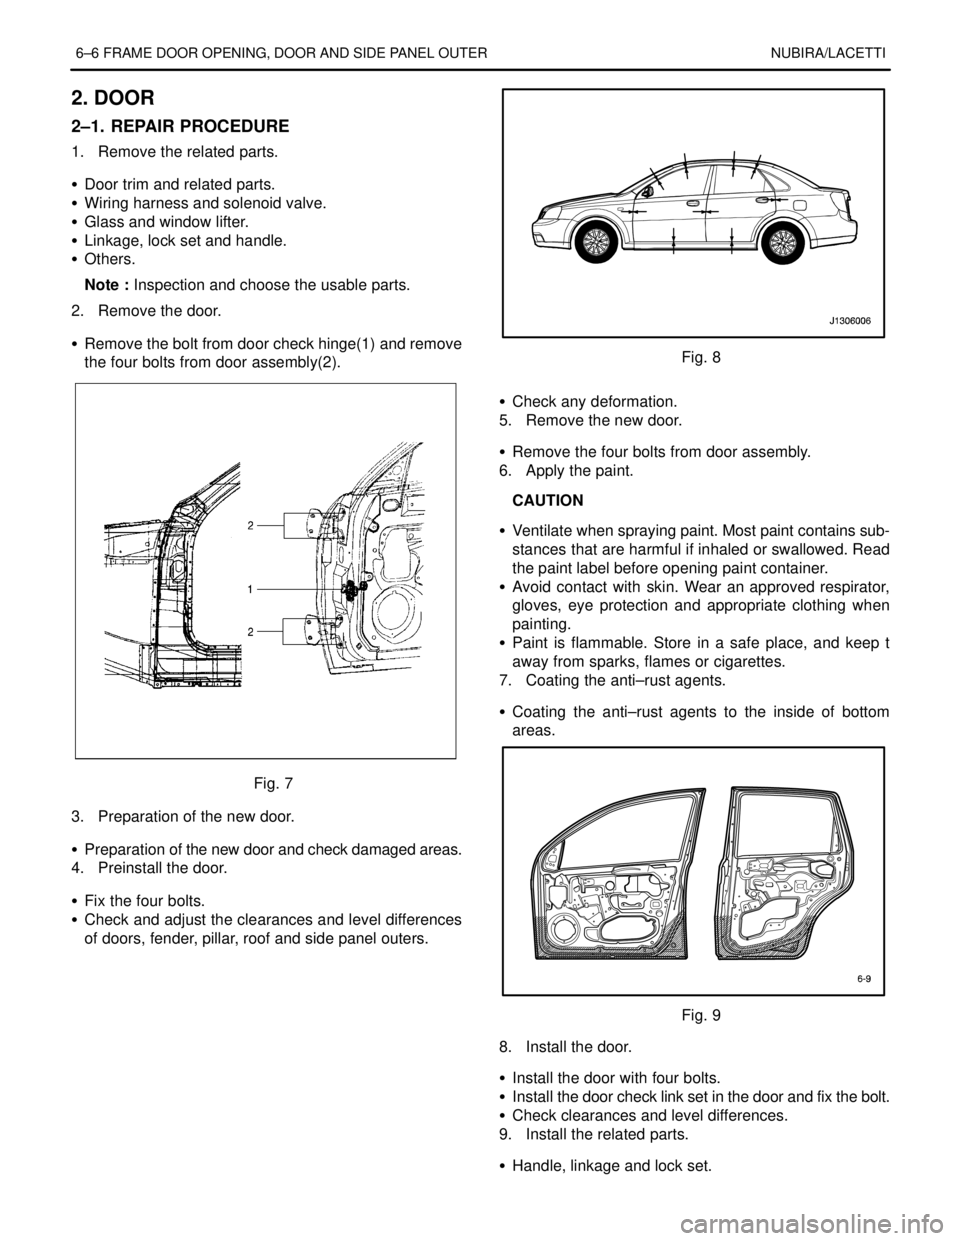
2. Remove the door.
S Remove the bolt from door check hinge(1) and remove
the four bolts from door assembly(2).
Fig. 7
3. Preparation of the new door.
S Preparation of the new door and check damaged areas.
4. Preinstall the door.
S Fix the four bolts.
S Check and adjust the clearances and level differences
of doors, fender, pillar, roof and side panel outers.
Fig. 8
S Check any deformation.
5. Remove the new door.
S Remove the four bolts from door assembly.
6. Apply the paint.
CAUTION
S Ventilate when spraying paint. Most paint contains sub-
stances that are harmful if inhaled or swallowed. Read
the paint label before opening paint container.
S Avoid contact with skin. Wear an approved respirator,
gloves, eye protection and appropriate clothing when
painting.
S Paint is flammable. Store in a safe place, and keep t
away from sparks, flames or cigarettes.
7. Coating the anti–rust agents.
S Coating the anti–rust agents to the inside of bottom
areas.
Fig. 9
8. Install the door.
S Install the door with four bolts.
S Install the door check link set in the door and fix the bolt.
S Check clearances and level differences.
9. Install the related parts.
S Handle, linkage and lock set.
Page 2572 of 2643
NUBIRA/LACETTI FRAME DOOR OPENING, DOOR AND SIDE PANEL OUTER 6–7
S Glass and window lifter.
S Solenoid valve and wiring harness.
S Install door trim and others.
Note : Before install the door trim and related parts, rub
in grease to the moving parts and check all operation.
10. Check and adjust.
S Check clearance and level differences.
S Check the door locking and unlocking condition.
S Check for water leaks in the passenger compartment.
S Install door trim and others.
Page 2581 of 2643
7–4 FENDER, HOOD, TAILGATE AND TRUNK LID NUBIRA/LACETTI
3. TAILGATE (HATCHBACK)
3–1. REPAIR PROCEDURE
1. Remove the related parts.
S Wiring harness.
S Rear wiper arm and motor.
S Rear window glass.
S Lock set, latch and others.
.
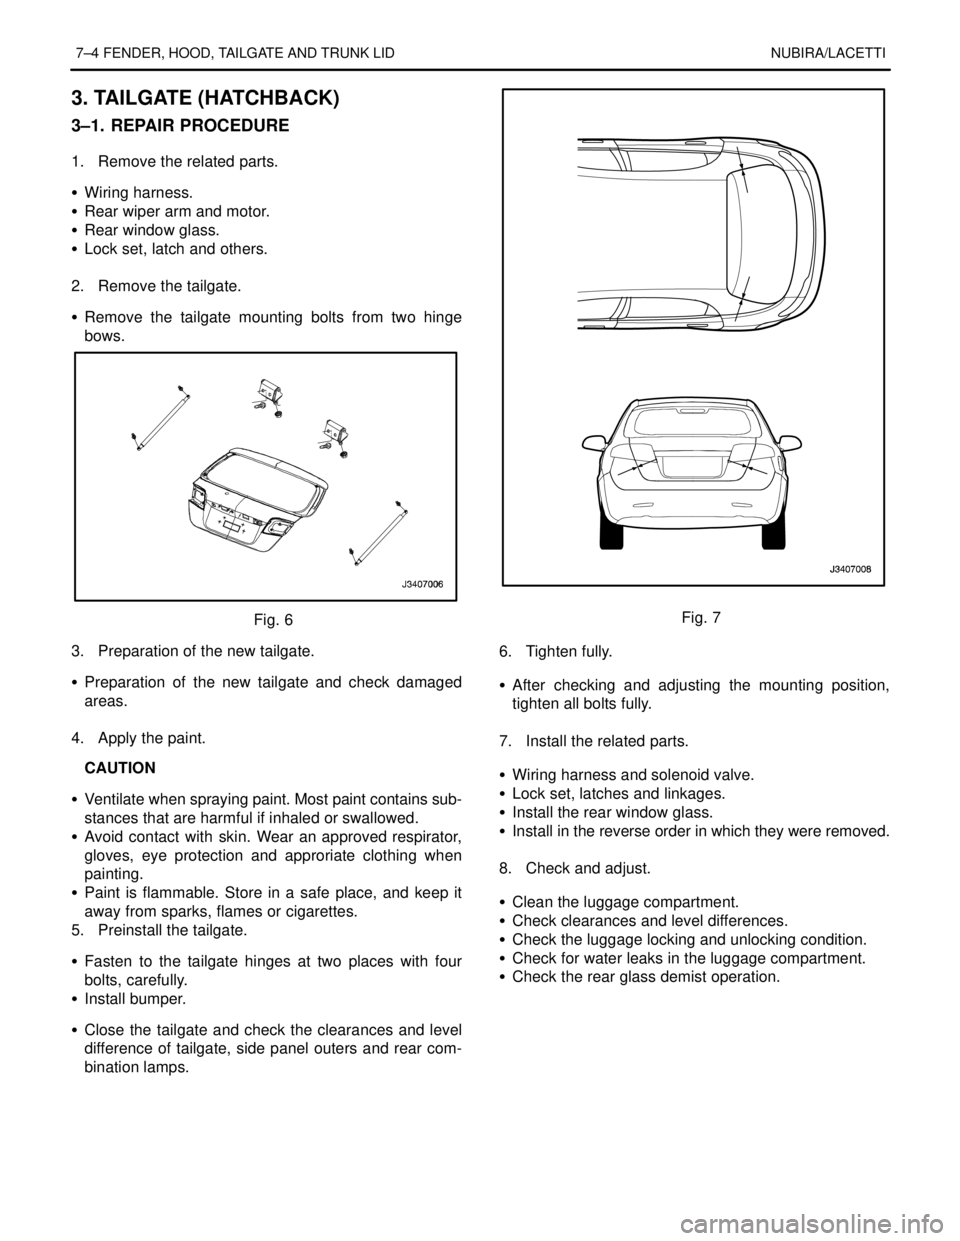
2. Remove the tailgate.
S Remove the tailgate mounting bolts from two hinge
bows.
Fig. 6
3. Preparation of the new tailgate.
S Preparation of the new tailgate and check damaged
areas.
.
4. Apply the paint.
CAUTION
S Ventilate when spraying paint. Most paint contains sub-
stances that are harmful if inhaled or swallowed.
S Avoid contact with skin. Wear an approved respirator,
gloves, eye protection and approriate clothing when
painting.
S Paint is flammable. Store in a safe place, and keep it
away from sparks, flames or cigarettes.
5. Preinstall the tailgate.
S Fasten to the tailgate hinges at two places with four
bolts, carefully.
S Install bumper.
S Close the tailgate and check the clearances and level
difference of tailgate, side panel outers and rear com-
bination lamps.Fig. 7
6. Tighten fully.
S After checking and adjusting the mounting position,
tighten all bolts fully.
.
7. Install the related parts.
S Wiring harness and solenoid valve.
S Lock set, latches and linkages.
S Install the rear window glass.
S Install in the reverse order in which they were removed.
.
8. Check and adjust.
S Clean the luggage compartment.
S Check clearances and level differences.
S Check the luggage locking and unlocking condition.
S Check for water leaks in the luggage compartment.
S Check the rear glass demist operation.