check engine DODGE AVENGER 2008 User Guide
[x] Cancel search | Manufacturer: DODGE, Model Year: 2008, Model line: AVENGER, Model: DODGE AVENGER 2008Pages: 467, PDF Size: 7.16 MB
Page 180 of 467
CAUTION!The TPMS has been optimized for the original
equipment tires and wheels. TPMS pressures and
warning have been established for the tire size
equipped on your vehicle. Undesirable system opera-
tion or sensor damage may result when using re-
placement equipment that is not of the same size,
type, and/or style. Aftermarket wheels can cause
sensor damage. Do not use aftermarket tire sealants
or balance beads if your vehicle is equipped with a
TPMS, as damage to the sensors may result.
(Refer to ªTire Inflation Pressuresº under ªTires Ð Gen-
eral Informationº and to ªTire Pressure Monitor System
(TPMS)º in Section 5 of this manual for more informa-
tion). 25. Malfunction Indicator Light
This light is part of an onboard diagnostic system
called OBD that monitors emissions, engine, and
automatic transaxle control systems. The light
will illuminate when the key is in the ON/RUN position
before engine start. If the bulb does not come on when
turning the key from LOCK/OFF to ON/RUN, have the
condition checked promptly.
Certain conditions such as a loose or missing gas cap,
poor fuel quality, etc. may illuminate the light after
engine start. The vehicle should be serviced if the light
stays on through several of your typical driving cycles. In
most situations the vehicle will drive normally and will
not require towing.
If the Malfunction Indicator Light flashes when the
engine is running, serious conditions may exist that178 UNDERSTANDING YOUR INSTRUMENT PANEL
Page 280 of 467
BRAKE SYSTEM
Your vehicle is equipped with power assisted brakes as
standard equipment. In the event power assist is lost for
any reason (i.e., repeated brake applications with the
engine off) the brakes will still function. However, the
effort required to brake the vehicle will be much greater
than that required with the power system operating.
WARNING!Riding the brakes can lead to brake failure and
possibly an accident. Driving with your foot resting
or riding on the brake pedal can result in abnormally
high brake temperatures, excessive lining wear, and
possible brake damage. You wouldn't have your full
braking capacity in an emergency. This light monitors various brake functions,
including brake fluid level and parking brake
application. If the brake light turns on, it may
indicate that the parking brake is applied, that
the brake fluid level is low, or that there is a problem with
the anti-lock brake system.
WARNING!Driving a vehicle with the brake light on is danger-
ous. A significant decrease in braking performance or
vehicle stability during braking may occur. It will
take you longer to stop the vehicle or will make your
vehicle harder to control. You could have an accident.
Have the vehicle checked immediately.278 STARTING AND OPERATING
Page 346 of 467
Automatic Transaxle
The DRIVE range can be selected when towing. How-
ever, if frequent shifting occurs while in this range, third
gear for a four-speed automatic and the fifth gear for a
six-speed AutoStick t should be selected.
NOTE: Using third or fifth instead of DRIVE while
operating the vehicle under heavy operating conditions,
will improve performance and extend transaxle life by
reducing excessive shifting and heat build-up. This ac-
tion will also provide better engine braking.
If you REGULARLY TOW a trailer for more than 45
minutes of continuous operation, then change the auto-
matic transaxle fluid and filter according to the interval
specified for ªpolice, taxi, fleet, or frequent trailer tow-
ingº in the ªMaintenance Scheduleº in this manual.
NOTE: Check the four-speed automatic transaxle fluid
level before towing. AutoStick t sixÐspeed transmission is sealed and the fluid level cannot be checked. See your
authorized dealership service center for assistance.
Electronic Speed Control Ð (If Equipped)
² Don't use in hilly terrain or with heavy loads.
² When using the speed control, if you experience speed
drops greater than 10 mph (16 km/h), disengage until
you can get back to cruising speed.
² Use speed control in flat terrain and with light loads to
maximize fuel efficiency.
Cooling System
To reduce potential for engine and transaxle overheating,
take the following actions:
² City Driving
When stopped for short periods of time, put transaxle in
neutral and increase engine idle speed.344 STARTING AND OPERATING
Page 360 of 467
11. Check the tire pressure as soon as possible. Correct
pressure as required.
JUMP-STARTING PROCEDURES DUE TO A LOW
BATTERY
Jump-starting remote battery terminals are located under
the hood.
The battery is stored between the left front headlight
assembly and the left front wheel splash shield. Access is
through the splash shield. WARNING! ² Take care to avoid the radiator cooling fan whenever the
hood is raised. It can start anytime the ignition switch is
on. You can be hurt by the fan.
² Do not attempt to push or tow your vehicle to get it
started. Vehicles equipped with an automatic transaxle
cannot be started this way. Unburned fuel could enter
the catalytic converter and once the engine has started,
ignite and damage the converter and vehicle. If the
vehicle has a discharged battery, booster cables may be
used to obtain a start from another vehicle. This type of
start can be dangerous if done improperly, so follow this
procedure carefully.
² Do not use a booster battery or any other booster source
with an output that exceeds 12 volts.
² During cold weather when temperatures are below
freezing point, electrolyte in a discharged battery may
freeze. Do not attempt jump-starting because the battery
could rupture or explode. The battery temperature must
be brought up above freezing point before attempting
jump-start.358 WHAT TO DO IN EMERGENCIES
Page 374 of 467
RESET button to turn off the message. If the problem
persists, the message will appear the next time the
vehicle is started. This might indicate a damaged cap. If
the problem is detected twice in a row, the system will
turn on the MIL. Resolving the problem will turn the MIL
light off.
EMISSIONS INSPECTION AND MAINTENANCE
PROGRAMS
In some localities, it may be a legal requirement to pass
an inspection of this vehicle's emissions control system.
Failure to pass could prevent vehicle registration.
For states that require an Inspection and Mainte-
nance (I/M), this check verifies the Malfunction
Indicator Light (MIL) is functioning and is not on
when the engine is running, and that the OBD II system
is ready for testing. Normally, the OBD II system will be ready. The OBD II
system may not be ready if the vehicle was recently
serviced, recently had a dead battery, or a battery replace-
ment. If the OBD II system should be determined not
ready for the I/M test, the vehicle may fail the test.
This vehicle has a simple ignition key-actuated test,
which you can use prior to going to the test station. To
check if this vehicle's OBD II system is ready, you must
do the following:
1. Insert the ignition key into the ignition switch.
2. Turn the ignition to the ON position, but do not crank
or start the engine.
3. If you crank or start the engine, you will have to start
this test over.
4. As soon as you turn the ignition key to the ON
position, you will see the MIL symbol come on as part of
a normal bulb check.372 MAINTAINING YOUR VEHICLE
Page 375 of 467
5. Approximately 15 seconds later, one of two things will
happen:
a. The MIL will flash for about 10 seconds and then
return to being fully illuminated until you turn OFF
the ignition key or start the engine. This means that the
vehicle's OBD II system is not ready and you should
not proceed to the I/M station.
b. The MIL will not flash at all and will remain fully
illuminated until you turn OFF the ignition key or start
the engine. This means that the vehicle's OBD II
system is ready, and you can proceed to the I/M
station.
If the OBD II system is not ready, you should see an
authorized dealer or repair facility. If this vehicle was
recently serviced or had a battery failure or replacement,
you may need to do nothing more than drive the vehicle as you normally would in order for the OBD II system to
update. A recheck with the above test routine may then
indicate that the system is now ready.
Regardless of whether the vehicle's OBD II system is
ready or not ready, if the MIL is illuminated during
normal vehicle operation, you should have the vehicle
serviced before going to the I/M station. The I/M station
can fail the vehicle because the MIL is on with the engine
running.
REPLACEMENT PARTS
Use of genuine Mopar t parts for normal/scheduled
maintenance and repairs is highly recommended to en-
sure the designed performance. Damage or failures
caused by the use of non-Mopar t parts for maintenance
and repairs will not be covered by the manufacturer's
warranty. MAINTAINING YOUR VEHICLE 373
7
Page 376 of 467
AUTHORIZED DEALER SERVICE
Your authorized dealer has the qualified service person-
nel, special tools, and equipment to perform all service
operations in an expert manner. Service manuals are
available which include detailed service information for
your vehicle. Refer to these service manuals before
attempting any procedure yourself.
NOTE: Intentional tampering with emissions control
systems can result in civil penalties being assessed
against you.
WARNING!You can be badly injured working on or around a
motor vehicle. Only do service work for which you
have the knowledge and the proper equipment. If you
have any doubt about your ability to perform a service
job, take your vehicle to a competent mechanic. MAINTENANCE PROCEDURES
The pages that follow contain the required maintenance
services determined by the engineers who designed your
vehicle.
Besides the maintenance items for which there are fixed
maintenance intervals, there are other items that should
operate satisfactorily without periodic maintenance.
However, if a malfunction of these items does occur, it
could adversely affect the engine or vehicle performance.
These items should be inspected if a malfunction is
observed or suspected.
ENGINE OIL
Checking Oil Level
To assure proper engine lubrication, the engine oil must
be maintained at the correct level. Check the oil level at
regular intervals, such as every fuel stop.374 MAINTAINING YOUR VEHICLE
Page 377 of 467
The best time to check the engine oil level is about 5
minutes after a fully warmed engine is shut off. Do not
check oil level before starting the engine after it has sat
overnight. Checking engine oil level when the engine is
cold will give you an incorrect reading.
Checking the oil while the vehicle is on level ground and
only when the engine is hot, will improve the accuracy of
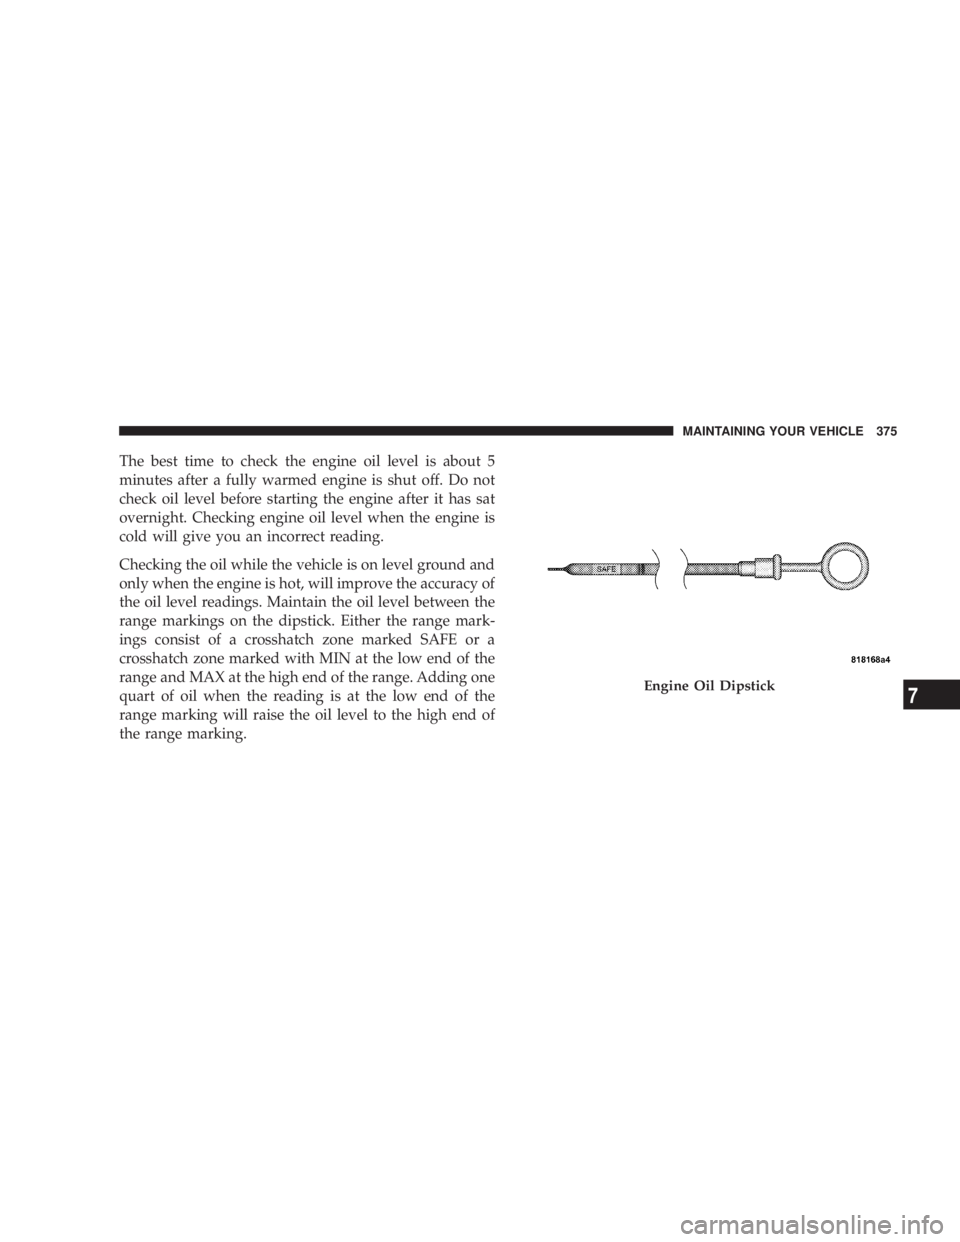
the oil level readings. Maintain the oil level between the
range markings on the dipstick. Either the range mark-
ings consist of a crosshatch zone marked SAFE or a
crosshatch zone marked with MIN at the low end of the
range and MAX at the high end of the range. Adding one
quart of oil when the reading is at the low end of the
range marking will raise the oil level to the high end of
the range marking. Engine Oil Dipstick MAINTAINING YOUR VEHICLE 375
7
Page 387 of 467
CAUTION!The A/C Air Filter is labeled with an arrow to
indicate airflow direction through the filter. Failure
to install the filter properly will result in the need to
replace it more often.
7. Reinstall the glove box door dampener and glove box.
POWER STEERING
Checking the power steering fluid level at a defined
service interval is not required. The fluid should only be
checked if a leak is suspected, abnormal noises are
apparent, and/or the system is not functioning as antici-
pated. Coordinate inspection efforts through a certified
DaimlerChrysler dealership. WARNING!Fluid level should be checked on a level surface and
with the engine off to prevent injury from moving
parts and to ensure accurate fluid level reading. Do
not overfill. Use only manufacturers recommended
power steering fluid.
If necessary, add fluid to restore to the proper indicated
level. With a clean cloth, wipe any spilled fluid from all
surfaces. Refer to ªFluids, Lubricants, and Genuine
Partsº in this section for the correct fluid type.
FRONT SUSPENSION
There are two front suspension lower ball joints that are
permanently lubricated. Inspect these ball joints when
other maintenance is performed. A damaged seal and the
corresponding potentially damaged ball joint must be
replaced. MAINTAINING YOUR VEHICLE 385
7
Page 389 of 467
Keep the blade rubber out of contact with petroleum
products such as engine oil, gasoline, etc.
NOTE: Always refer to the wiper blade packaging for
specific installation instructions. Many wiper blade re-
placements fit multiple vehicles.
WINDSHIELD WASHERS
NOTE: Refer to the appropriate ªEngine Compartmentº
diagram in Section 7 for the location of the windshield
washer fluid reservoir.
The fluid reservoir for the windshield washers is located
in the engine compartment. Be sure to check the fluid
level in the reservoir at regular intervals. Fill the reservoir
with windshield washer solvent (not radiator antifreeze)
and operate the system for a few seconds to flush out the
residual water. WARNING!Commercially available windshield washer solvents
are flammable. They could ignite and burn you. Care
must be exercised when filling or working around
the washer solution.
EXHAUST SYSTEM
The best protection against carbon monoxide entry into
the vehicle body is a properly maintained engine exhaust
system.
If you notice a change in the sound of the exhaust system
or if exhaust fumes can be detected inside the vehicle or
when the underside or rear of the vehicle is damaged,
have a competent technician inspect the complete ex-
haust system and adjacent body areas for broken, dam-
aged, deteriorated, or mispositioned parts. Open seams
or loose connections could permit exhaust fumes to seep MAINTAINING YOUR VEHICLE 387
7