check oil DODGE AVENGER 2008 Owners Manual
[x] Cancel search | Manufacturer: DODGE, Model Year: 2008, Model line: AVENGER, Model: DODGE AVENGER 2008Pages: 467, PDF Size: 7.16 MB
Page 82 of 467
Defroster
Check operation by selecting the defrost mode and place
the blower control on high speed. You should be able to
feel the air directed against the windshield.
NOTE: If the defrost feature is not functioning, the
cause should be located and corrected immediately by an
authorized service center. The windshield could fog up
while driving and obscure your visibility.
Periodic Safety Checks You Should Make Outside
The Vehicle
Tires
Examine tires for excessive tread wear or uneven wear
patterns. Check for stones, nails, glass, or other objects
lodged in the tread. Inspect tread and sidewall for cuts or
cracks. Check wheel nuts for tightness, and tires (includ-
ing spare) for proper pressure. Lights
Have someone observe the operation of exterior lights
while you work the controls. Check turn signal and high
beam indicator lights on the instrument panel.
Fluid Leaks
Check area under vehicle after overnight parking for fuel,
engine coolant, oil, or other fluid leaks. In addition, if
gasoline fumes are detected or fuel, power steering fluid,
transmission fluid, or brake fluid leaks are suspected, the
cause should be located and corrected immediately.80 THINGS TO KNOW BEFORE STARTING YOUR VEHICLE
Page 173 of 467
5. Low Fuel Light
When the fuel level drops to 2 gallons, the fuel
symbol will light and a single chime will sound.
6. Charging System Light
This light shows the status of the electrical charg-
ing system. The light should come on briefly when
the ignition is first turned on and remain on briefly as a
bulb check. If the light stays on or comes on while
driving, turn off some of the vehicle's electrical devices,
such as the Fog Lights or Rear Defroster. If the Charging
System Light remains on, it means that the vehicle is
experiencing a problem with the charging system. Obtain
SERVICE IMMEDIATELY. See your authorized dealer.
7. Airbag Light
The light comes on and remains on for 6 to 8
seconds as a bulb check when the ignition
switch is first turned ON. If the light does not come on during starting, stays on, or comes on while
driving, have the system checked by an authorized
dealer.
8. Theft Alarm Light Ð If Equipped
This light will flash rapidly for several seconds when the
alarm system is arming. The light will begin to flash
slowly indicating that the system is armed.
9. Seat Belt Reminder Light
When the ignition switch is first turned ON, this
light will come on for about six seconds. A chime
will sound if you have not pulled the shoulder belt
out of the retractor. This is a reminder to ªbuckle upº. If
you do not buckle up, the light will remain on.
10. Oil Pressure Light
Shows low engine oil pressure. The light will come
on and remain on when the ignition switch is
turned from the OFF to the ON position, and the light UNDERSTANDING YOUR INSTRUMENT PANEL 171
4
Page 174 of 467
will turn off after the engine is started. If the bulb does
not come on during starting, have the system checked by
an authorized dealer.
If the light comes on and remains on while driving, stop
the vehicle and shut off the engine. DO NOT OPERATE
THE VEHICLE UNTIL THE CAUSE IS CORRECTED.
The light does not show the quantity of oil in the engine.
This can be determined using the procedure shown in
Section 7.
11. Engine Temperature Warning Light
This light warns of an overheated engine condi-
tion. If the engine is critically hot, a warning chime
will sound 10 times. After the chime turns off, the
engine will still be critically hot until the light goes out.
12. Speedometer
Indicates vehicle speed in kilometers per hour Ð Km/h. 13. Tachometer
The white area of the scale shows the permissible engine
revolutions-per-minute (rpm x 1000) for each gear range.
Before reaching the red area, ease up on the accelerator to
prevent engine damage.
14. Transmission Range Indicator
This display indicator shows the automatic transaxle gear
selection.
15. Odometer/Trip Odometer
The odometer shows the total distance the vehicle has
been driven. U.S. federal regulations require that upon
transfer of vehicle ownership, the seller certify to the
purchaser the correct mileage that the vehicle has been
driven. Therefore, if the odometer reading is changed
during repair or replacement, be sure to keep a record of
the reading before and after the service so that the correct
mileage can be determined.172 UNDERSTANDING YOUR INSTRUMENT PANEL
Page 376 of 467
AUTHORIZED DEALER SERVICE
Your authorized dealer has the qualified service person-
nel, special tools, and equipment to perform all service
operations in an expert manner. Service manuals are
available which include detailed service information for
your vehicle. Refer to these service manuals before
attempting any procedure yourself.
NOTE: Intentional tampering with emissions control
systems can result in civil penalties being assessed
against you.
WARNING!You can be badly injured working on or around a
motor vehicle. Only do service work for which you
have the knowledge and the proper equipment. If you
have any doubt about your ability to perform a service
job, take your vehicle to a competent mechanic. MAINTENANCE PROCEDURES
The pages that follow contain the required maintenance
services determined by the engineers who designed your
vehicle.
Besides the maintenance items for which there are fixed
maintenance intervals, there are other items that should
operate satisfactorily without periodic maintenance.
However, if a malfunction of these items does occur, it
could adversely affect the engine or vehicle performance.
These items should be inspected if a malfunction is
observed or suspected.
ENGINE OIL
Checking Oil Level
To assure proper engine lubrication, the engine oil must
be maintained at the correct level. Check the oil level at
regular intervals, such as every fuel stop.374 MAINTAINING YOUR VEHICLE
Page 377 of 467
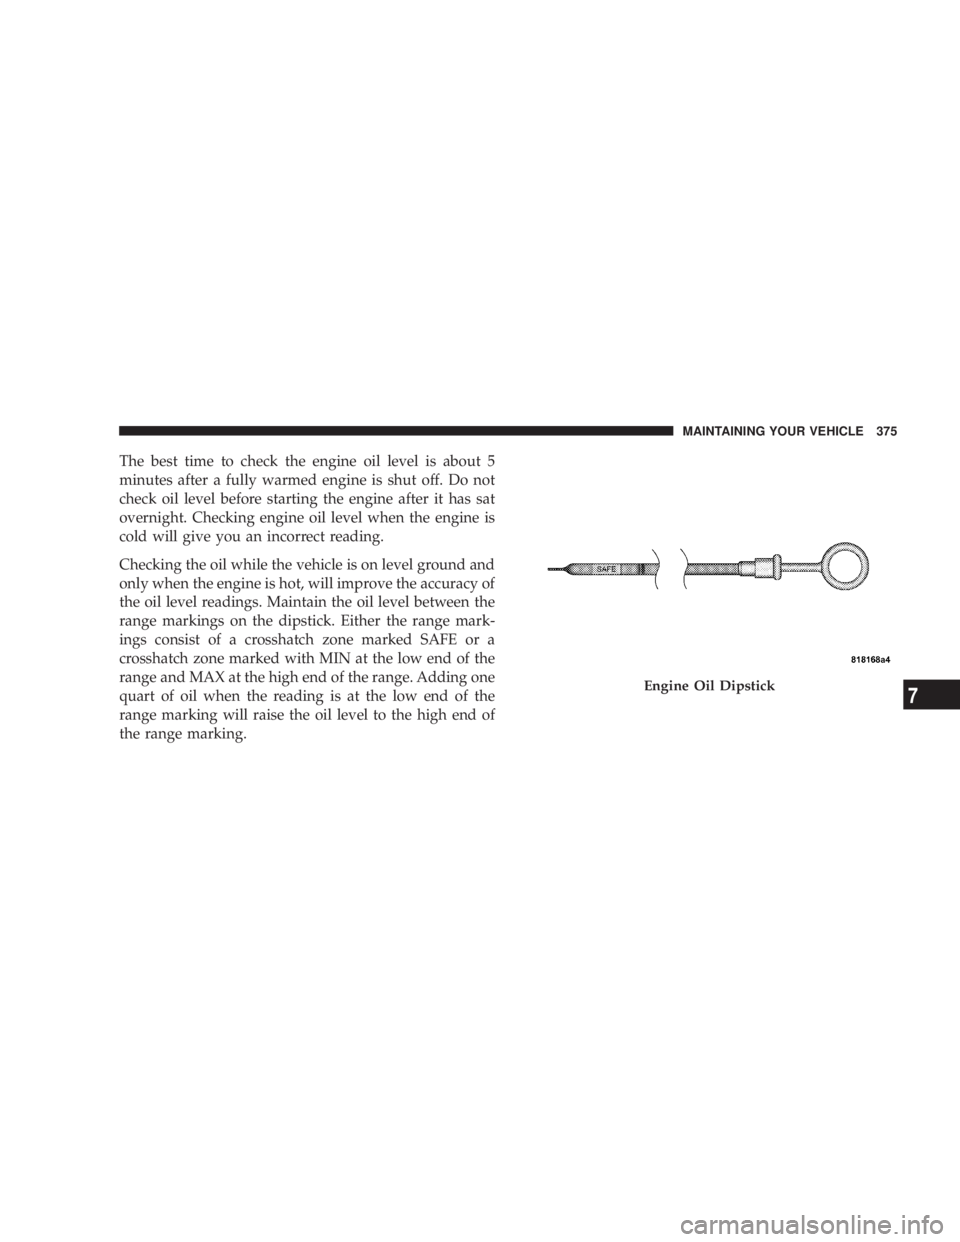
The best time to check the engine oil level is about 5
minutes after a fully warmed engine is shut off. Do not
check oil level before starting the engine after it has sat
overnight. Checking engine oil level when the engine is
cold will give you an incorrect reading.
Checking the oil while the vehicle is on level ground and
only when the engine is hot, will improve the accuracy of
the oil level readings. Maintain the oil level between the
range markings on the dipstick. Either the range mark-
ings consist of a crosshatch zone marked SAFE or a
crosshatch zone marked with MIN at the low end of the
range and MAX at the high end of the range. Adding one
quart of oil when the reading is at the low end of the
range marking will raise the oil level to the high end of
the range marking. Engine Oil Dipstick MAINTAINING YOUR VEHICLE 375
7
Page 389 of 467
Keep the blade rubber out of contact with petroleum
products such as engine oil, gasoline, etc.
NOTE: Always refer to the wiper blade packaging for
specific installation instructions. Many wiper blade re-
placements fit multiple vehicles.
WINDSHIELD WASHERS
NOTE: Refer to the appropriate ªEngine Compartmentº
diagram in Section 7 for the location of the windshield
washer fluid reservoir.
The fluid reservoir for the windshield washers is located
in the engine compartment. Be sure to check the fluid
level in the reservoir at regular intervals. Fill the reservoir
with windshield washer solvent (not radiator antifreeze)
and operate the system for a few seconds to flush out the
residual water. WARNING!Commercially available windshield washer solvents
are flammable. They could ignite and burn you. Care
must be exercised when filling or working around
the washer solution.
EXHAUST SYSTEM
The best protection against carbon monoxide entry into
the vehicle body is a properly maintained engine exhaust
system.
If you notice a change in the sound of the exhaust system
or if exhaust fumes can be detected inside the vehicle or
when the underside or rear of the vehicle is damaged,
have a competent technician inspect the complete ex-
haust system and adjacent body areas for broken, dam-
aged, deteriorated, or mispositioned parts. Open seams
or loose connections could permit exhaust fumes to seep MAINTAINING YOUR VEHICLE 387
7
Page 399 of 467
WARNING!² Overfilling the brake fluid reservoir can result in
spilling brake fluid on hot engine parts and the
brake fluid catching fire.
² Use of a brake fluid that has a lower initial boiling
point than the recommended MOPAR t DOT 3
product or a brake fluid that is unidentified as to
FMVSS specification may result in sudden brake
failure during hard prolonged braking. You could
have an accident.
Use only brake fluid that has been in a tightly closed
container to avoid contamination from foreign matter or
moisture. CAUTION!Do not allow petroleum base fluid to contaminate the
brake fluid, all brake seal components could be
damaged causing partial or complete brake failure.
AUTOMATIC TRANSAXLE
The automatic transaxle and differential assembly are
contained within a single housing.
The fluid level in the automatic transaxle should be
checked whenever the vehicle is serviced. Operation with
an improper fluid level will greatly reduce the life of the
transaxle and the fluid.
Fluid Level Check Ð Vehicles with 3.5L Engine
The automatic transaxle has no dipstick and is dealer
serviced only. MAINTAINING YOUR VEHICLE 397
7
Page 429 of 467
oil if it has been six months since your last oil change
even if the oil change indicator message is NOT
illuminated.
² Change your engine oil more often if you drive your
vehicle off-road for an extended period of time.
² Under no circumstances should oil change intervals
exceed 6,000 mi (10 000 km) or six months, whichever
comes first.
Your authorized dealer will reset the oil change indicator
message after completing the scheduled oil change. If a
scheduled oil change is performed by someone other
than your authorized dealer, the message can be reset by
referring to the steps described under ªOil Change
Requiredº under ªElectronic Vehicle Information Center
(EVIC)º in Section 4 or under ªOdometer/Trip Odom-
eterº under ªInstrument Cluster Descriptionsº in Section
4. At Each Stop for Fuel
² Check the engine oil level about five minutes after a
fully warmed engine is shut off. Checking the oil level
while the vehicle is on level ground will improve the
accuracy of the oil level reading. Add oil only when
the level is at or below the SAFE or MIN mark.
² Check the windshield washer solvent and add if
required.
Once a Month
² Check tire pressure and look for unusual wear or
damage.
² Inspect the battery and clean and tighten the terminals
as required.
² Check the fluid levels of coolant reservoir, brake
master cylinder, power steering, and automatic trans-
axle, and add fluid as needed. MAINTENANCE SCHEDULES 427
8 M
A
I
N
T
E
N
A
N
C
E
S
C
H
E
D
U
L
E
S
Page 430 of 467
NOTE: Six-speed AutoStick t Transaxle, if equipped, is
sealed therefore, checking the fluid level can only be
done by a certified dealership service center.
² Check all lights and other electrical items for correct
operation. At Each Oil Change
² Change the engine oil filter.
² Inspect the brake hoses and lines.
CAUTION!Failure to perform the required maintenance items
may result in damage to the vehicle.428 MAINTENANCE SCHEDULES
8 M
A
I
N
T
E
N
A
N
C
E
S
C
H
E
D
U
L
E
S
Page 447 of 467
Automatic Door Locks ..................... 32
Automatic Oil Change Indicator ........ 173,184,426
Automatic Temperature Control (ATC) ......... 246
Automatic Transaxle .............. 12,261,267,397
Adding Fluid ................... 397,398,424
Filter ............................... 399
Fluid and Filter Changes ................. 399
Fluid Level Check ................... 397,398
Interlock System ....................... 269
Reset Mode .......................... 273
Selection Of Lubricant ................... 424
Shifting ............................. 270
Special Additives ...................... 399
Autostick ............................. 274
Ball Joints ............................. 385
Battery ............................... 381
Gas Caution .......................... 381
Keyless Transmitter Replacement (RKE) ....... 26 Location ............................ 381
Bearings .............................. 400
Belts, Drive ............................ 378
Beverage Cooler ........................ 161
Body Mechanism Lubrication ............... 386
B-Pillar Location ........................ 295
Brake Assist System ...................... 282
Brake, Parking .......................... 276
Brake System ........................ 278,394
Anti-Lock (ABS) ....................... 279
Fluid Check ....................... 396,424
Hoses .............................. 395
Master Cylinder ....................... 396
Parking ............................. 276
Warning Light ........................ 179
Brakes ............................. 278,394
Brake/Transmission Interlock ............... 269
Break-In Recommendations, New Vehicle ........ 78
Bulb Replacement ..................... 41 1,412 INDEX 445
10