key DODGE AVENGER 2010 2.G Owner's Manual
[x] Cancel search | Manufacturer: DODGE, Model Year: 2010, Model line: AVENGER, Model: DODGE AVENGER 2010 2.GPages: 448, PDF Size: 7.17 MB
Page 31 of 448
CAUTION!
An unlocked vehicle is an invitation to thieves.
Always remove the key from the ignition and lock all
of the doors when leaving the vehicle unattended.
Power Door Locks
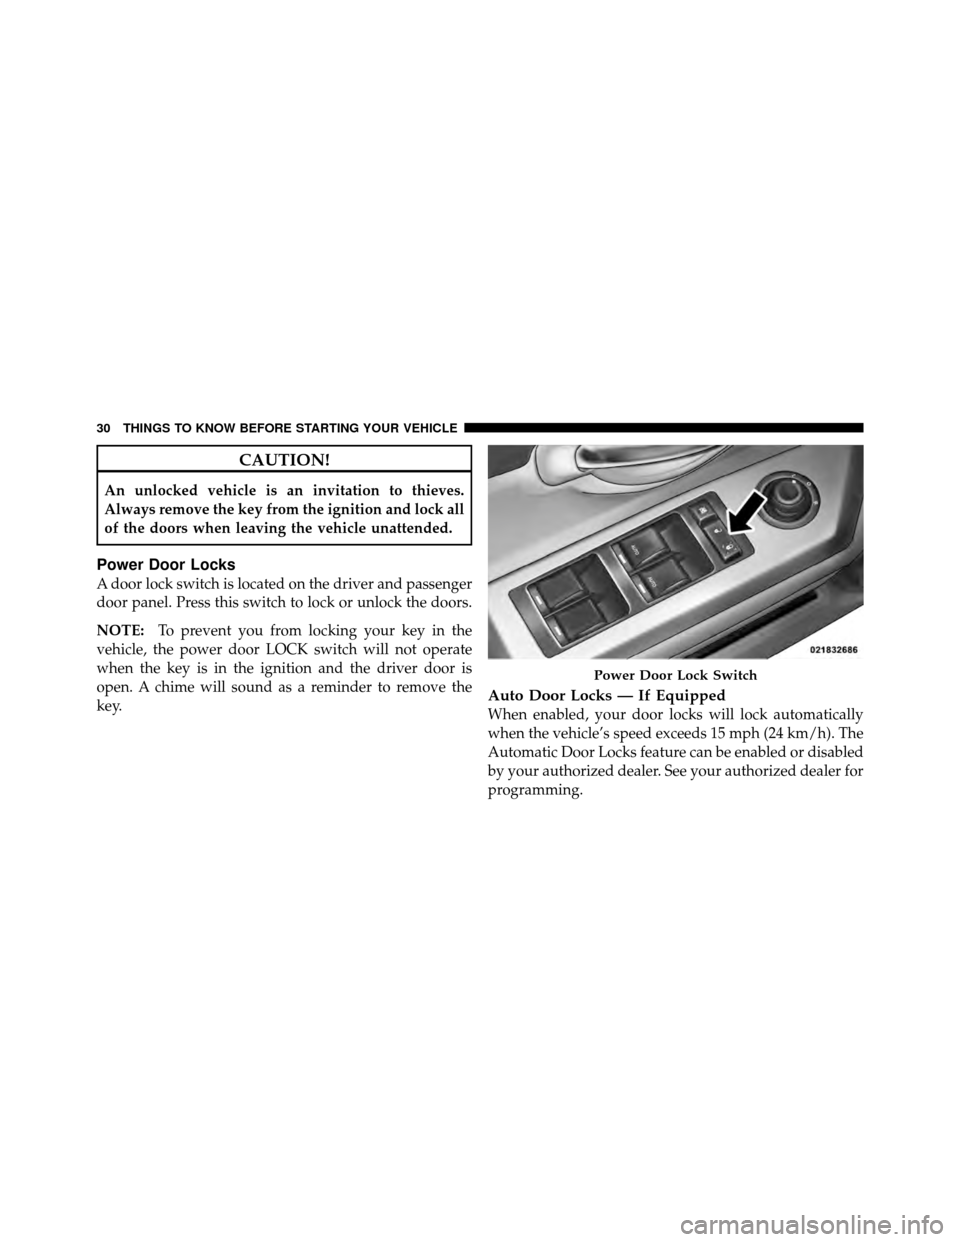
A door lock switch is located on the driver and passenger
door panel. Press this switch to lock or unlock the doors.
NOTE:To prevent you from locking your key in the
vehicle, the power door LOCK switch will not operate
when the key is in the ignition and the driver door is
open. A chime will sound as a reminder to remove the
key.
Auto Door Locks — If Equipped
When enabled, your door locks will lock automatically
when the vehicle’s speed exceeds 15 mph (24 km/h). The
Automatic Door Locks feature can be enabled or disabled
by your authorized dealer. See your authorized dealer for
programming.
Power Door Lock Switch
30 THINGS TO KNOW BEFORE STARTING YOUR VEHICLE
Page 32 of 448
Auto Unlock On Exit
The doors will unlock automatically on vehicles with
power door locks if:
1. The Automatic Unlock Doors On Exit feature is en-
abled.
2. The transmission shift lever was in gear and the
vehicle speed returned to 0 mph (0 km/h).
3. The transmission shift lever is in NEUTRAL or PARK.
4. The driver door is opened.
5. The doors were not previously unlocked, and
6. The vehicle speed is 0 mph (0 km/h).
Auto Unlock On Exit Programming
The Automatic Unlock Doors On Exit feature can be
enabled or disabled as follows:
•For vehicles equipped with the Electronic Vehicle
Information Center (EVIC), refer to “Electronic Vehicle
Information Center (EVIC)/Personal Settings (Cus-
tomer-Programmable Features)” in “Understanding
Your Instrument Panel” for further information.
•For vehicles not equipped with the EVIC, performing
the following procedure:
1. Close all doors and place the key in the ignition.
2. Within 15 seconds, cycle the ignition switch between
LOCK and ON and then back to LOCK four times ending
up in the LOCK position. (do not start the engine)
3. Within 30 seconds, press the power door UNLOCK
switch to unlock the doors.
2
THINGS TO KNOW BEFORE STARTING YOUR VEHICLE 31
Page 33 of 448
4. Repeat these steps if you want to return this feature to
its previous setting.
NOTE:Use the Automatic Unlock Doors On Exit feature
in accordance with local laws.
Child Protection Door Lock System (Rear Doors)
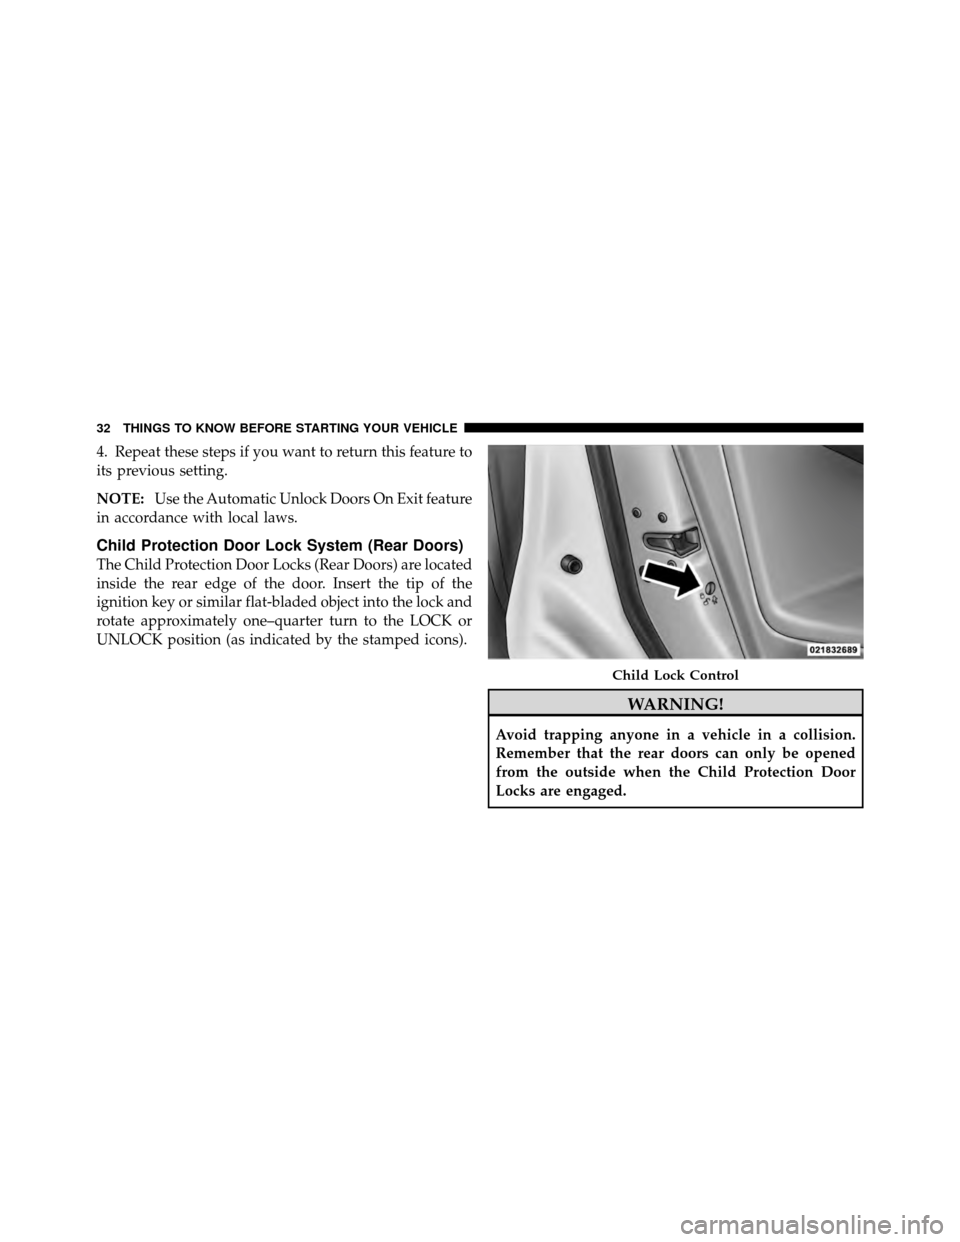
The Child Protection Door Locks (Rear Doors) are located
inside the rear edge of the door. Insert the tip of the
ignition key or similar flat-bladed object into the lock and
rotate approximately one–quarter turn to the LOCK or
UNLOCK position (as indicated by the stamped icons).
WARNING!
Avoid trapping anyone in a vehicle in a collision.
Remember that the rear doors can only be opened
from the outside when the Child Protection Door
Locks are engaged.
Child Lock Control
32 THINGS TO KNOW BEFORE STARTING YOUR VEHICLE
Page 35 of 448
There is a single window control on the passenger’s door
trim panel, which operates the passenger door window.
The window controls will operate when the ignition
switch is turned to the ON or ACC position, and when
the accessory delay feature is active.
WARNING!
Never leave children in a vehicle, with the keys in
the ignition switch. Occupants, particularly unat-
tended children, can become entrapped by the win-
dows while operating the power window switches.
Such entrapment may result in serious injury or
death.
Auto Window Down — If Equipped
The front window controls on the driver and passenger
door trim panels have an Auto-Down feature. These
switches are labeled AUTO to indicate this capability.
Push the window switch past the first detent, release, and
the window will go down automatically.
To open the window part way, push the window switch
to the first detent and release it when you want the
window to stop.
To cancel the Auto-Down movement, operate the switch
either in the up or down direction and release the switch.
34 THINGS TO KNOW BEFORE STARTING YOUR VEHICLE
Page 37 of 448
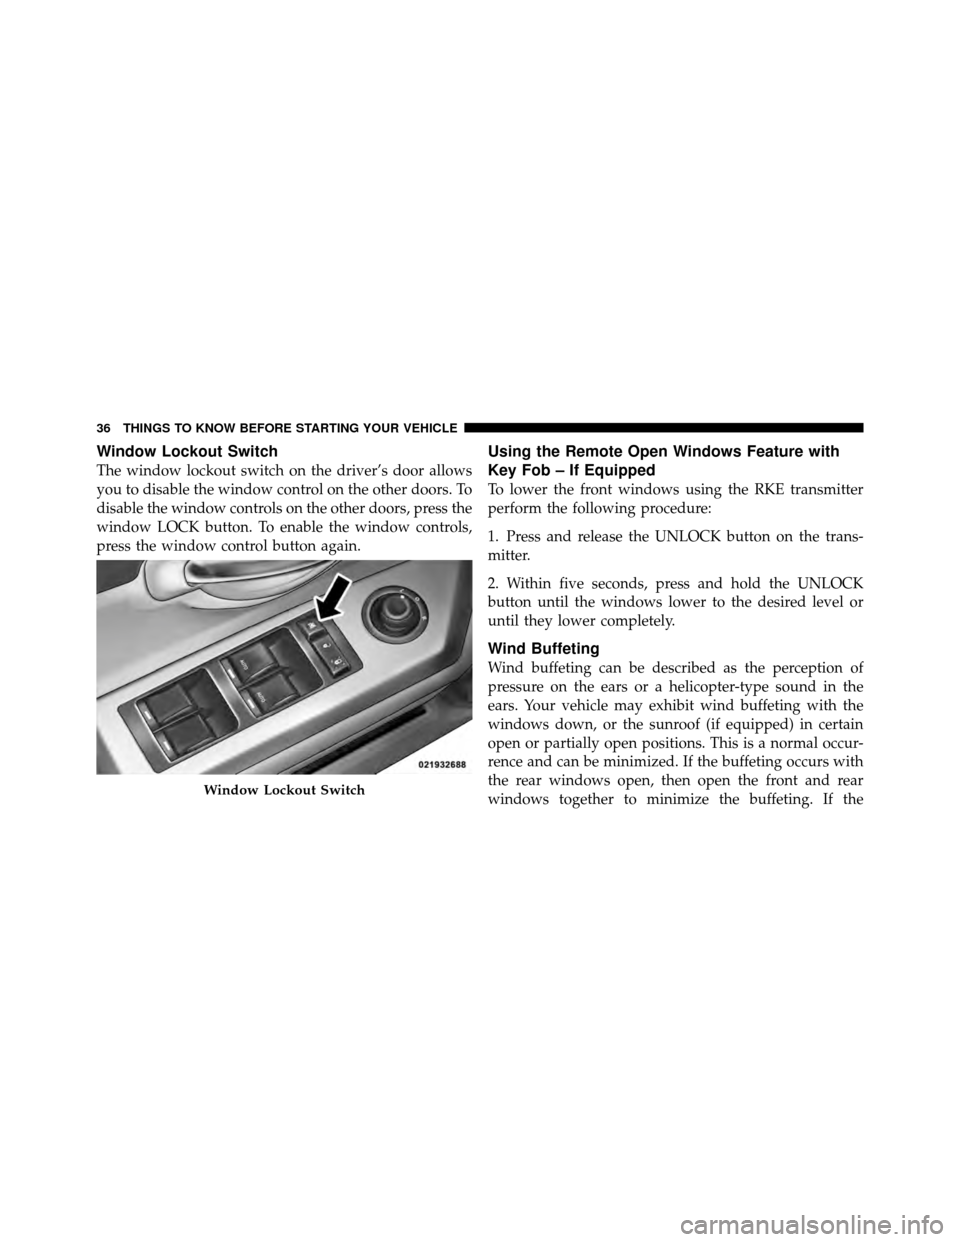
Window Lockout Switch
The window lockout switch on the driver’s door allows
you to disable the window control on the other doors. To
disable the window controls on the other doors, press the
window LOCK button. To enable the window controls,
press the window control button again.
Using the Remote Open Windows Feature with
Key Fob – If Equipped
To lower the front windows using the RKE transmitter
perform the following procedure:
1. Press and release the UNLOCK button on the trans-
mitter.
2. Within five seconds, press and hold the UNLOCK
button until the windows lower to the desired level or
until they lower completely.
Wind Buffeting
Wind buffeting can be described as the perception of
pressure on the ears or a helicopter-type sound in the
ears. Your vehicle may exhibit wind buffeting with the
windows down, or the sunroof (if equipped) in certain
open or partially open positions. This is a normal occur-
rence and can be minimized. If the buffeting occurs with
the rear windows open, then open the front and rear
windows together to minimize the buffeting. If the
Window Lockout Switch
36 THINGS TO KNOW BEFORE STARTING YOUR VEHICLE
Page 38 of 448
buffeting occurs with the sunroof open, then adjust the
sunroof opening to minimize the buffeting.
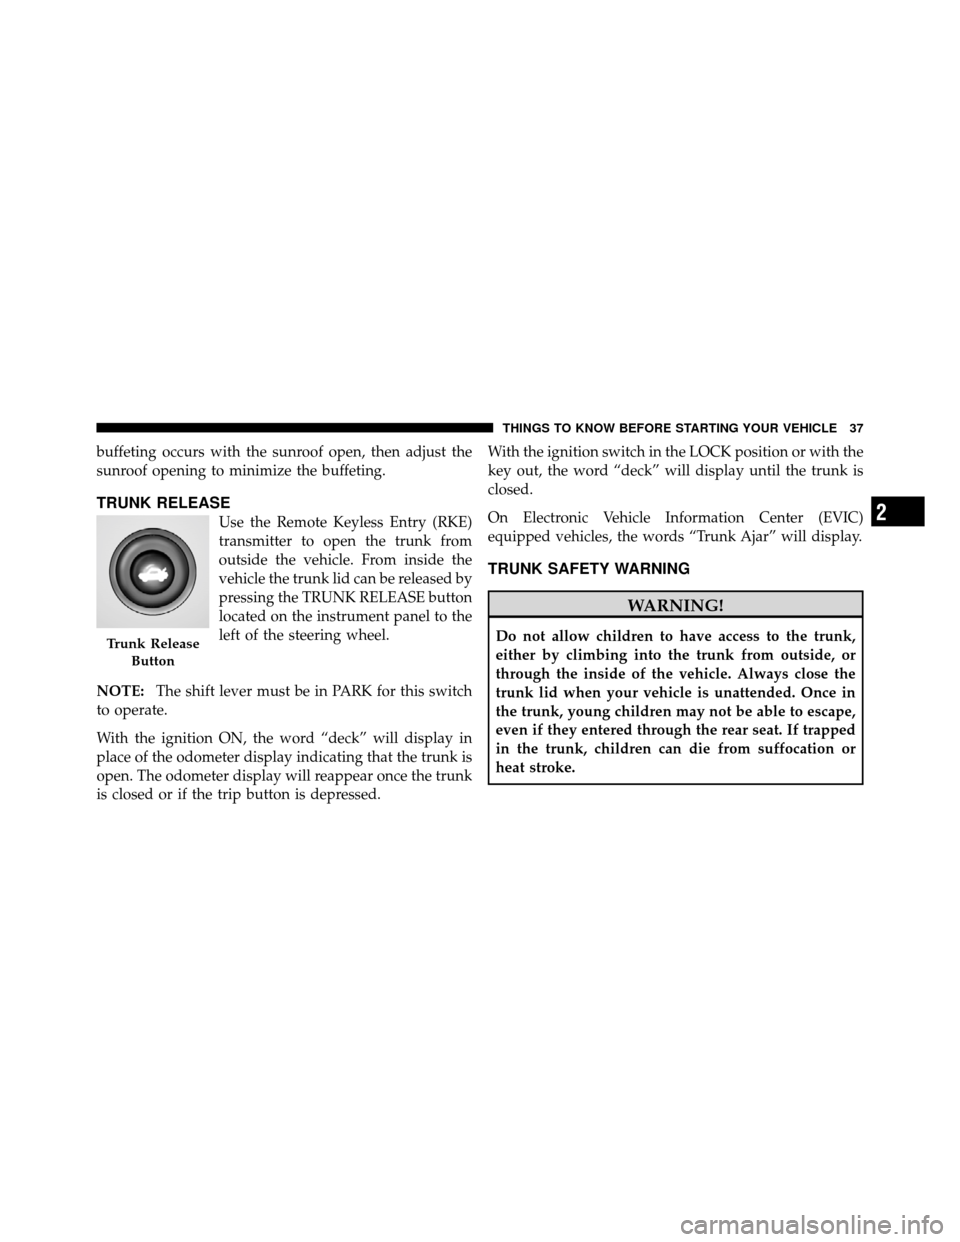
TRUNK RELEASE
Use the Remote Keyless Entry (RKE)
transmitter to open the trunk from
outside the vehicle. From inside the
vehicle the trunk lid can be released by
pressing the TRUNK RELEASE button
located on the instrument panel to the
left of the steering wheel.
NOTE: The shift lever must be in PARK for this switch
to operate.
With the ignition ON, the word “deck” will display in
place of the odometer display indicating that the trunk is
open. The odometer display will reappear once the trunk
is closed or if the trip button is depressed. With the ignition switch in the LOCK position or with the
key out, the word “deck” will display until the trunk is
closed.
On Electronic Vehicle Information Center (EVIC)
equipped vehicles, the words “Trunk Ajar” will display.
TRUNK SAFETY WARNING
WARNING!
Do not allow children to have access to the trunk,
either by climbing into the trunk from outside, or
through the inside of the vehicle. Always close the
trunk lid when your vehicle is unattended. Once in
the trunk, young children may not be able to escape,
even if they entered through the rear seat. If trapped
in the trunk, children can die from suffocation or
heat stroke.Trunk Release
Button
2
THINGS TO KNOW BEFORE STARTING YOUR VEHICLE 37
Page 62 of 448
The ORC determines if deployment of the front and/or
side airbags in a frontal or side collision is required. Based
on the impact sensors signals, a central electronic ORC
deploys the Advanced Front Airbags, SABIC airbags — if
equipped, Supplemental Seat-Mounted Side Airbags — if
equipped, and front seat belt pretensioners — if
equipped, as required, depending on the severity and
type of impact.
Advanced Front Airbags are designed to provide addi-
tional protection by supplementing the seat belts in
certain frontal collisions depending on the severity and
type of collision. Advanced Front Airbags are not ex-
pected to reduce the risk of injury in rear, side, or rollover
collisions.
The Advanced Front Airbags will not deploy in all frontal
collisions, including some that may produce substantial
vehicle damage — for example, some pole collisions,
truck underrides, and angle offset collisions. On the otherhand, depending on the type and location of impact,
Advanced Front Airbags may deploy in crashes with
little vehicle front-end damage but that produce a severe
initial deceleration.
The side airbags will not deploy in all side collisions. Side
airbag deployment will depend on the severity and type
of collision.
Because airbag sensors measure vehicle deceleration over
time, vehicle speed and damage by themselves are not
good indicators of whether or not an airbag should have
deployed.
Seat belts are necessary for your protection in all colli-
sions, and also are needed to help keep you in position,
away from an inflating airbag.
The ORC monitors the readiness of the electronic parts of
the airbag system whenever the ignition switch is in the
START or ON position. If the key is in the OFF position,
2
THINGS TO KNOW BEFORE STARTING YOUR VEHICLE 61
Page 65 of 448
covers the window. The airbag inflates in about 30 ms
(about one-quarter of the time that it takes to blink your
eyes) with enough force to injure you if you are not belted
and seated properly, or if items are positioned in the area
where the side curtain airbag inflates. This especially
applies to children. The side curtain airbag is only about
3-1/2 in (9 cm) thick when it is inflated.
Because airbag sensors estimate deceleration over time,
vehicle speed and damage are not good indicators of
whether or not an airbag should have deployed.
NOTE:In a rollover the pretensioners and/or SABIC
airbags may deploy on both sides of the vehicle.
Front and Side Impact Sensors
In front and side impacts, impact sensors can aid the
ORC in determining appropriate response to impact
events. Additional sensors in the ORC determine the
level of airbag deployment and provide verification.
Enhanced Accident Response System
In the event of an impact causing airbag deployment, if
the communication network remains intact, and the
power remains intact, depending on the nature of the
event the ORC will determine whether to have the
Enhanced Accident Response System perform the follow-
ing functions:
•Cut off fuel to the engine.
•Flash hazard lights as long as the battery has power or
until the ignition key is turned off.
•Turn on the interior lights, which remain on as long as
the battery has power or until the ignition key is
removed.
•Unlock the doors automatically.
If a Deployment Occurs
The front airbags are designed to deflate immediately
after deployment.
64 THINGS TO KNOW BEFORE STARTING YOUR VEHICLE
Page 129 of 448
WARNING!
•Never leave children in a vehicle with the key in
the ignition switch. Occupants, particularly unat-
tended children, can become entrapped by the
power sunroof while operating the power sunroof
switch. Such entrapment may result in serious
injury or death.
•In an accident, there is greater risk of being
thrown from a vehicle with an open sunroof. You
could also be seriously injured or killed. Always
fasten your seat belt properly and make sure all
passengers are properly secured too.
•Do not allow small children to operate the sun-
roof. Never allow your fingers, other body parts, or
any object to project through the sunroof opening.
Injury may result.
Sunroof Operation
Opening Sunroof Manually
Press the switch rearward and hold, and the sunroof will
open automatically from any position. The sunroof will
open fully, then stop automatically. During this opera-
tion, any release of the sunroof switch will stop the
sunroof.
Opening Sunroof — Express
Press the switch rearward and release, and the sunroof
will open automatically from any position. The sunroof
will open fully, then stop automatically. This is called
“Express Open”. During Express Open operation, any
movement of the sunroof switch will stop the sunroof.
Closing Sunroof Manually
To close the sunroof from an open or vent position, press
and hold the switch forward. The sunroof will close fully
and stop automatically. Release the switch to stop sun-
roof travel at any point.
128 UNDERSTANDING THE FEATURES OF YOUR VEHICLE
Page 162 of 448
tires or wheels on your vehicle, to ensure that the
replacement or alternate tires and wheels allow the TPMS
to continue to function properly.
CAUTION!
The TPMS has been optimized for the original
equipment tires and wheels. TPMS pressures and
warning have been established for the tire size
equipped on your vehicle. Undesirable system opera-
tion or sensor damage may result when using re-
placement equipment that is not of the same size,
type, and/or style. Aftermarket wheels can cause
sensor damage. Do not use tire sealant from a can, or
balance beads if your vehicle is equipped with a
TPMS, as damage to the sensors may result.25. Malfunction Indicator Light (MIL)
The Malfunction Indicator Light (MIL) is part of
an onboard diagnostic system called OBD that
monitors emissions, engine, and automatic trans-
mission control systems. The light will illuminate when
the key is in the ON position before engine start. If the
bulb does not come on when turning the key from LOCK
to ON, have the condition checked promptly.
Certain conditions such as a loose or missing gas cap,
poor fuel quality, etc., may illuminate the light after
engine start. The vehicle should be serviced if the light
stays on through several of your typical driving cycles. In
most situations, the vehicle will drive normally and will
not require towing.
4
UNDERSTANDING YOUR INSTRUMENT PANEL 161