headlights DODGE AVENGER 2010 2.G User Guide
[x] Cancel search | Manufacturer: DODGE, Model Year: 2010, Model line: AVENGER, Model: DODGE AVENGER 2010 2.GPages: 76, PDF Size: 11.78 MB
Page 17 of 76

TILT / TELESCOPING STEERING COLUMN
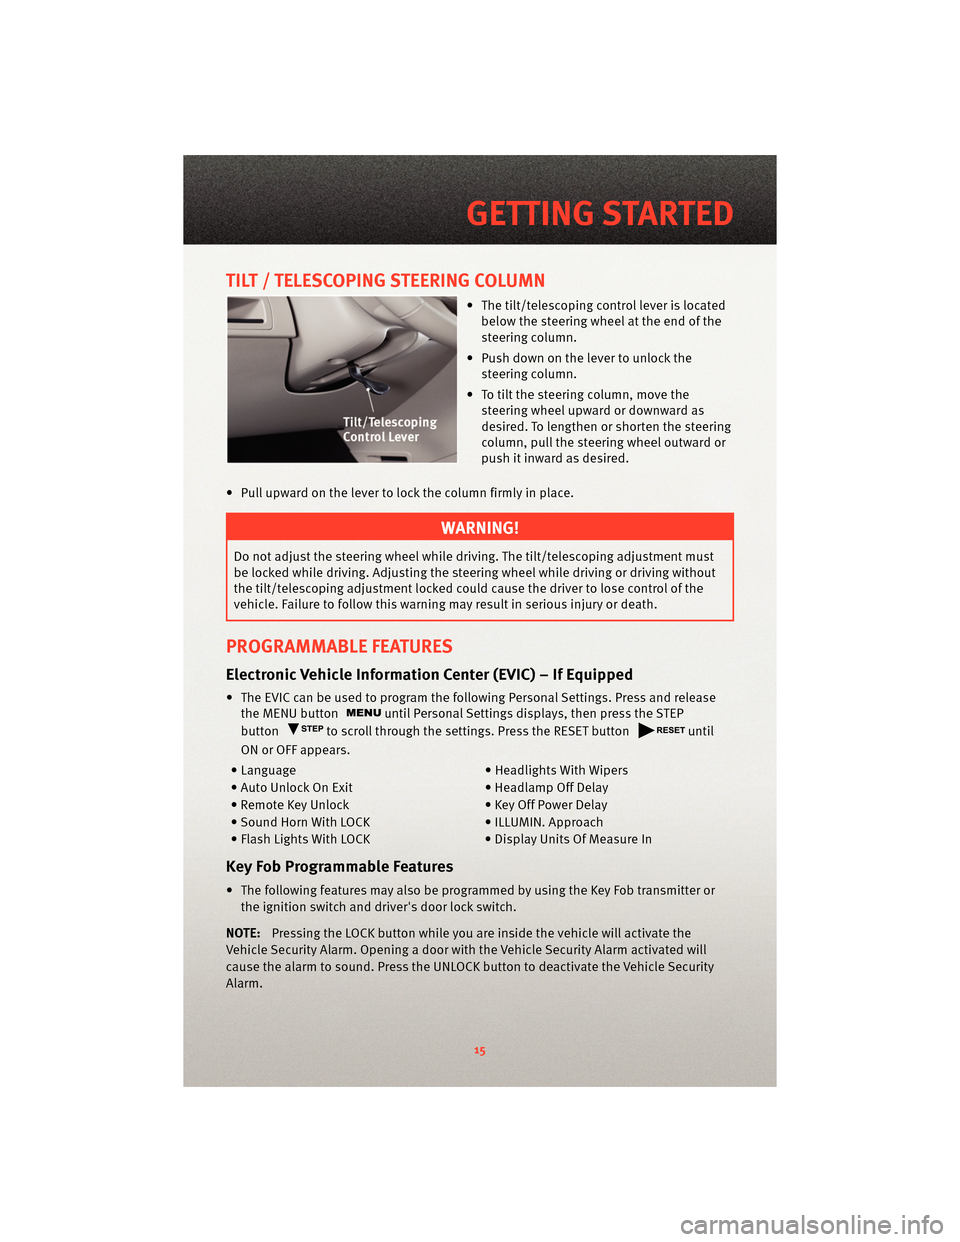
• The tilt/telescoping control lever is locatedbelow the steering wheel at the end of the
steering column.
• Push down on the lever to unlock the steering column.
• To tilt the steering column, move the steering wheel upward or downward as
desired. To lengthen or shorten the steering
column, pull the steering wheel outward or
push it inward as desired.
• Pull upward on the lever to lock the column firmly in place.
WARNING!
Do not adjust the steering wheel while drivin g. The tilt/telescoping adjustment must
be locked while driving. Adjusting the steering wheel while driving or driving without
the tilt/telescoping adjustment locked could cause the driver to lose control of the
vehicle. Failure to follow this warning may result in serious injury or death.
PROGRAMMABLE FEATURES
Electronic Vehicle Information Center (EVIC) – If Equipped
• The EVIC can be used to program the following Personal Settings. Press and release the MENU button
until Personal Settings displays, then press the STEP
button
to scroll through the settings. Press the RESET buttonuntil
ON or OFF appears.
• Language • Headlights With Wipers
• Auto Unlock On Exit • Headlamp Off Delay
• Remote Key Unlock • Key Off Power Delay
• Sound Horn With LOCK • ILLUMIN. Approach
• Flash Lights With LOCK • Display Units Of Measure In
Key Fob Programmable Features
• The following features may also be programmed by using the Key Fob transmitter or
the ignition switch and driver's door lock switch.
NOTE: Pressing the LOCK button while you are inside the vehicle will activate the
Vehicle Security Alarm. Opening a door with the Vehicle Security Alarm activated will
cause the alarm to sound. Press the UNLOCK button to deactivate the Vehicle Security
Alarm.
15
GETTING STARTED
Page 19 of 76

TURN SIGNAL/LIGHTS LEVER
Headlights/Parking Lights/Automatic Headlights
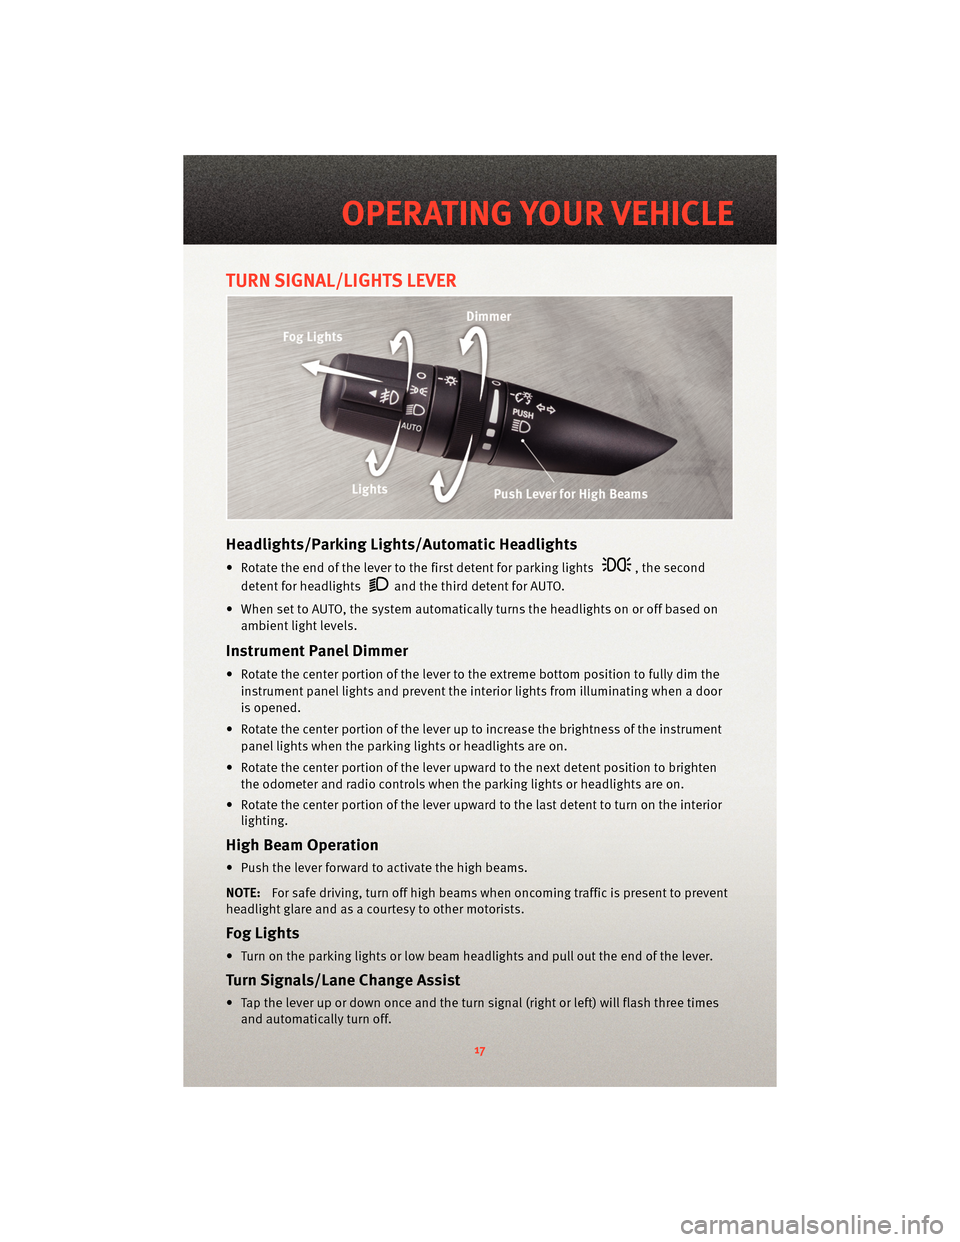
• Rotate the end of the lever to the first detent for parking lights, the second
detent for headlights
and the third detent for AUTO.
• When set to AUTO, the system automatically turns the headlights on or off based on ambient light levels.
Instrument Panel Dimmer
• Rotate the center portion of the lever t o the extreme bottom position to fully dim the
instrument panel lights and prevent the int erior lights from illuminating when a door
is opened.
• Rotate the center portion of the lever up to increase the brightness of the instrument panel lights when the parking lights or headlights are on.
• Rotate the center portion of the lever u pward to the next detent position to brighten
the odometer and radio controls when the parking lights or headlights are on.
• Rotate the center portion of the lever upward to the last detent to turn on the interior lighting.
High Beam Operation
• Push the lever forward to activate the high beams.
NOTE: For safe driving, turn off high beams when oncoming traffic is present to prevent
headlight glare and as a courtesy to other motorists.
Fog Lights
• Turn on the parking lights or low beam headlights and pull out the end of the lever.
Turn Signal s/Lane Change Assist
• Tap the lever up or down once and the turn signal (right or left) will flash three times
and automatically turn off.
17
OPERATING YOUR VEHICLE