reset DODGE AVENGER 2012 2.G User Guide
[x] Cancel search | Manufacturer: DODGE, Model Year: 2012, Model line: AVENGER, Model: DODGE AVENGER 2012 2.GPages: 108, PDF Size: 2.81 MB
Page 29 of 108
Store Radio Presets• Press the “SET/RND” button once and SET 1 will show in the display. Then select button (1–6).
• A second station may be added to each push button. Press the “SET/RND” button twice and SET 2 will show in the display. Then select button (1–6).
CD/DISC Operation
Seek Up/Down Buttons
• Press to seek through CD tracks.
• Hold either button to bypass tracks without stopping.
SET/RND Button (Random Play) • Press this button while the CD is playing to activate Random Play.
• This feature plays the selections on the CD in random order to provide an interesting change of pace.
Audio Jack Operation
• The Audio Jack allows a portable device, such as an MP3 player or a cassetteplayer, to be plugged into the radio and utilize the vehicle’s audio system, using a
3.5 mm audio cable, to amplify the source and play through the vehicle speakers.
• Pressing the “AUX” button will change the mode to auxiliary device if the Audio Jack is connected, allowing the music from your portable device to play through
the vehicle's speakers.
• The functions of the portable device are controlled using the device buttons. The volume may be controlled using the radio or portable device.
ELECTRONICS
27
Page 31 of 108
Radio Operation
Seek Up/Down Buttons• Press to seek through radio stations in AM, FM, or SAT bands.
• Hold either button to bypass stations without stopping.
Store Radio Presets • Press the “SET/RND” button once and SET 1 will show in the display. Then select button (1–6).
• A second station may be added to each push button. Press the “SET/RND” button twice and SET 2 will show in the display. Then select button (1–6).
Music Type • Press the “MUSIC TYPE” button to activate this mode. Press the “MUSIC TYPE” button again or turn the “TUNE/SCROLL” control knob to select the desired music
type (Adult Hits, Country, Jazz, Oldies, Rock, etc.).
• Once a music type is chosen and the icon is displayed, press either “SEEK” button and the radio will only search for stations with the selected music type.
NOTE: The Music Type function only operates when in FM mode.
SETUP Button • Pressing the “SETUP” button allows you to select between items that are available in that particular mode.
• Turn the “TUNE/SCROLL” control knob to scroll through the entries. Push the “AUDIO/SELECT” button to select an entry and make changes.
Sirius XM™ Satellite Radio
• Sirius XM™ Satellite Radio gives you over 130 channels, including 100%commercial-free music from nearly every genre, plus all your favorite sports, news,
talk and entertainment channels–all with crystal clear, coast-to-coast coverage, all
in one place and all at your fingertips.
• To access Sirius XM™ Satellite Radio, press the “SAT” hard-key.
CD/DISC Operation
Seek Up/Down Buttons
• Press to seek through CD tracks.
• Hold either button to bypass tracks without stopping.
SET/RND Button (Random Play) • Press this button while the CD is playing to activate Random Play.
• This feature plays the selections on the CD in random order to provide an interesting change of pace.
LIST Button • Press the “LIST” button to bring up a list of all folders on the CD. Scroll up or down the list by turning the “TUNE/SCROLL” control knob.
ELECTRONICS
29
Page 33 of 108
Clock Setting
• Turn the radio on, then touch the screen where the time is displayed.
• Touch the “USER CLOCK” soft-key (Navigation radio only).
• To adjust the hours, touch either the “HOUR FORWARD” or “HOUR BACKWARD”soft-key.
• To adjust the minutes, touch either the “MINUTE FORWARD” or “MINUTE BACKWARD” soft-key.
• To save the new time setting, touch the screen where the word “Save” is displayed.
Menu
• Press the “MENU” hard-key to access the System Setup menu and the My Files menu.
• Press the “MENU” hard-key in an active mode (SAT, CD, AUX, etc.) in order to change mode specific settings.
Equalizer, Balance And Fade
Audio Control Menu
• Press the “AUDIO” hard-key on the right side of the radio.
• Use either the arrow soft-keys or the cross-hair on the screen to change
Balance and Fade. The “CENTER”
soft-key resets the settings.
• Touch the “Equalizer” soft-key and use either the arrow soft-keys or the sliders on the screen to adjust BASS, MID, and/or TREBLE.
Display Settings
• Press the “MENU” hard-key and touchthe “Display Settings” soft-key to
access the Display Settings menu.
• Select the “Daytime Colors” soft-key to switch to manual daytime mode and to
adjust the brightness of the display
using daytime colors.
• Select the “Nighttime Colors” soft-key to switch to manual nighttime mode and to adjust the brightness of the display using nighttime colors.
• Select the “Auto Color Mode” soft-key to switch to automatic daytime/nighttime mode and to control the brightness of the display using the dimmer switch of the
vehicle.
• Touch the “EXIT” soft-key to save your settings.
ELECTRONICS
31
Page 34 of 108
Radio Operation
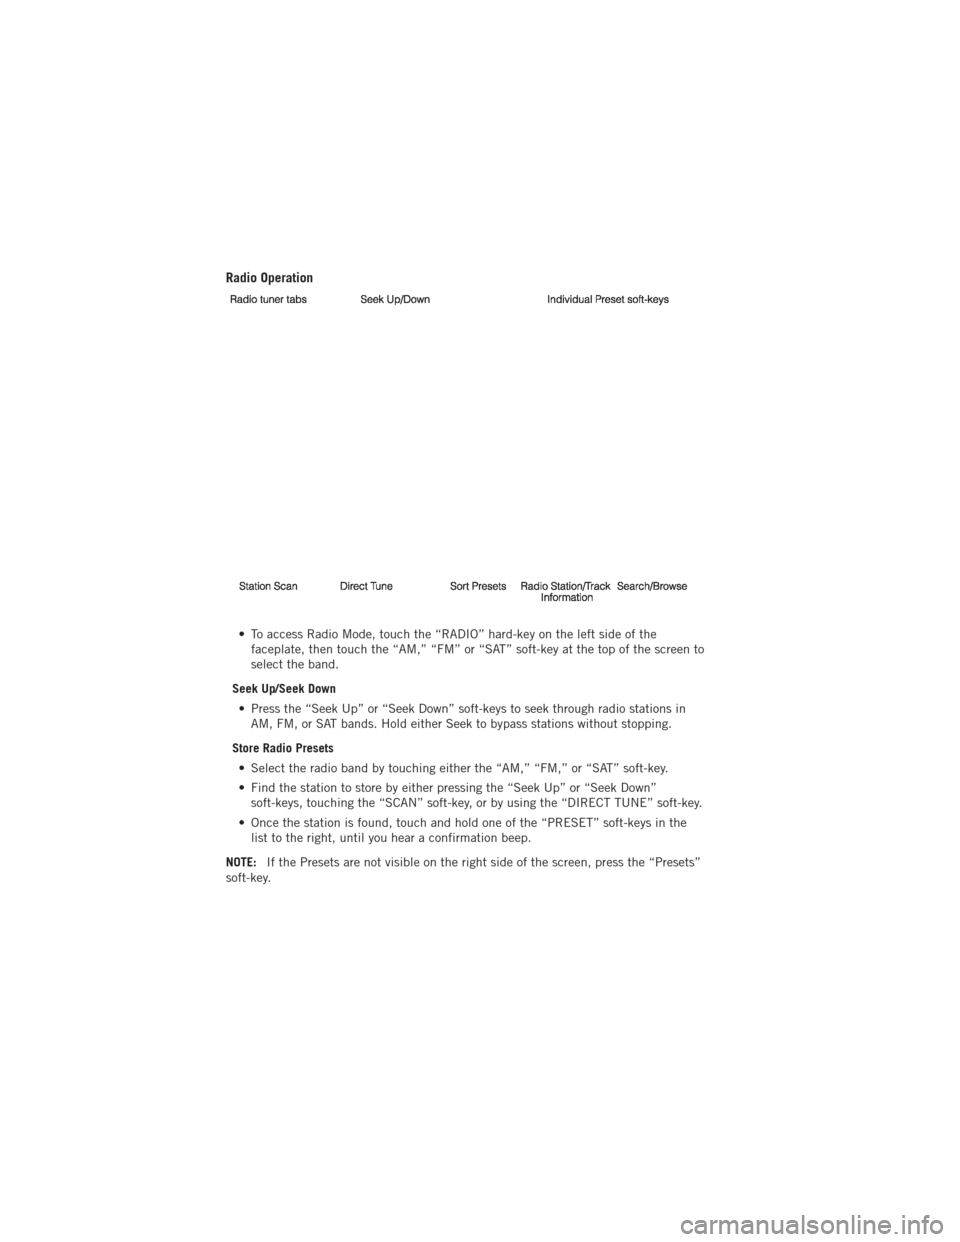
• To access Radio Mode, touch the “RADIO” hard-key on the left side of thefaceplate, then touch the “AM,” “FM” or “SAT” soft-key at the top of the screen to
select the band.
Seek Up/Seek Down • Press the “Seek Up” or “Seek Down” soft-keys to seek through radio stations in AM, FM, or SAT bands. Hold either Seek to bypass stations without stopping.
Store Radio Presets • Select the radio band by touching either the “AM,” “FM,” or “SAT” soft-key.
• Find the station to store by either pressing the “Seek Up” or “Seek Down” soft-keys, touching the “SCAN” soft-key, or by using the “DIRECT TUNE” soft-key.
• Once the station is found, touch and hold one of the “PRESET” soft-keys in the list to the right, until you hear a confirmation beep.
NOTE: If the Presets are not visible on the right side of the screen, press the “Presets”
soft-key.
ELECTRONICS
32
Page 42 of 108
Menu
• Press the “MENU” hard-key to access the System Setup menu and the My Filesmenu.
• Press the “MENU” hard-key in an active mode (SAT, CD, AUX, etc.) in order to change mode specific settings.
Equalizer, Balance And Fade
Audio Control Menu
• Press the “MENU” hard-key on the right side of the radio. Then press the
“Audio Control” soft-key to get to the
audio control menu.
• Use either the arrow soft-keys or the cross-hair on the screen to change
Balance and Fade. The “CENTER”
soft-key resets the settings.
• Touch the “Equalizer” soft-key and use either the arrow soft-keys or the sliders on the screen to adjust BASS, MID, and/or TREBLE.
Display Settings
• Press the “MENU” hard-key and touchthe Display Settings soft-key to access
the Display Settings menu.
• Select the “Daytime Colors” soft-key to switch to manual daytime mode and to
adjust the brightness of the display
using daytime colors.
• Select the “Nighttime Colors” soft-key to switch to manual nighttime mode and to adjust the brightness of the display using nighttime colors.
• Select the “Auto Color Mode” soft-key to switch to automatic daytime/nighttime mode and to control the brightness of the display using the dimmer switch of the
vehicle.
• Touch the “EXIT” soft-key to save your settings.
ELECTRONICS
40
Page 43 of 108
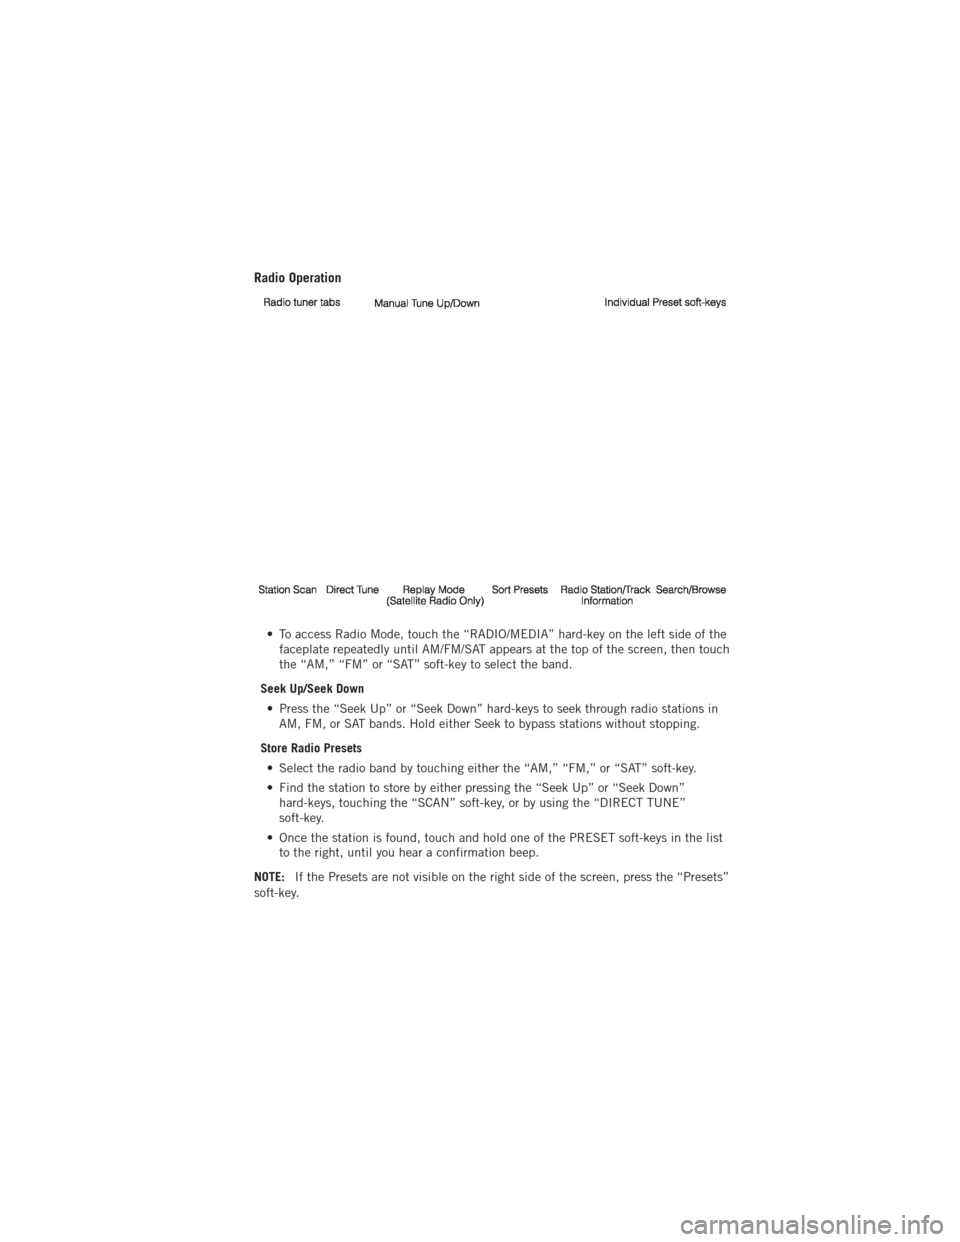
Radio Operation
• To access Radio Mode, touch the “RADIO/MEDIA” hard-key on the left side of thefaceplate repeatedly until AM/FM/SAT appears at the top of the screen, then touch
the “AM,” “FM” or “SAT” soft-key to select the band.
Seek Up/Seek Down • Press the “Seek Up” or “Seek Down” hard-keys to seek through radio stations in AM, FM, or SAT bands. Hold either Seek to bypass stations without stopping.
Store Radio Presets • Select the radio band by touching either the “AM,” “FM,” or “SAT” soft-key.
• Find the station to store by either pressing the “Seek Up” or “Seek Down” hard-keys, touching the “SCAN” soft-key, or by using the “DIRECT TUNE”
soft-key.
• Once the station is found, touch and hold one of the PRESET soft-keys in the list to the right, until you hear a confirmation beep.
NOTE: If the Presets are not visible on the right side of the screen, press the “Presets”
soft-key.
ELECTRONICS
41
Page 54 of 108
STEERING WHEEL AUDIO CONTROLS
• The steering wheel audio controls arelocated on the rear surface of the
steering wheel.
Right Switch
• Press the switch up or down toincrease or decrease the volume.
• Press the button in the center to change modes AM/FM/CD/SAT.
Left Switch
• Press the switch up or down to search for the next listenable station or select thenext or previous CD track.
• Press the button in the center to select the next preset station (radio) or to change CDs if equipped with a CD Changer.
iPod®/USB/MP3 CONTROL
• There are many ways to play music from iPod®/MP3 players or USB devices
through your vehicle's sound system.
• The remote USB port, located within the front storage area, allows you to plug an iPod
®into the vehicle's sound system.
NOTE: If equipped with the Media Center
730N (RHR), the USB port on the
faceplate allows the same functions as the
remote USB port.
• Non-Touch-Screen Radios: To hearaudio from devices connected to the
USB port, press the “AUX” button on
the radio faceplate
• Touch-Screen Radios: To hear audio from devices connected to the USB
port, press the “MEDIA” hard-key, then
touch the “AUX” or “iPod
®” soft-key.
• When connected to this feature: • The iPod
®can be controlled using the
radio buttons to Play, Browse, and
List the iPod
®or external devices
contents.
• The iPod
®battery charges when
plugged into the USB port (if
supported by the specific audio
device).
ELECTRONICS
52
Page 60 of 108
Bluetooth®STREAMING AUDIO
• If equipped with Uconnect™ VoiceCommand, your Bluetooth-equipped
iPod
®devices, cell phones or other
media players, may also be able to
stream music to your vehicle's
speakers. Your connected device must
be Bluetooth-compatible, and paired
with your Media Center radio (see
Uconnect™ Phone for pairing
instructions). Non-Touch-Screen
Radios: Press the “AUX” button on the radio faceplate until "BT" or “Audio
Streaming” is displayed on the radio screen. Touch-Screen-Radios: Press the
“RADIO/MEDIA” or “MEDIA” hard-key and then touch the “AUX” soft-key tab.
ELECTRONIC VEHICLE INFORMATION CENTER
(EVIC)
• The EVIC features a driver interactive display that is located in the
instrument cluster. Pressing the
controls on the left side of the steering
wheel allows the driver to select
vehicle information and Personal
Settings. For additional information,
refer to Programmable Features in this
guide.
• Press and release the MENU button to advance the display to Trip Functions
or Personal settings or to return to the
default System status display.
• Press and release the DOWN
button to advance the display through the
various Trip Functions or Personal Settings.
• Press and release the COMPASS
button to display the compass heading and
the outside temperature.
• Press and release the SELECT
Button to accept a selection. The SELECT
Button also resets various Trip Functions.
Compass Calibration
• This compass is self-calibrating, which eliminates the need to set the compass manually. When the vehicle is new, the compass may appear erratic and the EVIC
will display “CAL” until the compass is calibrated.
• You may also calibrate the compass by completing one or more 360 degree turns (in an area free from large metal or metallic objects) until the “CAL” message
displayed in the EVIC turns off. The compass will now function normally.
ELECTRONICS
58
Page 71 of 108
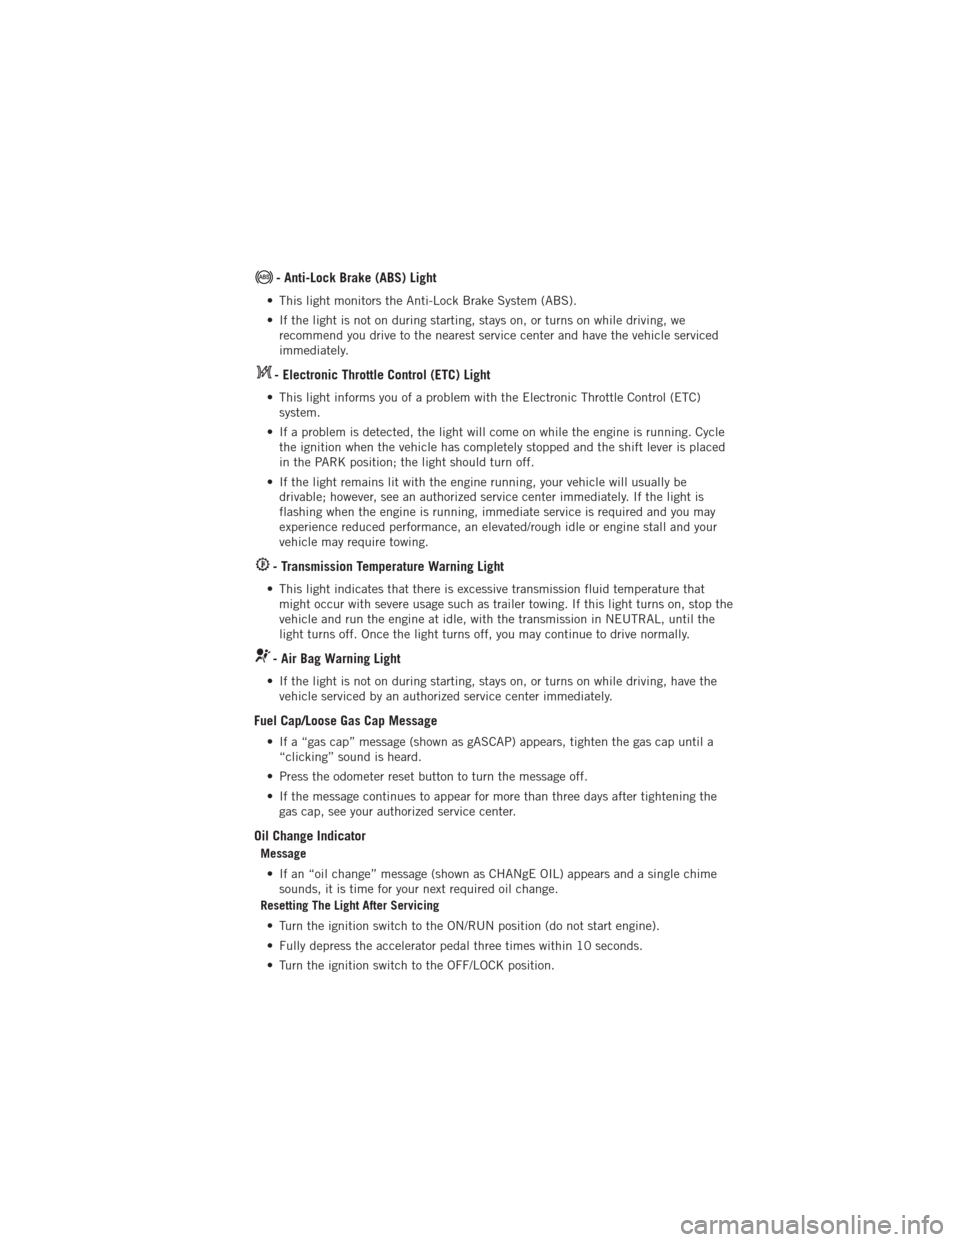
- Anti-Lock Brake (ABS) Light
• This light monitors the Anti-Lock Brake System (ABS).
• If the light is not on during starting, stays on, or turns on while driving, werecommend you drive to the nearest service center and have the vehicle serviced
immediately.
- Electronic Throttle Control (ETC) Light
• This light informs you of a problem with the Electronic Throttle Control (ETC)system.
• If a problem is detected, the light will come on while the engine is running. Cycle the ignition when the vehicle has completely stopped and the shift lever is placed
in the PARK position; the light should turn off.
• If the light remains lit with the engine running, your vehicle will usually be drivable; however, see an authorized service center immediately. If the light is
flashing when the engine is running, immediate service is required and you may
experience reduced performance, an elevated/rough idle or engine stall and your
vehicle may require towing.
- Transmission Temperature Warning Light
• This light indicates that there is excessive transmission fluid temperature thatmight occur with severe usage such as trailer towing. If this light turns on, stop the
vehicle and run the engine at idle, with the transmission in NEUTRAL, until the
light turns off. Once the light turns off, you may continue to drive normally.
- Air Bag Warning Light
• If the light is not on during starting, stays on, or turns on while driving, have thevehicle serviced by an authorized service center immediately.
Fuel Cap/Loose Gas Cap Message
• If a “gas cap” message (shown as gASCAP) appears, tighten the gas cap until a“clicking” sound is heard.
• Press the odometer reset button to turn the message off.
• If the message continues to appear for more than three days after tightening the gas cap, see your authorized service center.
Oil Change Indicator
Message
• If an “oil change” message (shown as CHANgE OIL) appears and a single chime sounds, it is time for your next required oil change.
Resetting The Light After Servicing
• Turn the ignition switch to the ON/RUN position (do not start engine).
• Fully depress the accelerator pedal three times within 10 seconds.
• Turn the ignition switch to the OFF/LOCK position.
WHAT TO DO IN EMERGENCIES
69
Page 102 of 108
Speed Control (Cruise Control).... 19
Starting Remote ................. 8
Steering TiltColumn .............. 16
Steering Wheel Audio Controls .... 52
Store Radio Presets ........ 27,29
SunRoof ................ 22
Supplemental Restraint System -
Airbag .................. 10
Text Messaging ............. 57
Theft Alarm (Security Alarm) ...... 9
Theft System Arming .......... 9
Theft System Disarming ......... 9
Tilt Steering Column .......... 16
Tires Air Pressure ............. 93
Changing ............... 71
Jacking ................ 71
PressureWarningLight ....... 66
SpareTire ............... 71 Towing .................. 64
24-Hour Towing Assistance ..... 66
Disabled Vehicle ........... 80
Recreational ............. 65
Trailer Towing Trailer and Tongue Weight ..... 64
Trailer Weight .............. 64
Transmission Fluid ................. 86
TurnSignals ............... 18
Uconnect™Phone ........... 53
Uconnect™ Voice Command ..... 56
Voice Commands ............ 56
Washers, Windshield .......... 19
Wheel and Wheel Trim Care ...... 94
Wind Buffeting ............. 23
Windshield Washers .......... 19
Windshield Wipers ........... 19
INDEX
100