transmission DODGE CALIBER 2010 1.G User Guide
[x] Cancel search | Manufacturer: DODGE, Model Year: 2010, Model line: CALIBER, Model: DODGE CALIBER 2010 1.GPages: 76, PDF Size: 12.18 MB
Page 3 of 76
INTRODUCTION/WELCOME
WELCOME FROM CHRYSLER GROUP
LLC ..................... 2
CONTROLS AT A GLANCE
DRIVER COCKPIT.............. 4
INSTRUMENT CLUSTER ..........6
GETTING STARTED
KEYFOB...................8
THEFT ALARM................ 9
SEATBELT ................. 9
CHILD RESTRAINTS ............. 9
FRONTSEATS................11
REARSEATS ................14
HEATEDSEATS...............14
TILT STEERING COLUMN ..........15
PROGRAMMABLEFEATURES .......16
OPERATING YOUR VEHICLE
TURN SIGNAL/LIGHTS LEVER .......18
WIPER/WASHER LEVER ..........19
SPEED CONTROL LEVER ......... 20
AUTOSTICK
®................21
MANUAL CLIMATE CONTROLS .......21
AUTOMATIC TEMPERATURE CONTROLS
(ATC) ................... 22
POWERSUNROOF ............ 22
WIND BUFFETING ..............23
ELECTRONICS
NON-TOUCH-SCREENRADIOS...... 24
TOUCH-SCREENRADIOS..........27
REMOTE AUDIO CONTROLS ........31
UNIVERSAL CONSUMER INTERFACE ....32
ELECTRONIC VEHICLE INFORMATION
CENTER (EVIC) ...............32
UNIVERSAL GARAGE DOOR OPENER
(HOMELINK
®) ...............33
POWERINVERTER .............34
POWER OUTLET ..............35
Uconnect™ Phone ............35
VOICECOMMAND .............37
UTILITY
TRAILER TOWING WEIGHTS (MAXIMUM
TRAILER WEIGHT RATINGS) ....... 38RECREATIONAL TOWING
(BEHIND MOTORHOME, ETC.)
...... 39
BRAKE/TRANSMISSION INTERLOCK
SYSTEM.................. 40
WHAT TO DO IN EMERGENCIES
24-HOUR TOWING ASSISTANCE
- U.S. ONLY .................41
INSTRUMENT CLUSTER WARNING
LIGHTS ...................41
IF YOUR ENGINE OVERHEATS .......44
AUTOMATIC TRANSAXLE
OVERHEATING ...............45
JACKINGANDTIRECHANGING...... 46
JUMP-STARTING ............. 49
TOWINGADISABLEDVEHICLE.......53
FREEING A STUCK VEHICLE ........54
EVENT DATA RECORDER (EDR) ......55
MAINTAINING YOUR VEHICLE
OPENING THE HOOD............56
ENGINE COMPARTMENT ..........57
FLUIDS AND CAPACITIES ..........59
MAINTENANCE CHART .......... 60
FUSES................... 62
TIREPRESSURES..............63
WHEEL AND WHEEL TRIM CARE ..... 64
EXTERIOR BULBS ............. 64
CONSUMER ASSISTANCE
CHRYSLER GROUP LLC CUSTOMER
CENTER...................65
CHRYSLER CANADA INC. CUSTOMER
CENTER...................65
ASSISTANCE FOR THE HEARING
IMPAIRED..................65
PUBLICATIONS ORDERING .........65
REPORTING SAFETY DEFECTS IN
THE 50 UNITED STATES AND
WASHINGTON, D.C. ........... 66
TIRE WARRANTY ............. 66
MOPAR ACCESSORIES
MOPAR®ACCESSORIES......... 69
TABLE OF CONTENTS
Page 8 of 76
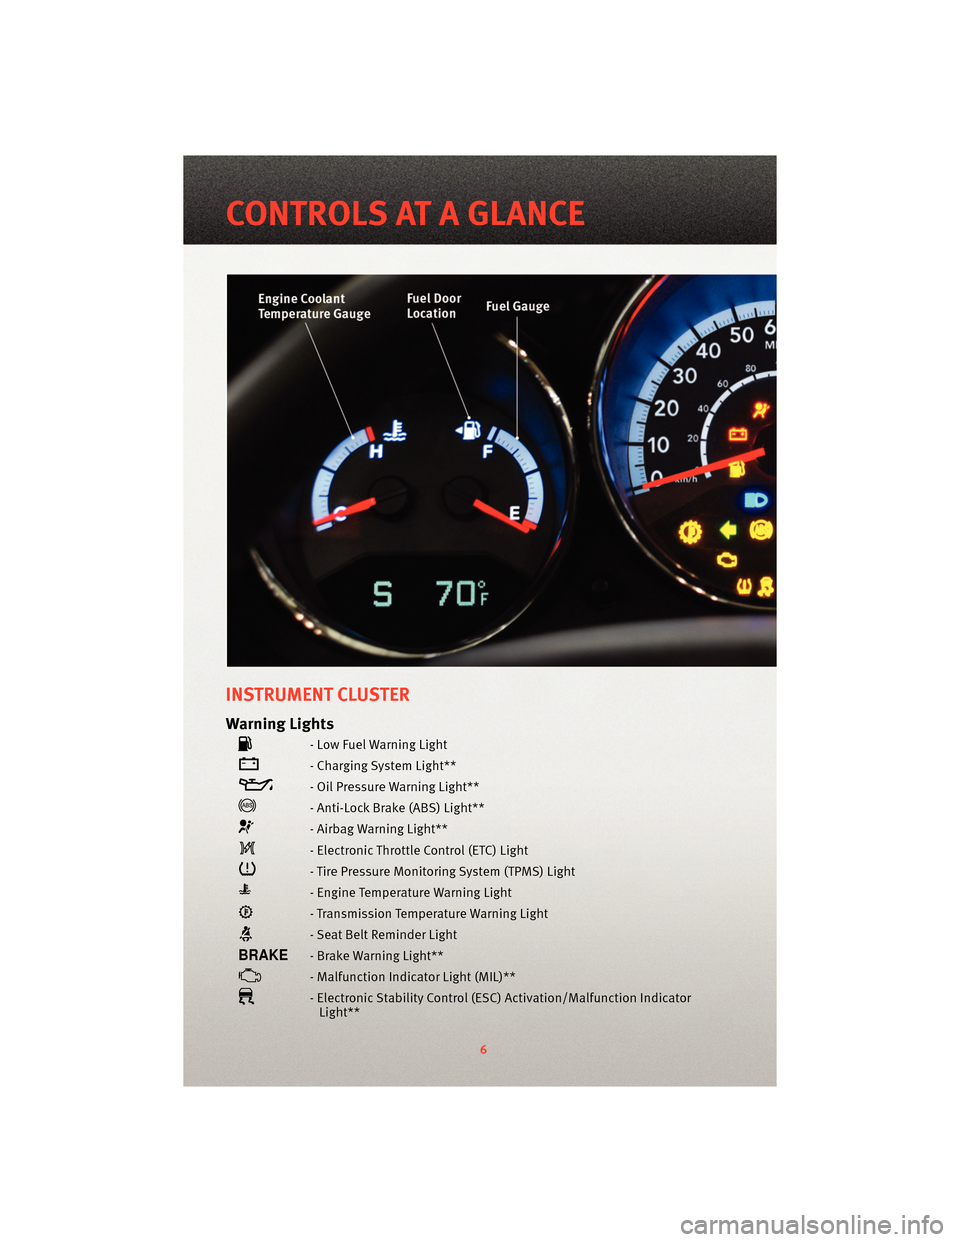
INSTRUMENT CLUSTER
Warning Lights
- Low Fuel Warning Light
- Charging System Light**
- Oil Pressure Warning Light**
- Anti-Lock Brake (ABS) Light**
- Airbag Warning Light**
- Electronic Throttle Control (ETC) Light
- Tire Pressure Monitoring System (TPMS) Light
- Engine Temperature Warning Light
- Transmission Temperature Warning Light
- Seat Belt Reminder Light
- Brake Warning Light**
- Malfunction Indicator Light (MIL)**
- Electronic Stability Control(ESC) Activation/Malfunction Indicator
Light**
6
CONTROLS AT A GLANCE
Page 19 of 76
Auto Unlock Doors On Exit
• The doors will automatically unlock if:• The Automatic Unlock Doors On Exit feature is enabled.
• The transmission was in gear and the vehicle speed returned to 0 mph (0 km/h).
• The transmission is in NEUTRAL or PARK.
• The driver's door is opened.
• The doors were not previously unlocked.
• To have all of the vehicle doors unlock when any door is opened: • Enter your vehicle and close all the doors.
• Within 15 seconds, cycle the ignition switch from the LOCK position to the ONposition a minimum of four times, ending in the LOCK position (do not start the
engine).
• Within 30 seconds, press the driver’s door lock switch in the UNLOCK direction. A single chime will indicate that programming is complete.
Auto Door Lock
• To have the doors lock automatically when the vehicle’s speed exceeds 15 mph
(24 km/h):
• Enter your vehicle and close all the doors.
• Within 15 seconds, cycle the ignition switch from the LOCK position to the ON position a minimum of four times, ending in the LOCK position (do not start the
engine).
• Within 30 seconds, press the driver’s door lock switch in the LOCK direction. A single chime will indicate that programming is complete.
Sound Horn With Lock
• To turn the horn chirp on or off when the doors are locked:
• Press the LOCK button for at least 4 seconds, but no longer than 10 seconds. Then,press the PANIC button while still holding the LOCK button.
• Release both buttons at the same time.
Flashing Lights With Lock
• The turn signal lights flash when the doors are locked or unlocked. This feature can be turned on or off:
• Press and hold the UNLOCK button for at least 4 seconds, but no longer than 10 seconds. Then, press and hold the LOCK button while still holding the UNLOCK
button.
• Release both buttons at the same time.
17
GETTING STARTED
Page 42 of 76
BRAKE/TRANSMISSION
INTERLOCK SYSTEM
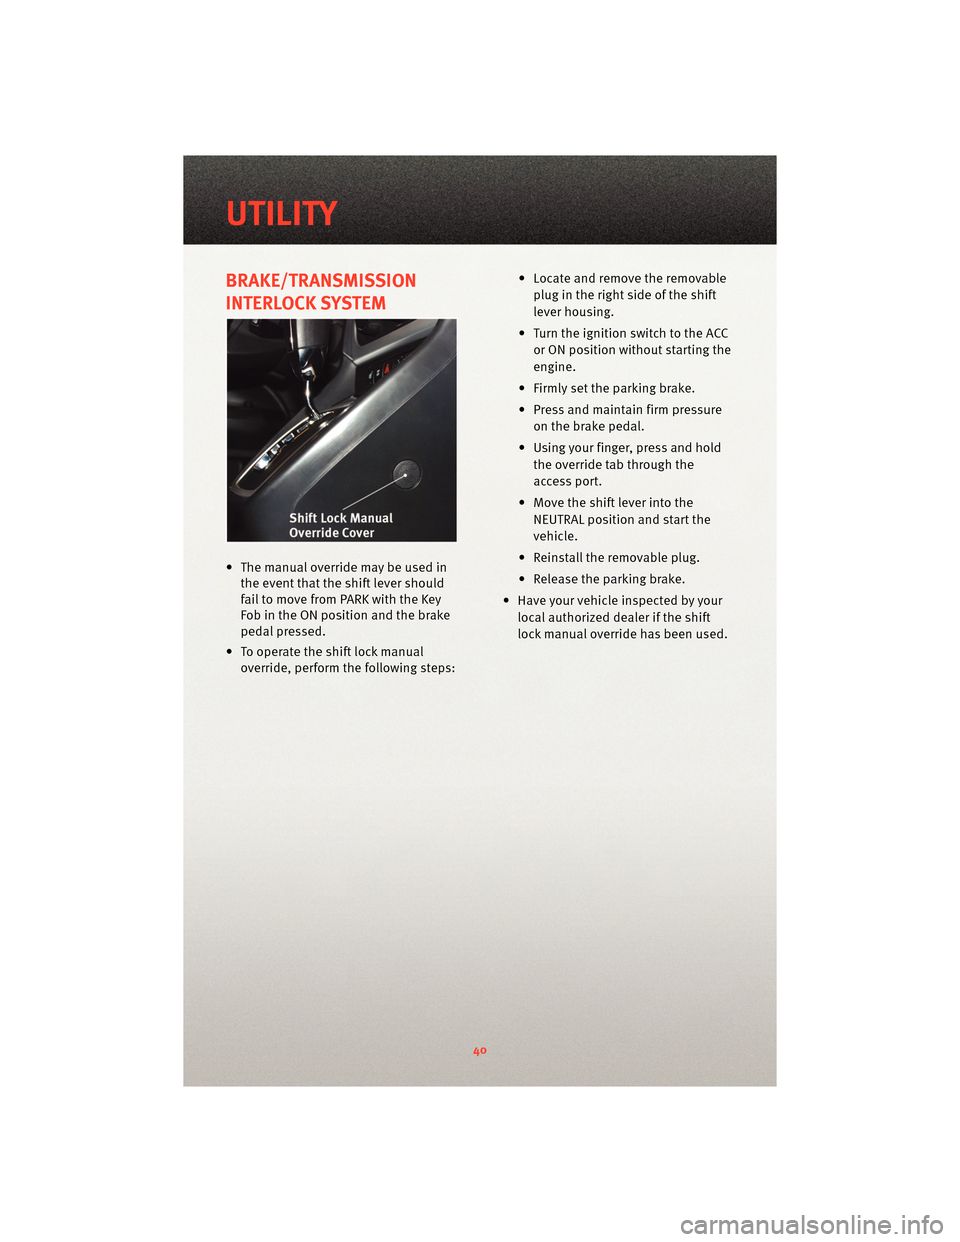
• The manual override may be used inthe event that the shift lever should
fail to move from PARK with the Key
Fob in the ON position and the brake
pedal pressed.
• To operate the shift lock manual override, perform the following steps: • Locate and remove the removable
plug in the right side of the shift
lever housing.
• Turn the ignition switch to the ACC or ON position without starting the
engine.
• Firmly set the parking brake.
• Press and maintain firm pressure on the brake pedal.
• Using your finger, press and hold the override tab through the
access port.
• Move the shift lever into the NEUTRAL position and start the
vehicle.
• Reinstall the removable plug.
• Release the parking brake.
• Have your vehicle inspected by your local authorized dealer if the shift
lock manual override has been used.
UTILITY
40
Page 44 of 76
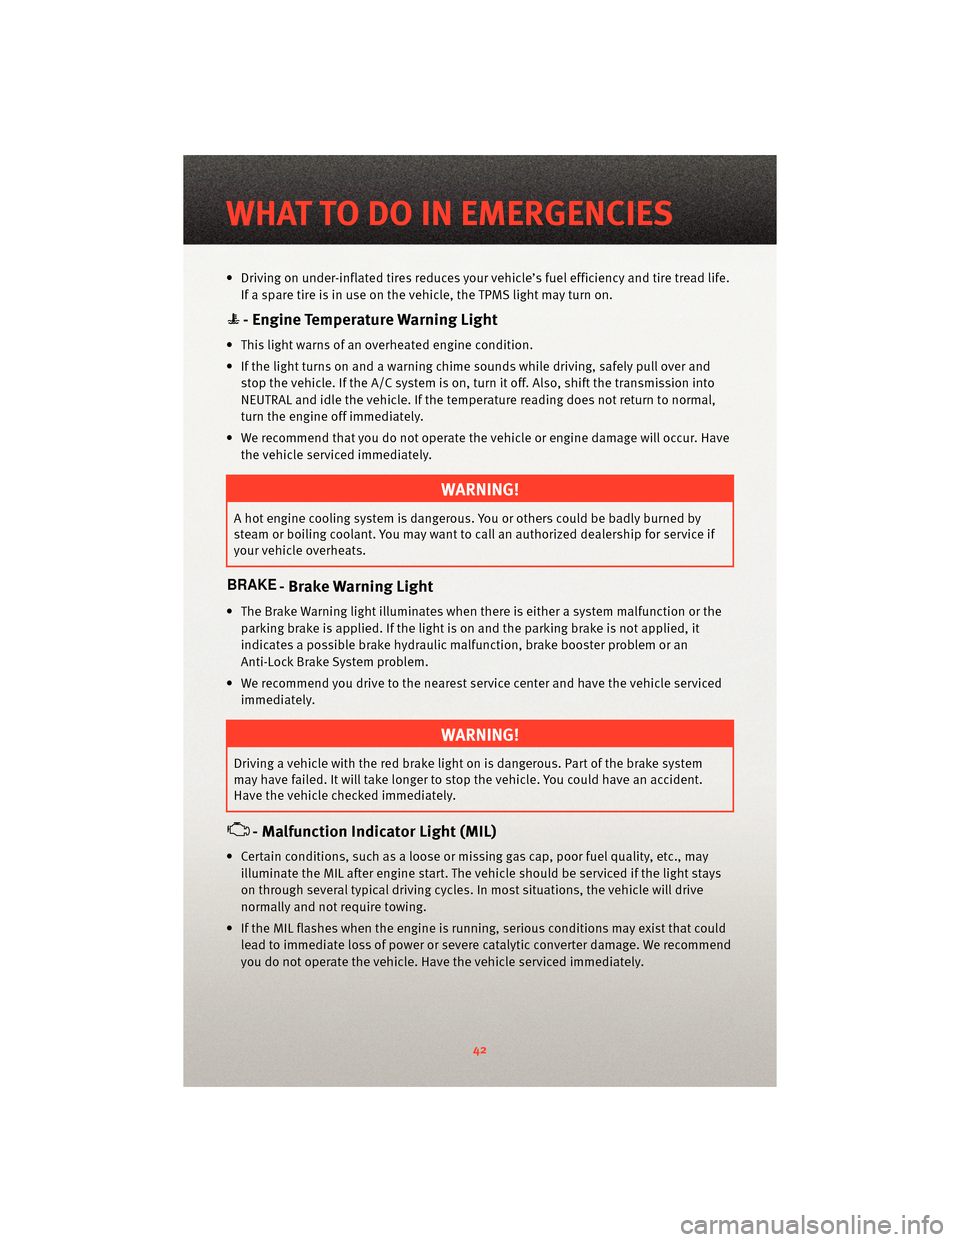
• Driving on under-inflated tires reduces yourvehicle’s fuel efficiency and tire tread life.
If a spare tire is in use on the vehicle, the TPMS light may turn on.
- Engine Temperature Warning Light
• This light warns of an overheated engine condition.
• If the light turns on and a warning chime sounds while driving, safely pull over and stop the vehicle. If the A/C system is on, t urn it off. Also, shiftthe transmission into
NEUTRAL and idle the vehicle. If the temperat ure reading does not return to normal,
turn the engine off immediately.
• We recommend that you do not operate the vehicle or engine damage will occur. Have the vehicle serviced immediately.
WARNING!
A hot engine cooling system is dangero us. You or others could be badly burned by
steam or boiling coolant. You may want to call an authorized dealership for service if
your vehicle overheats.
- Brake Warning Light
• The Brake Warning light illuminates when there is either a system malfunction or the
parking brake is applied. If the light is on and the parking brake is not applied, it
indicates a possible brake hydraulic malfunction, brake booster problem or an
Anti-Lock Brake System problem.
• We recommend you drive to the nearest service center and have the vehicle serviced immediately.
WARNING!
Driving a vehicle with the red brake light on is dangerous. Part of the brake system
may have failed. It will take longer to stop the vehicle. You could have an accident.
Have the vehicle checked immediately.
- Malfunction Indicator Light (MIL)
• Certain conditions, such as a loose or m issing gas cap,poor fuel quality, etc., may
illuminate the MIL after engine start. The vehicle should be serviced if the light stays
on through several typical driving cycles. In most situations, the vehicle will drive
normally and not require towing.
• If the MIL flashes when the engine is running, serious conditions may exist that could lead to immediate loss of power or severe catalytic converter damage. We recommend
you do not operate the vehicle. Hav e the vehicle serviced immediately.
WHAT TO DO IN EMERGENCIES
42
Page 45 of 76
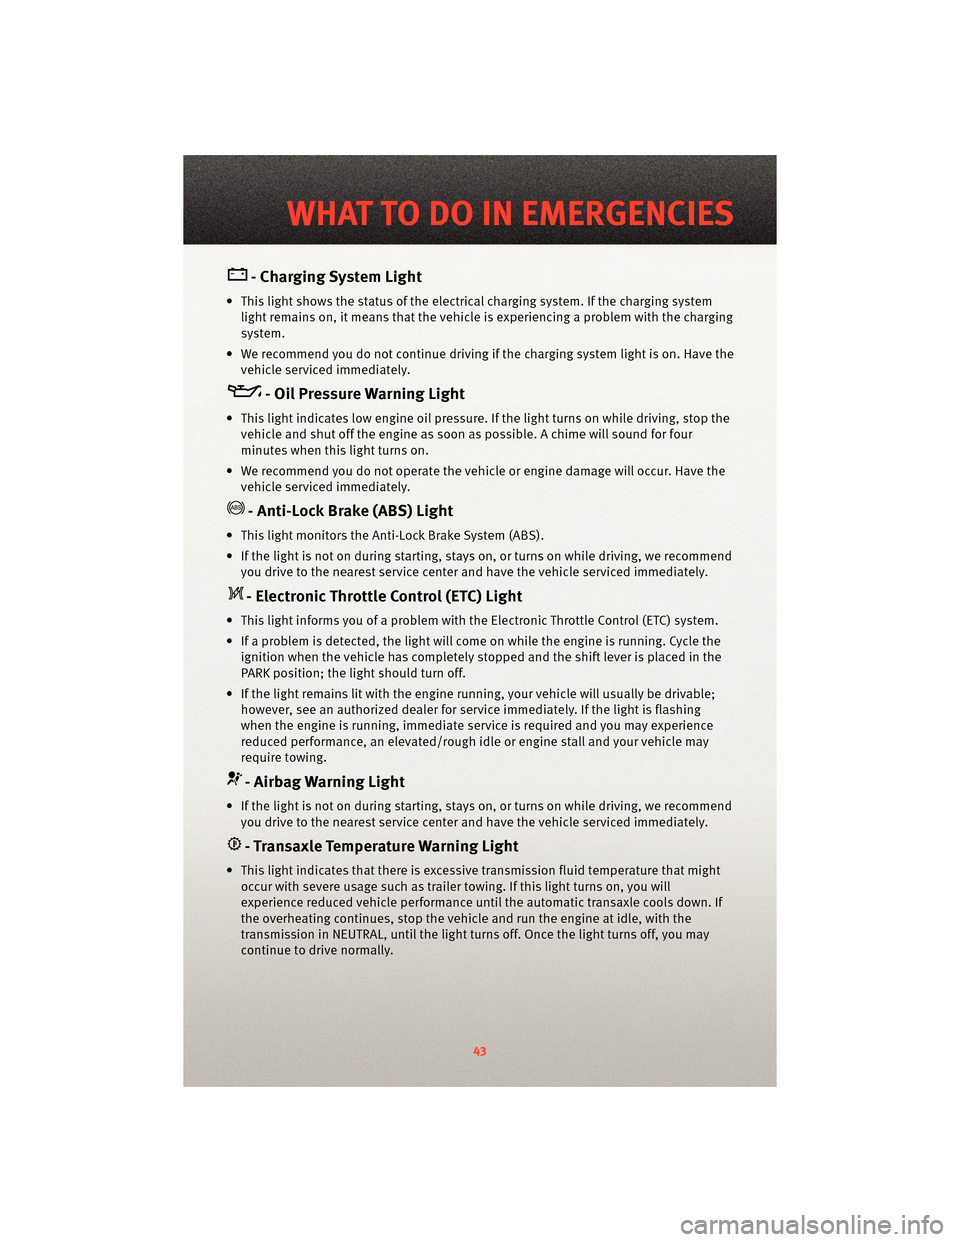
- Charging System Light
• This light shows the status of the electrical charging system. If the charging system
light remains on, it means that the vehicle is experiencing a problem with the charging
system.
• We recommend you do not continue driving if the charging system light is on. Have the vehicle serviced immediately.
- Oil Pressure Warning Light
• This light indicates low engine oil pressure. If the light turns on while driving, stop thevehicle and shut off the engine as soon as possible. A chime will sound for four
minutes when this light turns on.
• We recommend you do not operate the vehicle or engine damage will occur. Have the vehicle serviced immediately.
- Anti-Lock Brake (ABS) Light
• This light monitors the Anti-Lock Brake System (ABS).
• If the light is not on during starting, stays on, or turns on while driving, we recommendyou drive to the nearest service center and have the vehicle serviced immediately.
- Electronic Throttle Control (ETC) Light
• This light informs you of a problem with the Electronic Throttle Control (ETC) system.
• If a problem is detected, the light will come on while the engine is running. Cycle theignition when the vehicle has completely stopped and the shift lever is placed in the
PARK position; the light should turn off.
• If the light remains lit with the engine running, your vehicle will usually be drivable; however, see an authorized dealer for service immediately. If the light is flashing
when the engine is running, immediate servi ce is required and you may experience
reduced performance, an el evated/rough idle or engine stall and your vehicle may
require towing.
- Airbag Warning Light
• If the light is not on during starting, stays on, or turns on while driving, we recommend you drive to the nearest service center and have the vehicle serviced immediately.
- Transaxle Temperature Warning Light
• This light indicates that ther e is excessive transmission fluid temperat ure that might
occur with severe usage such as trailer towing. If this light turns on, you will
experience reduced vehicle performance unti l the automatic transaxle cools down. If
the overheating continues, stop the vehicle and run the engine at idle, with the
transmission in NEUTRAL, until the light turns off. Once the light turns off, you may
continue to drive normally.
43
WHAT TO DO IN EMERGENCIES
Page 49 of 76
WARNING!
Do not attempt to change a tire on the side of the vehicle close to moving traffic. Pull
far enough off the road to avoid being hit when operating the jack or changing the
wheel.
• Set the parking brake and shift the aut omatic transmission into P ARK, or a manual
transmission into REVERSE.
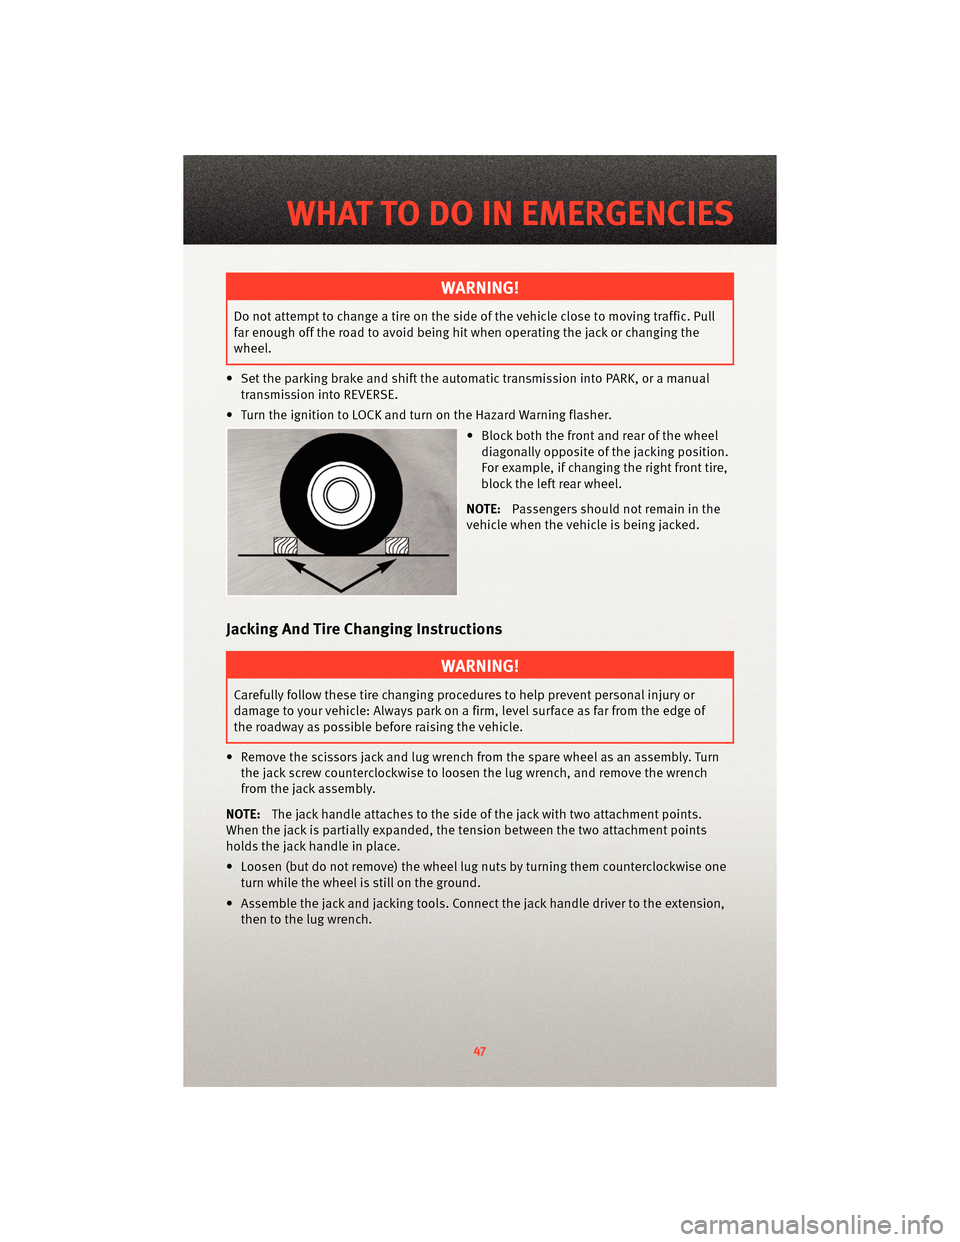
• Turn the ignition to LOCK and turn on the Hazard Warning flasher. • Block both the front and rear of the wheeldiagonally opposite of the jacking position.
For example, if changing the right front tire,
block the left rear wheel.
NOTE: Passengers should not remain in the
vehicle when the vehicle is being jacked.
Jacking And Tire Changing Instructions
WARNING!
Carefully follow these tire changing p rocedures to help prevent personal injury or
damage to your vehicle: Always park on a firm, level surface as far from the edge of
the roadway as possible before raising the vehicle.
• Remove the scissors jack and lug wrench from the spare wheel as an assembly. Turn the jack screw countercloc kwise to loosen the lug wrench, and remove the wrench
from the jack assembly.
NOTE: The jack handle attaches to the side of the jack with two attachment points.
When the jack is partially expanded, the tension between the two attachment points
holds the jack handle in place.
• Loosen (but do not remove) the wheel lug nuts by turning them counterclockwise one
turn while the wheel is still on the ground.
• Assemble the jack and jacking tools. Connect the jack handle driver to the extension, then to the lug wrench.
47
WHAT TO DO IN EMERGENCIES
Page 53 of 76
• Set the parking brake, shift the automatic transmission into PARK and turn the ignition
to LOCK.
• Turn off the heater, radio, and all unnecessary electrical accessories.
• If using another vehicle to jump-start the battery, park the vehicle within the jumper cables reach, set the parking brake and make sure the ignition is OFF.
WARNING!
Do not allow vehicles to touch each other as this could establish a ground connection
and personal injury could result.
Jump-Starting Procedure
WARNING!
Failure to follow this procedure could result in personal injury or property damage due
to battery explosion.
CAUTION!
Failure to follow these procedures could result in damage to the charging system of
the booster vehicle or the discharged vehicle.
• Connect the positive (+)end of the jumper cable to the positive (+)post of the
discharged vehicle.
• Connect the opposite end of the positive (+)jumper cable to the positive (+)post of
the booster battery.
• Connect the negative end (-)of the jumper cable to the negative (-)post of the booster
battery.
• Connect the opposite end of the negative (-)jumper cable to a good engine ground
(exposed metal part of the discharged vehicle’s engine) away from the battery and the
fuel injection system.
WARNING!
Do not connect the cable to the negative post (-)of the discharged battery. The
resulting electrical spark could cause the battery to explode and could result in
personal injury.
51
WHAT TO DO IN EMERGENCIES
Page 55 of 76
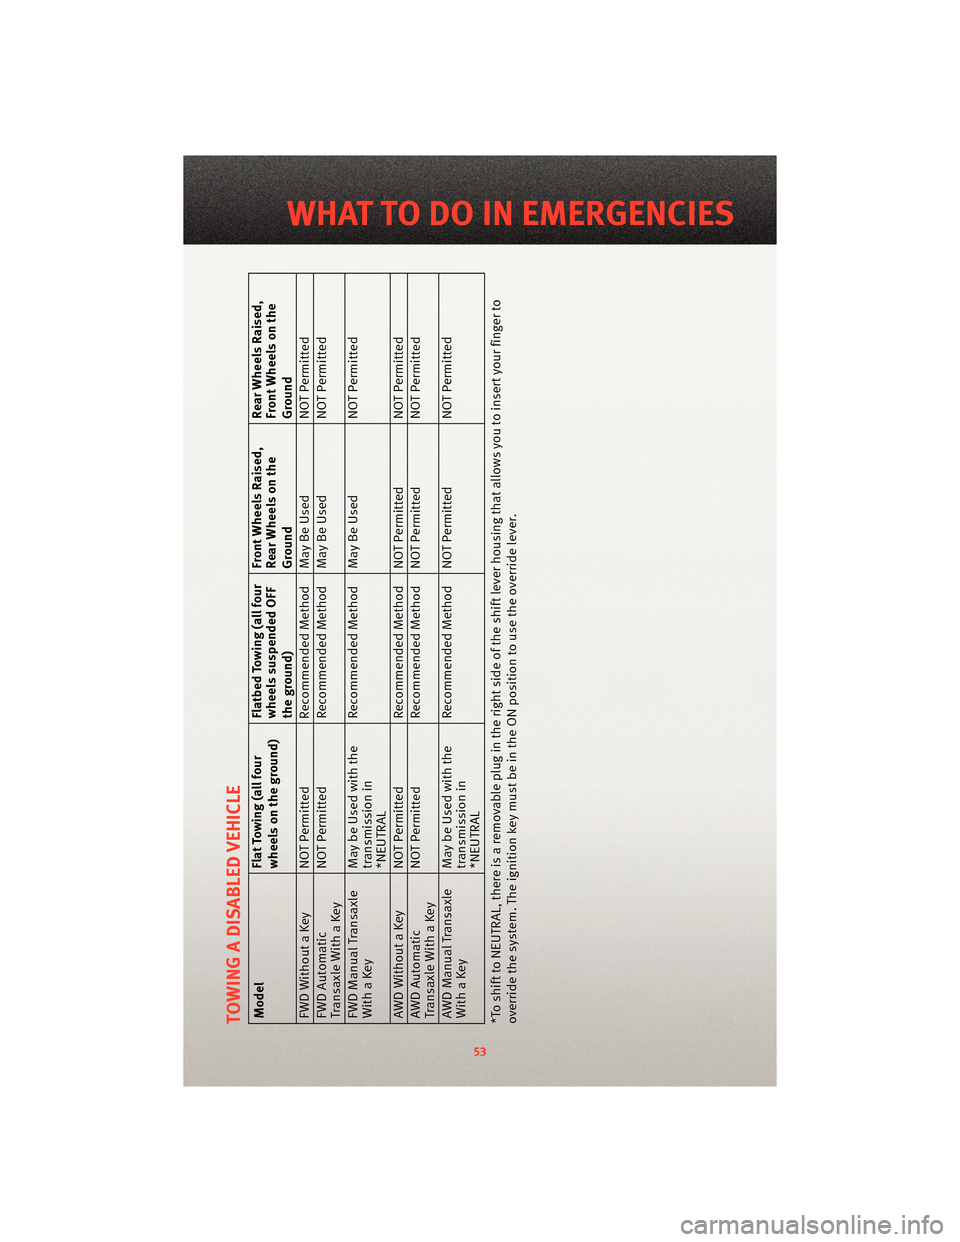
TOWING A DISABLED VEHICLEModelFlat Towing (all four
wheels on the ground)Flatbed Towing (all four
wheels suspended OFF
the ground)Front Wheels Raised,
Rear Wheels on the
GroundRear Wheels Raised,
Front Wheels on the
Ground
FWD Without a Key NOT Permitted Recommended Method May Be Used NOT Permitted
FWD Automatic
Transaxle With a Key NOT Permitted
Recommended Method May Be Used NOT Permitted
FWD Manual Transaxle
With a Key May be Used with the
transmission in
*NEUTRALRecommended Method May Be Used
NOT Permitted
AWD Without a Key NOT Permitted Recommended Method NOT Permitted NOT Permitted
AWD Automatic
Transaxle With a Key NOT Permitted
Recommended Method NOT Permitted NOT Permitted
AWD Manual Transaxle
With a Key May be Used with the
transmission in
*NEUTRALRecommended Method NOT Permitted
NOT Permitted
*To shift to NEUTRAL, there is a removable plug in the right side of the shif t lever housing that allows you to insert your finger to
override the system. The ignition key must be in the ON position to use the override lever.
53
WHAT TO DO IN EMERGENCIES
Page 56 of 76
FREEING A STUCK VEHICLE
• If your vehicle becomes stuck in mud, sand or snow, it can often be moved by arocking motion. Turn your steering wheel right and left to clear the area around the
front wheels. Then move the shift lever back and forth between REVERSE and DRIVE.
Using minimal accelerator pedal pressure to maintain the rocking motion, without
spinning the wheels, is most effective.
NOTE: To improve the vehicle's traction when starting off in deep snow, sand or gravel,
it may be desirable to switch the Electronic Stability Control (ESC) to “Partial Off” mode
by momentarily pressing the ESC Off
switch. For further information on ESC, refer to
the Owner's Manual on the DVD.
WARNING!
Fast spinning tires can be dangerous. Forces generated by excessive wheel speeds
may cause tire damage or failure. A tire could explode and injure someone. Do not
spin your vehicle's wheels faster than 30 mph (48 km/h) when you are stuck. Do not
let anyone near a spinning wheel, no matter what the speed.
CAUTION!
• When “rocking” a stuck vehicle by moving between 1st and REVERSE, do not spin the wheels faster than 15 mph (24 km/h), or drivetrain damage may result.
• Revving the engine or s pinning the wheels too fast ma y lead to transmission
overheating and failure. It can also damage the tires. Do not spin the wheels above
30 mph (48 km/h) while in gear (no transmission shifting occurring).
WHAT TO DO IN EMERGENCIES
54