jacking DODGE CALIBER 2011 1.G User Guide
[x] Cancel search | Manufacturer: DODGE, Model Year: 2011, Model line: CALIBER, Model: DODGE CALIBER 2011 1.GPages: 80, PDF Size: 3.66 MB
Page 3 of 80
INTRODUCTION/WELCOMEWelcome From Chrysler Group LLC....2
CONTROLS AT A GLANCEDriver Cockpit...............4
Instrument Cluster .............6
GETTING STARTEDKeyFOB ..................8
Remote Start................8
Theft Alarm .................9
Seat Belt ..................9
Supplemental Restraint System (SRS) —
Airbags ..................10
Child Restraints .............11
Front Seats ................13
Rear Seats ................15
Heated Seats ...............15
Tilt Steering Column ...........16
OPERATING YOUR VEHICLETurn Signal/Lights Lever .........17
Wiper/Washer Lever ...........18
Speed Control Lever ...........19
AutoStick
®................20
Manual Climate Controls .........20
Automatic Temperature Controls
(ATC) ...................21
Power Sunroof ..............22
Wind Buffeting ..............23
ELECTRONICSYour Vehicle's Sound System ......24
Non-Touch-Screen Radios ........26
Touch-Screen Radio ...........29
Steering Wheel Audio Controls ......33
Uconnect™ Phone ............33
Uconnect™ Voice Command .......35
iPod
®/USB/MP3 Control .........36
Electronic Vehicle Information Center
(EVIC) ...................37
Programmable Features .........38
Universal Garage Door Opener
(HomeLink
®) ...............40 Power Inverter
..............41
Power Outlet ...............42
UTILITY
Trailer Towing Weights (Maximum Trailer
Weight Ratings) ..............43
Recreational Towing (Behind Motorhome,
Etc.) ....................44
WHAT TO DO IN EMERGENCIES
24-Hour Towing Assistance .......45
Instrument Cluster Warning Lights . . . 45
If Your Engine Overheats .........48
Automatic Transmission Overheating . . 49
Jacking And Tire Changing ........50
Jump-Starting ..............52
Shift Lever Override ...........55
Towing A Disabled Vehicle ........56
Freeing A Stuck Vehicle .........57
Event Data Recorder (EDR) .......58
MAINTAINING YOUR VEHICLEOpening The Hood............59
Engine Compartment ...........60
Fluids And Capacities ..........62
Maintenance Chart ............63
Fuses ...................66
Tire Pressures ...............67
Wheel And Wheel Trim Care .......68
Exterior Bulbs ..............68
CONSUMER ASSISTANCEChrysler Group LLC Customer Center . . 69
Chrysler Canada Inc. Customer Center . 69
Assistance For The Hearing Impaired . . 69
Publications Ordering ..........69
Reporting Safety Defects In The
50 United States And
Washington, D.C. .............70
MOPAR ACCESSORIESAuthentic Accessories By MOPAR®...71
INDEX..................72
TABLE OF CONTENTS
Page 52 of 80
JACKING AND TIRE CHANGING
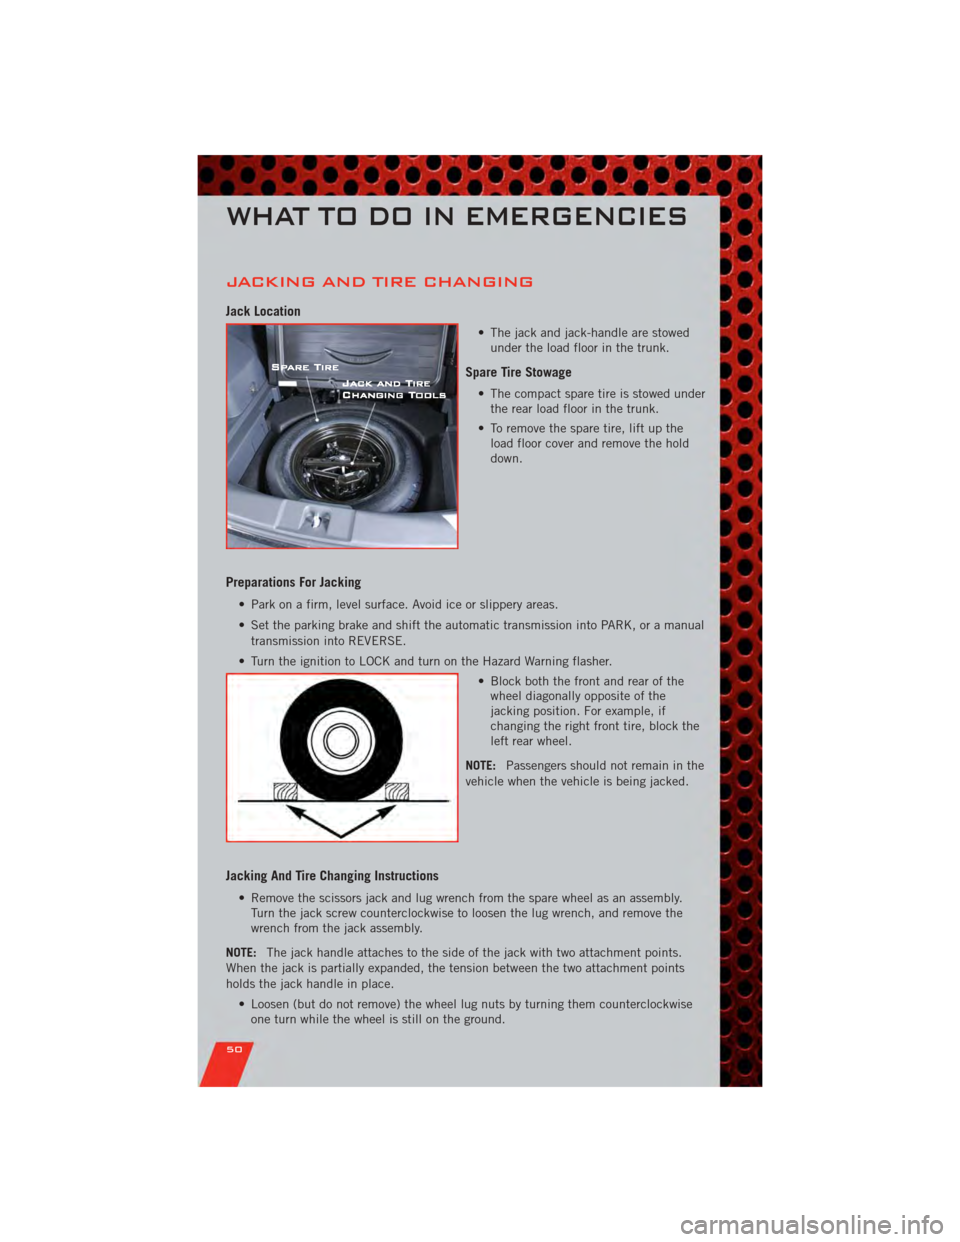
Jack Location
• The jack and jack-handle are stowedunder the load floor in the trunk.
Spare Tire Stowage
• The compact spare tire is stowed underthe rear load floor in the trunk.
• To remove the spare tire, lift up the load floor cover and remove the hold
down.
Preparations For Jacking
• Park on a firm, level surface. Avoid ice or slippery areas.
• Set the parking brake and shift the automatic transmission into PARK, or a manual
transmission into REVERSE.
• Turn the ignition to LOCK and turn on the Hazard Warning flasher. • Block both the front and rear of thewheel diagonally opposite of the
jacking position. For example, if
changing the right front tire, block the
left rear wheel.
NOTE: Passengers should not remain in the
vehicle when the vehicle is being jacked.
Jacking And Tire Changing Instructions
• Remove the scissors jack and lug wrench from the spare wheel as an assembly. Turn the jack screw counterclockwise to loosen the lug wrench, and remove the
wrench from the jack assembly.
NOTE: The jack handle attaches to the side of the jack with two attachment points.
When the jack is partially expanded, the tension between the two attachment points
holds the jack handle in place.
• Loosen (but do not remove) the wheel lug nuts by turning them counterclockwiseone turn while the wheel is still on the ground.
WHAT TO DO IN EMERGENCIES
50
Page 53 of 80
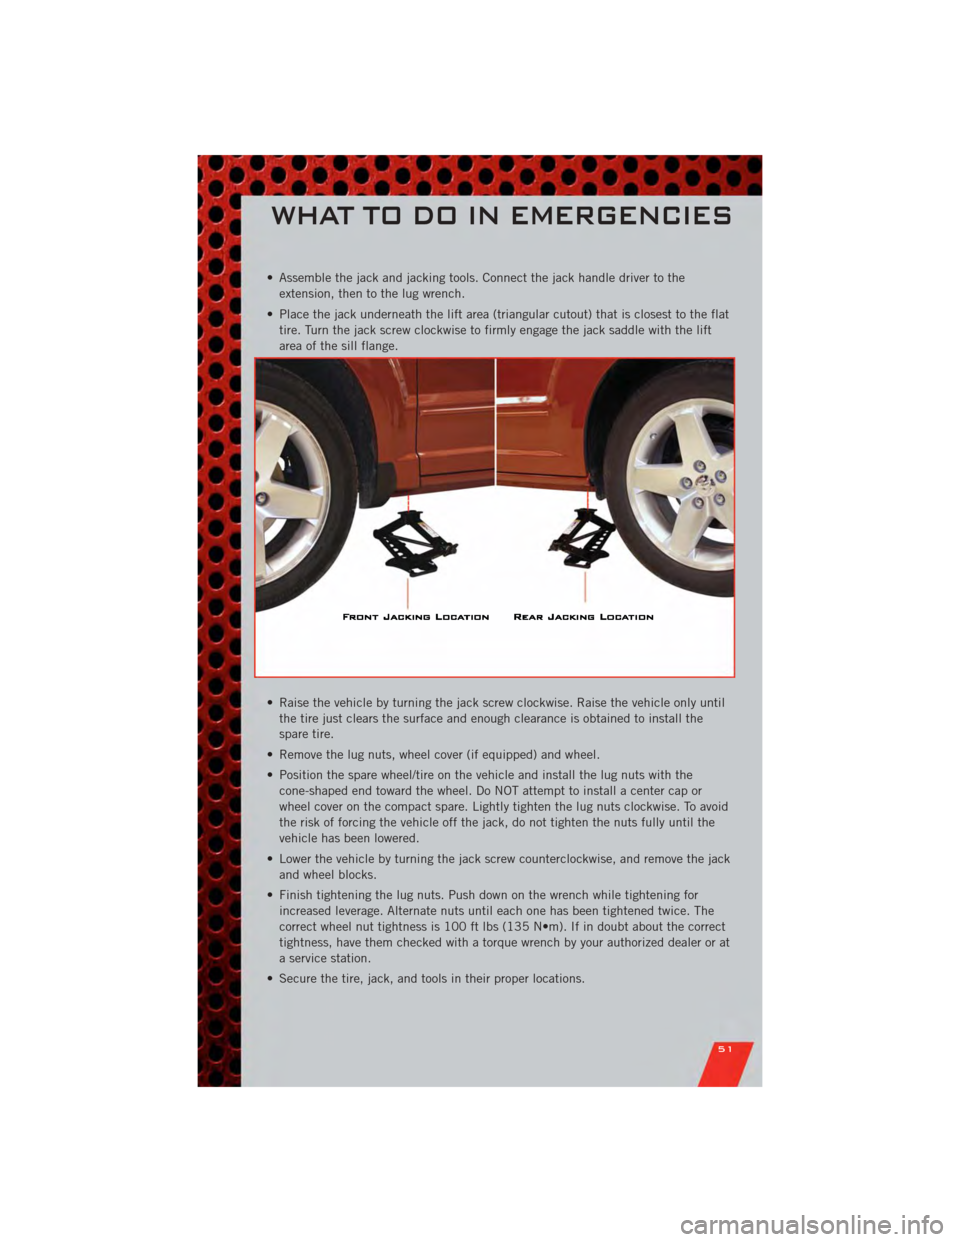
• Assemble the jack and jacking tools. Connect the jack handle driver to theextension, then to the lug wrench.
• Place the jack underneath the lift area (triangular cutout) that is closest to the flat tire. Turn the jack screw clockwise to firmly engage the jack saddle with the lift
area of the sill flange.
• Raise the vehicle by turning the jack screw clockwise. Raise the vehicle only until the tire just clears the surface and enough clearance is obtained to install the
spare tire.
• Remove the lug nuts, wheel cover (if equipped) and wheel.
• Position the spare wheel/tire on the vehicle and install the lug nuts with the cone-shaped end toward the wheel. Do NOT attempt to install a center cap or
wheel cover on the compact spare. Lightly tighten the lug nuts clockwise. To avoid
the risk of forcing the vehicle off the jack, do not tighten the nuts fully until the
vehicle has been lowered.
• Lower the vehicle by turning the jack screw counterclockwise, and remove the jack and wheel blocks.
• Finish tightening the lug nuts. Push down on the wrench while tightening for increased leverage. Alternate nuts until each one has been tightened twice. The
correct wheel nut tightness is 100 ft lbs (135 N•m). If in doubt about the correct
tightness, have them checked with a torque wrench by your authorized dealer or at
a service station.
• Secure the tire, jack, and tools in their proper locations.
WHAT TO DO IN EMERGENCIES
51
Page 75 of 80
Instrument Cluster............ 6
Indicators ............... 7
Instrument Cluster Warning
Lights ................. 6,45
Integrated Power Module (Fuses) . . . 66
Intermittent Wipers (Delay Wipers) . . 18
Introduction ............... 2
Inverter Outlet (115V) ......... 41
Inverter, Power ............. 41
iPod
®/USB/MP3 Control ........ 36
Jack Location .............. 50
Jump Starting .............. 52
KeyFob .................. 8
Key Fob Programmable Features . . . 38
Lane Change Assist .......... 17
LATCH (Lower Anchors and Tether for
CHildren) ................ 11
Lights Headlights .............. 17
Park .................. 17
Transmission Warning ........ 48
TurnSignal .............. 17
Warning (Instrument Cluster
Description) .............. 6
Maintenance Record .......... 65
MaintenanceSchedule ........ 63
Malfunction Indicator Light (Check
Engine) ................. 47
MediaCenterRadio ...... 26,27,29
MOPAR
®Accessories ......... 71
Navigation ................ 31
Non-Touch-Screen Radio ....... 26
OilChangeIndicator .......... 48
Oil Change Indicator, Reset ...... 48
Oil Pressure Light ........... 47
Oil, Engine Capacity ............... 62
Outlet Power ................. 42 Overheating, Engine
.......... 48
Panic Alarm ............... 8
Phone (Pairing) ............. 34
Phone (Uconnect) ........... 33
Power Glass Sunroof ............ 22
Inverter ................ 41
Outlet (Auxiliary Electrical
Outlet) ................ 42
Seats ................. 13
Steering ................ 62
Preparation for Jacking ........ 50
Programmable Electronic Features . . 38
Radio Non-Touch-Screen .......... 26
Touch-Screen ............ 29
Radio Operation .......... 26,29
Rain Sensitive Wiper System ..... 18
Rear Seat, Folding ........... 15
Recreational Towing .......... 44
Remote Starting System ........ 8
ReplacementBulbs .......... 68
Reporting Safety Defects ....... 70
Restraints, Child ............ 11
Seat Belts ................. 9
Seats ................... 13
Adjustment .............. 13
Folding Front Passenger ...... 14
Heated ................ 15
Power ................. 13
RearFolding ............. 15
Seek Button ............. 27,29
Setting the Clock .......... 28,30
Shift Lever Override .......... 55
Signals, Turn .............. 17
SIRIUS Travel Link ........... 32
SpareTire ................ 50
SparkPlugs ............... 62
Speed Control (Cruise Control) .... 19
Starting Remote ................. 8
Steering TiltColumn .............. 16
Steering Wheel Audio Controls .... 33
INDEX
73
Page 76 of 80
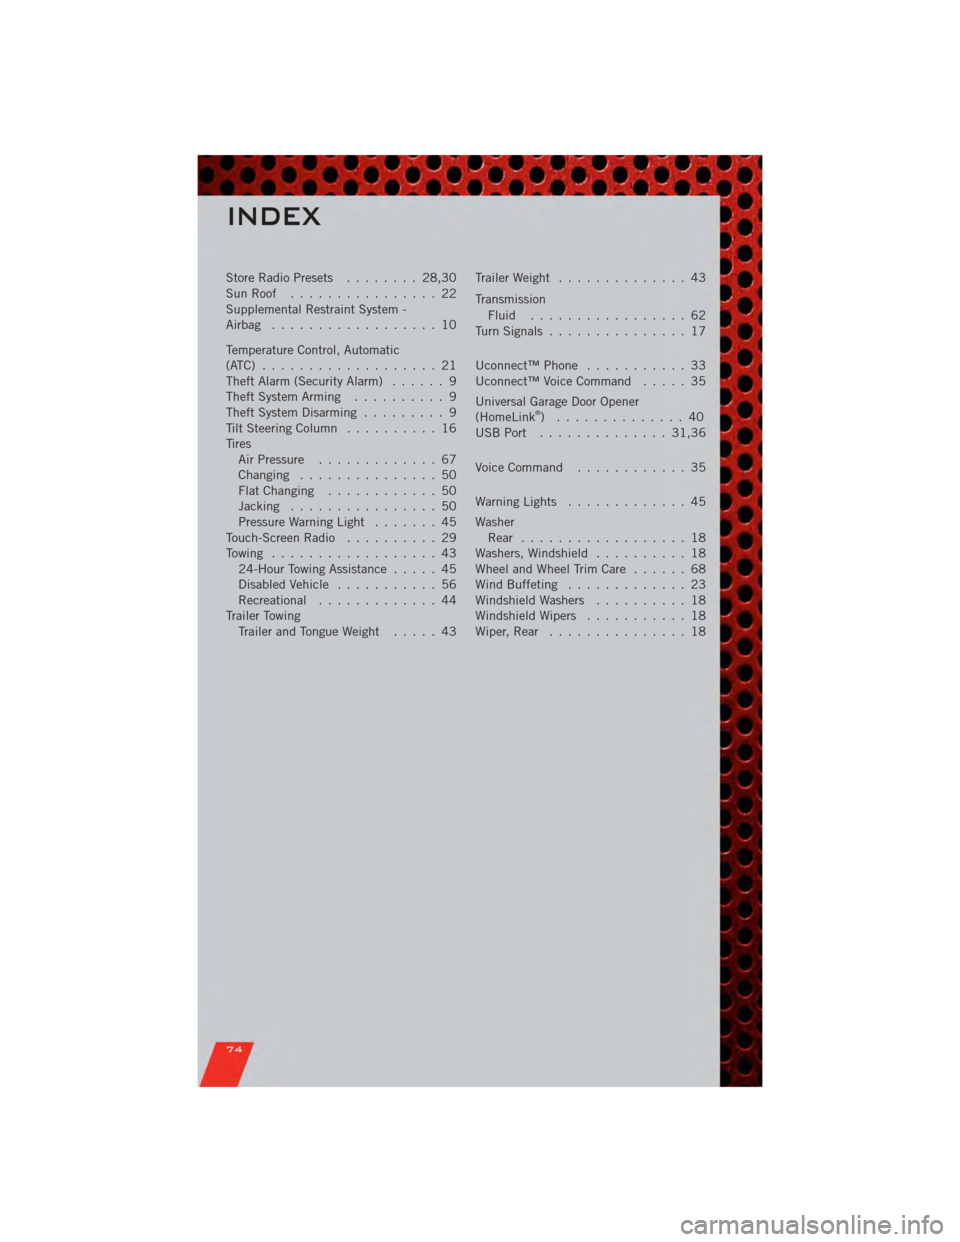
Store Radio Presets........ 28,30
SunRoof ................ 22
Supplemental Restraint System -
Airbag .................. 10
Temperature Control, Automatic
(ATC) ................... 21
Theft Alarm (Security Alarm) ...... 9
Theft System Arming .......... 9
Theft System Disarming ......... 9
Tilt Steering Column .......... 16
Tires Air Pressure ............. 67
Changing ............... 50
FlatChanging ............ 50
Jacking ................ 50
PressureWarningLight ....... 45
Touch-Screen Radio .......... 29
Towing .................. 43 24-Hour Towing Assistance ..... 45
Disabled Vehicle ........... 56
Recreational ............. 44
Trailer Towing Trailer and Tongue Weight ..... 43Trailer Weight
.............. 43
Transmission Fluid ................. 62
TurnSignals ............... 17
Uconnect™Phone ........... 33
Uconnect™ Voice Command ..... 35
Universal Garage Door Opener
(HomeLink
®) .............. 40
USBPort .............. 31,36
Voice Command ............ 35
WarningLights ............. 45
Washer Rear .................. 18
Washers, Windshield .......... 18
Wheel and Wheel Trim Care ...... 68
Wind Buffeting ............. 23
Windshield Washers .......... 18
Windshield Wipers ........... 18
Wiper,Rear ............... 18
INDEX
74