check engine DODGE CALIBER SRT 2008 1.G User Guide
[x] Cancel search | Manufacturer: DODGE, Model Year: 2008, Model line: CALIBER SRT, Model: DODGE CALIBER SRT 2008 1.GPages: 373, PDF Size: 3 MB
Page 165 of 373
CAUTION!
The TPMS has been optimized for the original
equipment tires and wheels. TPMS pressures and
warning have been established for the tire size
equipped on your vehicle. Undesirable system opera-
tion or sensor damage may result when using re-
placement equipment that is not of the same size,
type, and/or style. Aftermarket wheels can cause
sensor damage. Do not use tire sealant from a can, or
balance beads if your vehicle is equipped with a
TPMS, as damage to the sensors may result.
23. Malfunction Indicator Light
This light is part of an onboard diagnostic system
called OBD that monitors emissions, engine, and
automatic transmission control systems. The light
will illuminate when the key is in the ON/RUN positionbefore engine start. If the bulb does not come on when
turning the key from OFF to ON/RUN, have the condi-
tion checked promptly.
Certain conditions such as a loose or missing gas cap,
poor fuel quality, etc. may illuminate the light after
engine start. The vehicle should be serviced if the light
stays on through several of your typical driving cycles. In
most situations the vehicle will drive normally and will
not require towing.
If the Malfunction Indicator Light flashes when the
engine is running, serious conditions may exist that
could lead to immediate loss of power or severe catalytic
converter damage. The vehicle should be serviced as
soon as possible if this occurs.
164 UNDERSTANDING YOUR INSTRUMENT PANEL
Page 231 of 373
BRAKE SYSTEM
Your vehicle is equipped with power assisted brakes as
standard equipment. In the event power assist is lost for
any reason (for example, repeated brake applications
with the engine off), the brakes will still function. How-
ever, the effort required to brake the vehicle will be much
greater than that required with the power system oper-
ating.
WARNING!
Riding the brakes can lead to brake failure and
possibly an accident. Driving with your foot resting
or riding on the brake pedal can result in abnormally
high brake temperatures, excessive lining wear, and
possible brake damage. You wouldn't have your full
braking capacity in an emergency.If either of the two hydraulic systems lose normal capa-
bility, the remaining system will still function with some
loss of overall braking effectiveness. This will be evident
by increased pedal travel during application and greater
pedal force required to slow or stop. In addition, if the
malfunction is caused by an internal leak, as the brake
fluid in the master cylinder drops, the brake warning
indicator will light.
WARNING!
Driving a vehicle with the brake light on is danger-
ous. A significant decrease in braking performance or
vehicle stability during braking may occur. It will
take you longer to stop the vehicle or will make your
vehicle harder to control. You could have an accident.
Have the vehicle checked immediately.
230 STARTING AND OPERATING
Page 237 of 373
Shallow Standing Water
Although your vehicle is capable of driving through
shallow standing water, consider the following Caution
and Warning before doing so.
CAUTION!
²Always check the depth of the standing water
before driving through it. Never drive through
standing water that is deeper than the bottom of
the tire rims mounted on the vehicle.
²Determine the condition of the road or the path
that is under water, and if there are any obstacles
in the way, before driving through the standing
water.
²Do not exceed 5 mph (8 km/h) when driving
through standing water. This will minimize wave
effects.
CAUTION!
²Driving through standing water may cause dam-
age to your vehicle's drivetrain components. Al-
ways inspect your vehicle's fluids (i.e., engine oil,
transmission, axle, etc.) for signs of contamination
(i.e., fluid that is milky or foamy in appearance)
after driving through standing water. Do not con-
tinue to operate the vehicle if any fluid appears
contaminated, as this may result in further dam-
age. Such damage is not covered by the New
Vehicle Limited Warranty.
²Getting water inside your vehicle's engine can
cause it to lock up and stall out, and cause serious
internal damage to the engine. Such damage is not
covered by the New Vehicle Limited Warranty.
236 STARTING AND OPERATING
Page 282 of 373
NOTE:Do not remove foreign objects (e.g., screws or
nails) from the tire.
(C) Injecting TIREFIT Sealant into the deflated
tire:
1. Always start the engine before turning on the TIREFIT
kit.
2. After pressing the Air Pump Power Button
(3), the air pump should start to inflate the tire
and the sealant (white fluid) will flow from the
Sealant Bottle (1) through the Sealant Hose (7)
and into the tire.NOTE:Some sealant may leak out
through the puncture in the tire.
3.If the sealant Does Not Flow Through the Clear
Sealant Hose (7):
²Press the Air Pump Power Button (3) to turn off the
TIREFIT kit. Disconnect the Clear Sealant Hose (7)
from the valve stem. Make sure the valve stem isfree of debris. Reconnect the Clear Sealant Hose (7)
to the valve stem. Press the Air Pump Power Button
(3) to turn on the TIREFIT kit.
²Turn the Mode Select knob to the Sealant/Air Mode.
²Connect the Power Plug (5) to a different power
outlet in your vehicle or another vehicle, if available.
Make sure the engine is running before turning on
the TIREFIT kit.
²The Sealant Bottle (1) may be empty due to previous
use. Call for assistance.
(D) After Injecting TIREFIT Sealant:
1. Allow the air pump to inflate the tire to the pressure
indicated on the tire pressure label on the driver-side
latch pillar. Check the pressure in the tire by looking at
the Pressure Gauge (2).
WHAT TO DO IN EMERGENCIES 281
6
Page 290 of 373
MAINTAINING YOUR VEHICLE
CONTENTS
mEngine Compartment Ð Gasoline Engines.....291
mOnboard Diagnostic System Ð OBD II........292
NLoose Fuel Filler Cap Message............293
mEmissions Inspection And Maintenance
Programs............................293
mReplacement Parts......................295
mAuthorized Dealer Service................295
mMaintenance Procedures..................296
NEngine Oil..........................296NDrive Belt ± Check Condition.............299
NSpark Plugs.........................300
NCatalytic Converter....................300
NCrankcase Emission Control System........301
NFuel Filter..........................302
NAir Cleaner Element (Filter)..............302
NMaintenance-Free Battery................302
NAir Conditioner Maintenance.............304
NPower Steering Ð Fluid Check............305
7
Page 294 of 373
Loose Fuel Filler Cap Message
After fuel is added, the vehicle diagnostic system can
determine if the fuel filler cap is possibly loose or
improperly installed. A GASCAP message will be dis-
played in the instrument cluster. Tighten the gas cap until
a9clicking9sound is heard. This is an indication that the
gas cap is properly tightened. Press the trip odometer
reset button to turn off the message. If the problem
persists, the message will appear the next time the
vehicle is started. This might indicate a damaged cap. If
the problem is detected twice in a row, the system will
turn on the Malfunction Indicator Light (MIL). Resolving
the problem will turn the MIL light off.
EMISSIONS INSPECTION AND MAINTENANCE
PROGRAMS
In some localities, it may be a legal requirement to pass
an inspection of your vehicle's emissions control system.
Failure to pass could prevent vehicle registration.
For states, which have an I/M (Inspection and
Maintenance) requirement, this check verifies the
MIL is functioning and is not on when the engine
is running, and that the OBD system is ready for testing.
Normally, the OBD system will be ready. The OBD
system maynotbe ready if your vehicle was recently
serviced, if you recently had a dead battery, or a battery
replacement. If the OBD system should be determined
not ready for the I/M test, your vehicle may fail the test.
MAINTAINING YOUR VEHICLE 293
7
Page 295 of 373
Your vehicle has a simple ignition key-actuated test,
which you can use prior to going to the test station. To
check if your vehicle's OBD system is ready, you must do
the following:
1. Insert your ignition key into the ignition switch.
2. Turn the ignition to the ON position, but do not crank
or start the engine.
3. If you crank or start the engine, you will have to start
this test over.
4. As soon as you turn your key to the ON position, you
will see your MIL symbol come on as part of a normal
bulb check.5. Approximately 15 seconds later, one of two things will
happen:
a. The MIL will flash for about 10 seconds and then
return to being fully illuminated until you turn OFF
the ignition key or start the engine. This means that
your vehicle's OBD system isnot readyand you
shouldnotproceed to the I/M station.
b. The MIL will not flash at all and will remain fully
illuminated until you turn OFF the ignition key or start
the engine. This means that your vehicle's OBD system
isreadyand you can proceed to the I/M station.
If your OBD system isnot ready,you should see your
authorized dealer or repair facility. If your vehicle was
recently serviced or had a battery failure or replacement,
you may need to do nothing more than drive your
vehicle as you normally would in order for your OBD
system to update. A recheck with the above test routine
may then indicate that the system is now ready.
294 MAINTAINING YOUR VEHICLE
Page 297 of 373
MAINTENANCE PROCEDURES
The pages that follow contain therequiredmaintenance
services determined by the engineers who designed your
vehicle.
Besides the maintenance items for which there are fixed
maintenance intervals, there are other items that should
operate satisfactorily without periodic maintenance.
However, if a malfunction of these items does occur, it
could adversely affect the engine or vehicle performance.
These items should be inspected if a malfunction is
observed or suspected.
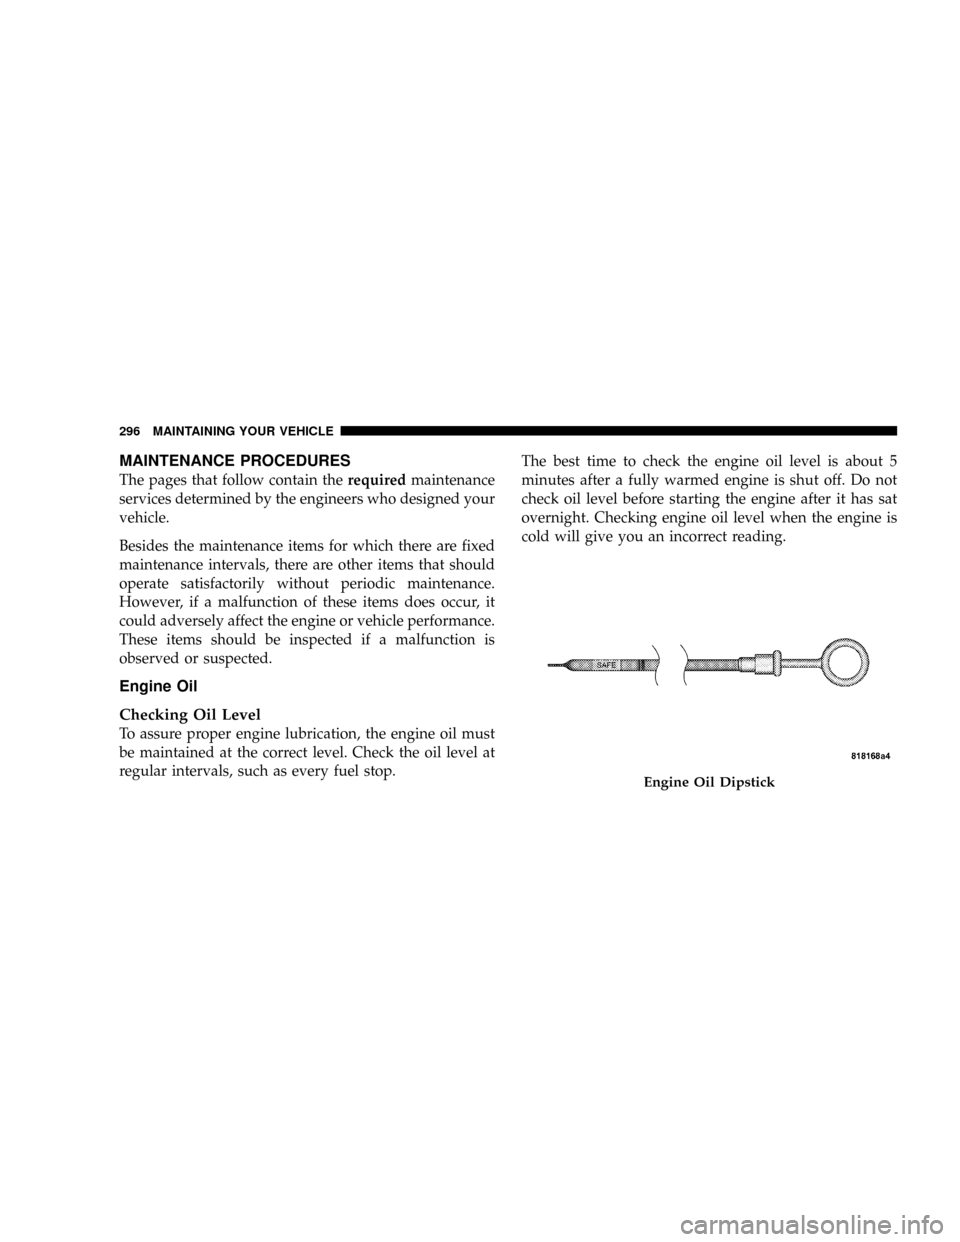
Engine Oil
Checking Oil Level
To assure proper engine lubrication, the engine oil must
be maintained at the correct level. Check the oil level at
regular intervals, such as every fuel stop.The best time to check the engine oil level is about 5
minutes after a fully warmed engine is shut off. Do not
check oil level before starting the engine after it has sat
overnight. Checking engine oil level when the engine is
cold will give you an incorrect reading.
Engine Oil Dipstick
296 MAINTAINING YOUR VEHICLE
Page 298 of 373
Checking the oil while the vehicle is on level ground and
only when the engine is hot, will improve the accuracy of
the oil level readings. Maintain the oil level between the
range markings on the dipstick. The range markings will
consist of a crosshatch zone that says SAFE or a cross-
hatch zone that says MIN at the low end of the range and
MAX at the high end of the range. Adding one quart of
oil when the reading is at the low end of the indicated
range will result in the oil level at the full end of the
indicator range.
CAUTION!
Do not overfill the engine. Overfilling the engine as
indicated by the range markings, as described above,
on the engine oil dipstick will cause oil aeration,
which can lead to loss of oil pressure and an increase
in oil temperature. This could damage your engine.
Change Engine Oil
Refer to the ªMaintenance Scheduleº in Section 8 for
recommended engine oil change intervals.
Engine Oil Selection
For best performance and maximum protection under all
types of operating conditions, the manufacturer only
recommends full synthetic engine oils that meet require-
ments of DaimlerChrysler Material Standard MS-10725.
The manufacturer recommends the use of a full synthetic
engine oil, such as Mobil 1tSAE 0W-40 or equivalent.
MAINTAINING YOUR VEHICLE 297
7
Page 300 of 373
Materials Added To Engine Oils
The manufacture strongly recommends against the addi-
tion of any additives (other than leak detection dyes) to
the engine oil. Engine oil is an engineered product and
it's performance may be impaired by supplemental ad-
ditives.
Disposing of Used Engine Oil
Care should be taken in disposing of used engine oil from
your vehicle. Used oil, indiscriminately discarded, can
present a problem to the environment. Contact your
dealer, service station, or governmental agency for advice
on how and where used oil can be safely discarded in
your area.
Engine Oil Filter
The engine oil filter should be replaced at every engine
oil change.
Engine Oil Filter Selection
All of this manufacturers engines have a full-flow type
disposable oil filter. Use a filter of this type for replace-
ment. The quality of replacement filters varies consider-
ably. Only high quality filters should be used to assure
most efficient service. Mopar Engine Oil Filters are high
quality oil filters and are recommended.
Drive Belt ± Check Condition
Check the drive belt condition. Refer to the ªMaintenance
Scheduleº in Section 8 of this manual.
Inspect the drive belt for evidence of cuts, cracks, or
glazing and replace belt if any sign of damage which
could result in belt failure.
The belt is self-tensioning and will not need adjustment.
MAINTAINING YOUR VEHICLE 299
7