key DODGE CALIBER SRT 2008 1.G Owner's Guide
[x] Cancel search | Manufacturer: DODGE, Model Year: 2008, Model line: CALIBER SRT, Model: DODGE CALIBER SRT 2008 1.GPages: 373, PDF Size: 3 MB
Page 175 of 373
UNLOCK ALL DOORSis selected all of the doors will
unlock at the first press of the remote keyless entry
unlock button. Press and hold the EVIC button when in
this display until ªDRIVER'S DOOR 1STº or ªALL
DOORSº appears to make your selection.
Sound Horn with Remote Key Lock
When ON is selected a short horn sound will occur when
the remote keyless entry ªLockº button is pressed. This
feature may be selected with or without the flash lights
on lock/unlock feature. Press and hold the EVIC button
when in this display until ªONº or ªOFFº appears to
make your selection.
Flash Lights with Remote Key Lock
When ON is selected, the front and rear turn signals will
flash when the doors are locked or unlocked using the
remote keyless entry transmitter. This feature may be
selected with or without the sound horn on lock featureselected. Press and hold the EVIC button when in this
display until ªONº or ªOFFº appears to make your
selection.
Delay Turning Headlamps Off
When this feature is selected the driver can choose to
have the headlamps remain on for 0, 30, 60, or 90 seconds
when exiting the vehicle. Press and hold the EVIC button
when in this display until 0, 30, 60, or 90 appears to make
your selection.
Headlamps On With Wipers (Available with Auto
Headlights Only)
When ON is selected and the headlight switch is in the
AUTO position, the headlights will turn on approxi-
mately 10 seconds after the wipers are turned on. The
headlights will also turn off when the wipers are turned
off if they were turned on by this feature. Press and hold
the EVIC button when in this display until ªONº or
ªOFFº appears to make your selection.
174 UNDERSTANDING YOUR INSTRUMENT PANEL
Page 176 of 373
NOTE:Turning the headlights on during the daytime
causes the instrument panel lights to dim. To increase the
brightness, refer to ªLightsº in this section.
Delay Power Off to Accessories Until Exit
When this feature is selected, the power window
switches, radio, hands±free system, power sunroof, and
power outlets will remain active for up to 60 minutes
after the ignition switch has been turned off. Opening a
vehicle door will cancel this feature. Press and hold the
EVIC button when in this display until ªOffº, ª45 sec.º,
ª5 min.º, or ª10 min.º appears to make your selection.
Turn Headlamps on with Remote Key Unlock
When this feature is selected the headlamps will activate
and remain on for up to 90 seconds when the doors are
unlocked using the remote keyless entry transmitter.
Press and hold the EVIC button when in this display until
ªOFFº, ª30 sec.º, ª60 sec.º, or ª90 sec.º appears to make
your selection.
Confirmation of Voice Commands Ð If Equipped
When ON is selected all voice commands from the
U-Connect system are confirmed. Press and hold the
EVIC button when in this display until ªONº or ªOFFº
appears to make your selection.
Display English or Metric
The EVIC, odometer, and navigation system units can be
changed between English and Metric.
Press and hold the EVIC button when in this display until
ªUSº or ªMETRICº appears to make your selection.
Oil Change Required
Your vehicle is equipped with an engine oil change
indicator system. The ªOil Change Requiredº message
will flash in the EVIC display for approximately 10
seconds after a single chime has sounded to indicate the
next scheduled oil change interval. The engine oil change
UNDERSTANDING YOUR INSTRUMENT PANEL 175
4
Page 225 of 373
STARTING PROCEDURES
Before starting your vehicle, adjust your seat, adjust both
inside and outside mirrors, and fasten your seat belts.
WARNING!
Never leave children alone in a vehicle. Leaving
children in a vehicle unattended is dangerous for a
number of reasons. A child or others could be seri-
ously or fatally injured. Don't leave the keys in the
ignition. A child could operate power windows,
other controls, or move the vehicle.
Manual Transaxle
Before starting the engine fully apply the parking brake,
press the clutch pedal to the floor, and place the gear
selector in NEUTRAL.NOTE:The engine will not start unless the clutch pedal
is pressed to the floor.
NOTE:If key won't turn and steering wheel is locked,
rotate the wheel in either direction to relieve pressure on
the locking mechanism and then turn the key.
Normal Starting
Normal starting of either a cold or a warm engine does
not require pumping or depressing the accelerator pedal.
Simply turn the ignition switch to the ªSTART'º position
and release when the engine starts. If the engine fails to
start within 15 seconds, turn the ignition switch to the
ªOFFº position, wait 10 to 15 seconds, then repeat the
normal starting procedure.
224 STARTING AND OPERATING
Page 226 of 373
WARNING!
Do not attempt to push or tow your vehicle to get it
started. Vehicles equipped with an automatic trans-
axle cannot be started this way. Unburned fuel could
enter the catalytic converter and once the engine has
started, ignite and damage the converter and vehicle.
If the vehicle has a discharged battery, booster cables
may be used to obtain a start from another vehicle.
This type of start can be dangerous if done improp-
erly, so follow the procedure carefully. See section 6
of this manual for jump starting instructions.
Extremely Cold Weather (below220ÉF or229ÉC)
To insure reliable starting at these temperatures, use of an
externally powered electric engine block heater (available
from your dealer) is recommended.
If Engine Fails to Start
If the engine fails to start after you have followed the
ªNORMAL STARTINGº procedure, it may be flooded.
Push the accelerator pedal all the way to the floor and
hold it there. Crank the engine for no more than 15
seconds. This should clear any excess fuel in case the
engine is flooded. Leave the ignition key in the ON
position, release the accelerator pedal and repeat the
ªNORMAL STARTINGº procedure.
WARNING!
Never pour fuel or other flammable liquid into the
throttle body air inlet opening in an attempt to start
the vehicle. This could result in flash fire causing
serious personal injury.
STARTING AND OPERATING 225
5
Page 230 of 373
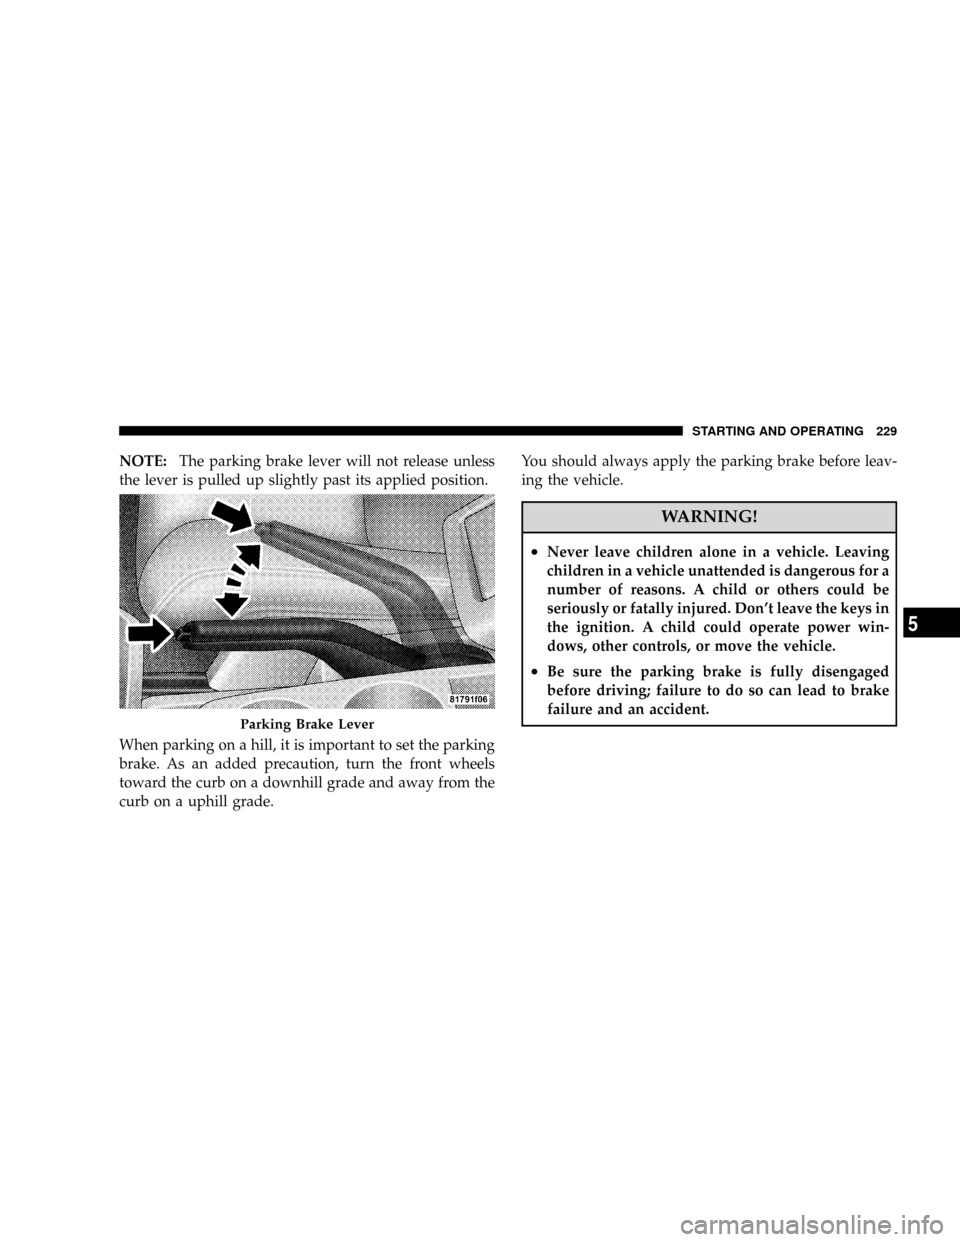
NOTE:The parking brake lever will not release unless
the lever is pulled up slightly past its applied position.
When parking on a hill, it is important to set the parking
brake. As an added precaution, turn the front wheels
toward the curb on a downhill grade and away from the
curb on a uphill grade.You should always apply the parking brake before leav-
ing the vehicle.
WARNING!
²Never leave children alone in a vehicle. Leaving
children in a vehicle unattended is dangerous for a
number of reasons. A child or others could be
seriously or fatally injured. Don't leave the keys in
the ignition. A child could operate power win-
dows, other controls, or move the vehicle.
²Be sure the parking brake is fully disengaged
before driving; failure to do so can lead to brake
failure and an accident.
Parking Brake Lever
STARTING AND OPERATING 229
5
Page 260 of 373
The Tire Pressure Monitoring Telltale Lamp will flash on
and off for 75 seconds, and remain on solid when a
system fault is detected. The system fault will also sound
a chime. If the ignition key is cycled, this sequence will
repeat, providing the system fault still exists. The Tire
Pressure Monitoring Telltale Lamp will turn off when the
fault condition no longer exists. A system fault can occur
by any of the following scenarios:
1. Jamming due to electronic devices or driving next to
facilities emitting the same Radio Frequencies as the TPM
sensors.
2. Installing some form of aftermarket window tinting
that affects radio wave signals.
3. Lots of snow or ice around the wheels or wheel
housings.
4. Using tire chains on the vehicle.
5. Using wheels/tires not equipped with TPM sensors.NOTE:Your vehicle is equipped with a compact spare
wheel and tire assembly.
1. The compact spare tire does not have a tire pressure
monitoring sensor. Therefore, the TPMS will not monitor
the tire pressure in the compact spare tire.
2. If you install the compact spare tire in place of a road
tire that has a pressure below the low-pressure warning
limit, upon the next ignition key cycle, a chime will
sound and the TPM Telltale Light will still turn ON due
to the low tire.
3. However, after driving the vehicle for up to 10 min-
utes above 15 mph (25 km/h), the TPM Telltale Light will
flash on and off for 75 seconds and then remain on solid.
4. For each subsequent ignition key cycle, a chime will
sound and the TPM Telltale Light will flash on and off for
75 seconds and then remain on solid.
STARTING AND OPERATING 259
5
Page 263 of 373
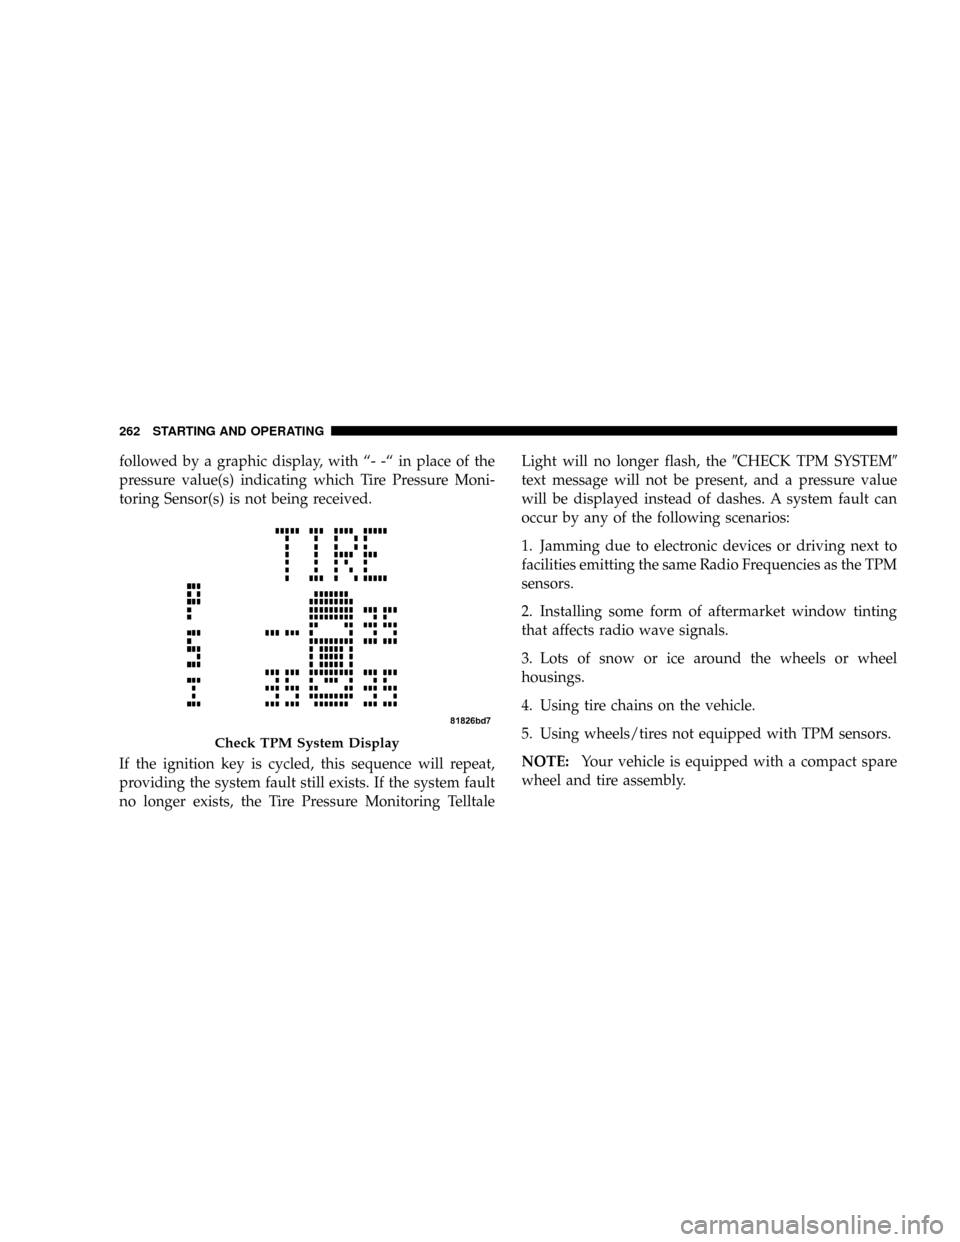
followed by a graphic display, with ª- -ª in place of the
pressure value(s) indicating which Tire Pressure Moni-
toring Sensor(s) is not being received.
If the ignition key is cycled, this sequence will repeat,
providing the system fault still exists. If the system fault
no longer exists, the Tire Pressure Monitoring TelltaleLight will no longer flash, the9CHECK TPM SYSTEM9
text message will not be present, and a pressure value
will be displayed instead of dashes. A system fault can
occur by any of the following scenarios:
1. Jamming due to electronic devices or driving next to
facilities emitting the same Radio Frequencies as the TPM
sensors.
2. Installing some form of aftermarket window tinting
that affects radio wave signals.
3. Lots of snow or ice around the wheels or wheel
housings.
4. Using tire chains on the vehicle.
5. Using wheels/tires not equipped with TPM sensors.
NOTE:Your vehicle is equipped with a compact spare
wheel and tire assembly.
Check TPM System Display
262 STARTING AND OPERATING
Page 264 of 373
1. The compact spare tire does not have a tire pressure
monitoring sensor. Therefore, the TPMS will not monitor
the tire pressure in the compact spare tire.
2. If you install the compact spare tire in place of a road
tire that has a pressure below the low-pressure warning
limit, upon the next ignition key cycle, a chime will
sound and the TPM Telltale Light will still turn ON due
to the low tire.
3. However, after driving the vehicle for up to 10 min-
utes above 15 mph (25 km/h), the TPM Telltale Light will
flash on and off for 75 seconds and then remain on solid.
4. For each subsequent ignition key cycle, a chime will
sound and the TPM Telltale Light will flash on and off for
75 seconds and then remain on solid.
5. Once you repair or replace the original road tire, and
reinstall it on the vehicle in place of the compact spare
tire, the TPMS will update automatically and the TPMTelltale Light will turn OFF, as long as no tire pressure is
below the low-pressure warning limit in any of the four
active road tires. The vehicle may need to be driven for
up to 10 minutes above 15 mph (25 km/h) in order for the
TPMS to receive this information.
General Information
This device complies with part 15 of the FCC rules and
RSS 210 of Industry Canada. Operation is subject to the
following conditions:
²This device may not cause harmful interference.
²This device must accept any interference received,
including interference that may cause undesired op-
eration.
The tire pressure sensors are covered under one of the
following licenses:
United States.....................KR5S120123
Canada........................2671-S120123
STARTING AND OPERATING 263
5
Page 272 of 373
RECREATIONAL TOWING (BEHIND
MOTORHOME, ETC.)
Towing This Vehicle Behind Another Vehicle (Flat
towing with all four wheels on the ground)
CAUTION!
DO NOT FLAT TOW any continuously variable
AUTOMATIC TRANSAXLE (CVT) equipped ve-
hicles or any ALL WHEEL DRIVE (AWD) equipped
vehicles. Damage to the drivetrain will result. If
these vehicles require towing, make sure all four
wheels are off the ground.NOTE: ONLYFront Wheel Drive (FWD) vehicles
equipped withMANUAL TRANSAXLESmay be recre-
ationally towed (flat towed) at any legal highway speed,
for any distance if theMANUAL TRANSAXLEis in
NEUTRALand the ignition key is in the accessory
position.
STARTING AND OPERATING 271
5
Page 274 of 373
WHAT TO DO IN EMERGENCIES
CONTENTS
mHazard Warning Flasher..................274
mIf Your Engine Overheats.................274
mTIREFIT Kit...........................276
NTIREFIT Storage......................276
NTIREFIT Usage Precautions..............277
NTIREFIT Kit Components & Operation......279
NSealing a Tire With TIREFIT..............280mJump-Starting Procedures Due To A Low
Battery..............................284
mFreeing A Stuck Vehicle..................286
mTowing A Disabled Vehicle................287
NWith Ignition Key.....................287
NWithout The Ignition Key...............288
6