lock DODGE CARAVAN 2004 4.G Workshop Manual
[x] Cancel search | Manufacturer: DODGE, Model Year: 2004, Model line: CARAVAN, Model: DODGE CARAVAN 2004 4.GPages: 397, PDF Size: 6.83 MB
Page 162 of 397
Power Switch, Volume Control
Press the ON/VOL control to turn the radio on. Turn the
volume control clockwise to increase the volume. The
volume will be displayed and continuously updated
while the button is pressed.
Seek Button (Radio Mode)
Press and release the Seek button to search for the next
station in either the AM or FM mode. Press the top of the
button to seek up and the bottom to seek down. Holding
the button will by pass stations until you release the
button.
Tuning
Press the TUNE control up or down to increase or
decrease the frequency. If you press and hold the button,
the radio will continue to tune until you release the
button. The frequency will be displayed and continu-
ously updated while the button is pressed.
PTY (Program Type) Button
Pressing this button once will turn on the PTY mode for
5 seconds. If no action is taken during the 5 second time
out the PTY icon will turn off. Pressing the PTY button
within 5 seconds will allow the program format type to
be selected. Many radio stations do not currently broad-
cast PTY information.
Toggle the PTY button to select the following format types:
Program Type Radio Display
Adult Hits Adlt Hit
Classical Classicl
Classic Rock Cls Rock
College College
Country Country
Information Inform
Jazz Jazz
Foreign Language Language
162 UNDERSTANDING YOUR INSTRUMENT PANEL
Page 165 of 397
To Set The Radio Push-button Memory
When you are receiving a station that you wish to
commit to push-button memory, press the SET button.
SET 1 will show in the display window. Select the
push-button you wish to lock onto this station and press
and release that button. If a station is not selected within
5 seconds after pressing the SET button, the station will
continue to play but will not be locked into push-button
memory.
You may add a second station to each push-button by
repeating the above procedure with this exception: Press
the SET button twice and SET 2 will show in the display
window. Each button can be set for SET 1 and SET 2 in
both AM and FM. This allows a total of 10 AM and 10 FM
stations to be locked into memory. You can recall the
stations stored in SET 2 memory by pressing the push-
button twice.
To Change From Clock To Radio Mode
Press the Time button to change the display between
radio frequency and time.
Operating Instructions Ð Tape Player
Insert the cassette with the exposed tape side toward the
right and the mechanical action of the player will gently
pull the cassette into the play position.
NOTE:When subjected to extremely cold temperatures,
the tape mechanism may require a few minutes to warm
up for proper operation. Sometimes poor playback may
be experienced due to a defective cassette tape. Clean and
demagnetize the tape heads at least twice a year.
Seek Button
Press the SEEK button up for the next selection on the
tape and down to return to the beginning of the current
selection.
UNDERSTANDING YOUR INSTRUMENT PANEL 165
4
Page 171 of 397
CD Diagnostic Indicators
When driving over a very rough road, the CD player may
skip momentarily. Skipping will not damage the disc or
the player, and play will resume automatically.
As a safeguard and to protect your CD player, one of the
following warning symbols may appear on your display.
A CD HOT symbol indicates the player is too hot.
CD HOT will pause the operation. Play can be resumed
when the operating temperature is corrected or another
MODE is selected.
An ERR symbol will appear on the display if the laser is
unable to read the Disc data for the following reasons:
²Excessive vibration
²Disc inserted upside down
²Damaged disc
²Water condensation on optics
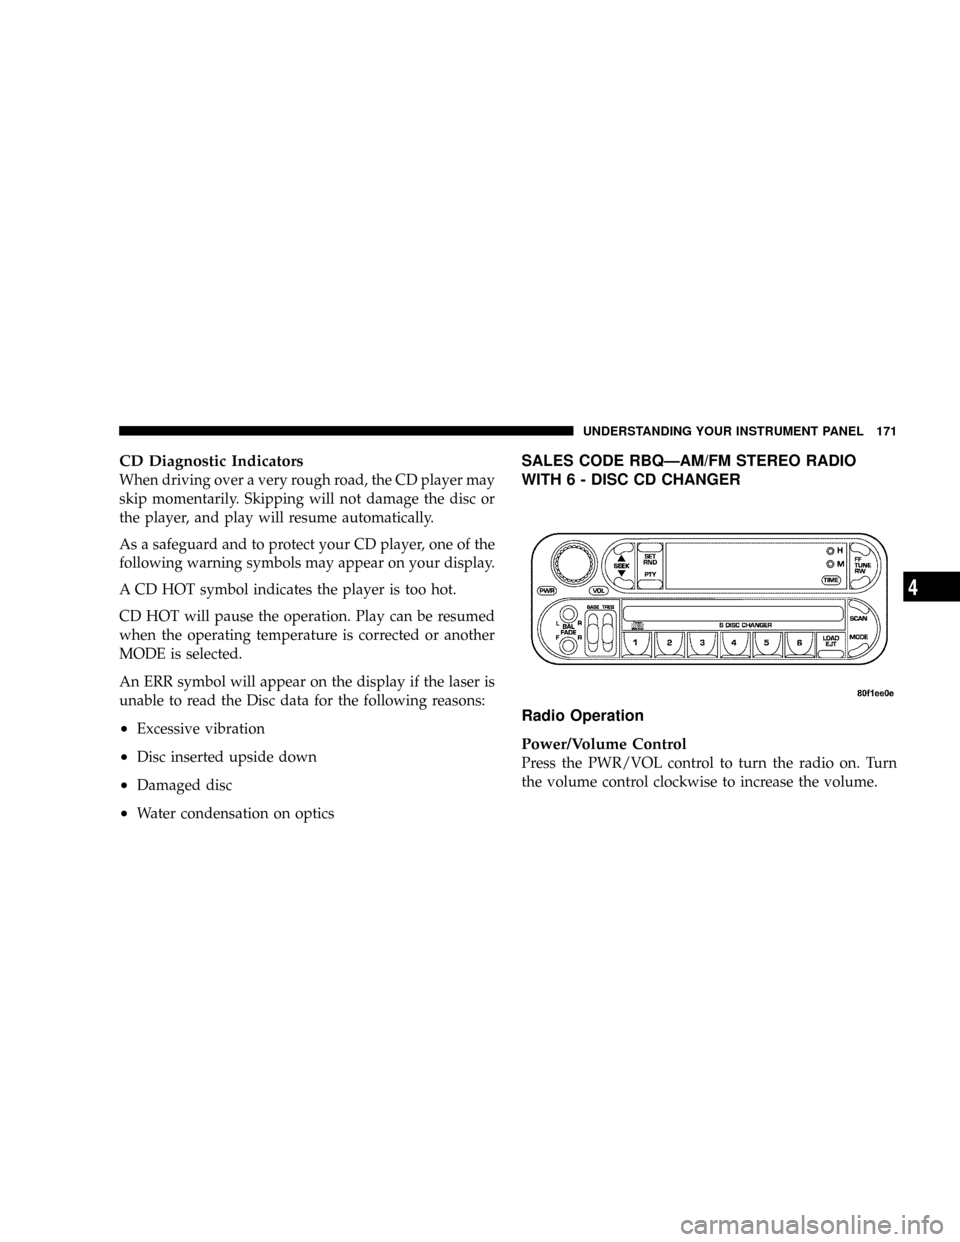
SALES CODE RBQÐAM/FM STEREO RADIO
WITH 6 - DISC CD CHANGER
Radio Operation
Power/Volume Control
Press the PWR/VOL control to turn the radio on. Turn
the volume control clockwise to increase the volume.
UNDERSTANDING YOUR INSTRUMENT PANEL 171
4
Page 173 of 397
Fade
The Fade control provides for balance between the front
and rear speakers. Press the FADE button in and it will
pop out. Adjust the balance and push the button back in.
Tone Control
The tone controls affect the Bass and Treble frequency
bands. Each is controlled by a slider control with a detent
at the mid position. Moving a control up or down
increases or decreases amplification of the band. The mid
position provides a balanced output.
To Set The Radio Push-Button Memory
When you are receiving a station that you wish to
commit to push-button memory, press the SET RND
button. SET 1 will show in the display window. Select the
ª1±6º button you wish to lock onto this station and press
and release that button. If a button is not selected within5 seconds after pressing the SET RND button, the station
will continue to play but will not be locked into push-
button memory.
You may add a second station to each push-button by
repeating the above procedure with this exception: Press
the SET button twice and SET 2 will show in the display
window. Each button can be set for SET 1 and SET 2 in
both AM and FM. This allows a total of 12 AM and 12 FM
stations to be locked into push-button memory. The
stations stored in SET 2 memory can be selected by
pressing the corresponding push-button twice. Every
time a preset button is used, a corresponding button
number will be displayed.
Time Button
Press the TIME button to change the display between
radio frequency and time.
UNDERSTANDING YOUR INSTRUMENT PANEL 173
4
Page 178 of 397

Time
Press the TIME button to change the display from
elapsed CD playing time to time of day.
SALES CODE RBKÐAM/ FM STEREO RADIO
WITH CD PLAYER AND CD CHANGER
CONTROLSRadio Operation
Power/Volume Control
Press the ON/VOL control to turn the radio on. Turn the
volume control clockwise to increase the volume.
NOTE:Power to operate the radio is supplied through
the ignition switch. It must be in the ON or ACC position
to operate the radio.
Seek
Press and release the SEEK button to search for the next
station in either the AM or FM mode. Press the top of the
button to seek up and the bottom to seek down. The
radio will remain tuned to the new station until you
make another selection. Holding the button in will by-
pass stations without stopping until you release it.
Tune
Press the TUNE control up or down to increase or
decrease the frequency. If you press and hold the button,
178 UNDERSTANDING YOUR INSTRUMENT PANEL
Page 179 of 397
the radio will continue to tune until you release the
button. The frequency will be displayed and continu-
ously updated while the button is pressed.
Balance
The Balance control adjusts the left-to-right speaker bal-
ance. Press the BAL button in and it will pop out. Adjust
the balance and push the button back in.
Fade
The Fade control provides for balance between the front
and rear speakers. Press the FADE button in and it will
pop out. Adjust the balance and push the button back in.
Bass and Treble Tone Control
The tone controls consist of 2 separate bands. The bass
band is on the left, and the treble band is on the right.
Each band is adjusted by a slider control with a detent at
the mid-position. Moving the control up or down in-
creases or decreases amplification of that band. The mid
position provides a balanced output.
AM/FM Selection
Press the AM/FM button to change from AM to FM. The
operating mode will be displayed next to the station
frequency. The display will show ST when a stereo
station is received.
To Set The Radio Push-Button Memory
When you are receiving a station that you wish to
commit to push-button memory, press the SET button.
SET 1 will show in the display window. Select the ª1±5º
button you wish to lock onto this station and press and
release that button. If a button is not selected within 5
seconds after pressing the SET button, the station will
continue to play but will not be locked into push-button
memory.
You may add a second station to each push-button by
repeating the above procedure with this exception: Press
the SET button twice and SET 2 will show in the display
window. Each button can be set for SET 1 and SET 2 in
UNDERSTANDING YOUR INSTRUMENT PANEL 179
4
Page 180 of 397

both AM and FM. This allows a total of 10 AM and 10 FM
stations to be locked into push-button memory. The
stations stored in SET 2 memory can be selected by
pressing the push-button twice. Every time a preset
button is used a corresponding button number will be
displayed.
Time
Press the TIME button to change the display between
radio frequency and time.
General Information
This radio complies with Part 15 of FCC rules and with
RSS-210 of Industry Canada. Operation is subject to the
following conditions:
1. This device may not cause harmful interference,
2. This device must accept any interference received,
including interference that may cause undesired opera-
tion.NOTE:Changes or modifications not expressively ap-
proved by the party responsible for compliance could
void the user's authority to operate the equipment.
CD Player Operation
NOTE:The ignition switch must be in the ON or ACC
position and the volume control ON before the CD player
will operate.
Inserting The Compact Disc
CAUTION!
This CD player will accept 43¤4inch (12 cm) discs
only. The use of other sized discs may damage the
CD player mechanism.
You may either insert or eject a disc with the radio OFF.
180 UNDERSTANDING YOUR INSTRUMENT PANEL
Page 193 of 397
Power Button
Pressing the power button will turn the headphones
ON/OFF.
NOTE:
²The headphones will turn off automatically and the
red LED will illuminate for approximately 2 minutes
when the radio or rear audio/video system is turned
off.
²The rear audio/video system must be turned ON
before sound can be heard from the headphones.
Volume Control
Rotate the volume control upward to increase the vol-
ume.
Scan Button
Pressing the scan button will automatically find the
audio signal that is transmitted from the CD/DVD
changer when the rear audio/video system and the
headphones are on. This button is used only if the
headphones are locked on to a source other than the
vehicle's radio.
NOTE:When the ªGREEN LEDº is showing the head-
phones are receiving the audio signal. When the ªRED
LEDº is showing the headphones are searching for the
audio signal
UNDERSTANDING YOUR INSTRUMENT PANEL 193
4
Page 195 of 397
NOTE:Follow the manufactures instructions for the
correct colors when connecting the RCA cables.
Operating Instructions Ð Video
Games/Camcorders
A video game unit or camcorder can be connected to the
rear audio/video system. Connect the cables to the RCA
jacks located on the front of the CD/DVD changer.
NOTE:To operate a video game unit a DC to AC
adapter may be required, plug the adapter into any
power outlet.
Follow the manufactures instructions for the correct
colors when connecting the RCA cables.
NOTE:MP3 player's, video game systems, camcorders
connected to the RCA jacks and CD's or DVD's inserted
into the CD/DVD changer can be heard through the
headphones.
REMOTE SOUND SYSTEM CONTROLS Ð IF
EQUIPPED
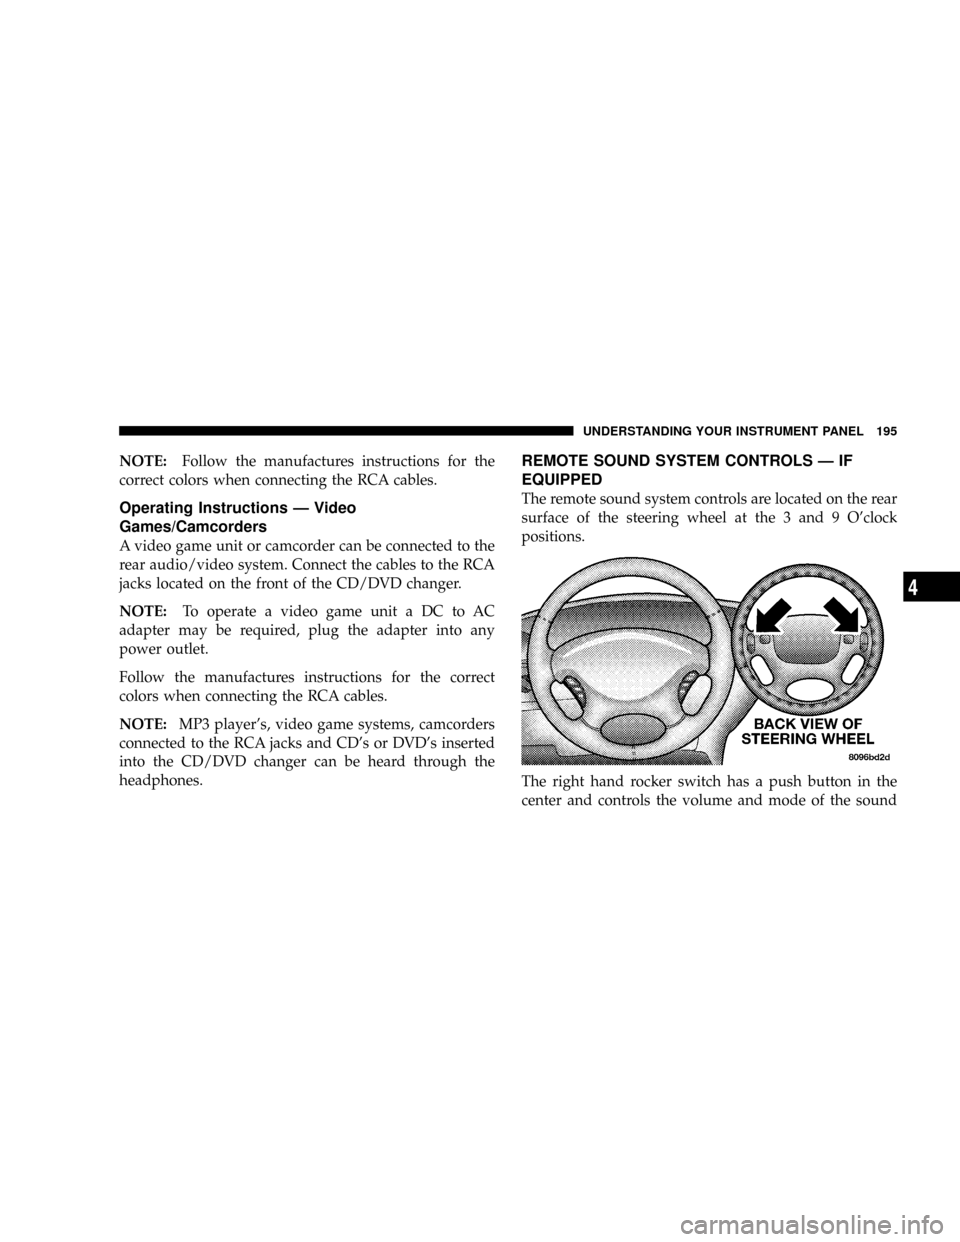
The remote sound system controls are located on the rear
surface of the steering wheel at the 3 and 9 O'clock
positions.
The right hand rocker switch has a push button in the
center and controls the volume and mode of the sound
UNDERSTANDING YOUR INSTRUMENT PANEL 195
4
Page 199 of 397
CLIMATE CONTROLS
The Air Conditioning and Heating System is designed to
make you comfortable in all types of weather.
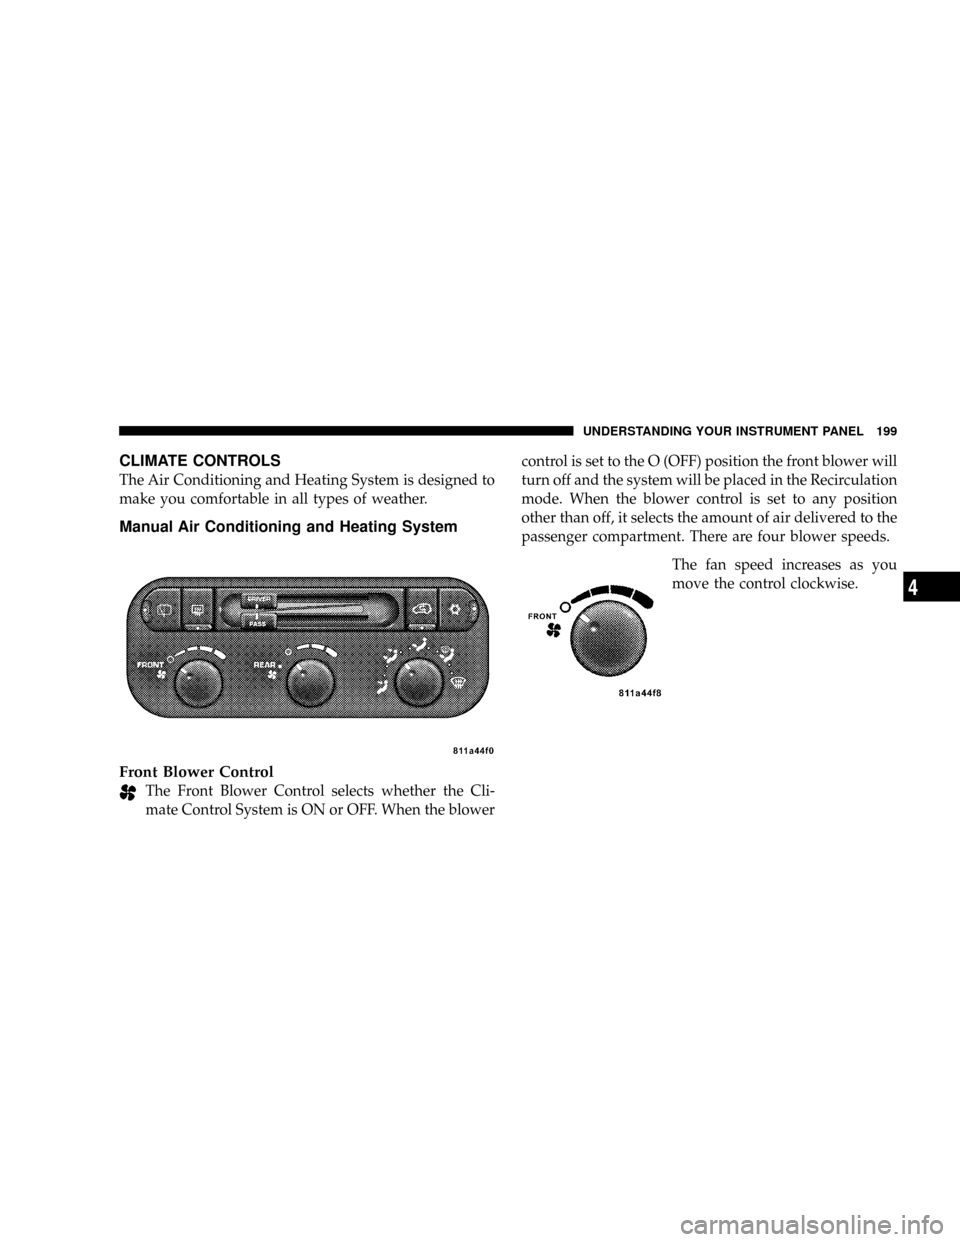
Manual Air Conditioning and Heating System
Front Blower Control
The Front Blower Control selects whether the Cli-
mate Control System is ON or OFF. When the blowercontrol is set to the O (OFF) position the front blower will
turn off and the system will be placed in the Recirculation
mode. When the blower control is set to any position
other than off, it selects the amount of air delivered to the
passenger compartment. There are four blower speeds.
The fan speed increases as you
move the control clockwise.
UNDERSTANDING YOUR INSTRUMENT PANEL 199
4