air condition DODGE CARAVAN 2009 User Guide
[x] Cancel search | Manufacturer: DODGE, Model Year: 2009, Model line: CARAVAN, Model: DODGE CARAVAN 2009Pages: 534, PDF Size: 9.93 MB
Page 308 of 534
NOTE:For maximum airflow to the rear, the center
instrument panel outlets can be directed toward the rear
seat passengers.
Economy Mode
If ECONOMY mode is desired, press the A/C button to
turn off the indicator light and the A/C compressor.
Rotate the temperature control knob to the desired
temperature.
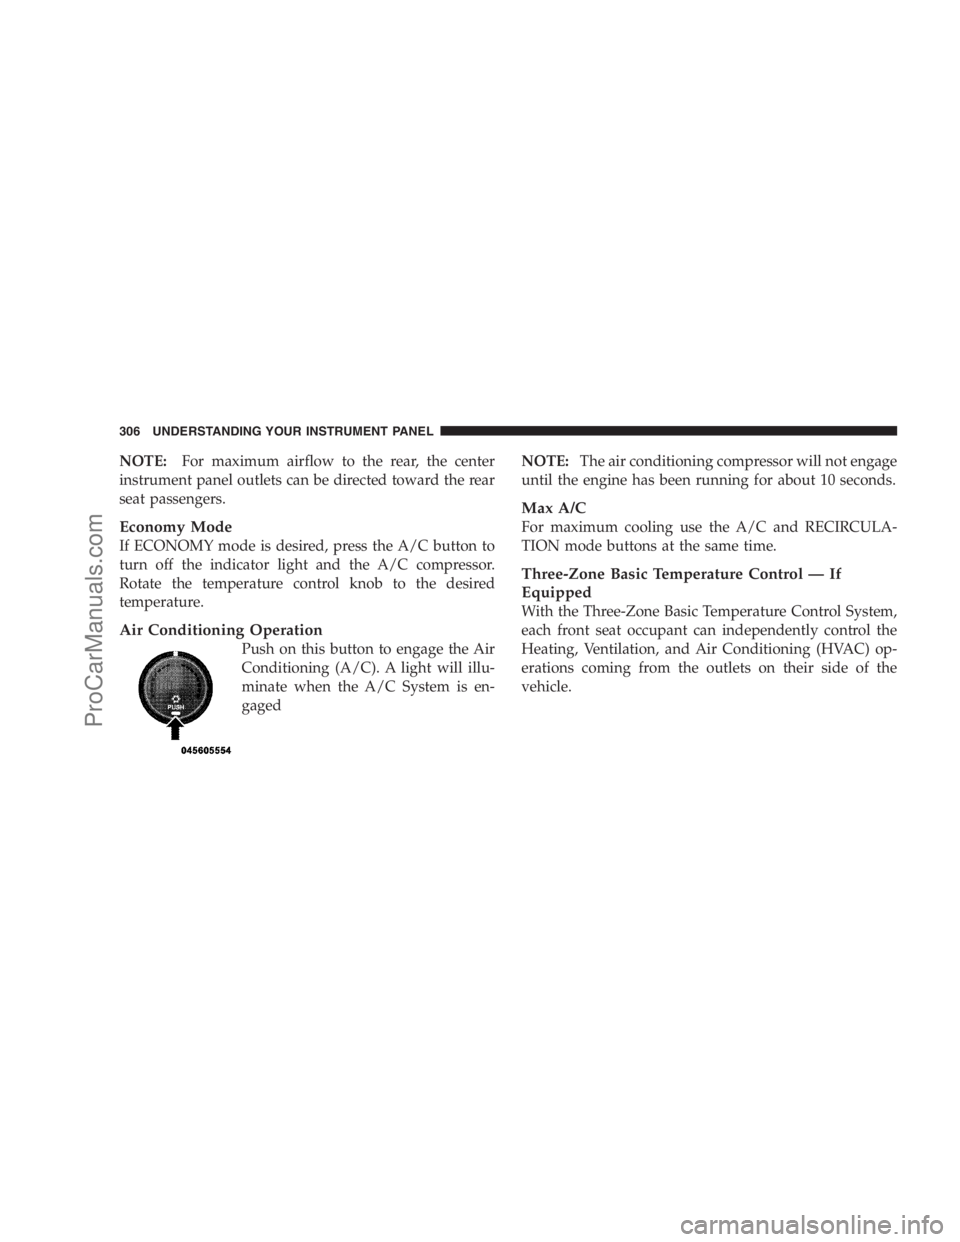
Air Conditioning Operation
Push on this button to engage the Air
Conditioning (A/C). A light will illu-
minate when the A/C System is en-
gagedNOTE:The air conditioning compressor will not engage
until the engine has been running for about 10 seconds.
Max A/C
For maximum cooling use the A/C and RECIRCULA-
TION mode buttons at the same time.
Three-Zone Basic Temperature Control — If
Equipped
With the Three-Zone Basic Temperature Control System,
each front seat occupant can independently control the
Heating, Ventilation, and Air Conditioning (HVAC) op-
erations coming from the outlets on their side of the
vehicle.
306 UNDERSTANDING YOUR INSTRUMENT PANEL
ProCarManuals.com
Page 309 of 534
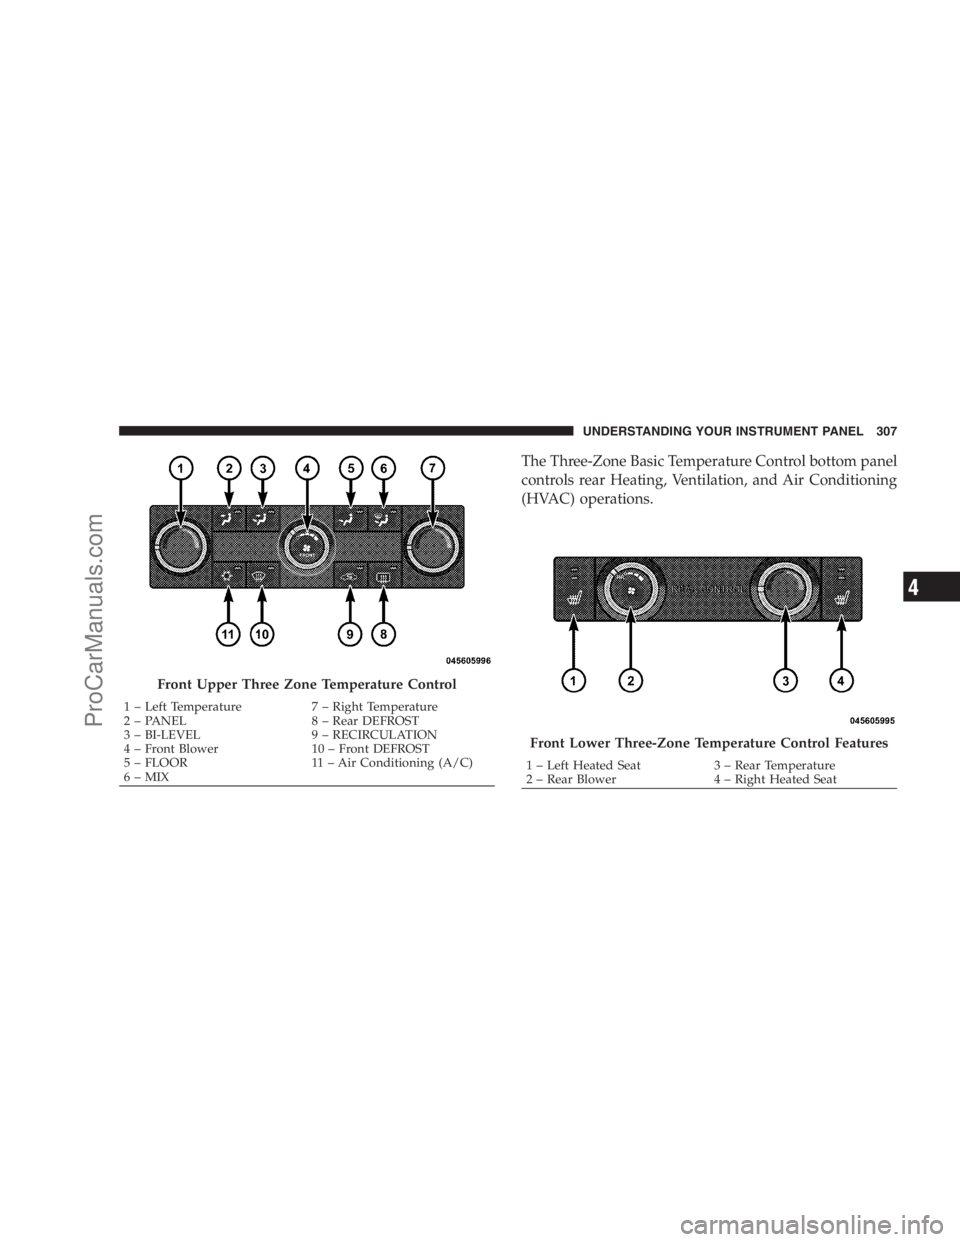
The Three-Zone Basic Temperature Control bottom panel
controls rear Heating, Ventilation, and Air Conditioning
(HVAC) operations.
Front Upper Three Zone Temperature Control
1 – Left Temperature 7 – Right Temperature
2 – PANEL 8 – Rear DEFROST
3 – BI-LEVEL 9 – RECIRCULATION
4 – Front Blower 10 – Front DEFROST
5 – FLOOR 11 – Air Conditioning (A/C)
6–MIX
Front Lower Three-Zone Temperature Control Features
1 – Left Heated Seat 3 – Rear Temperature
2 – Rear Blower 4 – Right Heated SeatUNDERSTANDING YOUR INSTRUMENT PANEL 307
4
ProCarManuals.com
Page 313 of 534
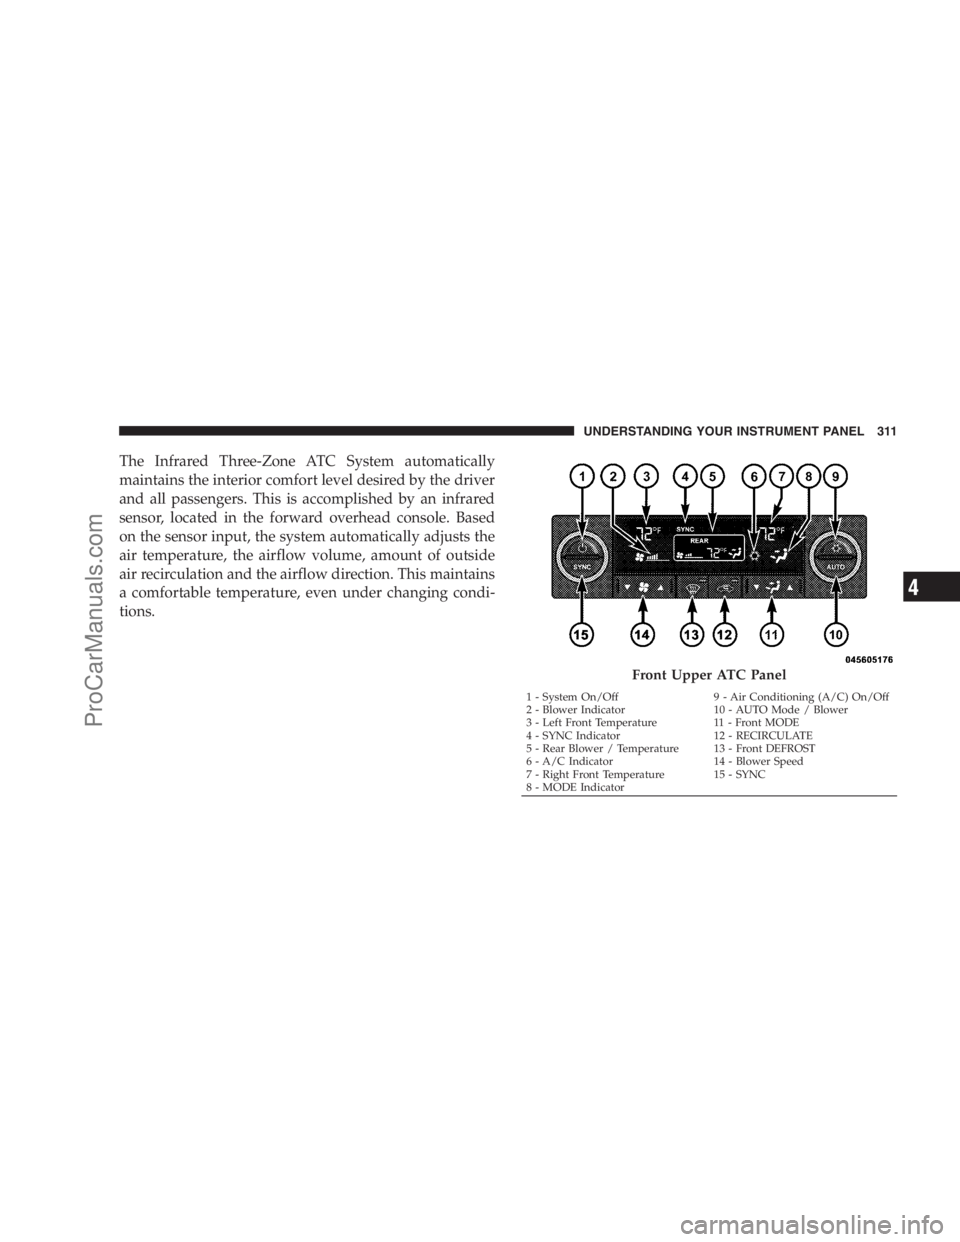
The Infrared Three-Zone ATC System automatically
maintains the interior comfort level desired by the driver
and all passengers. This is accomplished by an infrared
sensor, located in the forward overhead console. Based
on the sensor input, the system automatically adjusts the
air temperature, the airflow volume, amount of outside
air recirculation and the airflow direction. This maintains
a comfortable temperature, even under changing condi-
tions.
Front Upper ATC Panel
1 - System On/Off 9 - Air Conditioning (A/C) On/Off
2 - Blower Indicator 10 - AUTO Mode / Blower
3 - Left Front Temperature 11 - Front MODE
4 - SYNC Indicator 12 - RECIRCULATE
5 - Rear Blower / Temperature 13 - Front DEFROST
6 - A/C Indicator 14 - Blower Speed
7 - Right Front Temperature 15 - SYNC
8 - MODE Indicator
UNDERSTANDING YOUR INSTRUMENT PANEL 311
4
ProCarManuals.com
Page 316 of 534
Panel Mode
Air comes from the outlets in the instrument panel.
Each of these outlets can be individually adjusted to
direct the flow of air. The air vanes of the center outlets
and outboard outlets can be rotated to regulate or shut off
the airflow from these outlets.
Bi-Level Mode
Air comes from the instrument panel outlets, floor
outlets and defrost outlets. A slight amount of air is
also directed through the side window demister outlets.
NOTE:In many temperature positions, the BI-LEVEL
mode is designed to provide cooler air out of the panel
outlets and warmer air from the floor outlets.
Floor Mode
Air comes from the floor outlets. A slight amount of
air is directed through the defrost and side window
demister outlets.Mix Mode
Air comes from the floor, defrost and side window
demist outlets. This mode works best in cold or
snowy conditions. It allows you to stay comfort-
able, while keeping the windshield clear.
Defrost Mode
Air comes from the windshield and side window
demist outlets. Use DEFROST mode with maxi-
mum blower and temperature settings for best wind-
shield and side window defrosting.
NOTE:While operating in the other modes, the system
will not automatically sense the presence of fog, mist or
ice on the windshield. DEFROST mode must be manually
selected to clear the windshield and side glass.
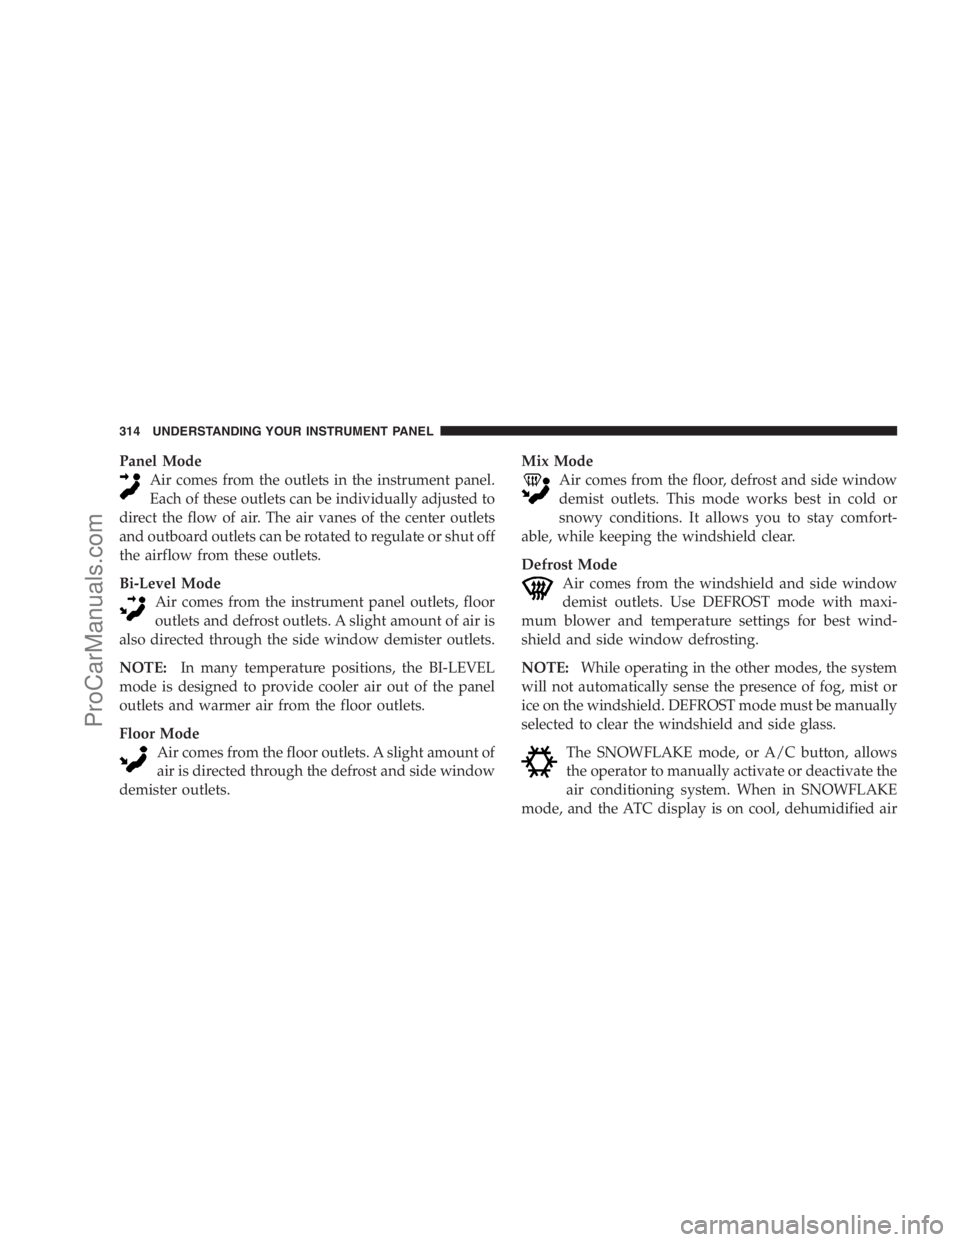
The SNOWFLAKE mode, or A/C button, allows
the operator to manually activate or deactivate the
air conditioning system. When in SNOWFLAKE
mode, and the ATC display is on cool, dehumidified air
314 UNDERSTANDING YOUR INSTRUMENT PANEL
ProCarManuals.com
Page 320 of 534
Rear Temperature Control
To change the temperature in the rear of the vehicle,
rotate the temperature knob counterclockwise to lower
the temperature, and clockwise to increase the tempera-
ture. The REAR temperature settings are displayed in the
front upper ATC panel.
When rear controls are locked by the front system, the
LOCK symbol on the temperature knob is illuminated
and any rear overhead adjustments are ignored.
Rear Mode Control
Auto Mode
The rear system automatically maintains the correct
mode and comfort level desired by the rear seat occu-
pants.Headliner Mode
Air comes from the outlets in the headliner. Each of
these outlets can be individually adjusted to direct
the flow of air. Moving the air vanes of the outlets to one
side will shut off the airflow.
Bi-Level Mode
Air comes from both the headliner outlets and the
floor outlets.
NOTE:In many temperature positions, the BI-LEVEL
mode is designed to provide cooler air out of the head-
liner outlets and warmer air from the floor outlets.
Floor Mode
Air comes from the floor outlets.
Summer Operation
The engine cooling system in air conditioned vehicles
must be protected with a high-quality antifreeze coolant
318 UNDERSTANDING YOUR INSTRUMENT PANEL
ProCarManuals.com
Page 321 of 534
to provide proper corrosion protection and to protect
against engine overheating. A 50% solution of ethylene
glycol antifreeze coolant in water is recommended. Refer
to “Maintenance Procedures” in Section 7 of this manual
for proper coolant selection.
Winter Operation
To ensure the best possible heater and defroster perfor-
mance, make sure the engine cooling system is function-
ing properly and the proper amount, type, and concen-
tration of coolant is used. Refer to “Maintenance
Procedures” in section 7 of this manual for proper coolant
selection. Use of the air RECIRCULATION mode during
Winter months is not recommended, because it may
cause window fogging.
Vacation/Storage
Anytime you store your vehicle, or keep it out of service
(i.e., vacation) for two weeks or more, run the air
conditioning system at idle for about five minutes, infresh air with the blower setting in high. This will ensure
adequate system lubrication to minimize the possibility
of compressor damage when the system is started again.
Window Fogging
Vehicle windows tend to fog on the inside in mild, rainy
and/or humid weather. To clear the windows, select
DEFROST or MIX mode and increase the front blower
speed. Do not use the RECIRCULATION mode without
A/C for long periods, as fogging may occur.
Outside Air Intake
Make sure the air intake, located directly in front of the
windshield, is free of obstructions such as leaves. Leaves
collected in the air intake may reduce airflow, and if they
enter the plenum they could plug the water drains. In
Winter months make sure the air intake is clear of ice,
slush and snow.
UNDERSTANDING YOUR INSTRUMENT PANEL 319
4
ProCarManuals.com
Page 322 of 534
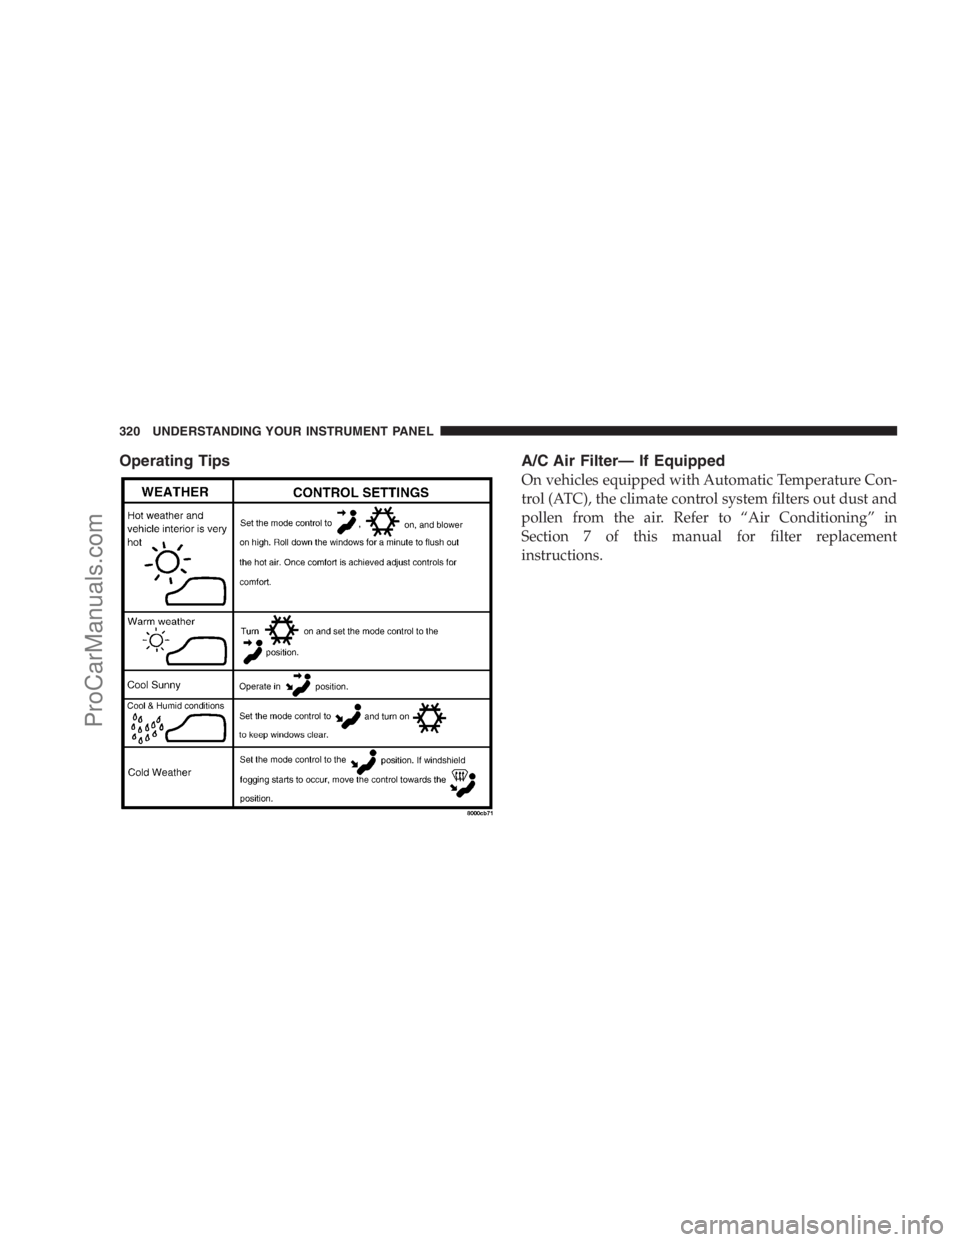
Operating Tips A/C Air Filter— If Equipped
On vehicles equipped with Automatic Temperature Con-
trol (ATC), the climate control system filters out dust and
pollen from the air. Refer to “Air Conditioning” in
Section 7 of this manual for filter replacement
instructions.
320 UNDERSTANDING YOUR INSTRUMENT PANEL
ProCarManuals.com
Page 362 of 534
is defined as the tire pressure after the vehicle has not
been driven for at least three hours, or driven less than
1 mile (1.6 km) after a three-hour period. The cold tire
inflation pressure must not exceed the maximum infla-
tion pressure molded into the tire sidewall.
Check tire pressures more often if subject to a wide range
of outdoor temperatures, as tire pressures vary with
temperature changes.
Tire pressures change by approximately 1 psi (7 kPa) per
12° F (7° C) of air temperature change. Keep this in mind
when checking tire pressure inside a garage, especially in
the Winter.
Example: If garage temperature is 68°F (20°C) and the
outside temperature is 32°F (0°C), then the cold tire
inflation pressure should be increased by 3 psi (21 kPa),
which equals 1 psi (7 kPa) for every 12°F (7°C) for this
outside temperature condition.Tire pressure may increase from 2 to 6 psi (13 to 40 kPa)
during operation. Do not reduce this normal pressure
buildup or your tire pressure will be too low.
Tire Pressures for High-Speed Operation
The manufacturer advocates driving at safe speeds
within posted speed limits. Where speed limits or condi-
tions are such that the vehicle can be driven at high
speeds, maintaining correct tire inflation pressure is very
important. Increased tire pressure and reduced vehicle
loading may be required for high-speed vehicle opera-
tion. Refer to original-equipment information, or an
authorized tire dealer, for recommended safe operating
speeds, loading and cold tire inflation pressures.
360 STARTING AND OPERATING
ProCarManuals.com
Page 365 of 534
WARNING!
•The limited-use spare tire is for emergency use
only. Installation of this limited-use spare tire
affects vehicle handling.
•Do not drive more than 50 mph (80 km/h) with a
limited-use spare tire.
•Keep the limited-use spare tire inflated to the cold
tire inflation pressure, listed on either your tire
placard or limited use spare tire and wheel assem-
bly.
•Replace (or repair) the original tire at the first
opportunity and reinstall it on your vehicle. Fail-
ure to do so could result in loss of vehicle control.
Tire Spinning
When stuck in mud, sand, snow, or ice conditions, do not
spin your vehicle’s wheels faster than 30 mph (48 km/h),
or continuously for longer than 30 seconds, without
stopping.
Refer to “Freeing A Stuck Vehicle” in Section 6 of this
manual for additional information.
WARNING!
•Fast spinning tires can be dangerous. Forces gen-
erated by excessive wheel speeds may cause tire
damage or failure. A tire could explode and injure
someone.
•Do not spin your vehicle’s wheels faster than 30 mph
(48 km/h), or for more than 30 seconds continuously,
when you are stuck; and do not let anyone near a
spinning wheel, no matter what the speed.
STARTING AND OPERATING 363
5
ProCarManuals.com
Page 372 of 534
TIRE PRESSURE MONITOR SYSTEM (TPMS)
The TPMS will warn the driver of a low tire pressure
based on the cold inflation tire pressure requirements
found on the tire placard located on the driver’s-side
B-pillar.
The tire pressure will vary with temperature by about
1 psi (6.9 kPa) for every 12°F (6.5°C). This means that
when the outside temperature decreases, the tire pressure
will decrease. Tire pressure should always be set based
on cold inflation tire pressure. This is defined as the tire
pressure after a vehicle has not been driven for more than
three hours - and in outside ambient temperature.Refer
to the “Tires – General Information” in this section for
information on how to properly inflate the vehicle’s
tires.The tire pressure will also increase as the vehicle is
driven - this is normal and there should be no adjustment
for this increased pressure.The TPMS will warn the driver of a low tire pressure if
the tire pressure falls below the low pressure warning
threshold for any reason, including low temperature
effects, or natural air pressure loss through the tire.
The TPMS will continue to warn the driver of low tire
pressure as long as the condition exists, and will not turn
off until the tire pressure is at or above recommended
cold tire placard pressure. Once the low tire pressure
warning has been illuminated, the tire pressure must be
increased to the recommended cold tire placard pressure
in order for the TPMS warning lamp to be turned off. The
system will automatically update and the TPMS warning
lamp will extinguish once the updated tire pressures
have been received. The vehicle may need to be driven
for up to 10 minutes above 15 mph (25 km/h) to receive
this information.
370 STARTING AND OPERATING
ProCarManuals.com