warning DODGE CHALLENGER 2012 3.G Owner's Manual
[x] Cancel search | Manufacturer: DODGE, Model Year: 2012, Model line: CHALLENGER, Model: DODGE CHALLENGER 2012 3.GPages: 124, PDF Size: 4.99 MB
Page 23 of 124
WARNING!
• Persons who are unable to feel pain to the skin because of advanced age,chronic illness, diabetes, spinal cord injury, medication, alcohol use,
exhaustion or other physical conditions must exercise care when using the
seat heater. It may cause burns even at low temperatures, especially if used
for long periods of time.
• Do not place anything on the seat that insulates against heat, such as a blanket or cushion. This may cause the seat heater to overheat. Sitting in a
seat that has been overheated could cause serious burns due to the increased
surface temperature of the seat.
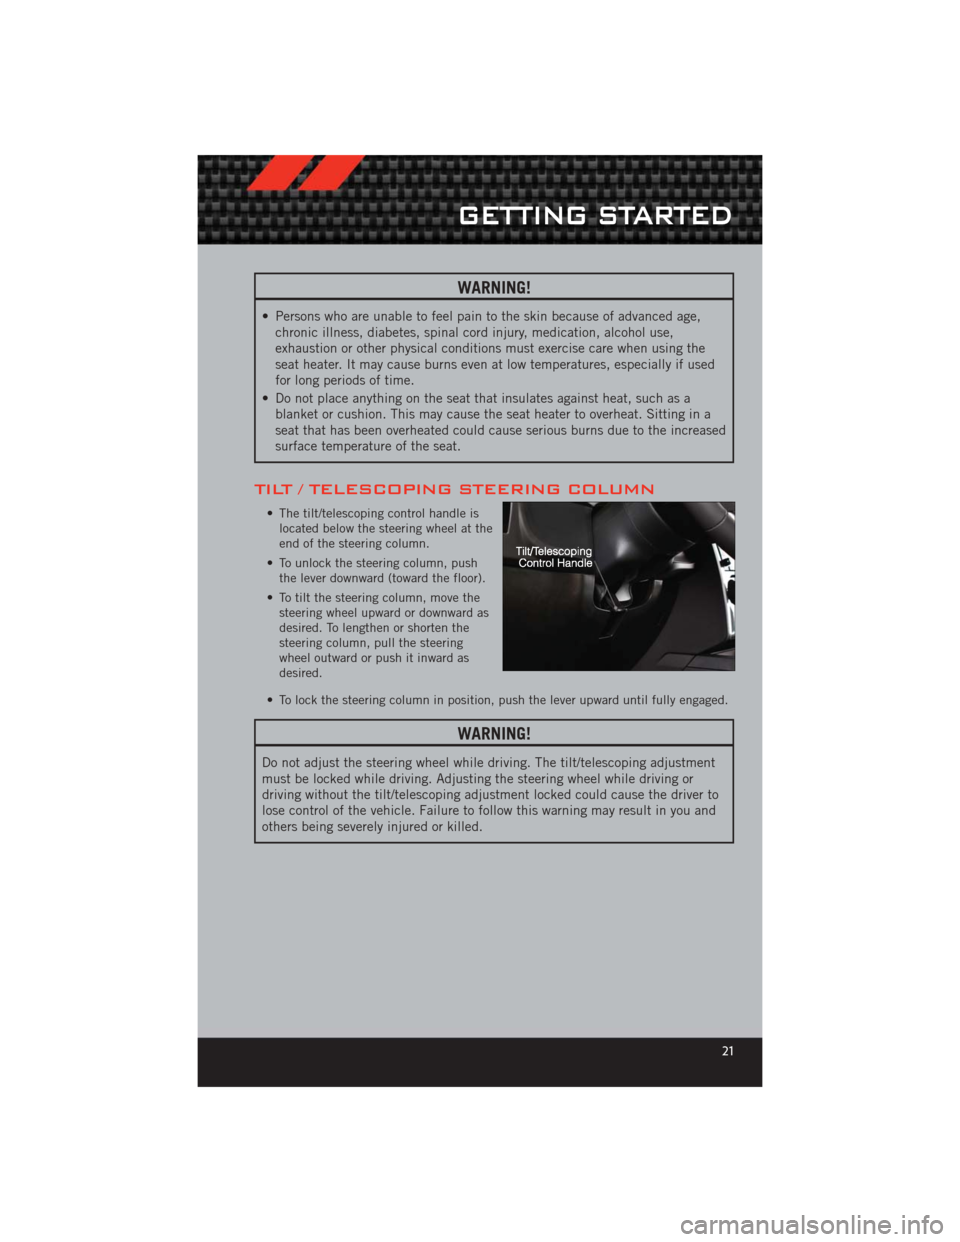
TILT / TELESCOPING STEERING COLUMN
• The tilt/telescoping control handle islocated below the steering wheel at the
end of the steering column.
• To unlock the steering column, push the lever downward (toward the floor).
• To tilt the steering column, move the steering wheel upward or downward as
desired. To lengthen or shorten the
steering column, pull the steering
wheel outward or push it inward as
desired.
• To lock the steering column in position, push the lever upward until fully engaged.
WARNING!
Do not adjust the steering wheel while driving. The tilt/telescoping adjustment
must be locked while driving. Adjusting the steering wheel while driving or
driving without the tilt/telescoping adjustment locked could cause the driver to
lose control of the vehicle. Failure to follow this warning may result in you and
others being severely injured or killed.
GETTING STARTED
21
Page 27 of 124
WARNING!
• Leaving the Electronic Speed Control system on when not in use isdangerous. You could accidentally set the system or cause it to go faster than
you want. You could lose control and have a collision. Always leave the
Electronic Speed Control system off when you are not using it.
• Electronic Speed Control can be dangerous where the system cannot maintain a constant speed. Your vehicle could go too fast for the conditions,
and you could lose control. A collision could be the result. Do not use
Electronic Speed Control in heavy traffic or on roads that are winding, icy,
snow-covered or slippery.
MANUAL TRANSMISSION 1 TO 4 SKIP SHIFT
• Skip Shift is enabled when vehicle speed is between 19 MPH (30 km/h) and21 MPH (34 km/h) and the accelerator pedal is at 1/4 throttle or less.
• For optimal fuel economy, under low acceleration conditions, your vehicle will only allow you to shift from first gear to fourth gear. Additionally, the skip shift message
will appear on the Electronic Vehicle Information Center.
• Refer to your Owner's Manual on the DVD for further information.
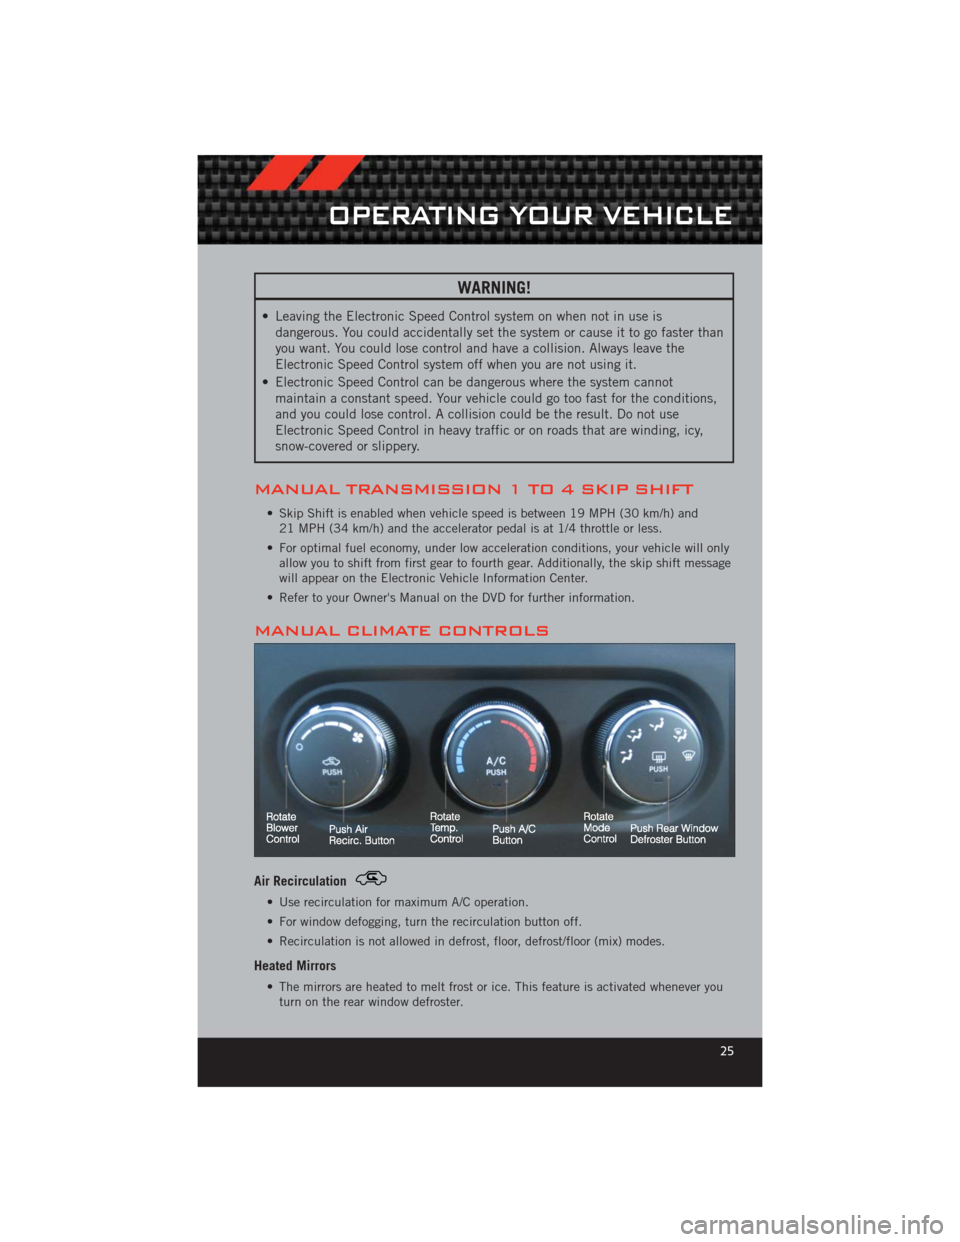
MANUAL CLIMATE CONTROLS
Air Recirculation
• Use recirculation for maximum A/C operation.
• For window defogging, turn the recirculation button off.
• Recirculation is not allowed in defrost, floor, defrost/floor (mix) modes.
Heated Mirrors
• The mirrors are heated to melt frost or ice. This feature is activated whenever you turn on the rear window defroster.
OPERATING YOUR VEHICLE
25
Page 29 of 124
Closing Sunroof
Express• Press the switch forward and release. The sunroof will close automatically from anyposition.
Manual Open/Close
• Press and hold the switch rearward to open or forward to close the sunroof. Anyrelease of the switch will stop the movement, and the sunroof will remain in a
partially open or closed position until the switch is pressed again.
Venting Sunroof
• Press and release the "VENT" button, and the sunroof will open to the ventposition. This is called “Express Vent” and will occur regardless of sunroof
position. During Express Vent operation, any movement of the switch will stop the
sunroof.
Pinch Protection Feature
• This feature will detect an obstruction in the opening of the sunroof during ExpressClose operation. If an obstruction in the path of the sunroof is detected, the
sunroof will automatically retract. Remove the obstruction if this occurs. Next,
press the switch forward and release to Express Close.
NOTE: If three consecutive sunroof close attempts result in Pinch Protect reversals, the
fourth close attempt will be a Manual Close movement with Pinch Protect disabled.
WARNING!
• Never leave children in a vehicle with the key in the ignition switch. Occupants, particularly unattended children, can become entrapped by the
power sunroof while operating the power sunroof switch. Such entrapment
may result in serious injury or death.
• In a collision, there is a greater risk of being thrown from a vehicle with an open sunroof. You could also be severely injured or killed. Always fasten your
seat belt properly and make sure all passengers are properly secured.
• Do not allow small children to operate the sunroof. Never allow your fingers, other body parts, or any object to project through the sunroof opening. Injury
may result.
WIND BUFFETING
• Wind buffeting can be described as a helicopter-type percussion sound. Ifbuffeting occurs with the rear windows open, adjust the front and rear windows
together.
• If buffeting occurs with the sunroof open, adjust the sunroof opening, or adjust any window. This will minimize buffeting.
OPERATING YOUR VEHICLE
27
Page 60 of 124
Phonebook Edit• Press the “Phone” button
.
• (After the BEEP), say “phonebook”.
• (After the BEEP), say “new entry” or “list names” or “delete”.
• Follow the prompts.
Making A Phone Call
• Press the “Phone” button.
• (After the BEEP), say “dial” (or “call” a name).
• (After the BEEP), say number (or name).
Receiving A Call – Accept (And End)
• When an incoming call rings/is announced on Uconnect™, press the Phone button.
• To end a call, press the Phone button
.
Mute (Or Unmute) Microphone During Call
• During a call, press the “Voice Command” button.
• (After the BEEP), say “mute” (or “mute off”).
Transfer Ongoing Call Between Handset And Vehicle
• During a call, press the “Voice Command” button.
• (After the BEEP), say “transfer call”.
Changing The Volume
• Start a dialogue by pressing the “Phone” button, then adjust the volume
during a normal call.
• Use the radio ON/OFF VOLUME rotary knob to adjust the volume to a comfortable level while the Uconnect™ system is speaking. Please note the volume setting for
Uconnect™ is different than the audio system.
WARNING!
• Any voice commanded system should be used only in safe driving conditionsfollowing local laws and phone use. All attention should be kept on the
roadway ahead. Failure to do so may result in a collision causing you and
others to be severely injured or killed.
• In an emergency, to use Uconnect™ Phone, your mobile phone must be: • turned on,
• paired to Uconnect™ Phone,
• and have network coverage.
ELECTRONICS
58
Page 62 of 124
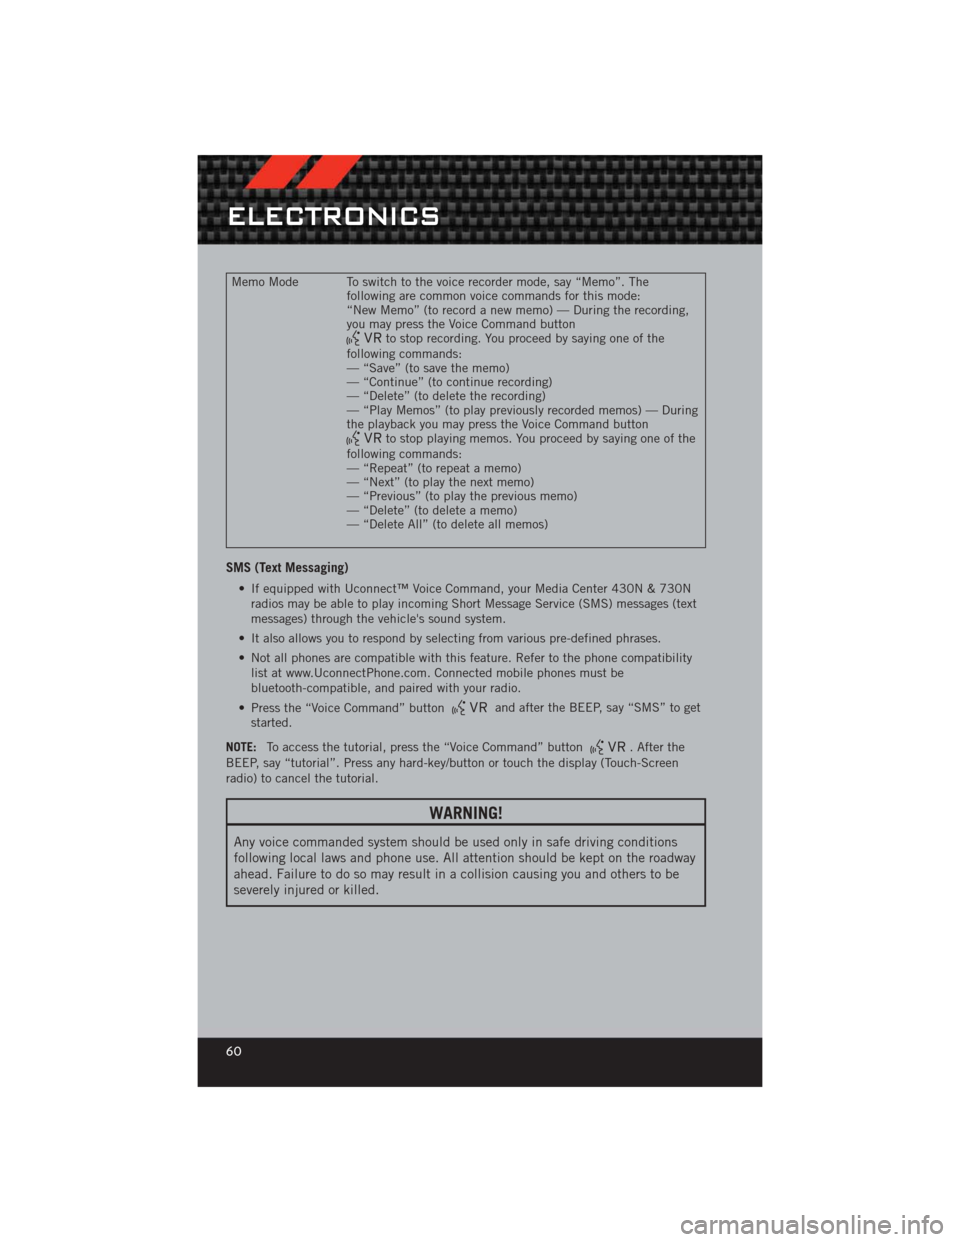
Memo Mode To switch to the voice recorder mode, say “Memo”. Thefollowing are common voice commands for this mode:
“New Memo” (to record a new memo) — During the recording,
you may press the Voice Command button
to stop recording. You proceed by saying one of the
following commands:
— “Save” (to save the memo)
— “Continue” (to continue recording)
— “Delete” (to delete the recording)
— “Play Memos” (to play previously recorded memos) — During
the playback you may press the Voice Command button
to stop playing memos. You proceed by saying one of the
following commands:
— “Repeat” (to repeat a memo)
— “Next” (to play the next memo)
— “Previous” (to play the previous memo)
— “Delete” (to delete a memo)
— “Delete All” (to delete all memos)
SMS (Text Messaging)
• If equipped with Uconnect™ Voice Command, your Media Center 430N & 730N radios may be able to play incoming Short Message Service (SMS) messages (text
messages) through the vehicle's sound system.
• It also allows you to respond by selecting from various pre-defined phrases.
• Not all phones are compatible with this feature. Refer to the phone compatibility list at www.UconnectPhone.com. Connected mobile phones must be
bluetooth-compatible, and paired with your radio.
• Press the “Voice Command” button
and after the BEEP, say “SMS” to get
started.
NOTE: To access the tutorial, press the “Voice Command” button
. After the
BEEP, say “tutorial”. Press any hard-key/button or touch the display (Touch-Screen
radio) to cancel the tutorial.
WARNING!
Any voice commanded system should be used only in safe driving conditions
following local laws and phone use. All attention should be kept on the roadway
ahead. Failure to do so may result in a collision causing you and others to be
severely injured or killed.
ELECTRONICS
60
Page 64 of 124
NOTE:
• The USB port supports certain Mini, Classic, Nano, Touch, and iPhone®devices. The
USB port also supports playing music from compatible external USB Mass Storage
Class memory devices. For supported audio file formats, refer to the USB Port
section in the Owner's Manual on the DVD. Refer to www.UconnectPhone.com for a
list of tested iPod
®s. Some iPod®software versions may not fully support the USB
port features. Please visit Apple’s website for iPod®software updates.
WARNING!
Do not plug in or remove the iPod®or external device while driving. Failure to
follow this warning could result in a collision.
ELECTRONIC VEHICLE INFORMATION CENTER
(EVIC)
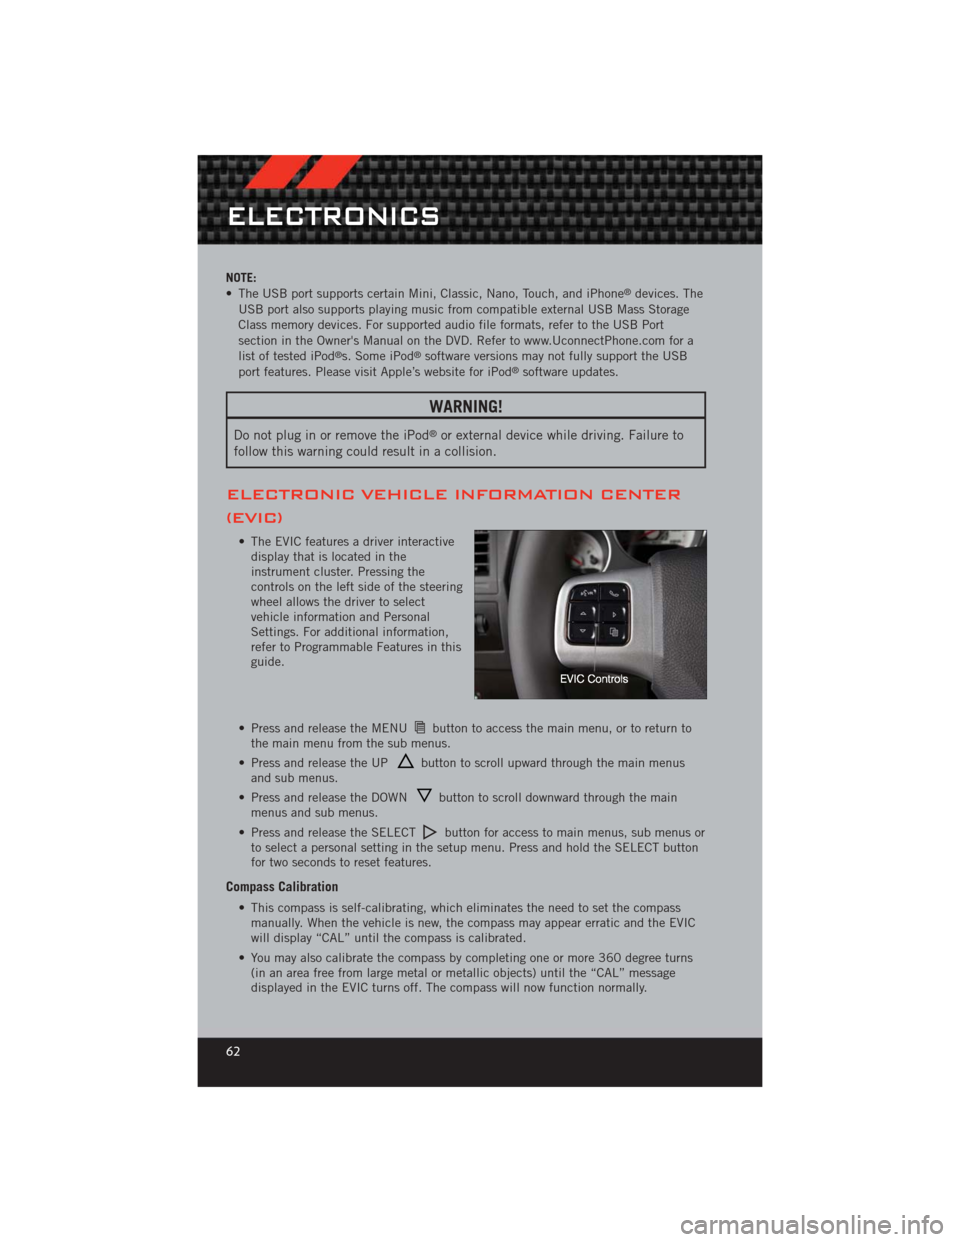
• The EVIC features a driver interactive display that is located in the
instrument cluster. Pressing the
controls on the left side of the steering
wheel allows the driver to select
vehicle information and Personal
Settings. For additional information,
refer to Programmable Features in this
guide.
• Press and release the MENU
button to access the main menu, or to return to
the main menu from the sub menus.
• Press and release the UP
button to scroll upward through the main menus
and sub menus.
• Press and release the DOWN
button to scroll downward through the main
menus and sub menus.
• Press and release the SELECT
button for access to main menus, sub menus or
to select a personal setting in the setup menu. Press and hold the SELECT button
for two seconds to reset features.
Compass Calibration
• This compass is self-calibrating, which eliminates the need to set the compass manually. When the vehicle is new, the compass may appear erratic and the EVIC
will display “CAL” until the compass is calibrated.
• You may also calibrate the compass by completing one or more 360 degree turns (in an area free from large metal or metallic objects) until the “CAL” message
displayed in the EVIC turns off. The compass will now function normally.
ELECTRONICS
62
Page 68 of 124
Programming A Non-Rolling Code
• For programming Garage Door Openers manufactured before 1995.
• Turn the ignition switch to the ON/RUN position.
• Place the hand-held transmitter 1 to 3 in (3 to 8 cm) away from the HomeLink
®
button you wish to program while keeping the HomeLink®indicator light in view.
• Simultaneously press and hold both the HomeLink
®button you want to program
and the hand-held transmitter button.
• Continue to hold buttons until the EVIC display changes from “CHANNEL # TRAINING” to “CHANNEL # TRAINED”, then release both buttons.
• Press and hold the programmed HomeLink
®button and observe the indicator light.
NOTE:
• If the EVIC displays “DID NOT TRAIN” repeat Programming A Non-Rolling Code.
• To program the two remaining HomeLink
®buttons, repeat each step for each
remaining button. DO NOT erase the channels.
Using HomeLink®
• To operate, press and release the programmed HomeLink®button. Activation will
now occur for the programmed device (i.e., garage door opener, gate operator,
security system, entry door lock, home/office lighting, etc.,). The hand-held
transmitter of the device may also be used at any time.
WARNING!
• Your motorized door or gate will open and close while you are programming the universal transceiver. Do not program the transceiver if people or pets are
in the path of the door or gate.
• Do not run your vehicle in a closed garage or confined area while programming the transceiver. Exhaust gas from your vehicle contains Carbon
Monoxide (CO) which is odorless and colorless. Carbon Monoxide is
poisonous when inhaled and can cause you and others to be severely injured
or killed.
ELECTRONICS
66
Page 73 of 124
WARNING!
Do not downshift for additional engine braking on a slippery surface. The drive
wheels could lose their grip and the vehicle could skid, causing a collision or
personal injury.
ELECTRONIC CONTROL DAMPING SYSTEM
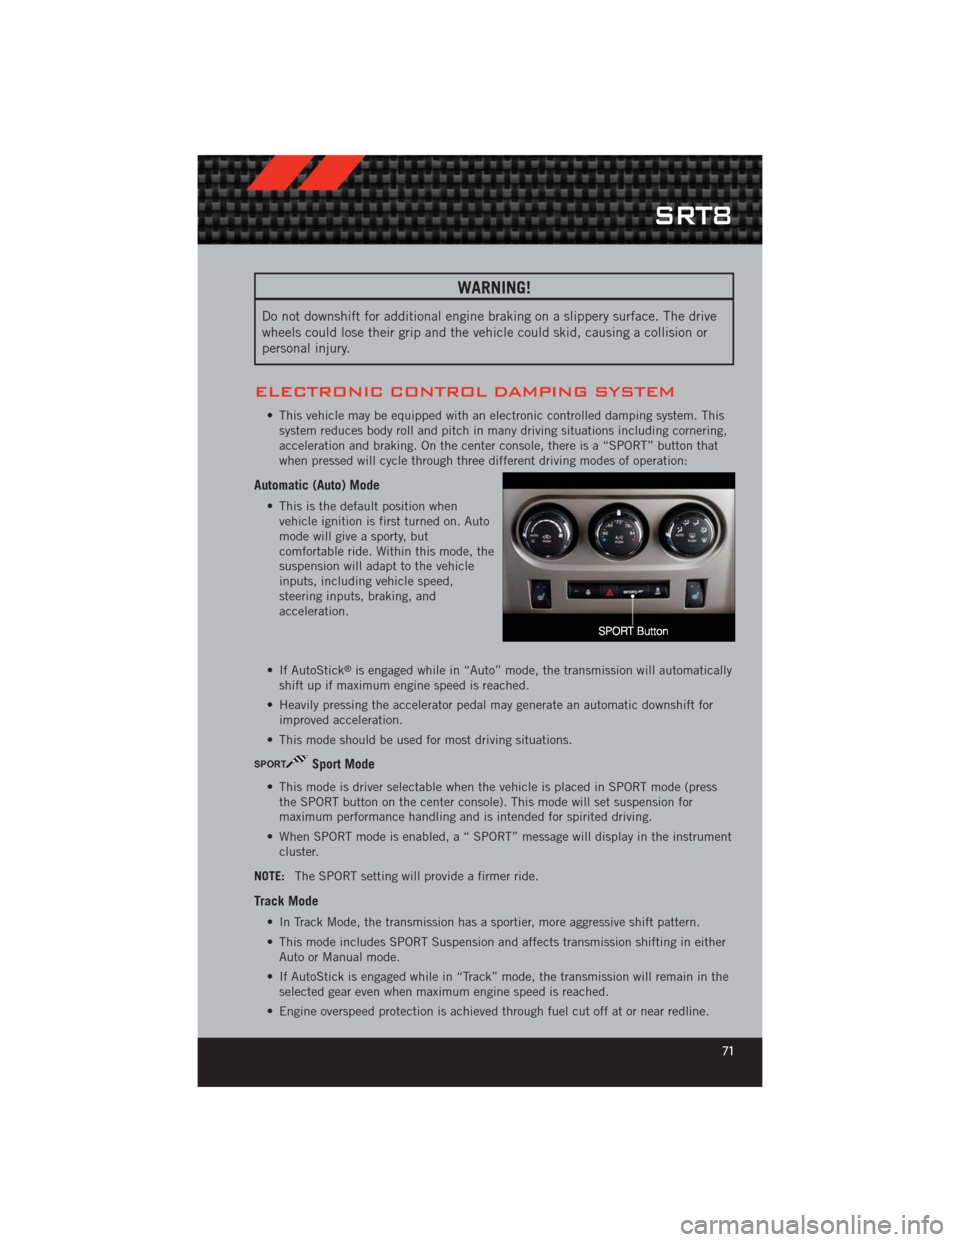
• This vehicle may be equipped with an electronic controlled damping system. Thissystem reduces body roll and pitch in many driving situations including cornering,
acceleration and braking. On the center console, there is a “SPORT” button that
when pressed will cycle through three different driving modes of operation:
Automatic (Auto) Mode
• This is the default position whenvehicle ignition is first turned on. Auto
mode will give a sporty, but
comfortable ride. Within this mode, the
suspension will adapt to the vehicle
inputs, including vehicle speed,
steering inputs, braking, and
acceleration.
• If AutoStick
®is engaged while in “Auto” mode, the transmission will automatically
shift up if maximum engine speed is reached.
• Heavily pressing the accelerator pedal may generate an automatic downshift for improved acceleration.
• This mode should be used for most driving situations.
SPORTSport Mode
• This mode is driver selectable when the vehicle is placed in SPORT mode (press the SPORT button on the center console). This mode will set suspension for
maximum performance handling and is intended for spirited driving.
• When SPORT mode is enabled, a “ SPORT” message will display in the instrument cluster.
NOTE: The SPORT setting will provide a firmer ride.
Track Mode
• In Track Mode, the transmission has a sportier, more aggressive shift pattern.
• This mode includes SPORT Suspension and affects transmission shifting in either
Auto or Manual mode.
• If AutoStick is engaged while in “Track” mode, the transmission will remain in the selected gear even when maximum engine speed is reached.
• Engine overspeed protection is achieved through fuel cut off at or near redline.
SRT8
71
Page 75 of 124
Peak G-Force• When selected, this screen displays all four G-Force values (two lateral and twolongitudinal).
Digital Speedometer • When selected, this screen displays vehicle speed and records top speed.
WARNING!
Measurement of vehicle statistics with the Performance Features is intended for
off-highway or off-road use only and should not be done on any public
roadways. It is recommended that these features be used in a controlled
environment and within the limits of the law. The capabilities of the vehicle as
measured by the performance pages must never be exploited in a reckless or
dangerous manner, which can jeopardize the user’s safety or the safety of
others. Only a safe, attentive, and skillful driver can prevent accidents.
SUMMER/THREE-SEASON TIRES
• This vehicle may be equipped with wheels and tires to enhance traction in bothwet and dry conditions.
• Summer tires are not intended to be driven in snow or on ice.
• Use summer tires only in sets of four.
NOTE: Summer tires will not contain the all season designation or mountain/snowflake
symbol on the sidewall of the tire.
WARNING!
Do not use summer tires in snow/ice conditions. You could lose control,
resulting in severe injury or death.
SRT8
73
Page 76 of 124
24-HOUR TOWING ASSISTANCE
• Dial toll-free 1-800-521-2779 or 1-800-363-4869 for Canadian residents.
• Provide your name, vehicle identification number and license plate number.
• Provide your location, including telephone number, from which you are calling.
• Briefly describe the nature of the problem and answer a few simple questions.
• You will be given the name of the service provider and an estimated time of arrival.If you feel you are in an “unsafe situation”, please let us know. With your consent,
we will contact local police or safety authorities.
INSTRUMENT CLUSTER WARNING LIGHTS
- Electronic Stability Control (ESC) Activation/Malfunction Indicator Light
• The “ESC Activation/Malfunction Indicator Light” in the instrument cluster willcome on when the ignition switch is turned to the ON/RUN position. It should go
out with the engine running. If the “ESC Activation/Malfunction Indicator Light”
comes on continuously with the engine running, a malfunction has been detected
in the ESC system.
• If this light remains on after several ignition cycles, and the vehicle has been driven several miles (kilometers) at speeds greater than 30 mph (48 km/h), we
recommend you drive to the nearest service center and have the vehicle serviced
immediately.
- Tire Pressure Monitoring System (TPMS) Light
• Each tire, including the spare (if provided), should be checked monthly, when coldand inflated to the inflation pressure recommended by the vehicle manufacturer on
the vehicle placard or tire inflation pressure label. (If your vehicle has tires of a
different size than the size indicated on the vehicle placard or tire inflation
pressure label, you should determine the proper tire inflation pressure for those
tires.)
• As an added safety feature, your vehicle has been equipped with a Tire Pressure Monitoring System (TPMS) that illuminates a low tire pressure telltale when one or
more of your tires is significantly under-inflated. Accordingly, when the low tire
pressure telltale illuminates, you should stop and check your tires as soon as
possible, and inflate them to the proper pressure. Driving on a significantly
under-inflated tire causes the tire to overheat and can lead to tire failure.
Under-inflation also reduces fuel efficiency and tire tread life, and may affect the
vehicle’s handling and stopping ability.
• IF THE LIGHT STARTS FLASHING INDICATING A LOW TIRE PRESSURE, ADJUST THE AIR
PRESSURE IN THE LOW TIRE TO THE AIR PRESSURE SHOWN ON THE VEHICLE PLACARD
OR TIRE INFLATION PRESSURE LABEL LOCATED ON THE DRIVER'S DOOR. NOTE: AFTER
INFLATION, THE VEHICLE MAY NEED TO BE DRIVEN FOR 20 MINUTES BEFORE THE
FLASHING LIGHT WILL TURN OFF.
• Please note that the TPMS is not a substitute for proper tire maintenance, and it is the driver’s responsibility to maintain correct tire pressure, even if under-inflation
has not reached the level to trigger illumination of the TPMS low tire pressure
telltale.
WHAT TO DO IN EMERGENCIES
74