display DODGE CHALLENGER 2013 3.G Owner's Guide
[x] Cancel search | Manufacturer: DODGE, Model Year: 2013, Model line: CHALLENGER, Model: DODGE CHALLENGER 2013 3.GPages: 140, PDF Size: 5.35 MB
Page 71 of 140
Sound Horn With Lock
• To turn the horn chirp on or off when the doors are locked:
• Press the LOCK button for at least four seconds, but no longer than 10 seconds. Then,
press the PANIC button while still holding the LOCK button.
• Release both buttons at the same time.
Flashing Lights With Lock
• The turn signal lights flashing, when the doors are locked or unlocked, feature can be
turned on or off. To turn this feature on or off:
•
Press and hold the UNLOCK button for at least four seconds, but no longer than 10 sec-
onds. Then, press and hold the LOCK button while still holding the UNLOCK button.
• Release both buttons at the same time.
UNIVERSAL GARAGE DOOR OPENER (HomeLink®)
•HomeLink® replaces up to three hand-held transmitters that operate devices such as
garage door openers, motorized gates, lighting or home security systems. The HomeLink®
unit is powered by your vehicles 12 Volt battery.
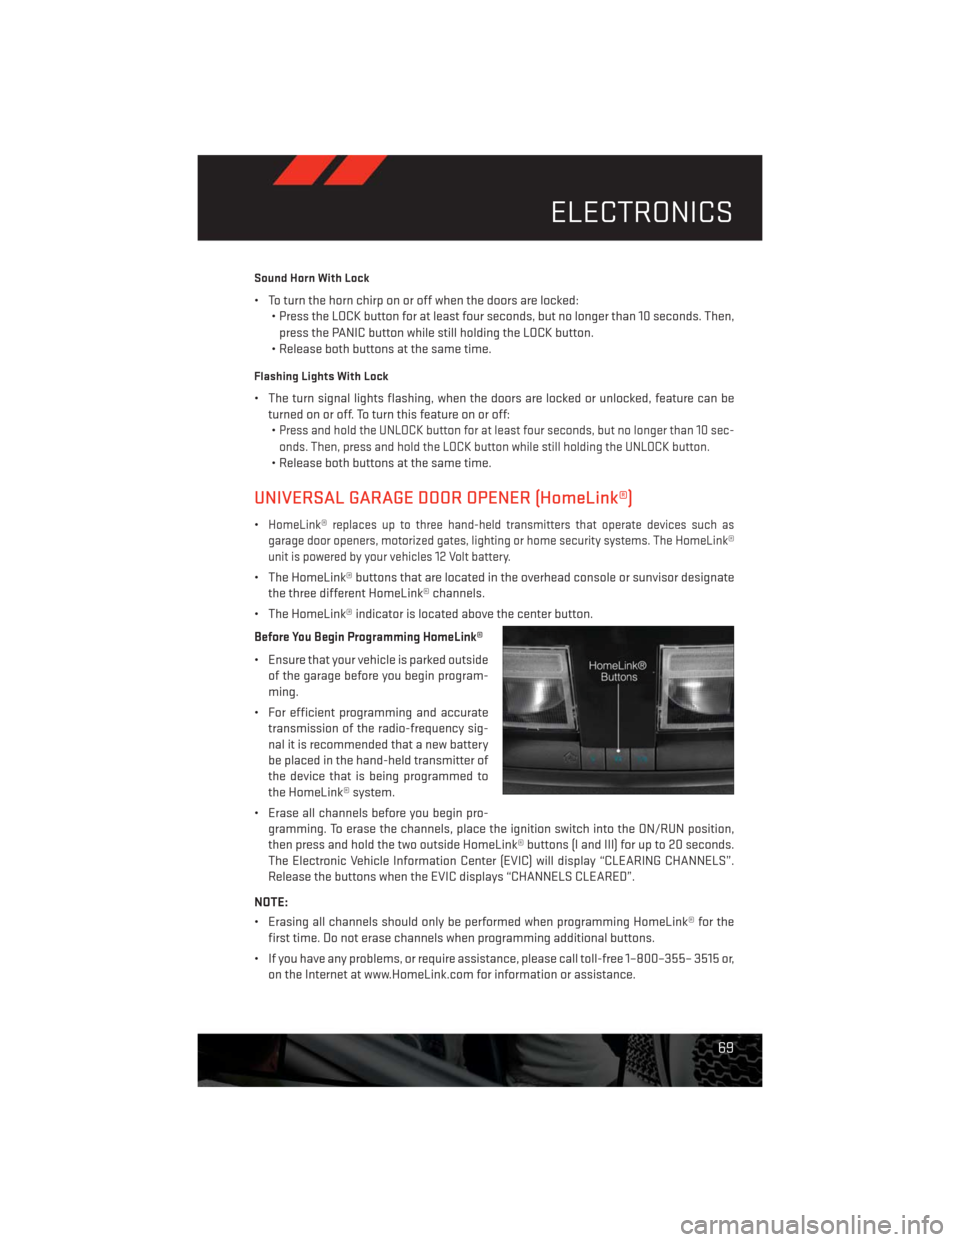
• The HomeLink® buttons that are located in the overhead console or sunvisor designate
the three different HomeLink® channels.
• The HomeLink® indicator is located above the center button.
Before You Begin Programming HomeLink®
• Ensure that your vehicle is parked outside
of the garage before you begin program-
ming.
• For efficient programming and accurate
transmission of the radio-frequency sig-
nal it is recommended that a new battery
be placed in the hand-held transmitter of
the device that is being programmed to
the HomeLink® system.
• Erase all channels before you begin pro-
gramming. To erase the channels, place the ignition switch into the ON/RUN position,
then press and hold the two outside HomeLink® buttons (I and III) for up to 20 seconds.
The Electronic Vehicle Information Center (EVIC) will display “CLEARING CHANNELS”.
Release the buttons when the EVIC displays “CHANNELS CLEARED”.
NOTE:
• Erasing all channels should only be performed when programming HomeLink® for the
first time. Do not erase channels when programming additional buttons.
• If you have any problems, or require assistance, please call toll-free 1–800–355– 3515 or,
on the Internet at www.HomeLink.com for information or assistance.
ELECTRONICS
69
Page 72 of 140
Programming A Rolling Code
• For programming Garage Door Openers that were manufactured after 1995. These
Garage Door Openers can be identified by the “LEARN” or “TRAIN” button located where
the hanging antenna is attached to the Garage Door Opener. It is NOT the button that is
normally used to open and close the door. The name and color of the button may vary by
manufacturer.
1. Place the ignition switch into the ON/RUN position.
2. Place the hand-held transmitter 1 to 3 in (3 to 8 cm) away from the HomeLink® button you
wish to program while keeping the HomeLink® indicator light in view.
3. Simultaneously press and hold both the Homelink® button you want to program and the
hand-held transmitter button.
4. Continue to hold buttons until the EVIC display changes from “CHANNEL # TRAINING” to
“CHANNEL # TRAINED”, then release both buttons.
NOTE:
If the EVIC displays “DID NOT TRAIN” repeat from Step 2.
5. At the garage door opener motor (in the garage), locate the “LEARN” or “TRAINING”
button. This can usually be found where the hanging antenna wire is attached to the
garage door opener motor. Firmly press and release the “LEARN” or “TRAINING” button.
NOTE:
You have 30 seconds in which to initiate the next step after the LEARN button has been
pressed.
6. Return to the vehicle and press the programmed HomeLink® button twice (holding the
button for two seconds each time). The EVIC will display “CHANNEL # TRANSMIT”. If the
garage door opener/device activates, programming is complete.
NOTE:
If the device does not activate, press the button a third time (for two seconds) to complete
the training.
7. To program the remaining two HomeLink® buttons, repeat each step for each remaining
button. DO NOT erase the channels.
ELECTRONICS
70
Page 73 of 140
Programming A Non-Rolling Code
• For programming Garage Door Openers manufactured before 1995.
1. Turn the ignition switch to the ON/RUN position.
2. Place the hand-held transmitter 1 to 3 in (3 to 8 cm) away from the HomeLink® button you
wish to program while keeping the HomeLink® indicator light in view.
3. Simultaneously press and hold both the HomeLink® button you want to program and the
hand-held transmitter button.
4. Continue to hold buttons until the EVIC display changes from “CHANNEL # TRAINING” to
“CHANNEL # TRAINED”, then release both buttons.
5. Press and hold the programmed HomeLink® button and observe the indicator light.
NOTE:
• If the EVIC displays “DID NOT TRAIN” repeat from Step 2.
• To program the two remaining HomeLink® buttons, repeat each step for each remaining
button. DO NOT erase the channels.
Using HomeLink®
• To operate, press and release the programmed HomeLink® button. Activation will now
occur for the programmed device (i.e., garage door opener, gate operator, security
system, entry door lock, home/office lighting, etc.,). The hand-held transmitter of the
device may also be used at any time.
WARNING!
• Your motorized door or gate will open and close while you are programming the
universal transceiver. Do not program the transceiver if people or pets are in the path
of the door or gate.
• Do not run your vehicle in a closed garage or confined area while programming the
transceiver. Exhaust gas from your vehicle contains Carbon Monoxide (CO) which is
odorless and colorless. Carbon Monoxide is poisonous when inhaled and can cause
you and others to be severely injured or killed.
ELECTRONICS
71
Page 76 of 140
AUTOSTICK®
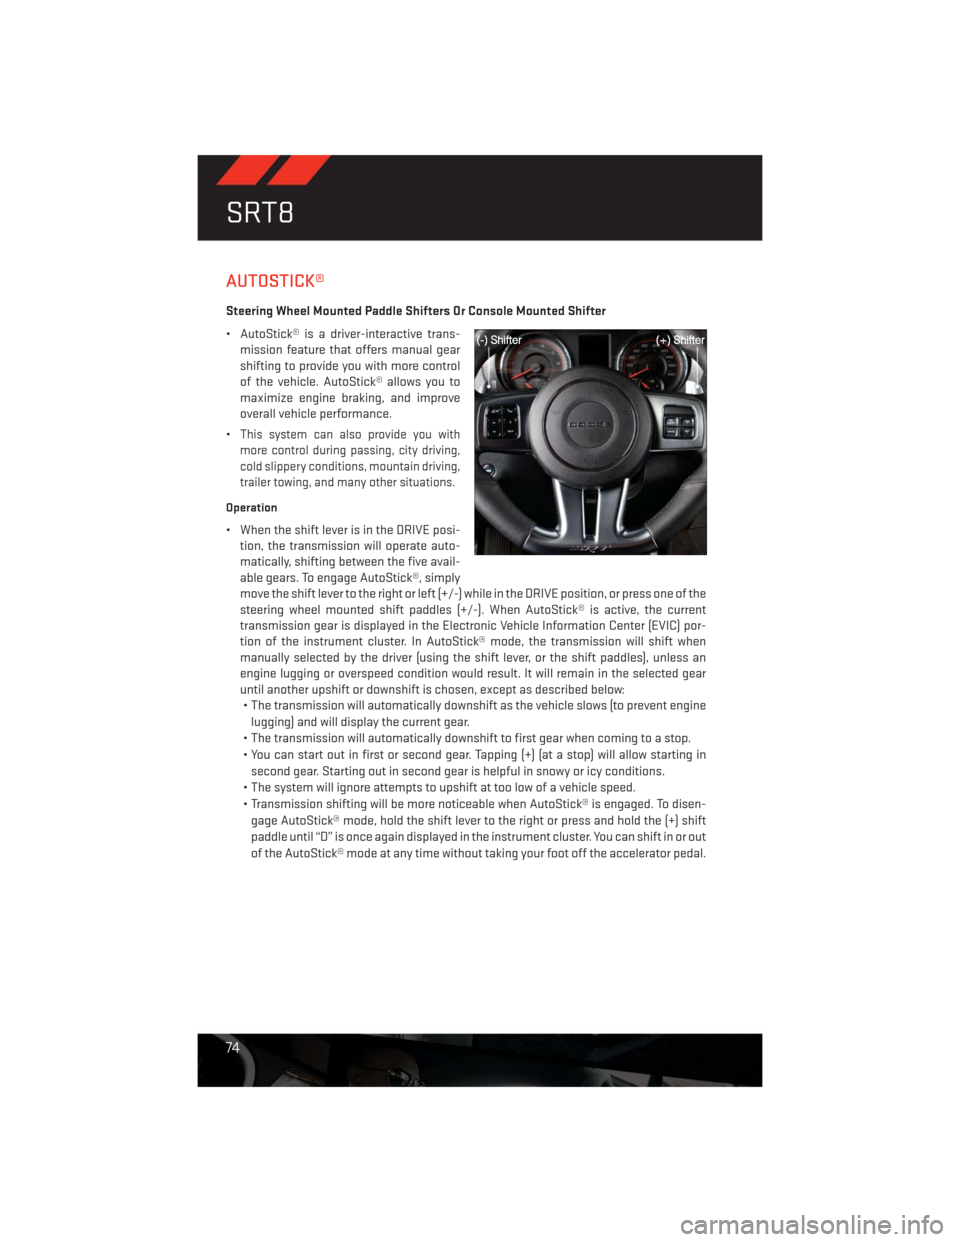
Steering Wheel Mounted Paddle Shifters Or Console Mounted Shifter
• AutoStick® is a driver-interactive trans-
mission feature that offers manual gear
shifting to provide you with more control
of the vehicle. AutoStick® allows you to
maximize engine braking, and improve
overall vehicle performance.
•
This system can also provide you with
more control during passing, city driving,
cold slippery conditions, mountain driving,
trailer towing, and many other situations.
Operation
• When the shift lever is in the DRIVE posi-
tion, the transmission will operate auto-
matically, shifting between the five avail-
able gears. To engage AutoStick®, simply
move the shift lever to the right or left (+/-) while in the DRIVE position, or press one of the
steering wheel mounted shift paddles (+/-). When AutoStick® is active, the current
transmission gear is displayed in the Electronic Vehicle Information Center (EVIC) por-
tion of the instrument cluster. In AutoStick® mode, the transmission will shift when
manually selected by the driver (using the shift lever, or the shift paddles), unless an
engine lugging or overspeed condition would result. It will remain in the selected gear
until another upshift or downshift is chosen, except as described below:
• The transmission will automatically downshift as the vehicle slows (to prevent engine
lugging) and will display the current gear.
• The transmission will automatically downshift to first gear when coming to a stop.
• You can start out in first or second gear. Tapping (+) (at a stop) will allow starting in
second gear. Starting out in second gear is helpful in snowy or icy conditions.
• The system will ignore attempts to upshift at too low of a vehicle speed.
• Transmission shifting will be more noticeable when AutoStick® is engaged. To disen-
gage AutoStick® mode, hold the shift lever to the right or press and hold the (+) shift
paddle until “D” is once again displayed in the instrument cluster. You can shift in or out
of the AutoStick® mode at any time without taking your foot off the accelerator pedal.
SRT8
74
Page 77 of 140
ELECTRONIC CONTROL DAMPING SYSTEM
•This vehicle may be equipped with an electronic controlled dampening system. This system
reduces body roll and pitch in many driving situations including cornering, acceleration and
braking. There are three modes of operation:
Automatic (Auto) Mode
•
This is the default position when vehicle ignition is first turned on. Auto mode will give a
sporty, but comfortable ride. Within this mode, the suspension will adapt to the vehicle
inputs, including road surfaces, vehicle speed, steering inputs, braking, and acceleration.
• If AutoStick® is engaged while in “Auto” mode, the transmission will automatically shift
up if maximum engine speed is reached.
• Heavily pressing the accelerator pedal may generate an automatic downshift for im-
proved acceleration.
• This mode should be used for most driving situations.
Sport Mode
SPORT
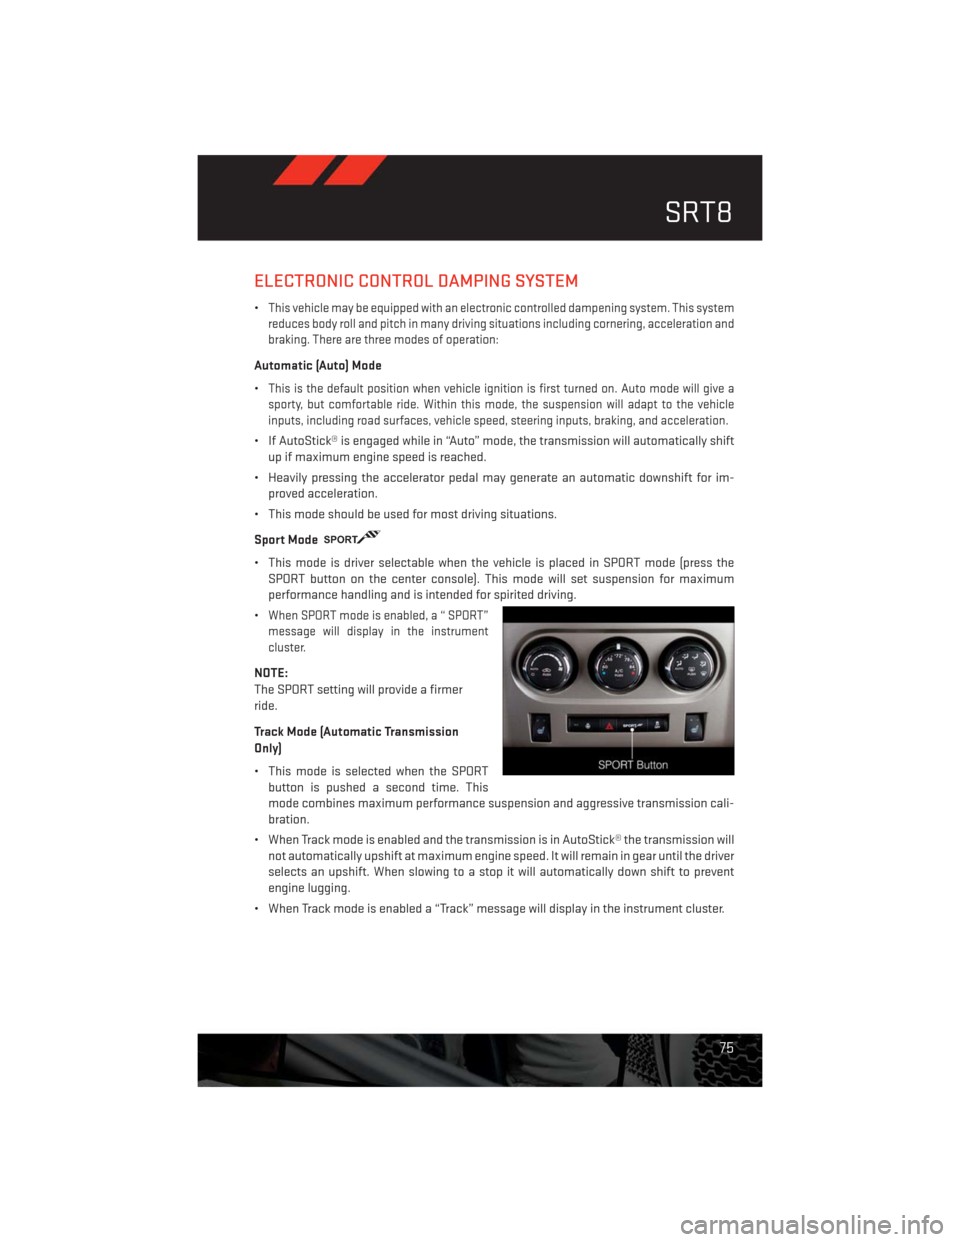
• This mode is driver selectable when the vehicle is placed in SPORT mode (press the
SPORT button on the center console). This mode will set suspension for maximum
performance handling and is intended for spirited driving.
•
When SPORT mode is enabled, a “ SPORT”
message will display in the instrument
cluster.
NOTE:
The SPORT setting will provide a firmer
ride.
Track Mode (Automatic Transmission
Only)
• This mode is selected when the SPORT
button is pushed a second time. This
mode combines maximum performance suspension and aggressive transmission cali-
bration.
• When Track mode is enabled and the transmission is in AutoStick® the transmission will
not automatically upshift at maximum engine speed. It will remain in gear until the driver
selects an upshift. When slowing to a stop it will automatically down shift to prevent
engine lugging.
• When Track mode is enabled a “Track” message will display in the instrument cluster.
SRT8
75
Page 78 of 140
PERFORMANCE FEATURES
Electronic Vehicle Information Center (EVIC)
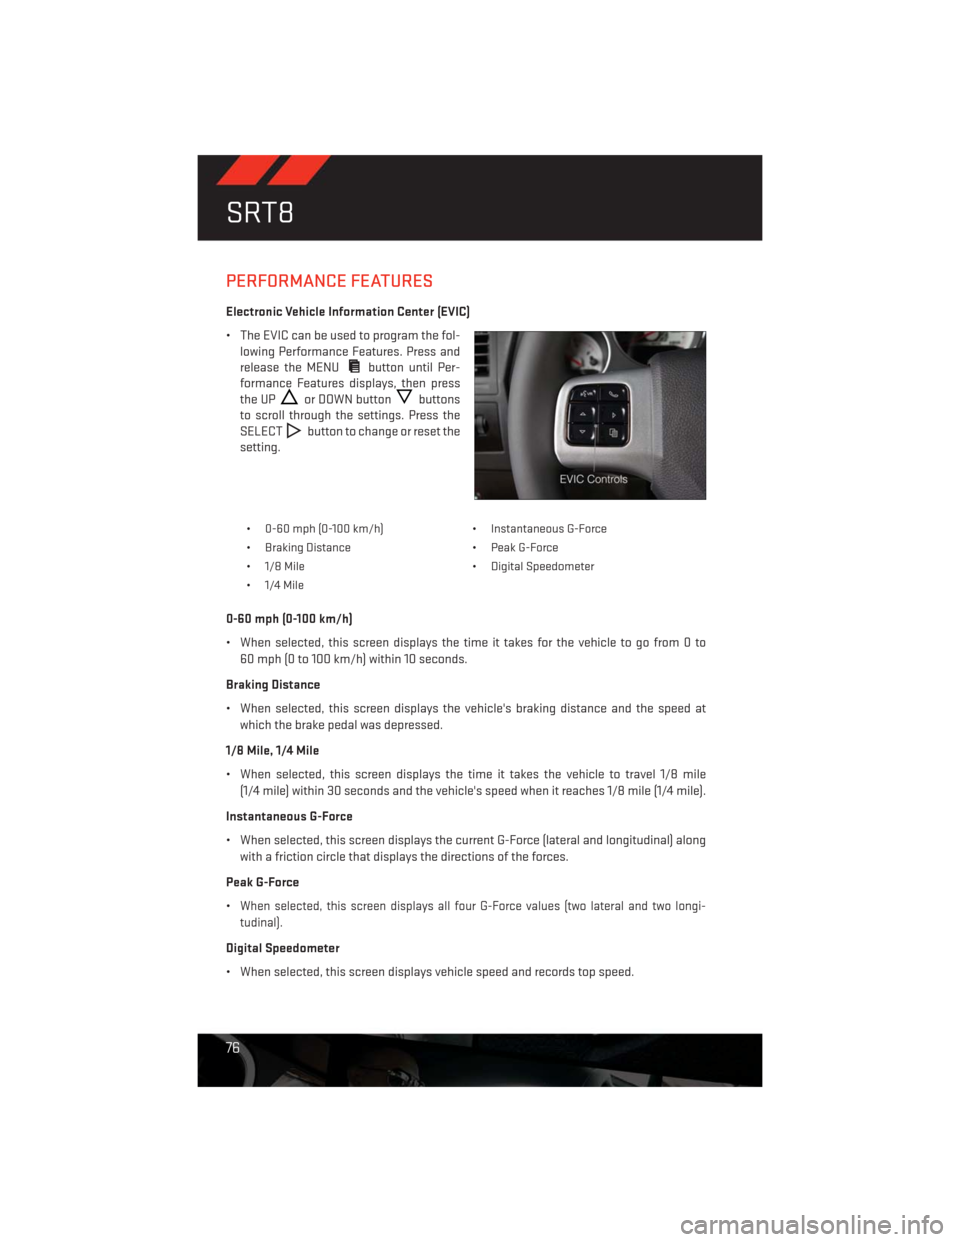
• The EVIC can be used to program the fol-
lowing Performance Features. Press and
release the MENU
button until Per-
formance Features displays, then press
the UP
or DOWN buttonbuttons
to scroll through the settings. Press the
SELECT
button to change or reset the
setting.
• 0-60 mph (0-100 km/h) • Instantaneous G-Force
• Braking Distance • Peak G-Force
• 1/8 Mile • Digital Speedometer
• 1/4 Mile
0-60 mph (0-100 km/h)
• When selected, this screen displays the time it takes for the vehicle to go from 0 to
60 mph (0 to 100 km/h) within 10 seconds.
Braking Distance
• When selected, this screen displays the vehicle's braking distance and the speed at
which the brake pedal was depressed.
1/8 Mile, 1/4 Mile
• When selected, this screen displays the time it takes the vehicle to travel 1/8 mile
(1/4 mile) within 30 seconds and the vehicle's speed when it reaches 1/8 mile (1/4 mile).
Instantaneous G-Force
• When selected, this screen displays the current G-Force (lateral and longitudinal) along
with a friction circle that displays the directions of the forces.
Peak G-Force
•
When selected, this screen displays all four G-Force values (two lateral and two longi-
tudinal).
Digital Speedometer
• When selected, this screen displays vehicle speed and records top speed.
SRT8
76
Page 83 of 140
- Anti-Lock Brake (ABS) Light
• This light monitors the Anti-Lock Brake System (ABS).
• If the light is not on during starting, stays on, or turns on while driving, we recommend you
drive to the nearest authorized dealer immediately and have the vehicle serviced
immediately.
- Electronic Throttle Control (ETC) Indicator Light
• This light informs you of a problem with the system.
• If a problem is detected, the light will come on while the engine is running. Cycle the
ignition when the vehicle has completely stopped and the shift lever is placed in the
PARK position; the light should turn off.
• If the light remains lit with the engine running, your vehicle will usually be drivable;
however, see an authorized dealer immediately. If the light is flashing when the engine is
running, immediate service is required and you may experience reduced performance,
an elevated/rough idle or engine stall and your vehicle may require towing.
- Air Bag Warning Light
• If the light is not on during starting, stays on, or turns on while driving, have the vehicle
serviced by an authorized dealer immediately.
Fuel Cap/Loose Gas Cap Message
• If a “gas cap” message (shown as gASCAP) appears, tighten the gas cap until a “clicking”
sound is heard.
• Press the odometer reset button to turn the message off.
• If the message continues to appear for more than three days after tightening the gas
cap, see your authorized service center.
Oil Change Indicator
• Your vehicle is equipped with an engine oil change indicator system. The “Oil Change
Due” message will flash in the EVIC display for approximately 10 seconds after a single
chime has sounded, to indicate the next scheduled oil change interval. The engine oil
change indicator system is duty cycle based, which means the engine oil change interval
may fluctuate, dependent upon your personal driving style
• Unless reset, this message will continue to display each time you turn the ignition switch
to the ON/RUN position or cycle the ignition to the ON/RUN position if equipped with
Keyless Enter-N-Go™. To turn off the message temporarily, press and release the MENU
button. To reset the oil change indicator system (after performing the scheduled main-
tenance) refer to the following procedure.
WHAT TO DO IN EMERGENCIES
81
Page 112 of 140
MAINTENANCE SCHEDULE
Your vehicle is equipped with an automatic oil change indicator system. The oil change
indicator system will remind you that it is time to take your vehicle in for scheduled
maintenance.
Based on engine operation conditions, the oil change indicator message will illuminate.
This means that service is required for your vehicle. Operating conditions such as frequent
short-trips, trailer tow, extremely hot or cold ambient temperatures, and E85 fuel usage
will influence when the “Change Oil” or “Oil Change Required” message is displayed.
Severe Operating Conditions can cause the change oil message to illuminate as early as
3,500 miles (5,600 km) since last reset. Have your vehicle serviced as soon as possible,
within the next 500 miles (805 km).
On Electronic Vehicle Information Center (EVIC) equipped vehicles, “Oil Change Required”
will be displayed in the EVIC and a single chime will sound, indicating that an oil change is
necessary.
On Non-EVIC equipped vehicles, “Change Oil” will flash in the instrument cluster odometer
and a single chime will sound, indicating that an oil change is necessary.
Your authorized dealer will reset the oil change indicator message after completing the
scheduled oil change. If a scheduled oil change is performed by someone other than your
authorized dealer, the message can be reset by referring to the steps described under
“Electronic Vehicle Information Center (EVIC)/Oil Change Required” in “Understanding Your
Instrument Panel” or under “Instrument Cluster Description/Odometer/Trip Odometer” in
“Understanding Your Instrument Panel” for further information.
NOTE:
Under no circumstances should oil change intervals exceed 10,000 miles (16,000 km) or
twelve months, whichever comes first.
MAINTAINING YOUR VEHICLE
110
Page 131 of 140
FREQUENTLY ASKED QUESTIONS
GETTING STARTED
• How do I install my LATCH Equipped Child Seat? pg. 15
OPERATION YOUR VEHICLE
• What is my engine break-in recommendation?
• Non SRT Version pg. 22
• SRT Version pg. 22
ELECTRONICS
• Which radio is in my vehicle?
• Uconnect® 130 pg. 34
• Uconnect® 130 WITH SiriusXM™ pg. 36
• Uconnect® 430/430N pg. 38
• Uconnect® 730N pg. 47
• How do I activate the Audio Jack?
• Uconnect® 130 pg. 38
• Uconnect® 130 WITH SiriusXM™ pg. 38
• Uconnect® 430/430N pg. 42
• Uconnect® 730N pg. 50
• How do I set the clock on my radio?
• Uconnect® 130 pg. 36
• Uconnect® 130 WITH SiriusXM™ pg. 36
• Uconnect® 430/430N pg. 39
• Uconnect® 730N pg. 47
• How do I use the Navigation feature?
• Uconnect® 430/430N pg. 44
• Uconnect® 730N pg. 53
• How do I pair my cell phone via Bluetooth® with the Uconnect® Hands-Free Voice
Activation System? pg. 61
• How do I use my USB port to listen to audio through my touch-screen radio? pg. 66
• What does the ECO message mean on the EVIC display? pg. 67
• How do I configure my Universal Garage Door Opener (HomeLink)? pg. 69
FAQ (How To?)
129