check engine light DODGE CHALLENGER 2013 3.G User Guide
[x] Cancel search | Manufacturer: DODGE, Model Year: 2013, Model line: CHALLENGER, Model: DODGE CHALLENGER 2013 3.GPages: 140, PDF Size: 5.35 MB
Page 13 of 140
•After pressing the Keyless Enter-N-Go™ LOCK button, you must wait 2 seconds before you
can lock or unlock the vehicle using the door handle. This is done to allow you to check if the
vehicle is locked by pulling the door handle, without the vehicle reacting and unlocking.
• If a Keyless Enter-N-Go™ door handle has not been used for 72 hours, the Keyless
Enter-N-Go™ feature for that handle may time out. Pulling the deactivated front door
handle will reactivate the door handle's Keyless Enter-N-Go™ feature.
To Enter the Trunk
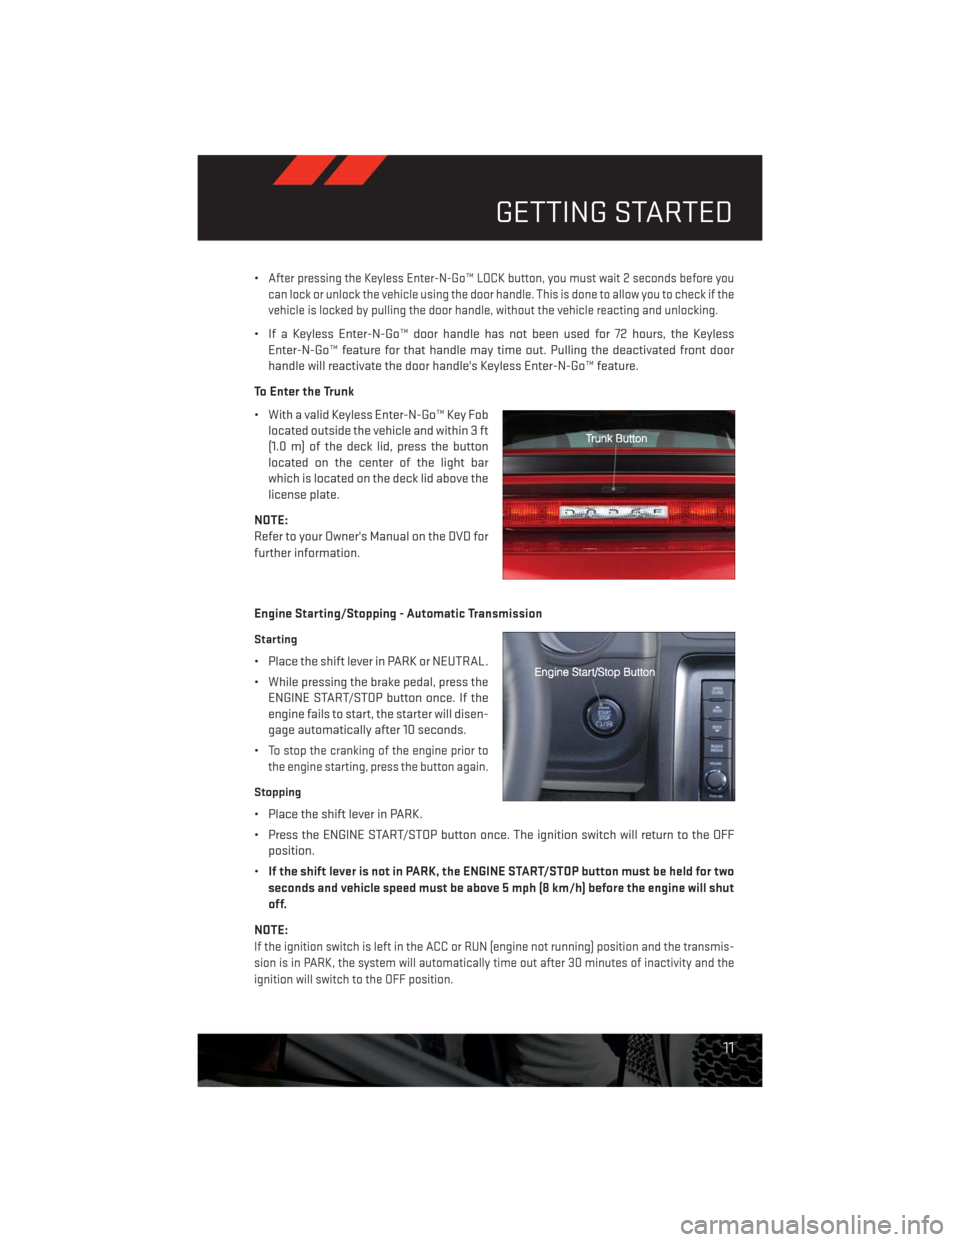
• With a valid Keyless Enter-N-Go™ Key Fob
located outside the vehicle and within 3 ft
(1.0 m) of the deck lid, press the button
located on the center of the light bar
which is located on the deck lid above the
license plate.
NOTE:
Refer to your Owner's Manual on the DVD for
further information.
Engine Starting/Stopping - Automatic Transmission
Starting
• Place the shift lever in PARK or NEUTRAL.
• While pressing the brake pedal, press the
ENGINE START/STOP button once. If the
engine fails to start, the starter will disen-
gage automatically after 10 seconds.
•
To stop the cranking of the engine prior to
the engine starting, press the button again.
Stopping
• Place the shift lever in PARK.
• Press the ENGINE START/STOP button once. The ignition switch will return to the OFF
position.
•If the shift lever is not in PARK, the ENGINE START/STOP button must be held for two
seconds and vehicle speed must be above 5 mph (8 km/h) before the engine will shut
off.
NOTE:
If the ignition switch is left in the ACC or RUN (engine not running) position and the transmis-
sion is in PARK, the system will automatically time out after 30 minutes of inactivity and the
ignition will switch to the OFF position.
GETTING STARTED
11
Page 80 of 140
ROADSIDE ASSISTANCE
•Dial toll-free 1-800-521-2779 for U.S. Residents or 1-800-363-4869 for Canadian Residents.
•Provide your name, vehicle identification number, license plate number, and your location,
including the telephone number from which you are calling.
• Briefly describe the nature of the problem and answer a few simple questions.
•
You will be given the name of the service provider and an estimated time of arrival. If you feel
you are in an “unsafe situation”, please let us know. With your consent, we will contact local
police or safety authorities.
INSTRUMENT CLUSTER WARNING LIGHTS
- Electronic Stability Control (ESC) Activation/Malfunction Indicator Light
• The “ESC Activation/Malfunction Indicator Light” in the instrument cluster will come on
when the ignition switch is turned to the ON/RUN position. It should go out with the
engine running. If the “ESC Activation/Malfunction Indicator Light” comes on continu-
ously with the engine running, a malfunction has been detected in the ESC system.
• If this light remains on after several ignition cycles, and the vehicle has been driven
several miles (kilometers) at speeds greater than 30 mph (48 km/h), we recommend you
drive to the nearest service center and have the vehicle serviced immediately.
- Tire Pressure Monitoring System (TPMS) Light
• Each tire, including the spare (if provided), should be checked monthly, when cold and
inflated to the inflation pressure recommended by the vehicle manufacturer on the
vehicle placard or tire inflation pressure label. (If your vehicle has tires of a different size
than the size indicated on the vehicle placard or tire inflation pressure label, you should
determine the proper tire inflation pressure for those tires.)
• As an added safety feature, your vehicle has been equipped with a Tire Pressure Moni-
toring System (TPMS) that illuminates a low tire pressure telltale when one or more of
your tires is significantly under-inflated. Accordingly, when the low tire pressure telltale
illuminates, you should stop and check your tires as soon as possible, and inflate them to
the proper pressure. Driving on a significantly under-inflated tire causes the tire to
overheat and can lead to tire failure. Under-inflation also reduces fuel efficiency and tire
tread life, and may affect the vehicle’s handling and stopping ability.
•IF THE LIGHT STARTS FLASHING INDICATING A LOW TIRE PRESSURE, ADJUST THE
AIR PRESSURE IN THE LOW TIRE TO THE AIR PRESSURE SHOWN ON THE VEHICLE
PLACARD OR TIRE INFLATION PRESSURE LABEL LOCATED ON THE DRIVER'S DOOR.
NOTE:
AFTER INFLATION, THE VEHICLE MAY NEED TO BE DRIVEN FOR 20 MINUTES BEFORE THE
FLASHING LIGHT WILL TURN OFF.
• Please note that the TPMS is not a substitute for proper tire maintenance, and it is the
driver’s responsibility to maintain correct tire pressure, even if under-inflation has not
reached the level to trigger illumination of the TPMS low tire pressure telltale.
WHAT TO DO IN EMERGENCIES
78
Page 81 of 140
•Your vehicle has also been equipped with a TPMS malfunction indicator to indicate when the
system is not operating properly. The TPMS malfunction indicator is combined with the low
tire pressure telltale. When the system detects a malfunction, the telltale will flash for
approximately one minute and then remain continuously illuminated. This sequence will
continue each time the vehicle is restarted as long as the malfunction exists.
•When the malfunction indicator is illuminated, the system may not be able to detect or
signal low tire pressure as intended. TPMS malfunctions may occur for a variety of reasons,
including the installation of replacement or alternate tires or wheels on the vehicle that
prevent the TPMS from functioning properly. Always check the TPMS malfunction telltale
after replacing one or more tires or wheels on your vehicle, to ensure that the replacement or
alternate tires and wheels allow the TPMS to continue to function properly.
NOTE:
Tire pressures change by approximately 1 psi (7 kPa) per 12° F (7° C) of air temperature
change. Keep this in mind when checking tire pressure inside a garage, especially in the
Winter. Example: If garage temperature is 68°F (20°C) and the outside temperature is 32°F
(0°C), then the cold tire inflation pressure should be increased by 3 psi (21 kPa), which equals
1 psi (7 kPa) for every 12°F (7°C) for this outside temperature condition.
CAUTION!
The TPMS has been optimized for the original equipment tires and wheels. TPMS
pressures and warning have been established for the tire size equipped on your vehicle.
Undesirable system operation or sensor damage may result when using replacement
equipment that is not of the same size, type, and/or style. Aftermarket wheels can cause
sensor damage. Do not use tire sealant from a can, or balance beads if your vehicle is
equipped with a TPMS, as damage to the sensors may result.
- Engine Temperature Warning Light
• This light warns of an overheated engine condition.
• If the light turns on or flashes continuously while driving, safely pull over and stop the
vehicle. If the A/C system is on, turn it off. Also, shift the transmission into NEUTRAL and
idle the vehicle. If the temperature reading does not return to normal, turn the engine off
immediately.
• We recommend that you do not operate the vehicle or engine damage will occur. Have the
vehicle serviced immediately.
WARNING!
A hot engine cooling system is dangerous. You or others could be badly burned by steam
or boiling coolant. You may want to call an authorized dealer for service if your vehicle
overheats.
WHAT TO DO IN EMERGENCIES
79
Page 82 of 140
BRAKE- Brake Warning Light
• The Brake Warning light illuminates when there is either a system malfunction or the
parking brake is applied. If the light is on and the parking brake is not applied, it indicates
a possible brake hydraulic malfunction, brake booster problem or an Anti-Lock Brake
System problem.
• Please have your vehicle serviced immediately.
WARNING!
Driving a vehicle with the red brake light on is dangerous. Part of the brake system may
have failed. It will take longer to stop the vehicle. You could have a collision. Have the
vehicle checked immediately.
- Malfunction Indicator Light (MIL)
• Certain conditions, such as a loose or missing gas cap, poor fuel quality, etc., may
illuminate the MIL after engine start. The vehicle should be serviced if the light stays on
through several typical driving cycles. In most situations, the vehicle will drive normally
and not require towing.
• If the MIL flashes when the engine is running, serious conditions may exist that could
lead to immediate loss of power or severe catalytic converter damage. We recommend
you do not operate the vehicle. Have the vehicle serviced immediately.
- Electronic Stability Control (ESC) OFF Indicator Light
• This light indicates the Electronic Stability Control (ESC) is off.
– Sport Shifting
• This light will illuminate when Track mode is selected. This mode provides performance
based transmission shifting in either Auto or Manual mode.
- Charging System Light
• This light shows the status of the electrical charging system. If the charging system light
remains on, it means that the vehicle is experiencing a problem with the charging
system.
• We recommend you do not continue driving if the charging system light is on. Have the
vehicle serviced immediately.
- Oil Pressure Warning Light
• This light indicates low engine oil pressure. If the light turns on while driving, stop the
vehicle and shut off the engine as soon as possible. A chime will sound when this light
turns on.
• We recommend you do not operate the vehicle or engine damage will occur. Have the
vehicle serviced immediately.
WHAT TO DO IN EMERGENCIES
80
Page 113 of 140
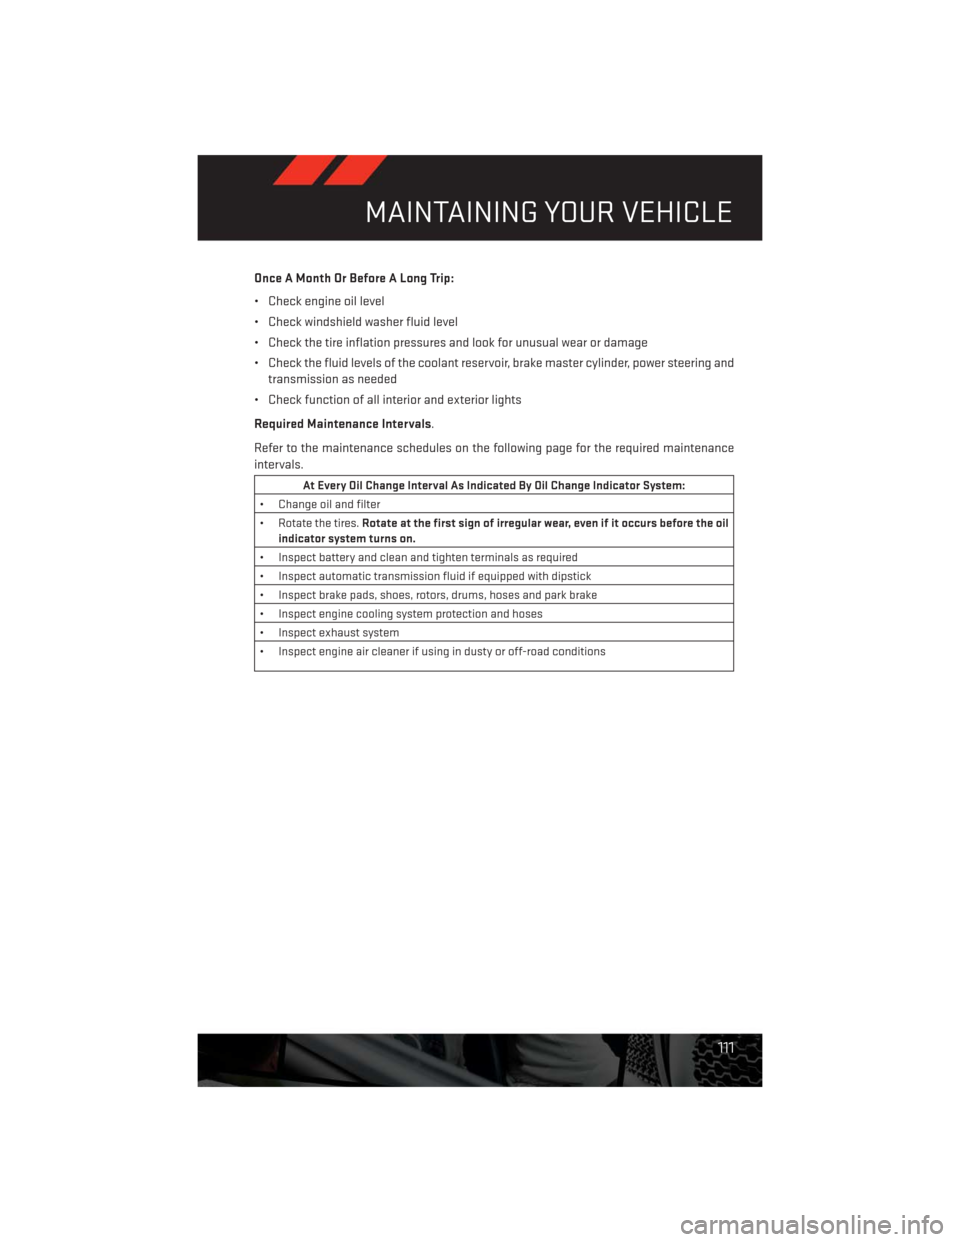
Once A Month Or Before A Long Trip:
• Check engine oil level
• Check windshield washer fluid level
• Check the tire inflation pressures and look for unusual wear or damage
• Check the fluid levels of the coolant reservoir, brake master cylinder, power steering and
transmission as needed
• Check function of all interior and exterior lights
Required Maintenance Intervals.
Refer to the maintenance schedules on the following page for the required maintenance
intervals.
At Every Oil Change Interval As Indicated By Oil Change Indicator System:
• Change oil and filter
• Rotate the tires.Rotate at the first sign of irregular wear, even if it occurs before the oil
indicator system turns on.
• Inspect battery and clean and tighten terminals as required
• Inspect automatic transmission fluid if equipped with dipstick
• Inspect brake pads, shoes, rotors, drums, hoses and park brake
• Inspect engine cooling system protection and hoses
• Inspect exhaust system
• Inspect engine air cleaner if using in dusty or off-road conditions
MAINTAINING YOUR VEHICLE
111
Page 129 of 140
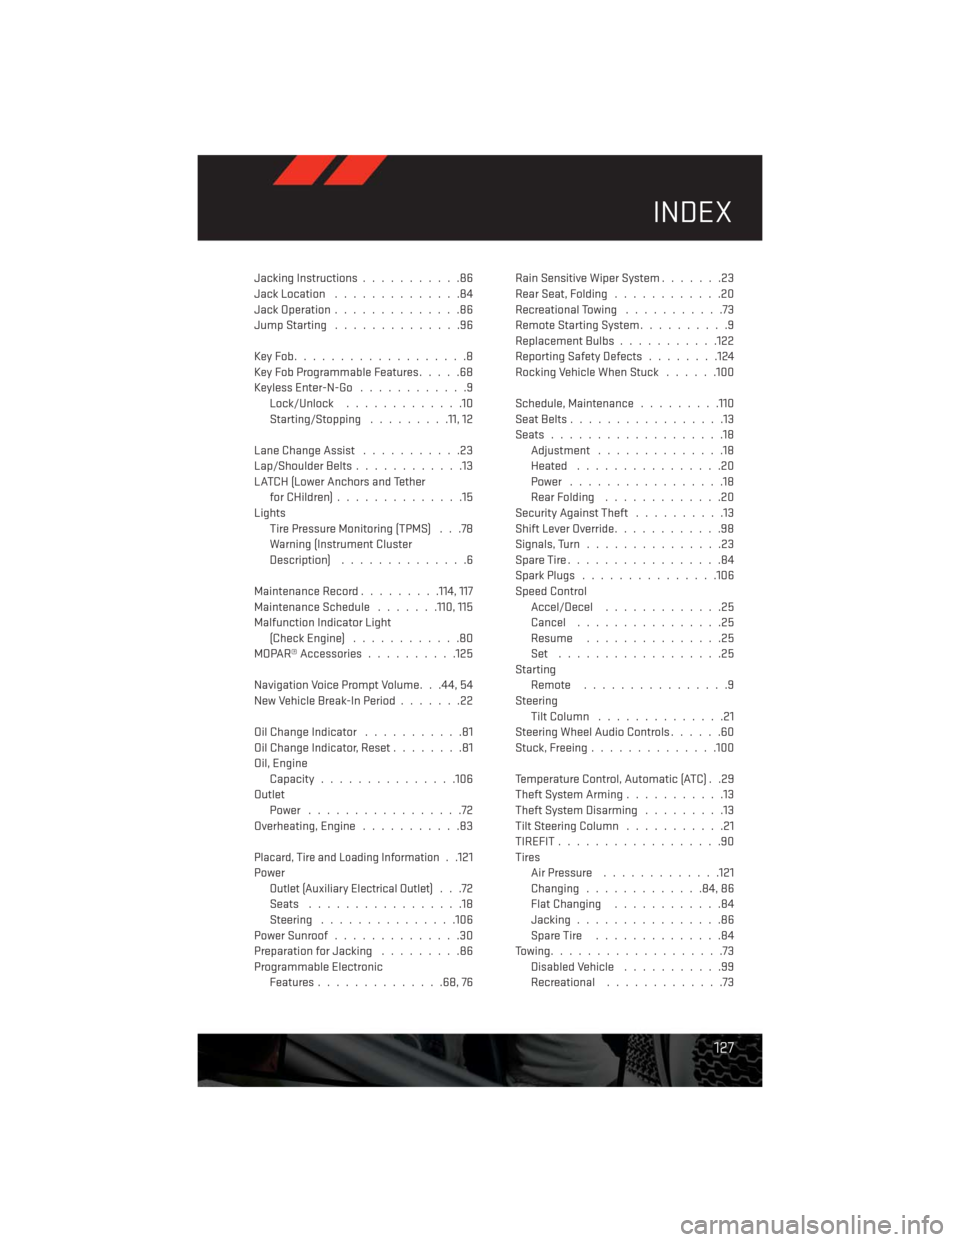
Jacking Instructions...........86
Jack Location..............84
Jack Operation..............86
JumpStarting ..............96
KeyFob...................8
Key Fob Programmable Features.....68
Keyless Enter-N-Go............9
Lock/Unlock.............10
Starting/Stopping .........11, 12
Lane Change Assist...........23
Lap/Shoulder Belts............13
LATCH (Lower Anchors and Tether
for CHildren)..............15
Lights
Tire Pressure Monitoring (TPMS) . . .78
Warning (Instrument Cluster
Description)..............6
Maintenance Record.........114, 117
Maintenance Schedule.......110, 115
Malfunction Indicator Light
(CheckEngine) ............80
MOPAR® Accessories..........125
Navigation Voice Prompt Volume. . .44, 54
New Vehicle Break-In Period.......22
OilChangeIndicator ...........81
Oil Change Indicator, Reset........81
Oil, Engine
Capacity...............106
Outlet
Power .................72
Overheating, Engine...........83
Placard, Tire and Loading Information. .121
Power
Outlet (Auxiliary Electrical Outlet)...72
Seats .................18
Steering...............106
Power Sunroof..............30
Preparation for Jacking.........86
Programmable Electronic
Features..............68,76Rain Sensitive Wiper System.......23
Rear Seat, Folding............20
Recreational Towing...........73
Remote Starting System..........9
Replacement Bulbs...........122
Reporting Safety Defects........124
Rocking Vehicle When Stuck......100
Schedule, Maintenance.........110
Seat Belts.................13
Seats...................18
Adjustment..............18
Heated................20
Power .................18
Rear Folding.............20
Security Against Theft..........13
Shift Lever Override............98
Signals, Turn...............23
SpareTire.................84
Spark Plugs...............106
Speed Control
Accel/Decel.............25
Cancel................25
Resume ...............25
Set ..................25
Starting
Remote ................9
Steering
Tilt Column..............21
Steering Wheel Audio Controls......60
Stuck, Freeing..............100
Temperature Control, Automatic (ATC) . .29
Theft System Arming...........13
Theft System Disarming.........13
Tilt Steering Column...........21
TIREFIT..................90
Tires
Air Pressure.............121
Changing.............84,86
Flat Changing............84
Jacking................86
SpareTire ..............84
Towing...................73
Disabled Vehicle...........99
Recreational.............73
INDEX
127