brake light DODGE CHALLENGER 2015 3.G Owners Manual
[x] Cancel search | Manufacturer: DODGE, Model Year: 2015, Model line: CHALLENGER, Model: DODGE CHALLENGER 2015 3.GPages: 603, PDF Size: 14.97 MB
Page 31 of 603
Cancel Remote Start
Remote Starting will also cancel if any of the following
occur:
•The engine stalls or engine speed exceeds 2500 rpm
•Any engine warning lights come on
•Low Fuel Light turns on
•The hood is opened
•The hazard switch is pushed
•The shift lever is moved out of PARK
•The brake pedal is pushed
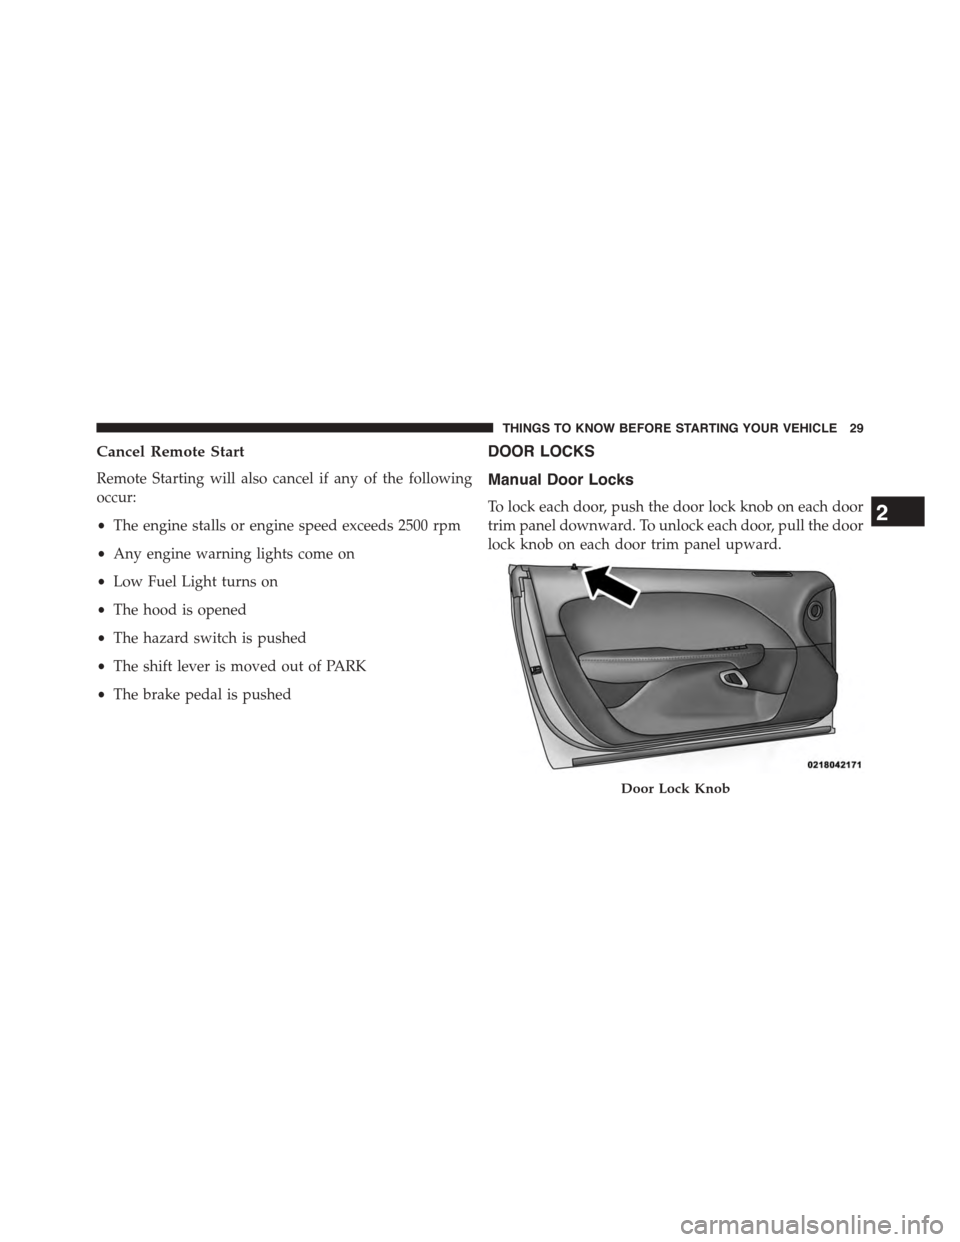
DOOR LOCKS
Manual Door Locks
To lock each door, push the door lock knob on each door
trim panel downward. To unlock each door, pull the door
lock knob on each door trim panel upward.
Door Lock Knob
2
THINGS TO KNOW BEFORE STARTING YOUR VEHICLE 29
Page 99 of 603
Periodic Safety Checks You Should Make Outside
The Vehicle
Tires
Examine tires for excessive tread wear and uneven wear
patterns. Check for stones, nails, glass, or other objects
lodged in the tread or sidewall. Inspect the tread for cuts
and cracks. Inspect sidewalls for cuts, cracks and bulges.
Check the wheel nuts for tightness. Check the tires
(including spare) for proper cold inflation pressure.
Lights
Have someone observe the operation of brake lights and
exterior lights while you work the controls. Check turn
signal and high beam indicator lights on the instrument
panel.
Door Latches
Check for positive closing, latching, and locking.
Fluid Leaks
Check area under vehicle after overnight parking for fuel,
engine coolant, oil, or other fluid leaks. Also, if gasoline
fumes are detected or if fuel, power steering fluid (if
equipped), or brake fluid leaks are suspected, the cause
should be located and corrected immediately.
2
THINGS TO KNOW BEFORE STARTING YOUR VEHICLE 97
Page 119 of 603
Automatic Transmission Vehicles
The BSM system sensors operate when the vehicle is in
any forward gear or REVERSE and enters stand-by mode
when the vehicle is in PARK.
Manual Transmission Vehicles
The BSM system sensors operate when the vehicle is in
any gear and enters stand-by mode when the Park Brake
is engaged, the vehicle is not in REVERSE, and the
vehicle is stationary.
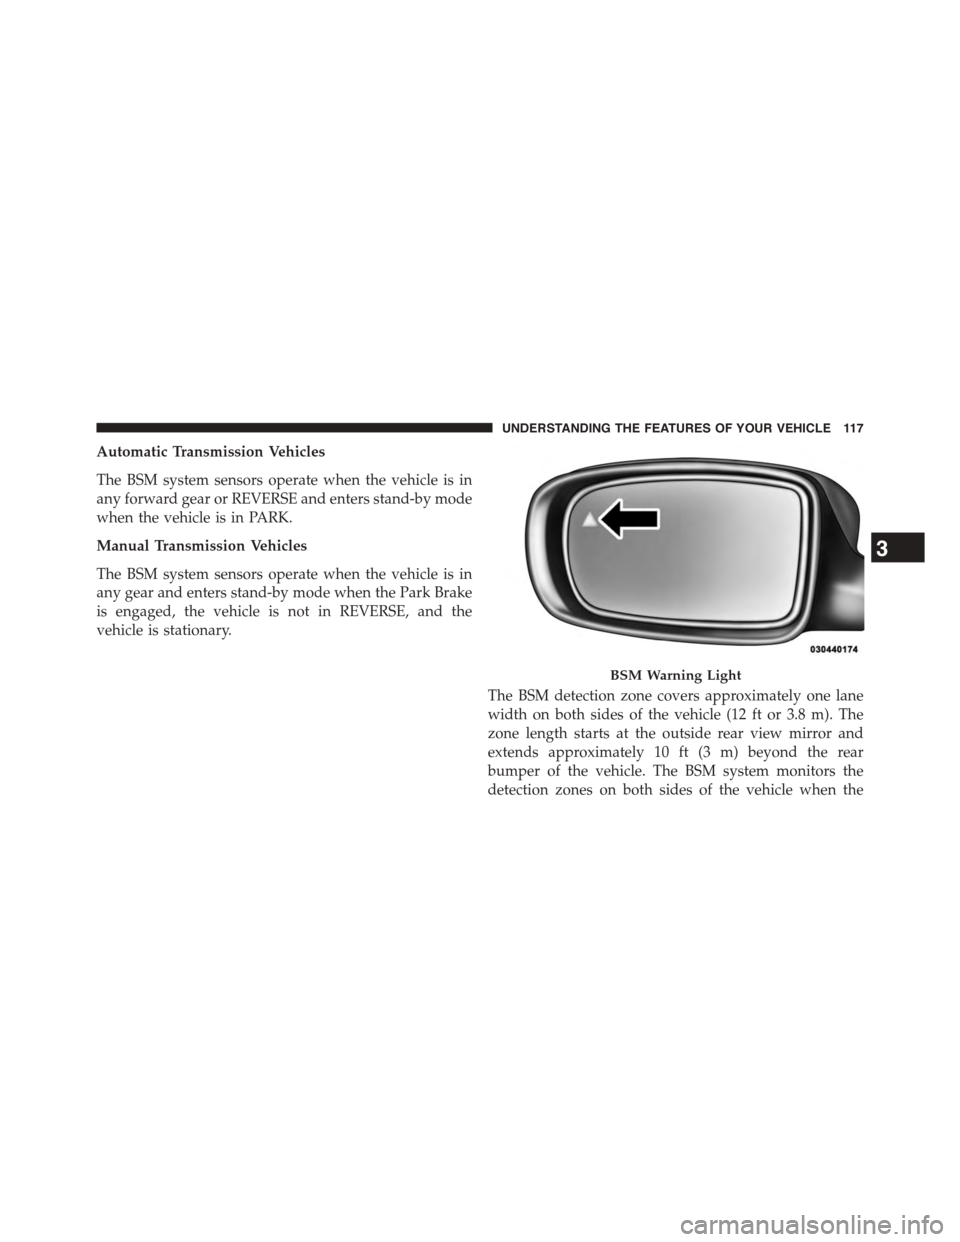
The BSM detection zone covers approximately one lane
width on both sides of the vehicle (12 ft or 3.8 m). The
zone length starts at the outside rear view mirror and
extends approximately 10 ft (3 m) beyond the rear
bumper of the vehicle. The BSM system monitors the
detection zones on both sides of the vehicle when the
BSM Warning Light
3
UNDERSTANDING THE FEATURES OF YOUR VEHICLE 117
Page 143 of 603
2. Push back on the multifunction lever once again to
reactivate the system.
Headlight Time Delay
This feature provides the safety of headlight illumination
for up to 90 seconds when leaving your vehicle in an
unlit area.
To activate the delay feature, turn OFF the ignition switch
while the headlights are still on. Then, turn off the
headlights within 45 seconds. The delay interval begins
when the headlight switch is turned off.
NOTE:The lights must be turned off within 45 seconds
of turning the ignition OFF to activate this feature.
If you turn the headlights, park lights or ignition switch
ON again, the system will cancel the delay.
If you turn the headlights off before the ignition, they will
turn off in the normal manner.
NOTE:The Headlight Time Delay is programmable us-
ing the Uconnect® System, refer to “Uconnect® Settings”
in “Understanding Your Instrument Panel” for further
information.
Daytime Running Lights (DRL) — If Equipped
The Daytime Running Lights will turn On when the
engine is started and remain On unless the headlamps
are turned ON, the parking brake is applied, or the
engine is shut Off.
NOTE:If allowed by law in the country in which the
vehicle was purchased the Daytime Running Lights can
be turned on and off using the Uconnect® System, refer
to “Uconnect® Settings” in “Understanding Your Instru-
ment Panel” for further information.
3
UNDERSTANDING THE FEATURES OF YOUR VEHICLE 141
Page 161 of 603
ACC will allow you to keep cruise control engaged in
light to moderate traffic conditions without the constant
need to reset your cruise control. ACC utilizes a radar
sensor designed to detect a vehicle directly ahead of you.
NOTE:
•If the sensor does not detect a vehicle ahead of you,
ACC will maintain a fixed set speed.
•If the ACC sensor detects a vehicle ahead, ACC will
apply limited braking or acceleration (not to exceed
the original set speed) automatically to maintain a
preset following distance, while matching the speed of
the vehicle ahead.
WARNING!
•Adaptive Cruise Control (ACC) is a convenience
system. It is not a substitute for active driving
involvement. It is always the driver ’s responsibil-
ity to be attentive of road, traffic, and weather
conditions, vehicle speed, distance to the vehicle
ahead; and, most importantly, brake operation to
ensure safe operation of the vehicle under all road
conditions. Your complete attention is always re-
quired while driving to maintain safe control of
your vehicle. Failure to follow these warnings can
result in a collision and death or serious personal
injury.
•The ACC system:
•Does not react to pedestrians, oncoming vehicles,
and stationary objects (e.g., a stopped vehicle in a
traffic jam or a disabled vehicle).
(Continued)
3
UNDERSTANDING THE FEATURES OF YOUR VEHICLE 159
Page 169 of 603
Metric Speed (km/h)
•Pressing the SET-button once will result in a 1 km/h
decrease in set speed. Each subsequent tap of the
button results in a decrease of 1 km/h.
•If the button is continually pressed, the set speed will
continue to decrease in 10 km/h increments until the
button is released. The decrease in set speed is re-
flected in the DID.
NOTE:
•When you override and push the SET+button or SET
-buttons, the new Set Speed will be the current speed
of the vehicle.
•When you use the SET-button to decelerate, if the
engine’s braking power does not slow the vehicle
sufficiently to reach the set speed, the brake system
will automatically slow the vehicle.
•The ACC system applies the brake down to 15 mph
(24 km/h) when following a target vehicle.
•The ACC system maintains set speed when driving up
hill and down hill. However, a slight speed change on
moderate hills is normal. In addition, downshifting
may occur while climbing uphill or descending down-
hill. This is normal operation and necessary to main-
tain set speed. When driving up hill and down hill, the
ACC system will cancel if the braking temperature
exceeds normal range (overheated).
Setting The Following Distance In ACC
The specified following distance for ACC can be set by
varying the distance setting between four bars (longest),
three bars (long), two bars (medium) and one bar (short).
Using this distance setting and the vehicle speed, ACC
calculates and sets the distance to the vehicle ahead. This
distance setting displays in the DID.
3
UNDERSTANDING THE FEATURES OF YOUR VEHICLE 167
Page 172 of 603
To decrease the distance setting, press the Distance
Setting — Decrease button and release. Each time the
button is pressed, the distance setting decreases by one
bar (shorter).
If there is no vehicle ahead, the vehicle will maintain the
set speed. If a slower moving vehicle is detected in the
same lane, the DID displays the “Sensed Vehicle Indica-
tor” icon, and the system adjusts vehicle speed automati-
cally to maintain the distance setting, regardless of the set
speed.
The vehicle will then maintain the set distance until:
•The vehicle ahead accelerates to a speed above the set
speed.
•The vehicle ahead moves out of your lane or view of
the sensor.
•The distance setting is changed.
•The system disengages. (Refer to the information on
ACC Activation).
The maximum braking applied by ACC is limited; how-
ever, the driver can always apply the brakes manually, if
necessary.
NOTE:The brake lights will illuminate whenever the
ACC system applies the brakes.
A Proximity Warning will alert the driver if ACC predicts
that its maximum braking level is not sufficient to
maintain the set distance. If this occurs, a visual alert
“BRAKE” will flash in the DID and a chime will sound
while ACC continues to apply its maximum braking
capacity.
170 UNDERSTANDING THE FEATURES OF YOUR VEHICLE
Page 227 of 603
WARNING!(Continued)
operating conditions. This can cause a fire if you
drive slowly or park over flammable substances such
as dry plants, wood, cardboard, etc. This could result
in death or serious injury to the driver, occupants or
others.
3. Vehicle Security Light — If Equipped
This light will flash at a fast rate for approxi-
mately 15 seconds, when the vehicle security
alarm is arming, and then will flash slowly
until the vehicle is disarmed.
4. Turn Signal Indicators
The arrow will flash with the exterior turn
signal when the turn signal lever is operated.
NOTE:
•A continuous chime will sound if the vehicle is
driven more than 1 mile (1.6 km) with either turn
signal on.
•Check for an inoperative outside light bulb if either
indicator flashes at a rapid rate.
5. Anti-Lock Brake (ABS) Light
This light monitors the Anti-Lock Brake System
(ABS). The light will turn on when the ignition
switch is placed in the ON/RUN position and may stay
on for as long as four seconds.
If the ABS light remains on or turns on while driving,
then the Anti-Lock portion of the brake system is not
functioning and service is required. However, the con-
ventional brake system will continue to operate normally
if the BRAKE warning light is not on.
4
UNDERSTANDING YOUR INSTRUMENT PANEL 225
Page 228 of 603
If the ABS light is on, the brake system should be serviced
as soon as possible to restore the benefits of Anti-Lock
Brakes. If the ABS light does not turn on when the
ignition switch is placed in the ON/RUN position, have
the light inspected by an authorized dealer.
6. Driver Information Display (DID) Area
The odometer display shows the total distance the ve-
hicle has been driven. The trip odometer shows indi-
vidual trip mileage.
NOTE:U.S. Federal regulations require that upon trans-
fer of vehicle ownership, the seller certify to the pur-
chaser the correct mileage that the vehicle has been
driven. If your odometer needs to be repaired or serviced,
the repair technician should leave the odometer reading
the same as it was before the repair or service. If he/she
cannot do so, then the odometer must be set at zero, and
a sticker must be placed in the door jamb stating what the
mileage was before the repair or service. It is a good idea
for you to make a record of the odometer reading before
the repair/service, so that you can be sure that it is
properly reset, or that the door jamb sticker is accurate if
the odometer must be reset at zero.
The DID features an interactive display, for further
information refer to “Driver Information Display (DID) ”.
226 UNDERSTANDING YOUR INSTRUMENT PANEL
Page 229 of 603
7. Gear Status Indicator — Automatic Transmission
Only
The Gear Status Indicator is self-contained within the
instrument cluster. It displays the gear position of the
automatic transmission.
8. Seat Belt Reminder Light
This light will turn on for four to eight seconds as
a bulb check when the ignition switch is first
placed in ON/RUN. A chime will sound if the
driver’s seat belt is unbuckled during the bulb check. The
Seat Belt Warning Light will flash or remain on continu-
ously if the driver’s seat belt remains unbuckled after the
bulb check or when driving. Refer to “Occupant Re-
straints” in “Things To Know Before Starting Your Ve-
hicle” for further information.
9. Brake Warning Light
This light monitors various brake functions,
including brake fluid level and parking brake
application. If the brake light turns on it may
indicate that the parking brake is applied, that
the brake fluid level is low, or that there is a problem with
the anti-lock brake system reservoir.
If the light remains on when the parking brake has been
disengaged, and the fluid level is at the full mark on the
master cylinder reservoir, it indicates a possible brake
hydraulic system malfunction. In this case, the light will
remain on until the condition has been corrected.
The dual brake system provides a reserve braking capac-
ity in the event of a failure to a portion of the hydraulic
system. A leak in either half of the dual brake system is
indicated by the Brake Warning Light which will turn on
when the brake fluid level in the master cylinder has
dropped below a specified level.
4
UNDERSTANDING YOUR INSTRUMENT PANEL 227