open hood DODGE CHALLENGER 2015 3.G Owners Manual
[x] Cancel search | Manufacturer: DODGE, Model Year: 2015, Model line: CHALLENGER, Model: DODGE CHALLENGER 2015 3.GPages: 603, PDF Size: 14.97 MB
Page 31 of 603
Cancel Remote Start
Remote Starting will also cancel if any of the following
occur:
•The engine stalls or engine speed exceeds 2500 rpm
•Any engine warning lights come on
•Low Fuel Light turns on
•The hood is opened
•The hazard switch is pushed
•The shift lever is moved out of PARK
•The brake pedal is pushed
DOOR LOCKS
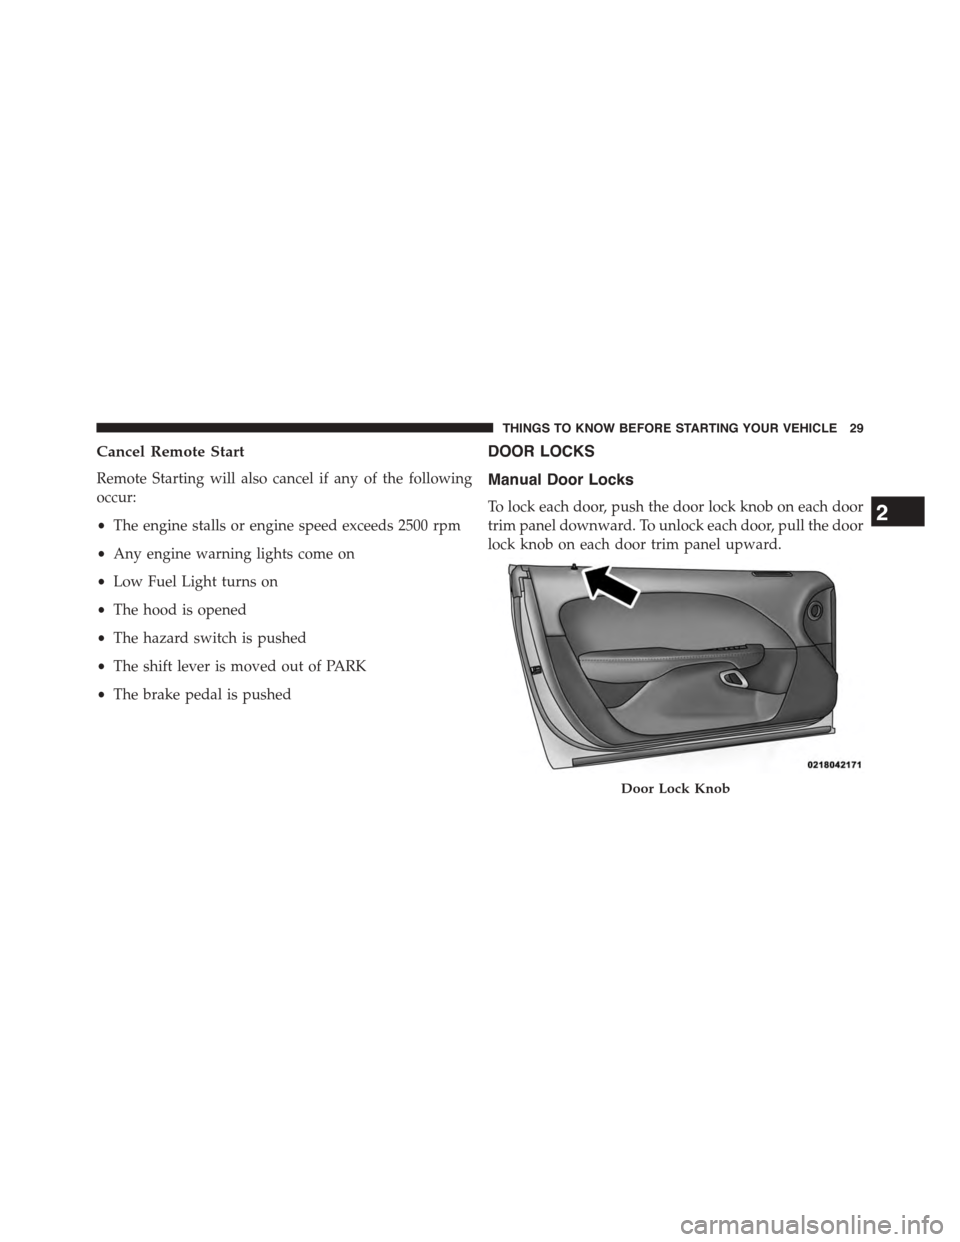
Manual Door Locks
To lock each door, push the door lock knob on each door
trim panel downward. To unlock each door, pull the door
lock knob on each door trim panel upward.
Door Lock Knob
2
THINGS TO KNOW BEFORE STARTING YOUR VEHICLE 29
Page 102 of 603
▫Front Ventilated Seats — If Equipped.......130
▫Manual Forward Or Rearward Adjustment . . .130
▫Manual Front Seatback Recline............131
▫Passenger Seat Easy Entry...............132
▫Head Restraints......................133
▫Folding Rear Seat.....................134
!TO OPEN AND CLOSE THE HOOD.........136
!LIGHTS.............................138
▫Headlight Switch.....................138
▫Automatic Headlights — If Equipped.......139
▫Headlights On With Wipers (Available With
Automatic Headlights Only).............139
▫Automatic High Beam Headlamp Control — If
Equipped...........................139
▫Headlight Time Delay..................141
▫Daytime Running Lights (DRL) — If
Equipped...........................141
▫Lights-On Reminder...................142
▫Fog Lights — If Equipped...............142
▫Multifunction Lever...................143
▫Turn Signals.........................143
▫Lane Change Assist...................144
▫High/Low Beam Switch................144
▫Flash-To-Pass........................144
▫Map/Reading Lights...................144
▫Interior Lights.......................145
!WINDSHIELD WIPERS AND WASHERS......147
100 UNDERSTANDING THE FEATURES OF YOUR VEHICLE
Page 138 of 603
WARNING!
•Be certain that the seatback is securely locked into
position. If the seatback is not securely locked into
position, the seat will not provide the proper sta-
bility for child seats and/or passengers. An improp-
erly latched seat could cause serious injury.
•The cargo area in the rear of the vehicle (with the
rear seatbacks in the locked-up or folded down
position) should not be used as a play area by
children when the vehicle is in motion. They could
be seriously injured in a collision. Children should
be seated and using the proper restraint system.
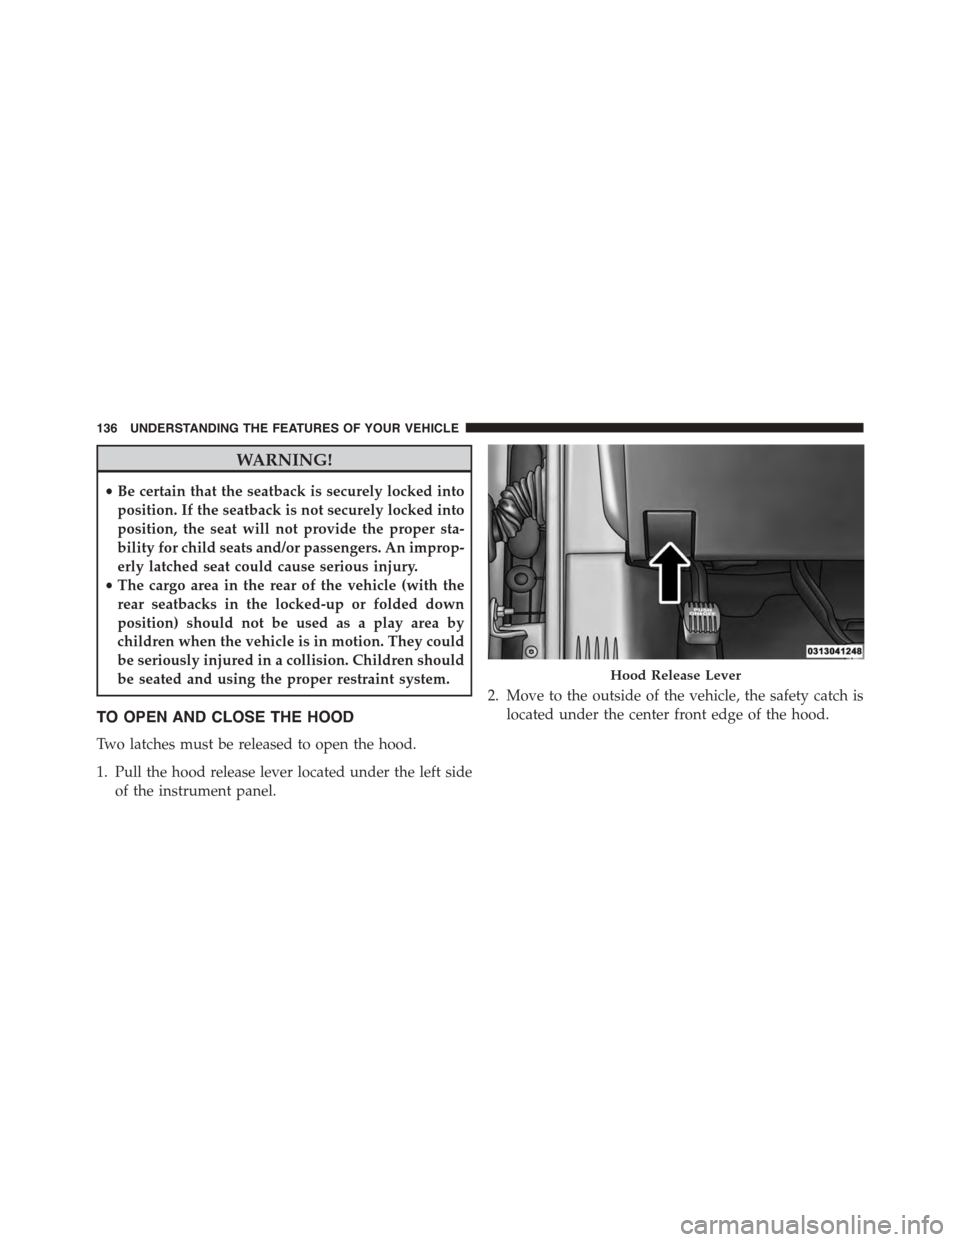
TO OPEN AND CLOSE THE HOOD
Two latches must be released to open the hood.
1. Pull the hood release lever located under the left side
of the instrument panel.
2. Move to the outside of the vehicle, the safety catch is
located under the center front edge of the hood.
Hood Release Lever
136 UNDERSTANDING THE FEATURES OF YOUR VEHICLE
Page 139 of 603
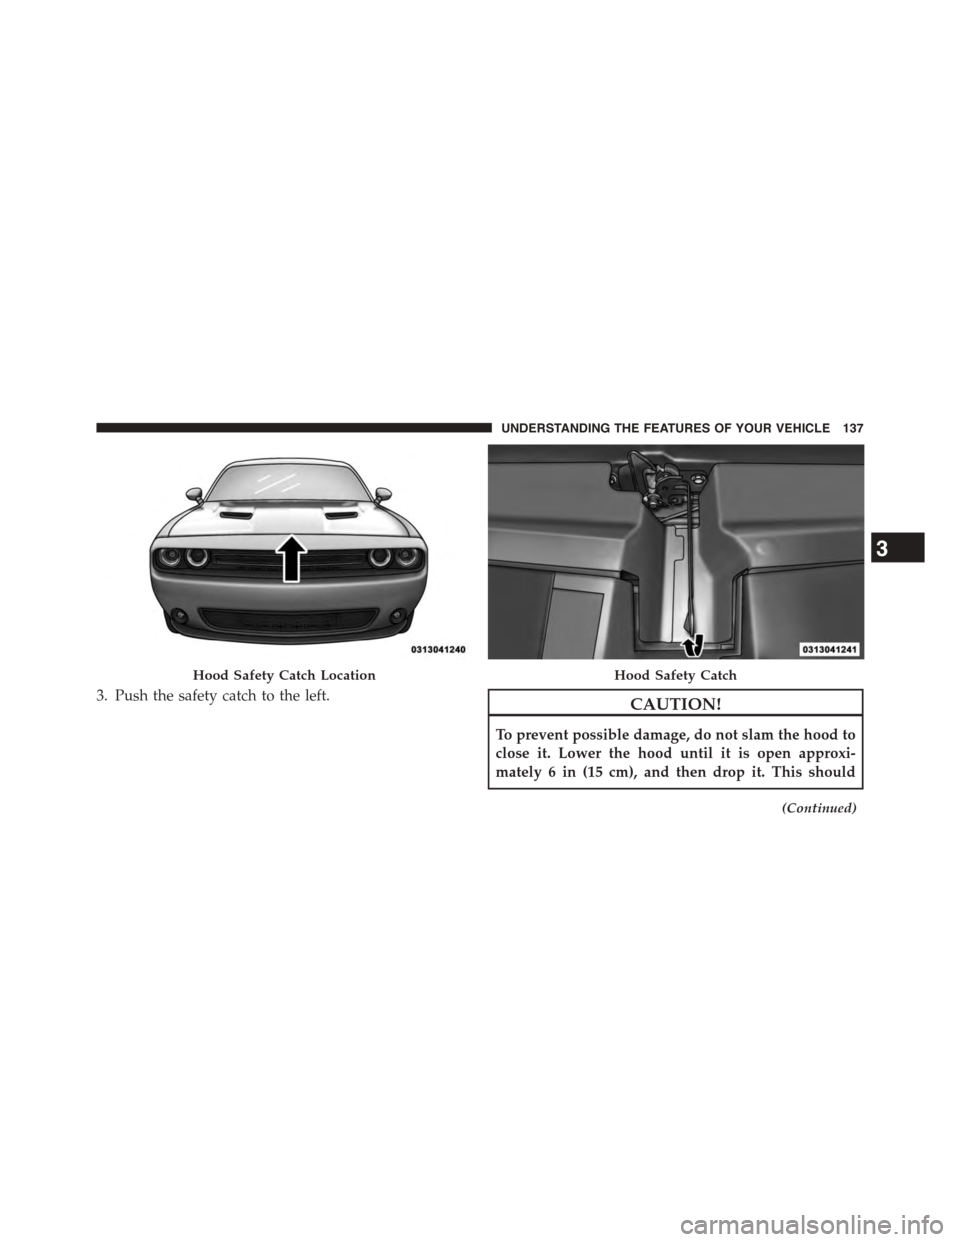
3. Push the safety catch to the left.CAUTION!
To prevent possible damage, do not slam the hood to
close it. Lower the hood until it is open approxi-
mately 6 in (15 cm), and then drop it. This should
(Continued)
Hood Safety Catch LocationHood Safety Catch
3
UNDERSTANDING THE FEATURES OF YOUR VEHICLE 137
Page 140 of 603
CAUTION!(Continued)
secure both latches. Never drive your vehicle unless
the hood is fully closed, with both latches engaged.
WARNING!
Be sure the hood is fully latched before driving your
vehicle. If the hood is not fully latched, it could open
when the vehicle is in motion and block your vision.
Failure to follow this warning could result in serious
injury or death.
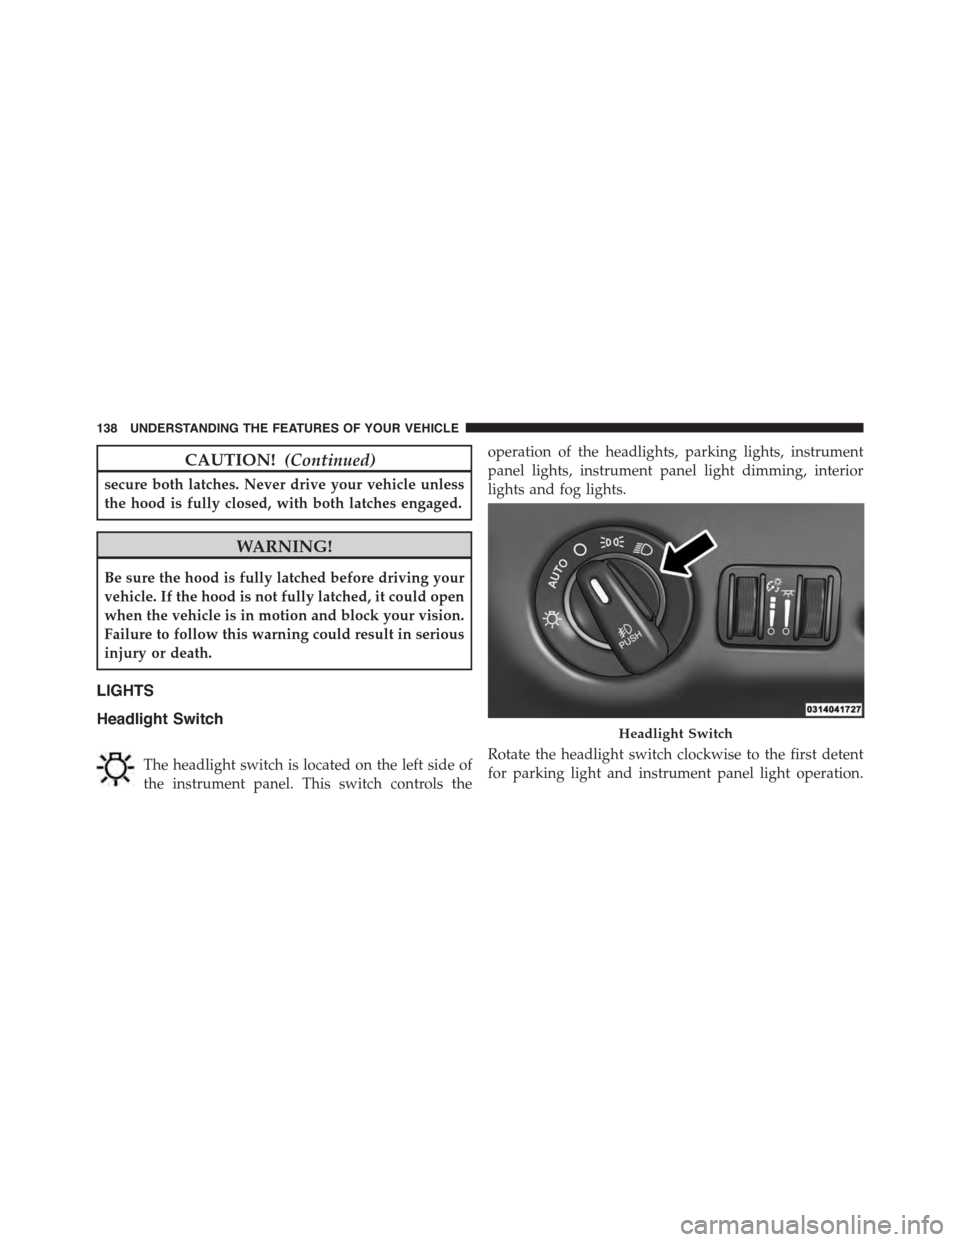
LIGHTS
Headlight Switch
The headlight switch is located on the left side of
the instrument panel. This switch controls the
operation of the headlights, parking lights, instrument
panel lights, instrument panel light dimming, interior
lights and fog lights.
Rotate the headlight switch clockwise to the first detent
for parking light and instrument panel light operation.
Headlight Switch
138 UNDERSTANDING THE FEATURES OF YOUR VEHICLE
Page 456 of 603

supplement to the radiator and aids in removing heat
from the engine cooling system.
CAUTION!
Driving with a hot cooling system could damage
your vehicle. If the temperature gauge reads “H,”
pull over and stop the vehicle. Idle the vehicle with
the air conditioner turned off until the pointer drops
back into the normal range. If the pointer remains on
the “H,” turn the engine off immediately and call for
service.
WARNING!
You or others can be badly burned by hot engine
coolant (antifreeze) or steam from your radiator. If
you see or hear steam coming from under the hood,
(Continued)
WARNING!(Continued)
do not open the hood until the radiator has had time
to cool. Never try to open a cooling system pressure
cap when the radiator or coolant bottle is hot.
TIRE SERVICE KIT — IF EQUIPPED
Small punctures up to¼” (6 mm) in the tire tread can be
sealed with Tire Service Kit. Foreign objects (e.g., screws
or nails) should not be removed from the tire. Tire Service
Kit can be used in outside temperatures down to approxi-
mately -4°F (-20°C).
This kit will provide a temporary tire seal, allowing you
to drive your vehicle up to 100 miles (160 km) with a
maximum speed of 55 mph (90 km/h).
454 WHAT TO DO IN EMERGENCIES
Page 479 of 603
WARNING!
•Take care to avoid the radiator cooling fan when-
ever the hood is raised. It can start anytime the
ignition switch is ON. You can be injured by
moving fan blades.
•Remove any metal jewelry such as rings, watch
bands and bracelets that could make an inadvertent
electrical contact. You could be seriously injured.
•Batteries contain sulfuric acid that can burn your
skin or eyes and generate hydrogen gas which is
flammable and explosive. Keep open flames or
sparks away from the battery.
1. Set the parking brake, shift into PARK (automatic
transmission) or 1st gear (manual transmission) and
place the ignition to LOCK.
2. Turn off the heater, radio, and all unnecessary electri-
cal accessories.
3. If using another vehicle to jump-start the battery, park
the vehicle within the jumper cables reach, set the
parking brake and make sure the ignition is OFF.
WARNING!
Do not allow vehicles to touch each other as this
could establish a ground connection and personal
injury could result.
Jump-Starting Procedure
WARNING!
Failure to follow this jump-starting procedure could
result in personal injury or property damage due to
battery explosion.
6
WHAT TO DO IN EMERGENCIES 477
Page 513 of 603
To minimize the possibility of catalytic converter dam-
age:
•Do not shut off the engine or interrupt the ignition,
when the transmission is in gear and the vehicle is in
motion.
•Do not try to start the engine by pushing or towing the
vehicle.
•Do not idle the engine with any spark plug wires
disconnected or removed, such as when diagnostic
testing, or for prolonged periods during very rough
idle or malfunctioning operating conditions.
NOTE:Your vehicles exhaust system may be equipped
with an Electronic Exhaust Valve (EEV) system, if the
exhaust system is replaced with aftermarket products a
Malfunction Indicator Lamp (MIL) may be illuminated.
Cooling System
WARNING!
•When working near the radiator cooling fan,
disconnect the fan motor lead or place the ignition
in the LOCK position (OFF position for Keyless
Enter-N-Go™). The fan is temperature controlled
and can start at any time the ignition switch is in
the ON position (RUN position for Keyless Enter-
N-Go™).
•You or others can be badly burned by hot engine
coolant (antifreeze) or steam from your radiator. If
you see or hear steam coming from under the hood,
do not open the hood until the radiator has had
time to cool. Never try to open a cooling system
pressure cap when the radiator is hot.
7
MAINTAINING YOUR VEHICLE 511
Page 547 of 603
BULB REPLACEMENT
NOTE:Lens fogging can occur under certain atmo-
spheric conditions. This will usually clear as atmospheric
conditions change to allow the condensation to change
back into a vapor. Turning the lamps on will usually
accelerate the clearing process.
Low Beam Headlamp, High Beam Headlamp,
Park/Turn Lamp — Models with Halogen
Headlamps — If Equipped
To replace the passenger side lamps:
1. Open the hood.
2. Remove the headlamp cover.
3. Reach behind the passenger headlamp assembly.
NOTE:The park/turn lamps can also be accessed at this
point.
4. Turn the headlamp access cap counterclockwise to
remove.
5. Remove bulb by turning it counter clockwise and
disconnect.
6. Install new bulb by turning it clockwise and reconnect.
7. Reinstall headlamp access cap by turning it clockwise
and then reinstall headlamp cover.
To replace the driver side lamps:
1. Open the hood.
2. Remove the air cleaner filter cover by removing three
fasteners and loosening the clean air inlet clamp and
then rotate cover off to the side.
NOTE:The cover has an electrical connector that does
not need to be disconnected if the cover is rotated off to
the side.
7
MAINTAINING YOUR VEHICLE 545
Page 590 of 603
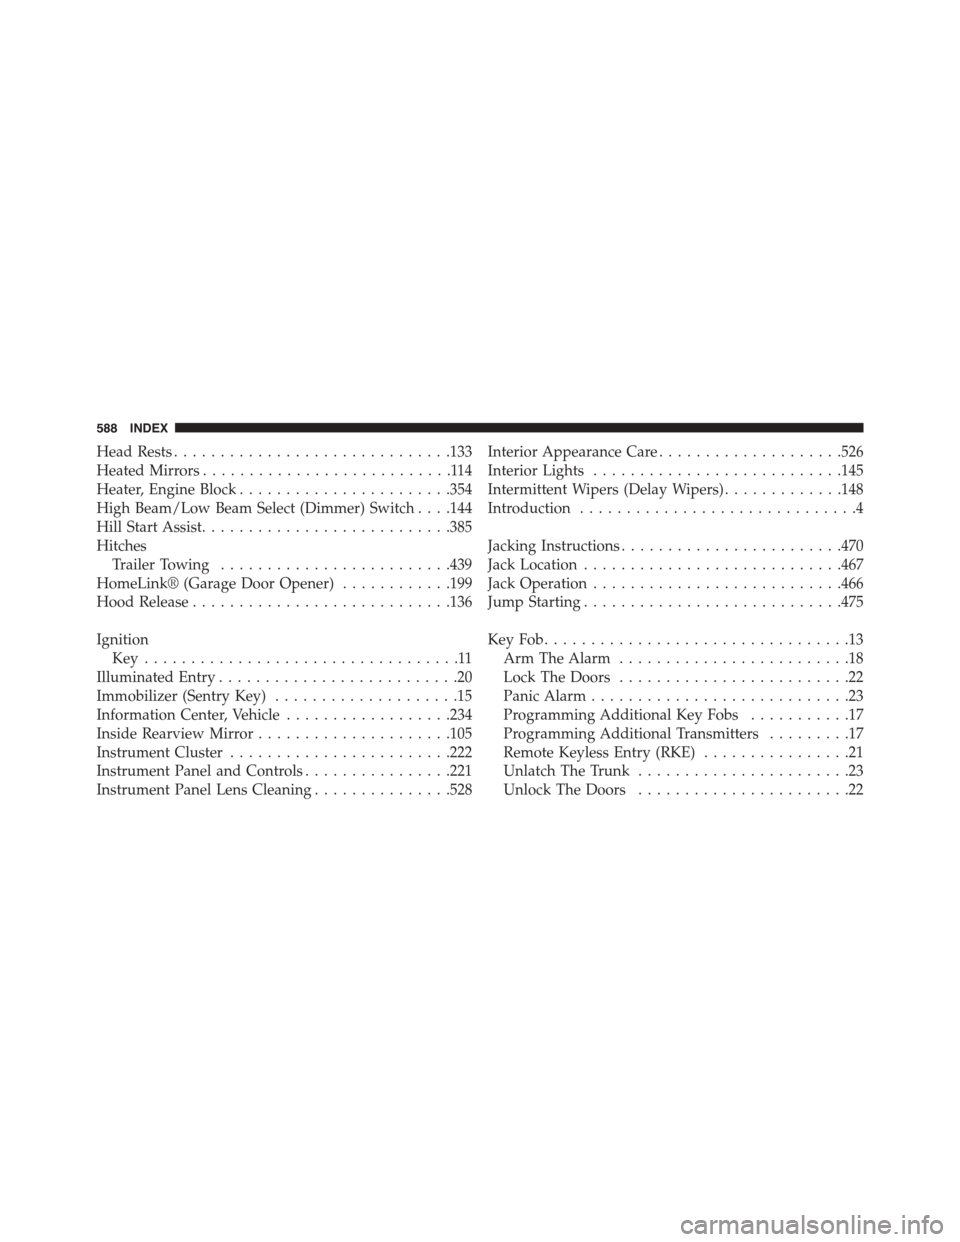
Head Rests..............................133
Heated Mirrors...........................114
Heater, Engine Block.......................354
High Beam/Low Beam Select (Dimmer) Switch . . . .144
Hill Start Assist...........................385
Hitches
Trailer Towing.........................439
HomeLink® (Garage Door Opener)............199
Hood Release............................136
Ignition
Key . . . . . . . . . . . . . . . . . . . . . . . . . . . . . . . . . .11
Illuminated Entry..........................20
Immobilizer (Sentry Key)....................15
Information Center, Vehicle..................234
Inside Rearview Mirror.....................105
Instrument Cluster........................222
Instrument Panel and Controls................221
Instrument Panel Lens Cleaning...............528
Interior Appearance Care....................526
Interior Lights...........................145
Intermittent Wipers (Delay Wipers).............148
Introduction..............................4
Jacking Instructions........................470
Jack Location............................467
Jack Operation...........................466
Jump Starting............................475
Key Fob . . . . . . . . . . . . . . . . . . . . . . . . . . . . . . . . .13
Arm The Alarm.........................18
Lock The Doors.........................22
Panic Alarm............................23
Programming Additional Key Fobs...........17
Programming Additional Transmitters.........17
Remote Keyless Entry (RKE)................21
Unlatch The Trunk.......................23
Unlock The Doors.......................22
588 INDEX