windshield wipers DODGE CHALLENGER 2015 3.G Owners Manual
[x] Cancel search | Manufacturer: DODGE, Model Year: 2015, Model line: CHALLENGER, Model: DODGE CHALLENGER 2015 3.GPages: 603, PDF Size: 14.97 MB
Page 102 of 603
▫Front Ventilated Seats — If Equipped.......130
▫Manual Forward Or Rearward Adjustment . . .130
▫Manual Front Seatback Recline............131
▫Passenger Seat Easy Entry...............132
▫Head Restraints......................133
▫Folding Rear Seat.....................134
!TO OPEN AND CLOSE THE HOOD.........136
!LIGHTS.............................138
▫Headlight Switch.....................138
▫Automatic Headlights — If Equipped.......139
▫Headlights On With Wipers (Available With
Automatic Headlights Only).............139
▫Automatic High Beam Headlamp Control — If
Equipped...........................139
▫Headlight Time Delay..................141
▫Daytime Running Lights (DRL) — If
Equipped...........................141
▫Lights-On Reminder...................142
▫Fog Lights — If Equipped...............142
▫Multifunction Lever...................143
▫Turn Signals.........................143
▫Lane Change Assist...................144
▫High/Low Beam Switch................144
▫Flash-To-Pass........................144
▫Map/Reading Lights...................144
▫Interior Lights.......................145
!WINDSHIELD WIPERS AND WASHERS......147
100 UNDERSTANDING THE FEATURES OF YOUR VEHICLE
Page 103 of 603
▫Intermittent Wiper System...............148
▫Mist Feature.........................148
▫Windshield Washers...................148
▫Headlights On With Wipers (Available With
Automatic Headlights Only).............149
▫Rain Sensing Wipers — If Equipped........150
!TILT/TELESCOPING STEERING COLUMN . . .151
!POWER TILT/TELESCOPING STEERING
COLUMN — IF EQUIPPED...............152
!HEATED STEERING WHEEL — IF EQUIPPED . .153
!ELECTRONIC SPEED CONTROL — IF
EQUIPPED...........................154
▫To Activate..........................155
▫To Set A Desired Speed.................156
▫To Deactivate........................156
▫To Resume Speed.....................156
▫To Vary The Speed Setting...............156
▫To Accelerate For Passing................158
!ADAPTIVE CRUISE CONTROL (ACC) — IF
EQUIPPED...........................158
▫Adaptive Cruise Control (ACC) Operation . . . .161
▫Activating Adaptive Cruise Control (ACC) . . . .162
▫To Activate/Deactivate..................162
▫To Set A Desired ACC Speed.............164
▫To Cancel...........................164
▫To Tu r n O f f . . . . . . . . . . . . . . . . . . . . . . . . ..165
▫To Resume..........................165
3
UNDERSTANDING THE FEATURES OF YOUR VEHICLE 101
Page 149 of 603
Interior Light Defeat (OFF)
Rotate the left dimmer control to the extreme bottom
“OFF” position. The interior lights will remain off when
the doors are open.
Parade Mode (Daytime Brightness Feature)
Rotate the instrument panel dimmer control upward to
the first detent. This feature brightens all text displays
such as the odometer, Driver Information Display (DID),
and radio when the position lights or headlights are on.
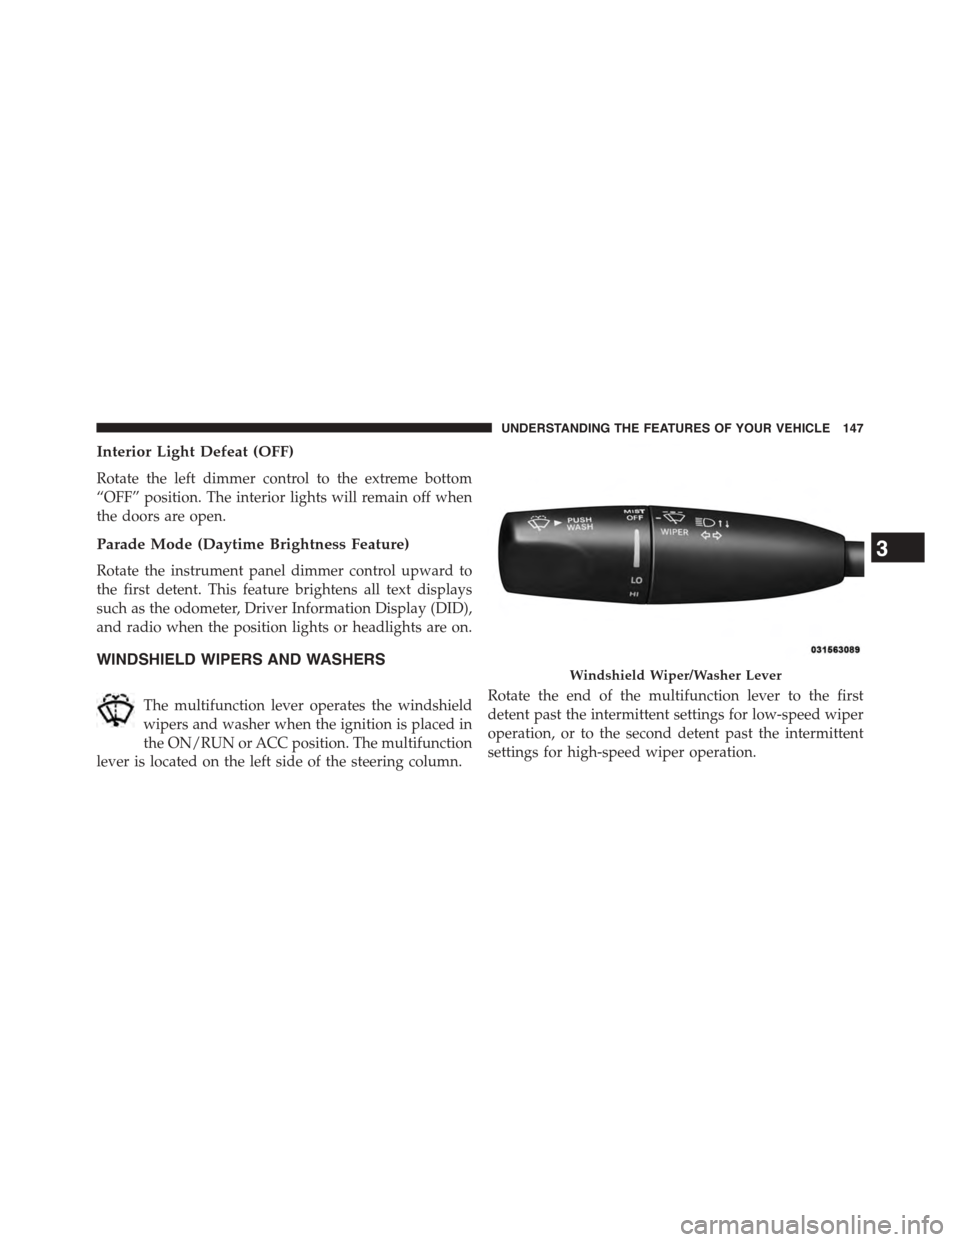
WINDSHIELD WIPERS AND WASHERS
The multifunction lever operates the windshield
wipers and washer when the ignition is placed in
the ON/RUN or ACC position. The multifunction
lever is located on the left side of the steering column.
Rotate the end of the multifunction lever to the first
detent past the intermittent settings for low-speed wiper
operation, or to the second detent past the intermittent
settings for high-speed wiper operation.
Windshield Wiper/Washer Lever
3
UNDERSTANDING THE FEATURES OF YOUR VEHICLE 147
Page 150 of 603
CAUTION!
Turn the windshield wipers off when driving
through an automatic car wash. Damage to the wind-
shield wipers may result if the wiper switch is left in
any position other than off.
Intermittent Wiper System
Use the intermittent wiper when weather conditions
make a single wiping cycle with a variable pause be-
tween cycles desirable. Rotate the end of the multifunc-
tion lever to the first detent position, and then turn the
end of the lever to select the desired delay interval. There
are four delay settings, which allow you to regulate the
wipe interval from a minimum of one cycle every second
to a maximum of approximately 36 seconds between
cycles. The delay intervals will double in duration when
the vehicle speed is 10 mph (16 km/h) or less.
Mist Feature
Rotate the end of the lever downward to the Mist
position to activate a single wipe cycle to clear off road
mist or spray from a passing vehicle. The wipers will
continue to operate until you release the multifunction
lever.
NOTE:The mist feature does not activate the washer
pump; therefore, no washer fluid will be sprayed on the
windshield. The wash function must be used in order to
spray the windshield with washer fluid.
Windshield Washers
To use the washer, push the multifunction lever inward
(toward the steering column) and hold it for as long as
washer spray is desired.
If you activate the washer while the windshield wiper
control is in the delay range, the wipers will operate for
148 UNDERSTANDING THE FEATURES OF YOUR VEHICLE
Page 151 of 603
several wipe cycles after releasing the multifunction lever
and then resume the intermittent interval previously
selected.
If you activate the washer while the windshield wiper is
turned off, the wipers will operate for several wipe cycles
and then turn off.
WARNING!
Sudden loss of visibility through the windshield
could lead to a collision. You might not see other
vehicles or other obstacles. To avoid sudden icing of
the windshield during freezing weather, warm the
windshield with the defroster before and during
windshield washer use.
Headlights On With Wipers (Available With
Automatic Headlights Only)
When this feature is active, the headlights will turn on
approximately 10 seconds after the wipers are turned on
if the headlight switch is placed in the A (AUTO)
position. In addition, the headlights will turn off when
the wipers are turned off if they were turned on by this
feature.
NOTE:For vehicle equipped with rain sensor (auto
wipes), please note that in addition to the 10 seconds, the
headlights can also turn on if the Rain Sensing feature is
ON, and the front wipers complete a minimum of 5 wipe
cycles within 60 seconds.
In this case (auto wipes) the headlights will turn off if no
wipes occurs in 240 Seconds.
3
UNDERSTANDING THE FEATURES OF YOUR VEHICLE 149
Page 152 of 603
The Headlights On with Wipers feature can be turned on
and off using the Uconnect® System, refer to “Uconnect®
Settings” in “Understanding Your Instrument Panel” for
further information.
Rain Sensing Wipers — If Equipped
This feature senses moisture on the windshield and
automatically activates the wipers for the driver. The
feature is especially useful for road splash or overspray
from the windshield washers of the vehicle ahead. Rotate
the end of the multifunction lever to one of four settings
to activate this feature.
The sensitivity of the system can be adjusted with the
multifunction lever. Wiper delay position 1 is the least
sensitive, and wiper delay position 4 is the most sensi-
tive. Setting 3 should be used for normal rain conditions.
Settings 1 and 2 can be used if the driver desires less
wiper sensitivity. Setting 4 can be used if the driver
desires more sensitivity. Place the wiper switch in the
OFF position when not using the system.
NOTE:
•The Rain Sensing feature will not operate when the
wiper switch is in the low or high-speed position.
•The Rain Sensing feature may not function properly
when ice, or dried salt water is present on the wind-
shield.
•Use of Rain-X® or products containing wax or silicone
may reduce Rain Sensing performance.
150 UNDERSTANDING THE FEATURES OF YOUR VEHICLE
Page 261 of 603
touchscreen. Press the “Parkview Backup camera Delay”
button on the touchscreen and select from “ON” or
“OFF.”
•Rain Sensing Auto Wipers
When this feature is selected, the system will automati-
cally activate the windshield wipers if it senses moisture
on the windshield. To enable or disable, press the “Rain
Sensing” button on the touchscreen, and select “On” or
“Off.” Press the back arrow/Done button on the touch-
screen to return to the previous menu.
•Hill Start Assist — If Equipped
When this feature is selected, the Hill Start Assist (HSA)
system is active. Refer to “Electronic Brake Control
System” in “Starting And Operating” for system function
and operating information. To enable or disable, press the
“Hill Start Assist” button on the touchscreen, and select
“On” or “Off.” Press the back arrow/Done button on the
touchscreen to return to the previous menu.
Lights
After pressing the “Lights” button on the touchscreen,
the following settings will be available:
•Headlight Off Delay
When this feature is selected, it allows the adjustment of
the amount of time the headlights remain on after the
engine is shut off. To change the Headlight Off Delay
setting, press the “Headlight Off Delay” button on the
touchscreen and choose either “0,” “30,” “60,” or “90”
buttons on the touchscreen to select your desired time
interval. Press the back arrow/Done button on the touch-
screen to return to the previous menu.
•Headlight Illumination On Approach
When this feature is selected, it allows the adjustment of
the amount of time the headlights remain on when the
doors are unlocked with the Remote Keyless Entry (RKE)
transmitter. To change the Illuminated Approach status,
4
UNDERSTANDING YOUR INSTRUMENT PANEL 259
Page 279 of 603
Assistance” button on the touchscreen. Press the
“Parkview Backup camera Delay” button on the touch-
screen to turn the ParkView® Delay ON or OFF.
•Rain Sensing Auto Wipers
When this feature is selected, the system will automati-
cally activate the windshield wipers if it senses moisture
on the windshield. To make your selection, press the
“Rain Sensing” button on the touchscreen, until a check-
mark appears next to setting, indicating that the setting
had been selected. Press the back arrow button on the
touchscreen to return to the previous menu.
•Hill Start Assist — If Equipped
When this feature is selected, the Hill Start Assist (HSA)
system is active. Refer to “Electronic Brake Control
System” in “Starting And Operating” for system function
and operating information. To make your selection, press
the “Hill Start Assist” button on the touchscreen, until a
check-mark appears next to setting, indicating that the
setting had been selected. Press the back arrow button on
the touchscreen to return to the previous menu.
Lights
After pressing the “Lights” button on the touchscreen the
following settings will be available.
•Headlight Off Delay
When this feature is selected, it allows adjustment of the
amount of time the headlights remain on after the engine
is shut off. To change the Headlights Off Delay setting,
press the “+” or “-” button on the touchscreen to select
your desired time interval, and choose either 0 sec, 30 sec,
60 sec or 90 seconds. Press the back arrow button on the
touchscreen to return to the previous menu, or push the
back button on the faceplate.
•Headlight Illumination On Approach
When this feature is selected, the headlights will activate
and remain on for 0, 30, 60, or 90 seconds when the doors
4
UNDERSTANDING YOUR INSTRUMENT PANEL 277
Page 507 of 603
Refrigerant Recovery And Recycling HFO 1234yf
— If Equipped
HFO 1234yf Air Conditioning Refrigerant is a hydro-
fluorocarbon (HFC) that is endorsed by the Environmen-
tal Protection Agency and is an ozone-saving product
with a low GWP (Global Warming Potential). However,
the manufacturer recommends that air conditioning ser-
vice be performed by authorized dealer or other service
facilities using recovery and recycling equipment.
NOTE:Use only manufacturer approved A/C system
PAG compressor oil, and refrigerants.
A/C Air Filter
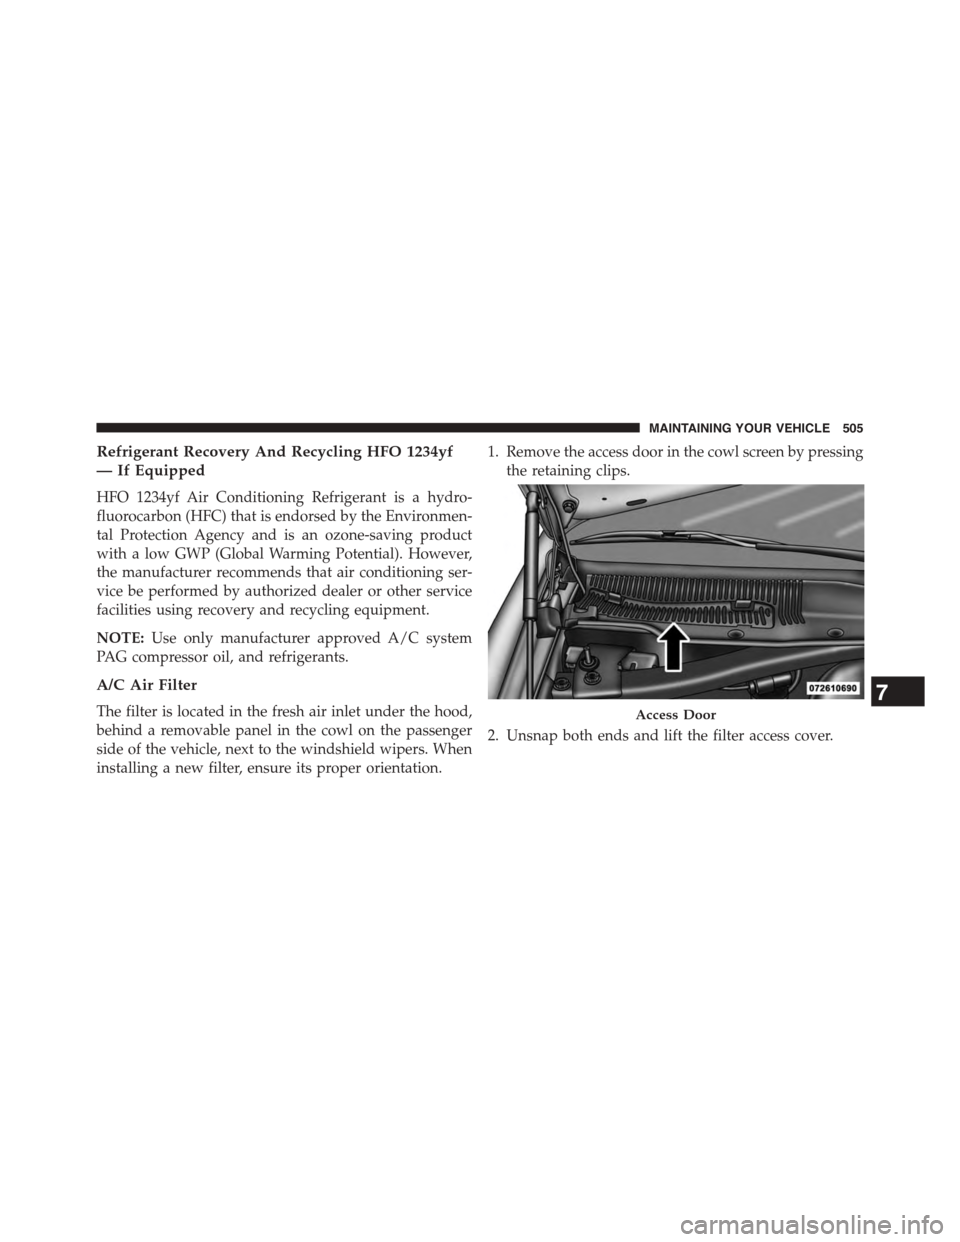
The filter is located in the fresh air inlet under the hood,
behind a removable panel in the cowl on the passenger
side of the vehicle, next to the windshield wipers. When
installing a new filter, ensure its proper orientation.
1. Remove the access door in the cowl screen by pressing
the retaining clips.
2. Unsnap both ends and lift the filter access cover.
Access Door
7
MAINTAINING YOUR VEHICLE 505
Page 509 of 603
Body Lubrication
Locks and all body pivot points, including such items as
seat tracks, door hinge pivot points and rollers, liftgate,
tailgate, decklid, sliding doors and hood hinges, should
be lubricated periodically with a lithium based grease,
such as MOPAR® Spray White Lube to assure quiet, easy
operation and to protect against rust and wear. Prior to
the application of any lubricant, the parts concerned
should be wiped clean to remove dust and grit; after
lubricating excess oil and grease should be removed.
Particular attention should also be given to hood latching
components to ensure proper function. When performing
other underhood services, the hood latch, release mecha-
nism and safety catch should be cleaned and lubricated.
The external lock cylinders should be lubricated twice a
year, preferably in the Fall and Spring. Apply a small
amount of a high quality lubricant, such as MOPAR®
Lock Cylinder Lubricant directly into the lock cylinder.
Windshield Wiper Blades
Clean the rubber edges of the wiper blades and the
windshield periodically with a sponge or soft cloth and a
mild nonabrasive cleaner. This will remove accumula-
tions of salt or road film.
Operation of the wipers on dry glass for long periods
may cause deterioration of the wiper blades. Always use
washer fluid when using the wipers to remove salt or dirt
from a dry windshield.
Avoid using the wiper blades to remove frost or ice from
the windshield. Keep the blade rubber out of contact with
petroleum products such as engine oil, gasoline, etc.
NOTE:Life expectancy of wiper blades varies depend-
ing on geographical area and frequency of use. Poor
performance of blades may be present with chattering,
marks, water lines or wet spots. If any of these conditions
are present, clean the wiper blades or replace as neces-
sary.
7
MAINTAINING YOUR VEHICLE 507