clock setting DODGE CHALLENGER 2015 3.G User Guide
[x] Cancel search | Manufacturer: DODGE, Model Year: 2015, Model line: CHALLENGER, Model: DODGE CHALLENGER 2015 3.GPages: 220, PDF Size: 30.96 MB
Page 73 of 220
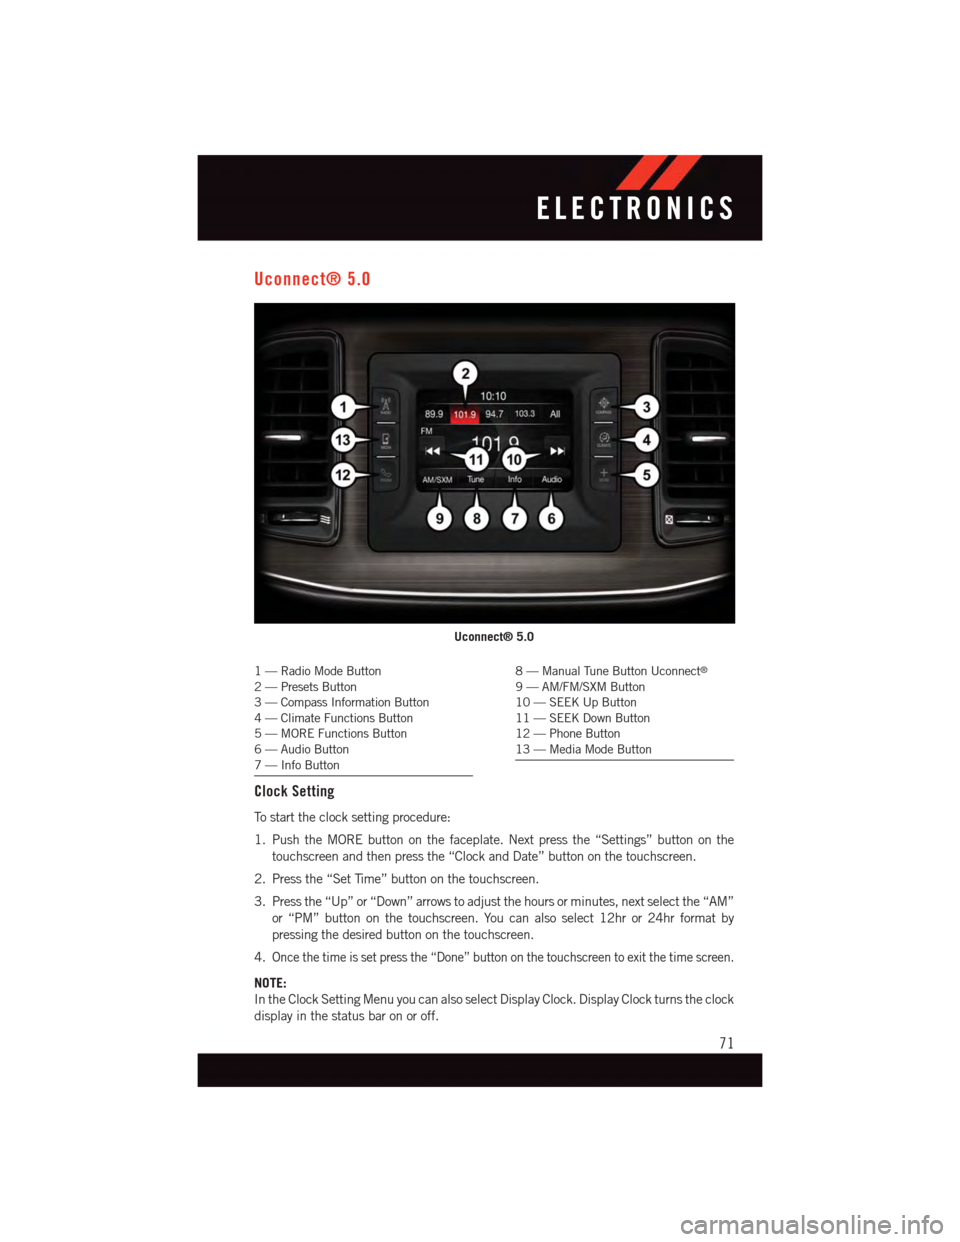
Uconnect® 5.0
1—RadioModeButton2—PresetsButton3—CompassInformationButton4—ClimateFunctionsButton5—MOREFunctionsButton6—AudioButton7—InfoButton
8—ManualTuneButtonUconnect®
9—AM/FM/SXMButton10 — SEEK Up Button11 — SEEK Down Button12 — Phone Button13 — Media Mode Button
Clock Setting
To s t a r t t h e c l o c k s e t t i n g p r o c e d u r e :
1. Push the MORE button on the faceplate. Next press the “Settings” button on the
touchscreen and then press the “Clock and Date” button on the touchscreen.
2. Press the “Set Time” button on the touchscreen.
3. Press the “Up” or “Down” arrows to adjust the hours or minutes, next select the “AM”
or “PM” button on the touchscreen. You can also select 12hr or 24hr format by
pressing the desired button on the touchscreen.
4.Once the time is set press the “Done” button on the touchscreen to exit the time screen.
NOTE:
In the Clock Setting Menu you can also select Display Clock. Display Clock turns the clock
display in the status bar on or off.
Uconnect® 5.0
ELECTRONICS
71
Page 84 of 220
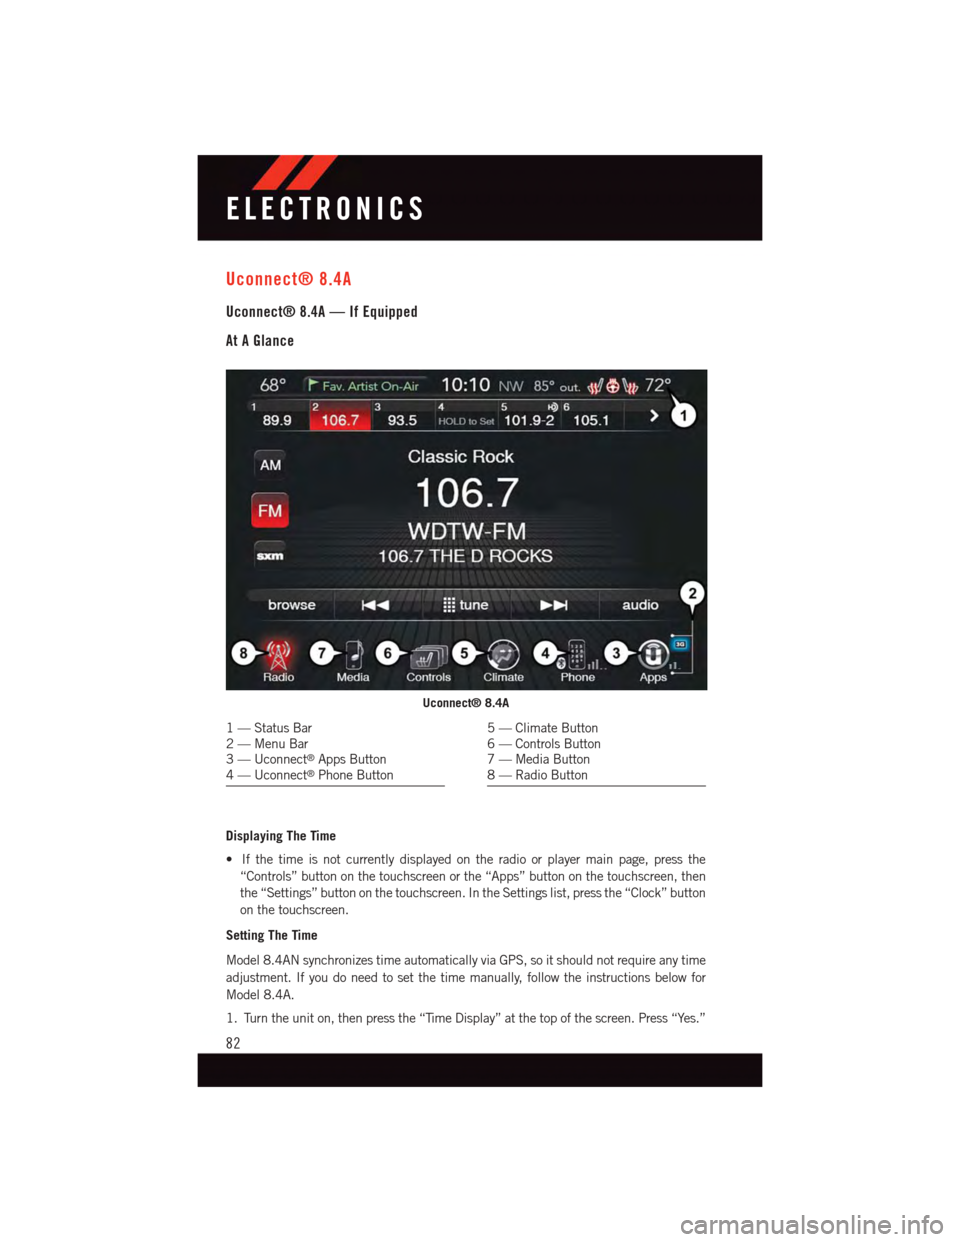
Uconnect® 8.4A
Uconnect® 8.4A — If Equipped
At A Glance
Displaying The Time
•Ifthetimeisnotcurrentlydisplayedontheradioorplayermainpage,pressthe
“Controls” button on the touchscreen or the “Apps” button on the touchscreen, then
the “Settings” button on the touchscreen. In the Settings list, press the “Clock” button
on the touchscreen.
Setting The Time
Model 8.4AN synchronizes time automatically via GPS, so it should not require any time
adjustment. If you do need to set the time manually, follow the instructions below for
Model 8.4A.
1. Turn the unit on, then press the “Time Display” at the top of the screen. Press “Yes.”
Uconnect® 8.4A
1—StatusBar2—MenuBar3—Uconnect®Apps Button4—Uconnect®Phone Button
5—ClimateButton6—ControlsButton7—MediaButton8—RadioButton
ELECTRONICS
82
Page 85 of 220
NOTE:
If the time is not displayed at the top of the screen, press the “Controls” or the “Apps”
button on the touchscreen, then the “Settings” button on the touchscreen. In the Settings
screen, press the “Clock” button on the touchscreen.
2. Press “+” or “–” next to Set Time Hours and Set Time Minutes to adjust the time.
3. If these features are not available, uncheck the Sync with GPS box.
4. Press “X” to save your settings and exit out of the Clock Setting screen.
Audio Settings
1. Press the “Media” or “Radio” button on the touchscreen.
2. Press the “Audio” button on the touchscreen to activate the Audio settings screen to
adjust Balance/Fade, Equalizer and Speed Adjusted Volume.
3. You can return to the Radio screen by pressing the “X” located at the top right.
Balance/Fade
1. Press the “Media” or “Radio” button on the touchscreen.
2. Press the “Audio” button on the touchscreen to activate the Audio settings screen to
adjust Balance/Fade, Equalizer and Speed Adjusted Volume.
3. Press the “Balance/Fade” button on the touchscreen to Balance audio between the
front speakers or fade the audio between the rear and front speakers.
4. Pressing the “Front,” “Rear,” “Left” or “Right” button on the touchscreens or press
and drag the Speaker Icon to adjust the Balance/Fade.
Equalizer
1. Press the “Media” or “Radio” button on the touchscreen.
2. Press the “Audio” button on the touchscreen to activate the Audio settings screen to
adjust Balance/Fade, Equalizer and Speed Adjusted Volume.
3. Press the “Equalizer” button on the touchscreen to activate the Equalizer screen.
4. Press the “+” or “–” button on the touchscreens, or by pressing and dragging over the
“level bar” for each of the equalizer bands. The level value, which spans between plus
or minus 9, is displayed at the bottom of each of the Bands.
Speed Adjusted Volume
1. Press the “Media” or “Radio” button on the touchscreen.
2. Press the “Audio” button on the touchscreen to activate the Audio settings screen to
adjust Balance/Fade, Equalizer and Speed Adjusted Volume.
3. Press the “Speed Adjusted Volume” button on the touchscreen to activate the Speed
Adjusted Volume screen. The Speed Adjusted Volume is adjusted by pressing the
“volume level” indicator. This alters the automatic adjustment of the audio volume
with variation to vehicle speed.
ELECTRONICS
83
Page 115 of 220
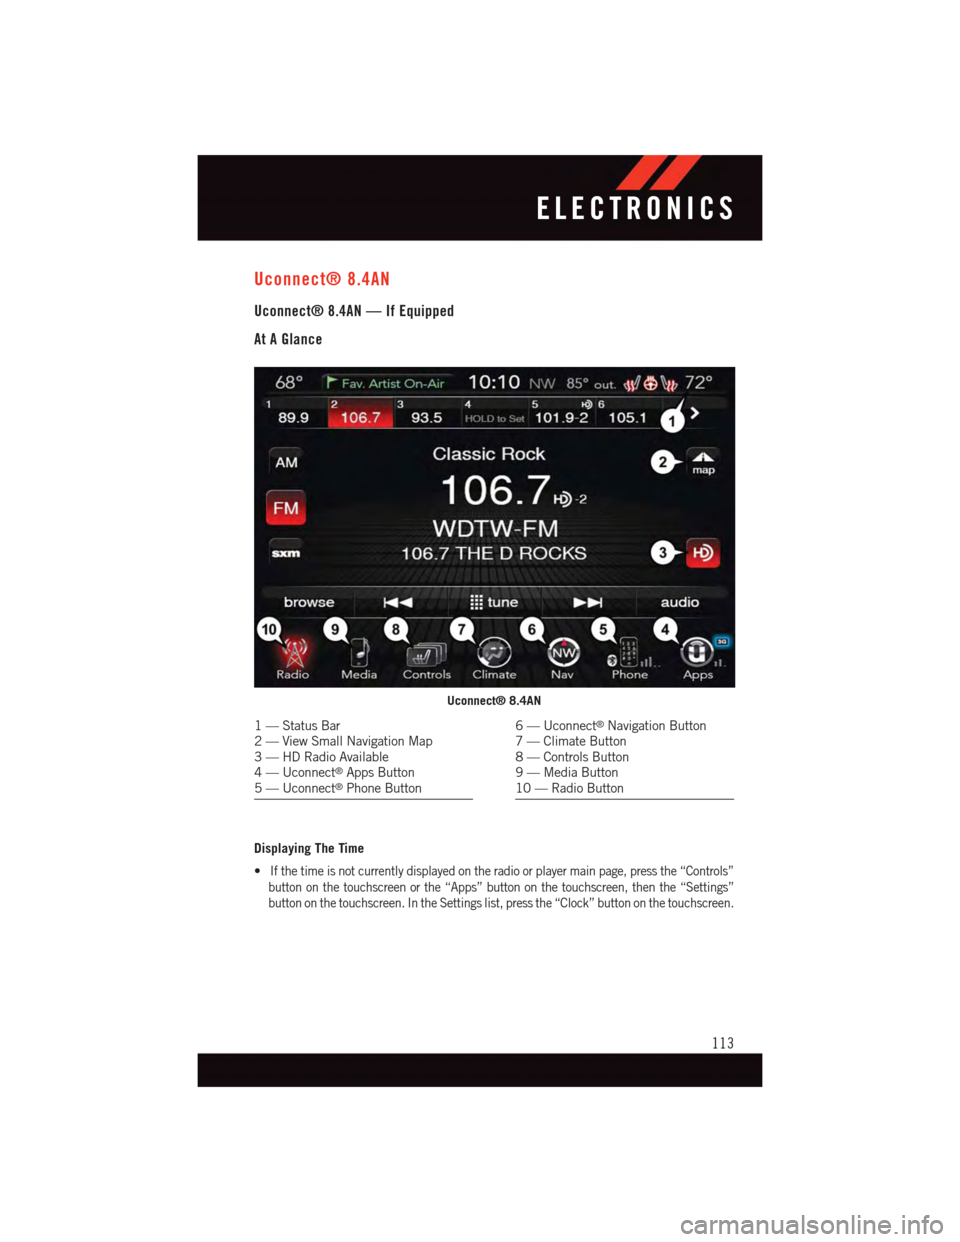
Uconnect® 8.4AN
Uconnect® 8.4AN — If Equipped
At A Glance
Displaying The Time
•If the time is not currently displayed on the radio or player main page, press the “Controls”
button on the touchscreen or the “Apps” button on the touchscreen, then the “Settings”
button on the touchscreen. In the Settings list, press the “Clock” button on the touchscreen.
Uconnect® 8.4AN
1—StatusBar2—ViewSmallNavigationMap3—HDRadioAvailable4—Uconnect®Apps Button5—Uconnect®Phone Button
6—Uconnect®Navigation Button7—ClimateButton8—ControlsButton9—MediaButton10 — Radio Button
ELECTRONICS
113
Page 116 of 220
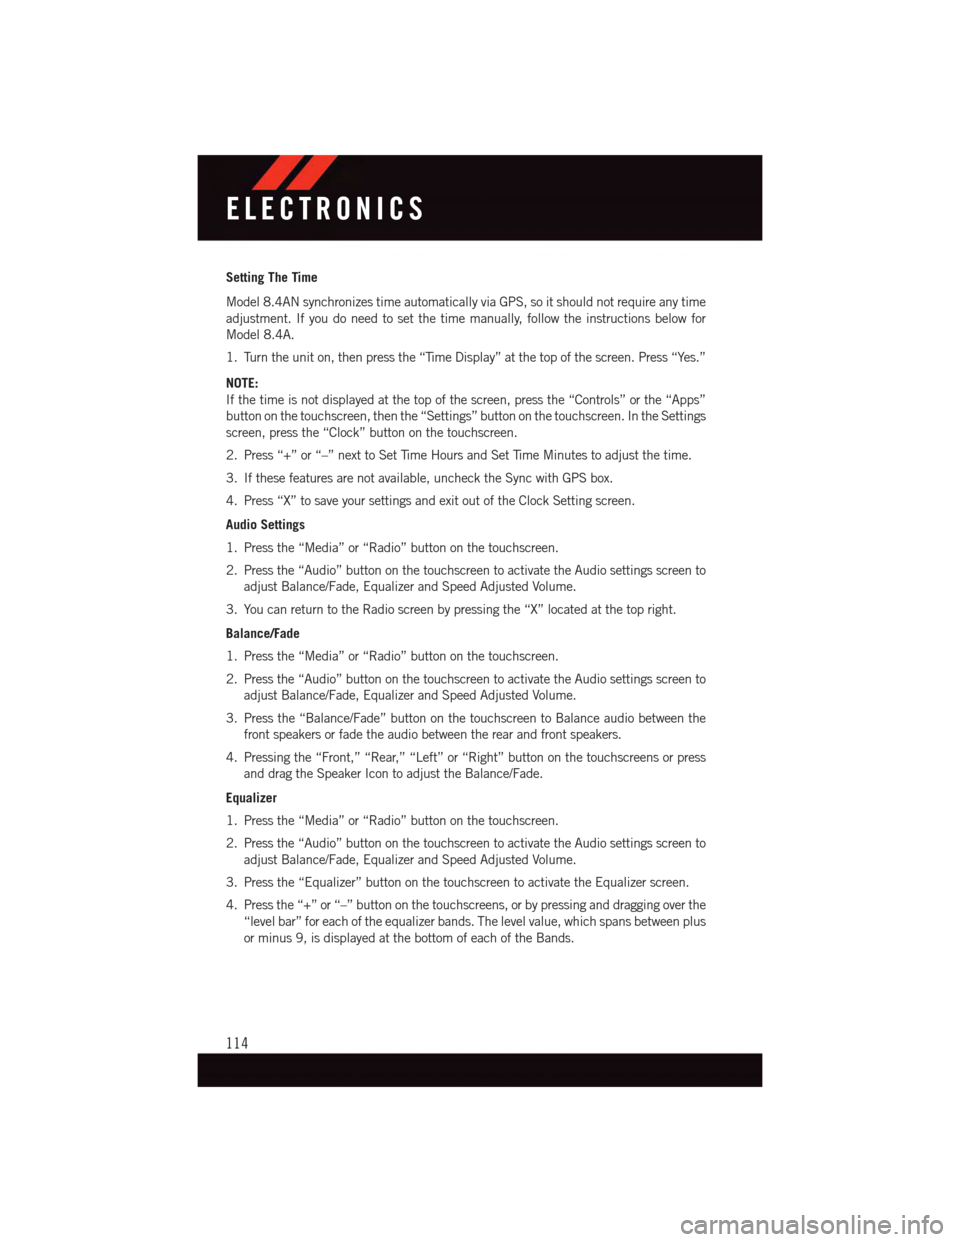
Setting The Time
Model 8.4AN synchronizes time automatically via GPS, so it should not require any time
adjustment. If you do need to set the time manually, follow the instructions below for
Model 8.4A.
1. Turn the unit on, then press the “Time Display” at the top of the screen. Press “Yes.”
NOTE:
If the time is not displayed at the top of the screen, press the “Controls” or the “Apps”
button on the touchscreen, then the “Settings” button on the touchscreen. In the Settings
screen, press the “Clock” button on the touchscreen.
2. Press “+” or “–” next to Set Time Hours and Set Time Minutes to adjust the time.
3. If these features are not available, uncheck the Sync with GPS box.
4. Press “X” to save your settings and exit out of the Clock Setting screen.
Audio Settings
1. Press the “Media” or “Radio” button on the touchscreen.
2. Press the “Audio” button on the touchscreen to activate the Audio settings screen to
adjust Balance/Fade, Equalizer and Speed Adjusted Volume.
3. You can return to the Radio screen by pressing the “X” located at the top right.
Balance/Fade
1. Press the “Media” or “Radio” button on the touchscreen.
2. Press the “Audio” button on the touchscreen to activate the Audio settings screen to
adjust Balance/Fade, Equalizer and Speed Adjusted Volume.
3. Press the “Balance/Fade” button on the touchscreen to Balance audio between the
front speakers or fade the audio between the rear and front speakers.
4. Pressing the “Front,” “Rear,” “Left” or “Right” button on the touchscreens or press
and drag the Speaker Icon to adjust the Balance/Fade.
Equalizer
1. Press the “Media” or “Radio” button on the touchscreen.
2. Press the “Audio” button on the touchscreen to activate the Audio settings screen to
adjust Balance/Fade, Equalizer and Speed Adjusted Volume.
3. Press the “Equalizer” button on the touchscreen to activate the Equalizer screen.
4. Press the “+” or “–” button on the touchscreens, or by pressing and dragging over the
“level bar” for each of the equalizer bands. The level value, which spans between plus
or minus 9, is displayed at the bottom of each of the Bands.
ELECTRONICS
114
Page 133 of 220
PROGRAMMABLE FEATURES
Uconnect® Customer Programmable Features
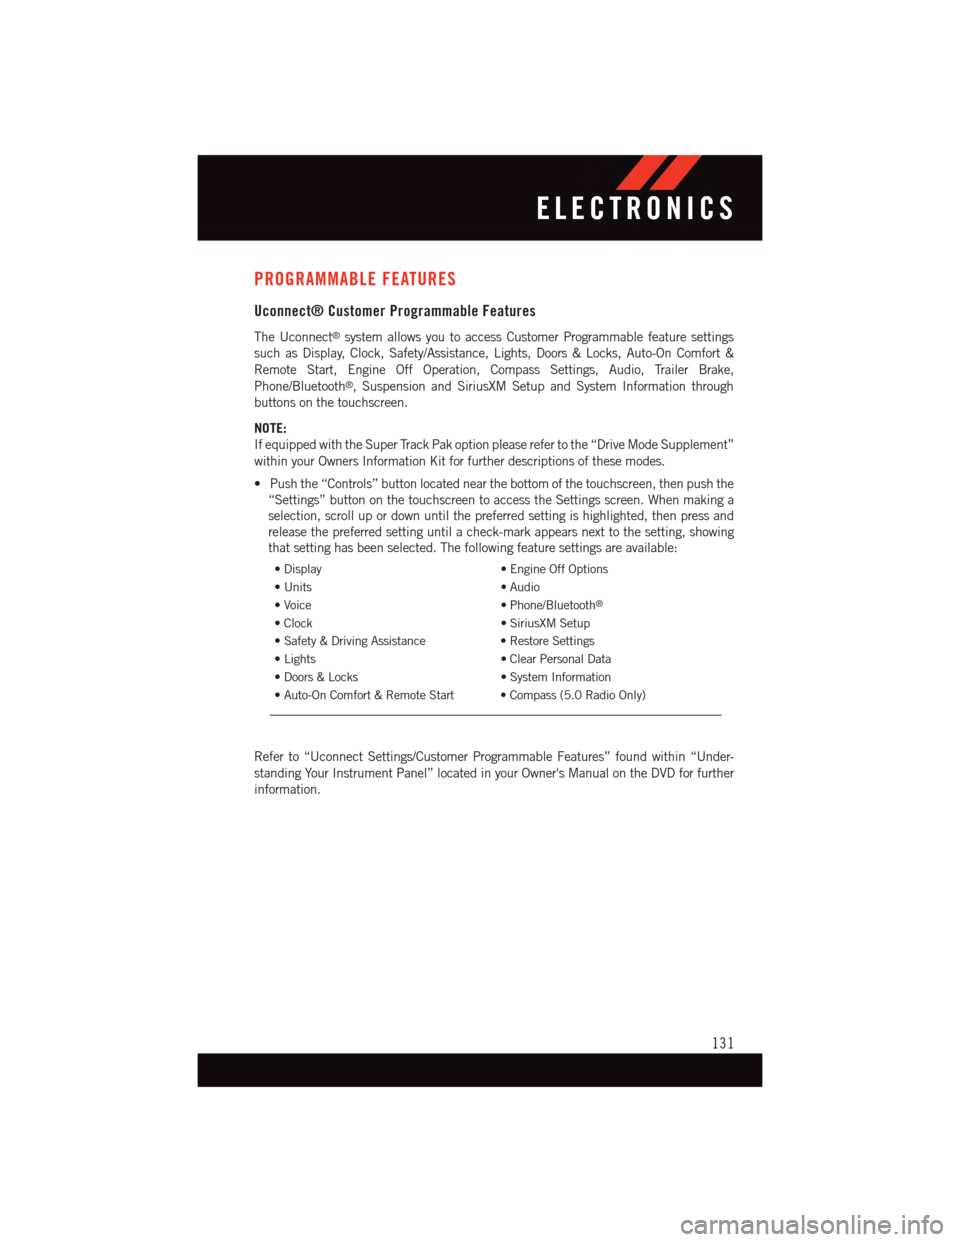
The Uconnect®system allows you to access Customer Programmable feature settings
such as Display, Clock, Safety/Assistance, Lights, Doors & Locks, Auto-On Comfort &
Remote Start, Engine Off Operation, Compass Settings, Audio, Trailer Brake,
Phone/Bluetooth®,SuspensionandSiriusXMSetupandSystemInformationthrough
buttons on the touchscreen.
NOTE:
If equipped with the Super Track Pak option please refer to the “Drive Mode Supplement”
within your Owners Information Kit for further descriptions of these modes.
•Pushthe“Controls”buttonlocatednearthebottomofthetouchscreen,thenpushthe
“Settings” button on the touchscreen to access the Settings screen. When making a
selection, scroll up or down until the preferred setting is highlighted, then press and
release the preferred setting until a check-mark appears next to the setting, showing
that setting has been selected. The following feature settings are available:
•Display•EngineOffOptions
•Units•Audio
•Voice•Phone/Bluetooth®
•Clock•SiriusXMSetup
•Safety&DrivingAssistance•RestoreSettings
•Lights•ClearPersonalData
•Doors&Locks•SystemInformation
•Auto-OnComfort&RemoteStart •Compass(5.0RadioOnly)
Refer to “Uconnect Settings/Customer Programmable Features” found within “Under-
standing Your Instrument Panel” located in your Owner's Manual on the DVD for further
information.
ELECTRONICS
131
Page 214 of 220
Access
Uconnect®..............55
Access, Uconnect®...........55
Adaptive Cruise Control (ACC)
(Cruise Control) . . . . . . . . . . . .40
Adding Engine Coolant (Antifreeze) . .186
Adding Washer Fluid..........186
Air Bag
Advanced Front Air Bag.......18
Advance Front Air Bag.......18
Air Bags . . . . . . . . . . . . . . .18Air Bag Warning Light . . . . . . . .18Front Air Bag . . . . . . . . . . . .18Rollover . . . . . . . . . . . . . . .18Side Impacts.............18Air bag Light . . . . . . . . . . . . . .148Air Cleaner, Engine (Engine AirCleaner Filter)............186Air Conditioner Maintenance.....186Air Conditioning...........46,48Air Conditioning Refrigerant......186Air Conditioning System........186AlarmVehicle Security Alarm.......16Alarm (Security Alarm)......16,150Antifreeze (Engine Coolant). . .182, 184,186Disposal . . . . . . . . . . . . . .186Anti-Lock Warning Light........148APPUconnect®Access..........57Appearance Care............186Arming System (Security Alarm)....16Assistance Towing...........145Automatic Headlights.......37,151Automatic High Beams.........37Automatic Temperature Control(ATC) . . . . . . . . . . . . . . . . .46Automatic TransmissionAdding Fluid........184, 186Autostick...........43,137Fluid Type . . . . . . . . . .184, 186Autostick..............43,137Axle Fluid . . . . . . . . . . . .184, 186Axle Lubrication . . . . . . . . .184, 186
Back-Up Camera............49Battery.................186
Blind Spot Monitoring..........50Body Mechanism Lubrication.....186Brake Fluid . . . . . . . . . . . .184, 186Brakes.................186Brake System.............186Fluid Check.........184, 186Master Cylinder..........186Break-In Recommendations, NewVehicle . . . . . . . . . . . . . .33, 34Bulb Replacement...........206Bulbs, Light . . . . . . . . . . . . . .206
Capacities, Fluid.........182, 184Caps, FillerOil (Engine)............186Car Washes . . . . . . . . . . . . . . .186Change Oil Indicator..........149Changing A Flat Tire..........152Charging System Light.........147Child Restraint...........20,21Child RestraintsLower Anchors And Tethers ForChildren . . . . . . . . . . . . . . .21CleaningWheels...............186Windshield Wiper Blades.....186Climate Control . . . . . . . . . . . . .46Clock . . . . . . . . . . . . . . . . . . .71Clock Setting...............71Cluster Warning/Indicator LightsAnti-Lock Brake (ABS) Light . . .148Charging System Light......147Electronic Speed Control ONIndicator . . . . . . . . . . . . . .151Electronic Speed Control SETIndicator . . . . . . . . . . . . . .151Electronic Throttle Control (ETC)Indicator Light . . . . . . . . . . .148Engine Temperature WarningLight . . . . . . . . . . . . . . . .147Front Fog Light Indicator . . . . .150Fuel Cap/Loose Gas Cap......151High Beam Indicator.......150Malfunction Indicator Light(MIL) . . . . . . . . . . . . . . . .147Oil Pressure Warning Light . . . .148Park/Headlight ON Indicator . . .150
INDEX
212