ESP DODGE CHALLENGER 2020 Repair Manual
[x] Cancel search | Manufacturer: DODGE, Model Year: 2020, Model line: CHALLENGER, Model: DODGE CHALLENGER 2020Pages: 396, PDF Size: 16.64 MB
Page 342 of 396
340MULTIMEDIA
Care And Maintenance
Touchscreen
Do not press the touchscreen with any hard
or sharp objects (pen, USB stick, jewelry,
etc.), which could scratch the touchscreen
surface!
Do not spray any liquid or caustic chemicals
directly on the screen! Use a clean and dry
microfiber lens cleaning cloth in order to
clean the touchscreen.
If necessary, use a lint-free cloth dampened
with a cleaning solution, such as isopropyl
alcohol or an isopropyl alcohol and water
solution ratio of 50:50. Be sure to follow the
solvent manufacturer's precautions and
directions.
UCONNECT 4 WITH 7-INCH DISPLAY
INTRODUCTION
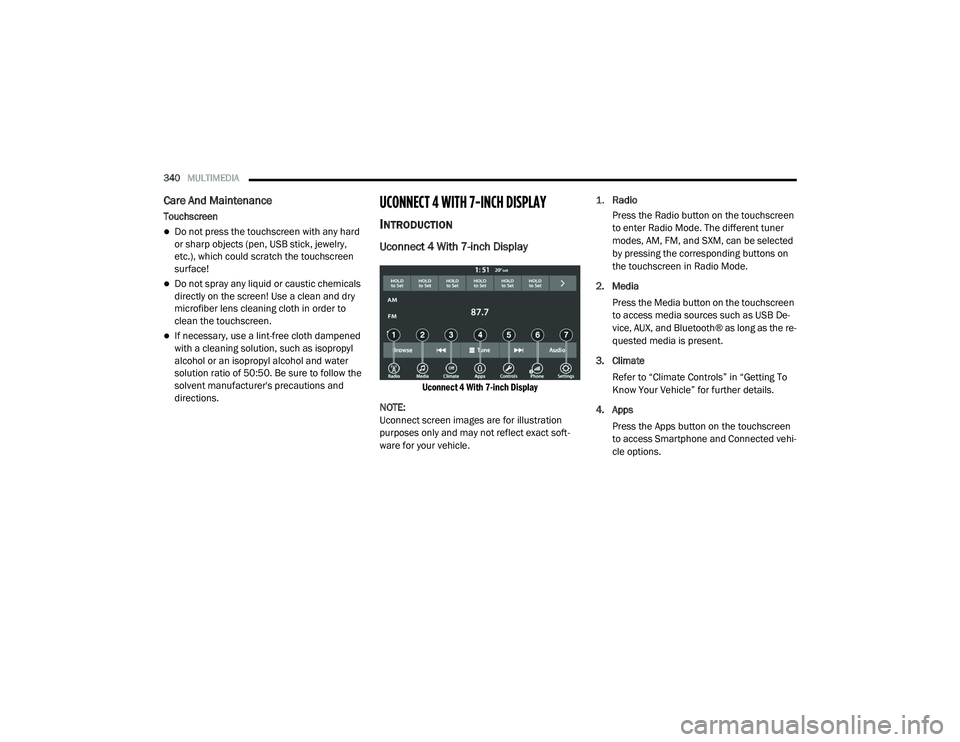
Uconnect 4 With 7-inch Display
Uconnect 4 With 7-inch Display
NOTE:
Uconnect screen images are for illustration
purposes only and may not reflect exact soft -
ware for your vehicle.
1.
Radio
Press the Radio button on the touchscreen
to enter Radio Mode. The different tuner
modes, AM, FM, and SXM, can be selected
by pressing the corresponding buttons on
the touchscreen in Radio Mode.
2. Media Press the Media button on the touchscreen
to access media sources such as USB De -
vice, AUX, and Bluetooth® as long as the re -
quested media is present.
3. Climate Refer to “Climate Controls” in “Getting To
Know Your Vehicle” for further details.
4. Apps Press the Apps button on the touchscreen
to access Smartphone and Connected vehi -
cle options.
20_LA_OM_EN_USC_t.book Page 340
Page 343 of 396
MULTIMEDIA341
5. Controls
Press the Controls button on the touch -
screen to adjust the heated and vented
seats or heated steering wheel (if
equipped).
6. Phone Press the Phone button on the touchscreen
to access the Uconnect Phone feature.
7. Settings Press the Settings button on the touch -
screen to access the Uconnect Settings
menu.
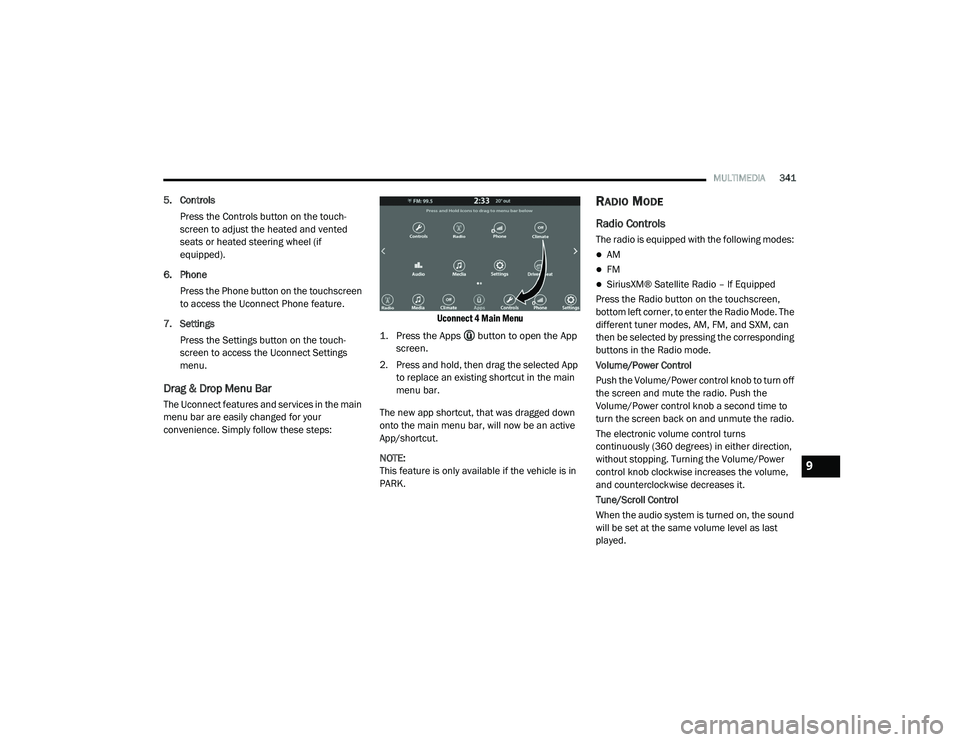
Drag & Drop Menu Bar
The Uconnect features and services in the main
menu bar are easily changed for your
convenience. Simply follow these steps:
Uconnect 4 Main Menu
1. Press the Apps button to open the App screen.
2. Press and hold, then drag the selected App to replace an existing shortcut in the main
menu bar.
The new app shortcut, that was dragged down
onto the main menu bar, will now be an active
App/shortcut.
NOTE:
This feature is only available if the vehicle is in
PARK.
RADIO MODE
Radio Controls
The radio is equipped with the following modes:
AM
FM
SiriusXM® Satellite Radio – If Equipped
Press the Radio button on the touchscreen,
bottom left corner, to enter the Radio Mode. The
different tuner modes, AM, FM, and SXM, can
then be selected by pressing the corresponding
buttons in the Radio mode.
Volume/Power Control
Push the Volume/Power control knob to turn off
the screen and mute the radio. Push the
Volume/Power control knob a second time to
turn the screen back on and unmute the radio.
The electronic volume control turns
continuously (360 degrees) in either direction,
without stopping. Turning the Volume/Power
control knob clockwise increases the volume,
and counterclockwise decreases it.
Tune/Scroll Control
When the audio system is turned on, the sound
will be set at the same volume level as last
played.
9
20_LA_OM_EN_USC_t.book Page 341
Page 345 of 396
MULTIMEDIA343
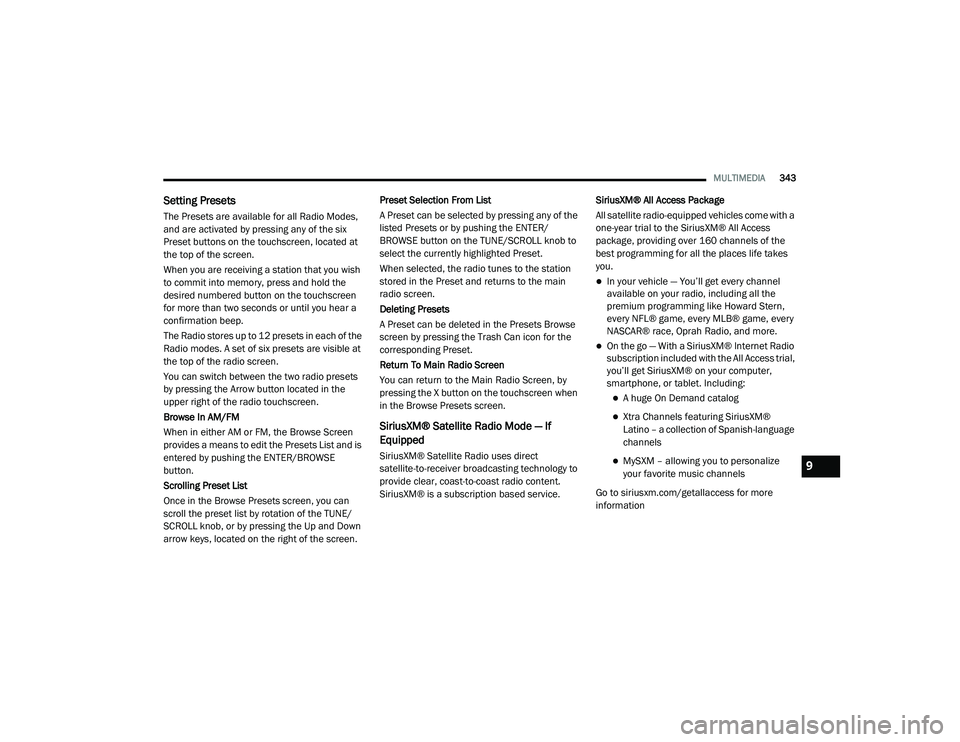
Setting Presets
The Presets are available for all Radio Modes,
and are activated by pressing any of the six
Preset buttons on the touchscreen, located at
the top of the screen.
When you are receiving a station that you wish
to commit into memory, press and hold the
desired numbered button on the touchscreen
for more than two seconds or until you hear a
confirmation beep.
The Radio stores up to 12 presets in each of the
Radio modes. A set of six presets are visible at
the top of the radio screen.
You can switch between the two radio presets
by pressing the Arrow button located in the
upper right of the radio touchscreen.
Browse In AM/FM
When in either AM or FM, the Browse Screen
provides a means to edit the Presets List and is
entered by pushing the ENTER/BROWSE
button.
Scrolling Preset List
Once in the Browse Presets screen, you can
scroll the preset list by rotation of the TUNE/
SCROLL knob, or by pressing the Up and Down
arrow keys, located on the right of the screen. Preset Selection From List
A Preset can be selected by pressing any of the
listed Presets or by pushing the ENTER/
BROWSE button on the TUNE/SCROLL knob to
select the currently highlighted Preset.
When selected, the radio tunes to the station
stored in the Preset and returns to the main
radio screen.
Deleting Presets
A Preset can be deleted in the Presets Browse
screen by pressing the Trash Can icon for the
corresponding Preset.
Return To Main Radio Screen
You can return to the Main Radio Screen, by
pressing the X button on the touchscreen when
in the Browse Presets screen.
SiriusXM® Satellite Radio Mode — If
Equipped
SiriusXM® Satellite Radio uses direct
satellite-to-receiver broadcasting technology to
provide clear, coast-to-coast radio content.
SiriusXM® is a subscription based service.
SiriusXM® All Access Package
All satellite radio-equipped vehicles come with a
one-year trial to the SiriusXM® All Access
package, providing over 160 channels of the
best programming for all the places life takes
you.
In your vehicle — You’ll get every channel
available on your radio, including all the
premium programming like Howard Stern,
every NFL® game, every MLB® game, every
NASCAR® race, Oprah Radio, and more.
On the go — With a SiriusXM® Internet Radio
subscription included with the All Access trial,
you’ll get SiriusXM® on your computer,
smartphone, or tablet. Including:
A huge On Demand catalog
Xtra Channels featuring SiriusXM®
Latino – a collection of Spanish-language
channels
MySXM – allowing you to personalize
your favorite music channels
Go to siriusxm.com/getallaccess for more
information9
20_LA_OM_EN_USC_t.book Page 343
Page 348 of 396
346MULTIMEDIA
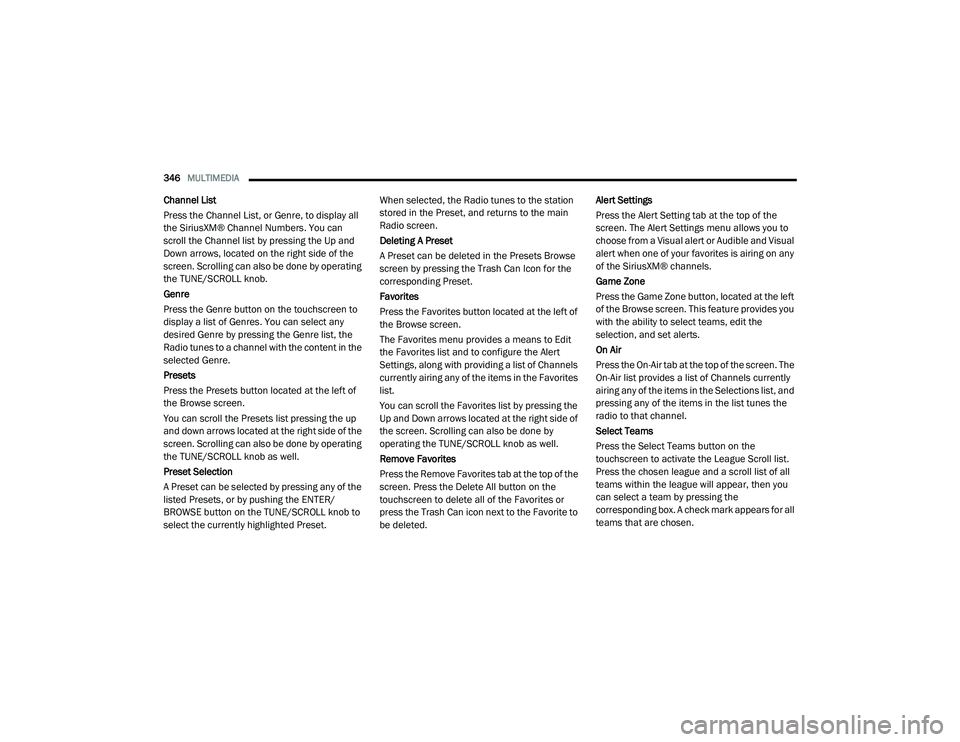
Channel List
Press the Channel List, or Genre, to display all
the SiriusXM® Channel Numbers. You can
scroll the Channel list by pressing the Up and
Down arrows, located on the right side of the
screen. Scrolling can also be done by operating
the TUNE/SCROLL knob.
Genre
Press the Genre button on the touchscreen to
display a list of Genres. You can select any
desired Genre by pressing the Genre list, the
Radio tunes to a channel with the content in the
selected Genre.
Presets
Press the Presets button located at the left of
the Browse screen.
You can scroll the Presets list pressing the up
and down arrows located at the right side of the
screen. Scrolling can also be done by operating
the TUNE/SCROLL knob as well.
Preset Selection
A Preset can be selected by pressing any of the
listed Presets, or by pushing the ENTER/
BROWSE button on the TUNE/SCROLL knob to
select the currently highlighted Preset. When selected, the Radio tunes to the station
stored in the Preset, and returns to the main
Radio screen.
Deleting A Preset
A Preset can be deleted in the Presets Browse
screen by pressing the Trash Can Icon for the
corresponding Preset.
Favorites
Press the Favorites button located at the left of
the Browse screen.
The Favorites menu provides a means to Edit
the Favorites list and to configure the Alert
Settings, along with providing a list of Channels
currently airing any of the items in the Favorites
list.
You can scroll the Favorites list by pressing the
Up and Down arrows located at the right side of
the screen. Scrolling can also be done by
operating the TUNE/SCROLL knob as well.
Remove Favorites
Press the Remove Favorites tab at the top of the
screen. Press the Delete All button on the
touchscreen to delete all of the Favorites or
press the Trash Can icon next to the Favorite to
be deleted.Alert Settings
Press the Alert Setting tab at the top of the
screen. The Alert Settings menu allows you to
choose from a Visual alert or Audible and Visual
alert when one of your favorites is airing on any
of the SiriusXM® channels.
Game Zone
Press the Game Zone button, located at the left
of the Browse screen. This feature provides you
with the ability to select teams, edit the
selection, and set alerts.
On Air
Press the On-Air tab at the top of the screen. The
On-Air list provides a list of Channels currently
airing any of the items in the Selections list, and
pressing any of the items in the list tunes the
radio to that channel.
Select Teams
Press the Select Teams button on the
touchscreen to activate the League Scroll list.
Press the chosen league and a scroll list of all
teams within the league will appear, then you
can select a team by pressing the
corresponding box. A check mark appears for all
teams that are chosen.
20_LA_OM_EN_USC_t.book Page 346
Page 359 of 396
MULTIMEDIA357
Uconnect Phone supports the following
features:
Voice Activated Features
Hands-Free dialing via Voice (“Call John
Smith Mobile” or, “Dial 248-555-1212”).
Hands-Free text-to-speech listening of your
incoming SMS messages.
Hands-Free text message replying (Forward
one of 18 pre-defined SMS messages to
incoming calls/text messages).
Redialing last dialed numbers (“Redial”).
Calling back the last incoming call number
(“Call Back”).
Viewing call logs on screen (“Show incoming
calls,” “Show outgoing calls,” “Show missed
calls,” “Show recent calls”).
Searching contacts phone number (“Search
for John Smith Mobile”).
NOTE:
Examples of Voice Commands are provided
throughout this manual. For quick use, go to the
Voice Command Quick Reference Section. Screen Activated Features
Dialing via keypad using touchscreen.
Viewing and calling contacts from phone -
books displayed on the touchscreen.
Setting favorite contact phone numbers so
they are easily accessible on the main phone
screen.
Viewing and calling contacts from recent call
logs.
Reviewing your recent incoming SMS.
Listening to music on your Bluetooth® device
via the touchscreen.
Pairing up to 10 phones/audio devices for
easy access to connect to them quickly.
NOTE:
Your phone must be capable of SMS messaging
via Bluetooth® for messaging features to work
properly.
Your mobile phone’s audio is transmitted
through your vehicle’s audio system; the system
automatically mutes your radio when using the
Uconnect Phone. For Uconnect customer support:
US residents - visit UconnectPhone.com or
call:
877-855-8400
Canadian residents - (English) call:
800-465-2001
or (French) call:
800-387-9983
Visit UconnectPhone.com
Uconnect Phone allows you to transfer calls
between the system and your mobile phone as
you enter or exit your vehicle and enables you to
mute the system's microphone for private
conversation.
WARNING!
ALWAYS drive safely with your hands on the
steering wheel. You have full responsibility
and assume all risks related to the use of the
Uconnect features and applications in this
vehicle. Only use Uconnect when it is safe to
do so. Failure to do so may result in an
accident involving serious injury or death.
9
20_LA_OM_EN_USC_t.book Page 357
Page 361 of 396
MULTIMEDIA359
Natural Speech
Your Uconnect Phone Voice system uses a
Natural Language Voice Recognition (VR)
engine.
Natural speech allows the user to speak
commands in phrases or complete sentences.
The system filters out certain non-word
utterances and sounds such as “ah” and “eh.”
The system handles fill-in words such as “I
would like to.”
The system handles multiple inputs in the same
phrase or sentence such as “make a phone
call” and “to Kelly Smith”. For multiple inputs in
the same phrase or sentence, the system
identifies the topic or context and provides the
associated follow-up prompt such as “Who do
you want to call?” in the case where a phone
call was requested but the specific name was
not recognized.
The system utilizes continuous dialog; when the
system requires more information from the user
it will ask a question to which the user can
respond without pushing the Voice Command
button on your steering wheel. Help Command
If you need assistance at any prompt, or if you
want to know your options at any prompt, say
“Help” following the beep.
To activate the Uconnect Phone from idle,
simply push the Phone button (if active) on your
steering wheel and say a command or say
“Help.” All Uconnect Phone sessions begin with
a push of the VR button or the Phone button (if
active) on the radio control head.
Cancel Command
At any prompt, after the beep, you can say
“Cancel” and you will be returned to the main
menu.
You can also push the VR button or Phone
button (if active) on your steering wheel when
the system is listening for a command and be
returned to the main or previous menu.
Pair (Link) Uconnect Phone To A Mobile Phone
To begin using your Uconnect Phone, you must
pair your compatible Bluetooth®-enabled
mobile phone. Mobile phone pairing is the
process of establishing a wireless connection
between a cellular phone and the Uconnect
system.
To complete the pairing process, you need to
reference your mobile phone Owner's Manual.
Please visit UconnectPhone.com for complete
mobile phone compatibility information.
NOTE:
You must have Bluetooth® enabled on your
phone to complete this procedure.
The vehicle must be in PARK.
1. Place the ignition in the ACC or ON/RUN position.
2. Press the Phone button in the Menu Bar on the touchscreen.
NOTE:
If there are no phones currently connected with
the system, a pop-up will appear asking if you
would like to pair a mobile phone.
3. Select “Yes” to begin the pairing process.
9
20_LA_OM_EN_USC_t.book Page 359
Page 368 of 396
366MULTIMEDIA
Call Continuation
Call continuation is the progression of a phone
call on the Uconnect Phone after the vehicle
ignition has been switched to OFF.
NOTE:
The call will remain within the vehicle audio
system until the phone becomes out of range
for the Bluetooth® connection. It is recom -
mended to press the Transfer button on the
touchscreen when leaving the vehicle.
Browsing SMS
Using the steering wheel commands, you can
view and manage the last 10 SMS messages
received on the instrument panel. To use this
function, the mobile phone must support the
SMS exchange function through Bluetooth®.
Select the PHONE button on the instrument
panel menu, and then select “SMS Reader”
using the arrow keys on the steering wheel
controls.
The “SMS Reader” submenu allows the last
10 SMS messages to be displayed.Advanced Phone Connectivity
Transfer Call To And From Mobile Phone
The Uconnect Phone allows ongoing calls to be
transferred from your mobile phone to the
Uconnect Phone without terminating the call. To
transfer an ongoing call from your connected
mobile phone to the Uconnect Phone or vice
versa, press the Transfer button on the Phone
main screen.
Connect Or Disconnect Link Between The
Uconnect Phone And Mobile Phone
If you would like to connect or disconnect the
Bluetooth® connection between a Uconnect
Phone paired mobile phone and the Uconnect
Phone, follow the instructions described in your
mobile phone User's Manual.
Things You Should Know About Your
Uconnect Phone
Voice Command
For the best performance:
Adjust the rearview mirror to provide at least
½-inch (1 cm) gap between the overhead
console (if equipped) and the mirror.
Always wait for the beep before speaking.
Speak normally, without pausing, just as you
would speak to a person sitting a few feet/
meters away from you.
Ensure that no one other than you is
speaking during a voice command period.
Performance is maximized under:
Low-To-Medium Blower Setting
Low-To-Medium Vehicle Speed
Low Road Noise
Smooth Road Surface
Fully Closed Windows
Dry Weather Conditions
WARNING!
ALWAYS drive safely with your hands on the
wheel. You have full responsibility and
assume all risks related to the use of the
Uconnect features and applications in this
vehicle. Only use Uconnect when it is safe to
do so. Failure to do so may result in an
accident involving serious injury or death.
20_LA_OM_EN_USC_t.book Page 366
Page 371 of 396
MULTIMEDIA369
The radio manufacturer believes the internal
wireless radio is safe for use by consumers. The
level of energy emitted is far less than the
electromagnetic energy emitted by wireless
devices such as mobile phones. However, the
use of wireless radios may be restricted in some
situations or environments, such as aboard
airplanes. If you are unsure of restrictions, you
are encouraged to ask for authorization before
turning on the wireless radio.
The following regulatory statement applies to all
Radio Frequency (RF) devices equipped in this
vehicle:
This device complies with Part 15 of the FCC
Rules and with Innovation, Science and
Economic Development Canada license-exempt
RSS standard(s). Operation is subject to the
following two conditions:
1. This device may not cause harmful
interference, and
2. This device must accept any interference received, including interference that may
cause undesired operation. Le présent appareil est conforme aux CNR
d`Innovation, Science and Economic
Development applicables aux appareils radio
exempts de licence. L'exploitation est autorisée
aux deux conditions suivantes:
1. l'appareil ne doit pas produire de
brouillage, et
2. l'utilisateur de l'appareil doit accepter tout brouillage radioélectrique subi, même si le
brouillage est susceptible d'en compro -
mettre le fonctionnement.
La operación de este equipo está sujeta a las
siguientes dos condiciones:
1. es posible que este equipo o dispositivo no cause interferencia perjudicial y
2. este equipo o dispositivo debe aceptar cualquier interferencia, incluyendo la que
pueda causar su operación no deseada.
NOTE:
Changes or modifications not expressly
approved by the party responsible for compli -
ance could void the user’s authority to operate
the equipment. NOTE:
This equipment has been tested and found to
comply with the limits for a Class B digital
device, pursuant to Part 15 of the FCC Rules.
These limits are designed to provide reason
-
able protection against harmful interference
in a residential installation. This equipment
generates, uses and can radiate radio
frequency energy and, if not installed and
used in accordance with the instructions,
may cause harmful interference to radio
communications. However, there is no guar -
antee that interference will not occur in a
particular installation.
If this equipment does cause harmful inter -
ference to radio or television reception,
which can be determined by turning the
equipment off and on, the user is encour -
aged to try to correct the interference by one
or more of the following measures:
a. Increase the separation between the equipment and receiver.
b. Consult an authorized dealer or an expe -
rienced radio technician for help.
9
20_LA_OM_EN_USC_t.book Page 369
Page 374 of 396
372MULTIMEDIA
PHONE
Making and answering hands-free phone calls
is easy with Uconnect. When the Phonebook
button is illuminated on your touchscreen, your
system is ready. Check UconnectPhone.com for
mobile phone compatibility and pairing
instructions.
Push the Phone button . After the beep, say
one of the following commands:
“ Call John Smith”
“Dial 123-456-7890 and follow the system
prompts”
“ Redial (call previous outgoing phone
number)”
“ Call back (call previous incoming phone
number)”
TIP:
When providing a Voice Command, push the
Phone button and say “ Call”, then
pronounce the name exactly as it appears in
your phone book. When a contact has multiple
phone numbers, you can say “ Call John Smith
work.”
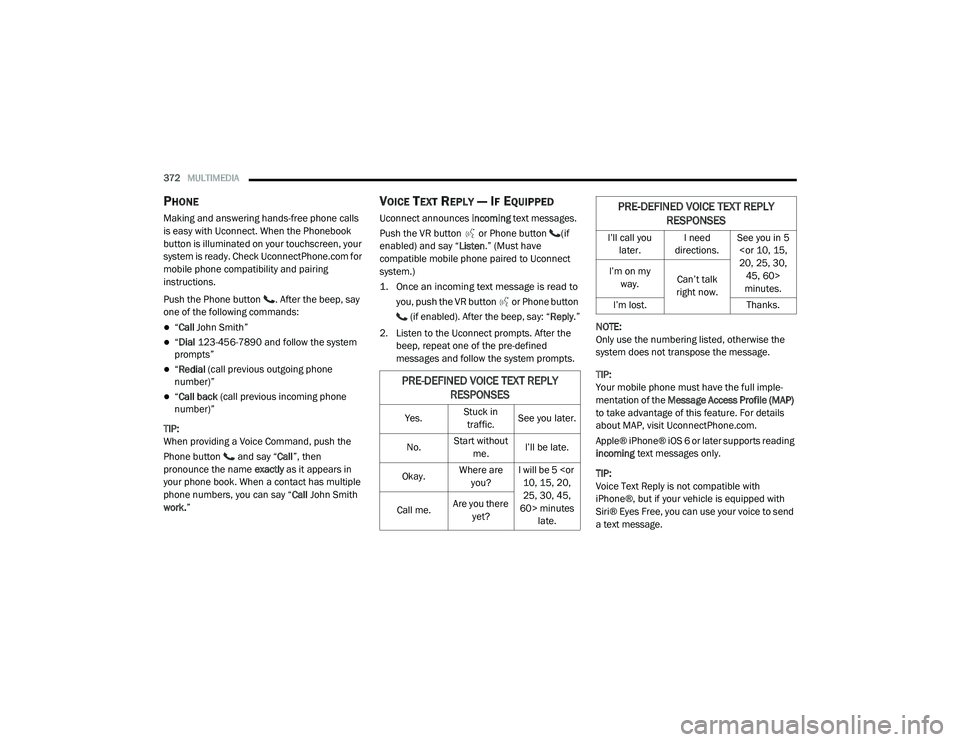
VOICE TEXT REPLY — IF EQUIPPED
Uconnect announces incoming text messages.
Push the VR button or Phone button (if
enabled) and say “ Listen.” (Must have
compatible mobile phone paired to Uconnect
system.)
1. Once an incoming text message is read to
you, push the VR button
or Phone button
(if enabled). After the beep, say: “ Reply
.”
2. Listen to the Uconnect prompts. After the beep, repeat one of the pre-defined
messages and follow the system prompts. NOTE:
Only use the numbering listed, otherwise the
system does not transpose the message.
TIP:
Your mobile phone must have the full imple
-
mentation of the Message Access Profile (MAP)
to take advantage of this feature. For details
about MAP, visit UconnectPhone.com.
Apple® iPhone® iOS 6 or later supports reading
incoming text messages only.
TIP:
Voice Text Reply is not compatible with
iPhone®, but if your vehicle is equipped with
Siri® Eyes Free, you can use your voice to send
a text message.
PRE-DEFINED VOICE TEXT REPLY RESPONSES
Yes. Stuck in
traffic. See you later.
No. Start without
me. I’ll be late.
Okay. Where are
you? I will be 5
25, 30, 45,
60> minutes late.
Call me.
Are you there
yet?
I’ll call you later. I need
directions. See you in 5
minutes.
I’m on my
way. Can’t talk
right now.
I’m lost. Thanks.
PRE-DEFINED VOICE TEXT REPLY
RESPONSES
20_LA_OM_EN_USC_t.book Page 372
Page 375 of 396
MULTIMEDIA373
CLIMATE
Adjust vehicle temperatures hands-free and
keep everyone comfortable while you keep
moving ahead. (If vehicle is equipped with
climate control.)
Push the VR button . After the beep, say one of
the following commands:
“Set driver temperature to 70 degrees ”
“Set passenger temperature to 70 degrees ”
TIP:
Voice Command for Climate may only be used
to adjust the interior temperature of your
vehicle. Voice Command will not work to adjust
the heated seats or steering wheel if equipped.
NAVIGATION (4C NAV)
The Uconnect navigation feature helps you save
time and become more productive when you
know exactly how to get to where you want to go.
1. To enter a destination, push the VR button
. After the beep, say: “ Find address
800
Chrysler Drive Auburn Hills, Michigan.”
2. Then follow the system prompts. TIP:
To start a POI search, push the VR button .
After the beep, say: “
Find nearest coffee shop.”
SIRI® EYES FREE — IF EQUIPPED
Siri lets you use your voice to send text
messages, select media, place phone calls and
much more. Siri uses your natural language to
understand what you mean and responds back
to confirm your requests. The system is
designed to keep your eyes on the road and
your hands on the wheel by letting Siri help you
perform useful tasks.
To enable Siri, push and hold, then release the
Uconnect Voice Recognition (VR) button on the
steering wheel. After you hear a double beep
you can ask Siri to play podcasts and music, get
directions, read text messages, and many other
useful requests.
DO NOT DISTURB
With Do Not Disturb, you can disable
notifications from incoming calls and texts,
allowing you to keep your eyes on the road and
hands on the wheel. For your convenience,
there is a counter display to keep track of your missed calls and text messages while you were
using Do Not Disturb.
Do Not Disturb can automatically reply with a
text message, a call or both, when declining an
incoming call and send it to voicemail.
Automatic reply messages can be:
“I am driving right now, I will get back to you
shortly”.
Create a custom auto reply message up to
160 characters.
NOTE:
Only the first 25 characters can be seen on the
touchscreen while typing a custom message.
While in Do Not Disturb, Conference Call can be
selected so you can still place a second call
without being interrupted by incoming calls.
NOTE:
Reply with text message is not compatible
with iPhones®.
Auto reply with text message is only available
on phones that support Bluetooth® MAP.9
20_LA_OM_EN_USC_t.book Page 373