water pump DODGE CHALLENGER 2021 Owners Manual
[x] Cancel search | Manufacturer: DODGE, Model Year: 2021, Model line: CHALLENGER, Model: DODGE CHALLENGER 2021Pages: 328, PDF Size: 15 MB
Page 49 of 328
GETTING TO KNOW YOUR VEHICLE47
Windshield Washers
To use the washer, push the multifunction lever
inward (toward the steering wheel) and hold. If the
lever is pushed while in the intermittent setting,
the wipers will turn on and operate for two cycles
after the end of the lever is released, and then
resume the intermittent interval previously
selected.
If the end of the lever is pushed while the wipers
are in the off position, the wipers will operate for
three wipe cycles and then turn off.
Mist
Rotate the end of the lever downward to the MIST
position and release for a single wiping cycle. The
wipers will continue to operate until you release
the multifunction lever.
NOTE:The Mist feature does not activate the washer
pump; therefore, no washer fluid will be sprayed on
the windshield. The wash function must be used in
order to spray the windshield with washer fluid.
For information on wiper care and replacement,
see Ú page 260.RAIN SENSING WIPERS — IF EQUIPPED
This feature senses rain or snowfall on the
windshield and automatically activates the wipers.
Rotate the end of the multifunction lever to one of
four settings to activate this feature.
The sensitivity of the system can be adjusted with
the multifunction lever. Wiper delay position 1 is
the least sensitive, and wiper delay position 4 is
the most sensitive.
Wiper delay position three should be used for
normal rain conditions.
NOTE:
The Rain Sensing feature will not operate when
the wiper switch is in the low or high-speed posi -
tion.
The Rain Sensing feature may not function prop -
erly when ice, or dried salt water is present on
the windshield.
Use of Rain-X or products containing wax or sili-
cone may reduce Rain Sensing performance.
The Rain Sensing feature can be turned on and
off using the Uconnect system Ú page 120.
WARNING!
Sudden loss of visibility through the windshield
could lead to a collision. You might not see other
vehicles or other obstacles. To avoid sudden
icing of the windshield during freezing weather,
warm the windshield with the defroster before
and during windshield washer use.
CAUTION!
Turn the windshield wipers off when driving
through an automatic car wash. Damage to
the windshield wipers may result if the wiper
control is left in any position other than off.
In cold weather, always turn off the wiper
switch and allow the wipers to return to the
park position before turning off the engine. If
the wiper switch is left on and the wipers
freeze to the windshield, damage to the wiper
motor may occur when the vehicle is
restarted.
Always remove any buildup of snow that
prevents the windshield wiper blades from
returning to the off position. If the windshield
wiper control is turned off and the blades
cannot return to the off position, damage to
the wiper motor may occur.
2
21_LA_OM_EN_USC_t.book Page 47
Page 111 of 328
STARTING AND OPERATING109
The following table shows the approximate
distances for each zone:
NOTE:If snow, ice, mud, or any foreign substance builds
up on the camera lens, clean the lens, rinse with
water, and dry with a soft cloth. Do not cover the
lens.
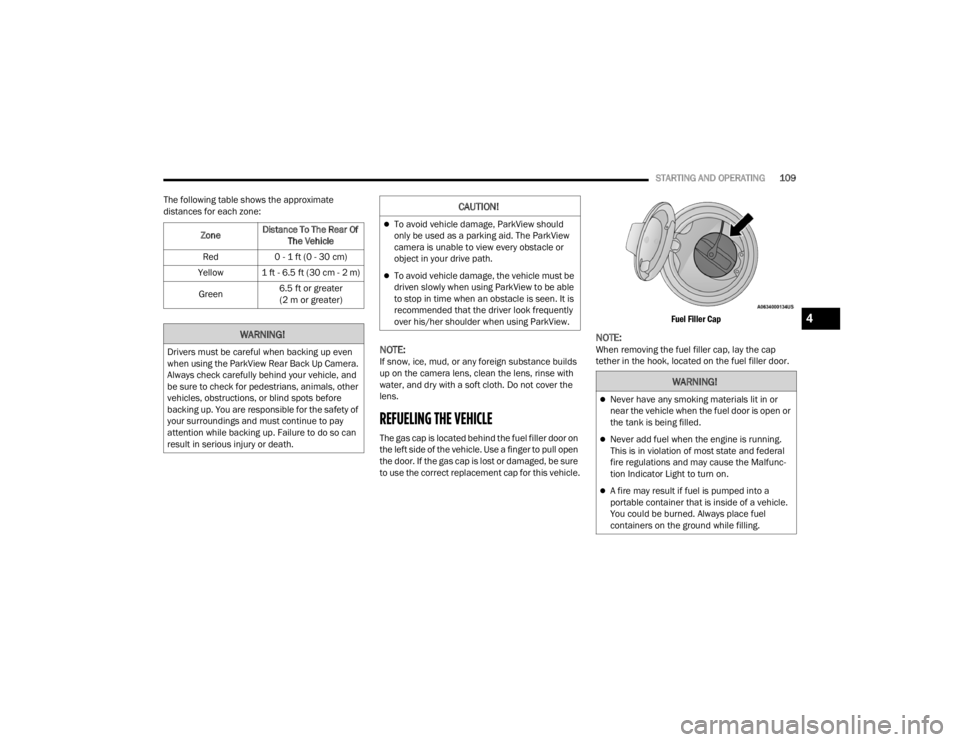
REFUELING THE VEHICLE
The gas cap is located behind the fuel filler door on
the left side of the vehicle. Use a finger to pull open
the door. If the gas cap is lost or damaged, be sure
to use the correct replacement cap for this vehicle.
Fuel Filler Cap
NOTE:When removing the fuel filler cap, lay the cap
tether in the hook, located on the fuel filler door.
Zone
Distance To The Rear Of
The Vehicle
Red 0 - 1 ft (0 - 30 cm)
Yellow 1 ft - 6.5 ft (30 cm - 2 m)
Green 6.5 ft or greater
(2 m or greater)
WARNING!
Drivers must be careful when backing up even
when using the ParkView Rear Back Up Camera.
Always check carefully behind your vehicle, and
be sure to check for pedestrians, animals, other
vehicles, obstructions, or blind spots before
backing up. You are responsible for the safety of
your surroundings and must continue to pay
attention while backing up. Failure to do so can
result in serious injury or death.
CAUTION!
To avoid vehicle damage, ParkView should
only be used as a parking aid. The ParkView
camera is unable to view every obstacle or
object in your drive path.
To avoid vehicle damage, the vehicle must be
driven slowly when using ParkView to be able
to stop in time when an obstacle is seen. It is
recommended that the driver look frequently
over his/her shoulder when using ParkView.
WARNING!
Never have any smoking materials lit in or
near the vehicle when the fuel door is open or
the tank is being filled.
Never add fuel when the engine is running.
This is in violation of most state and federal
fire regulations and may cause the Malfunc -
tion Indicator Light to turn on.
A fire may result if fuel is pumped into a
portable container that is inside of a vehicle.
You could be burned. Always place fuel
containers on the ground while filling.
4
21_LA_OM_EN_USC_t.book Page 109
Page 208 of 328
206SAFETY
If A Deployment Occurs
The front air bags are designed to deflate
immediately after deployment.
NOTE:Front and/or side air bags will not deploy in all colli -
sions. This does not mean something is wrong with
the air bag system.
If you do have a collision which deploys the air
bags, any or all of the following may occur:
The air bag material may sometimes cause
abrasions and/or skin reddening to the occu -
pants as the air bags deploy and unfold. The
abrasions are similar to friction rope burns or
those you might get sliding along a carpet or
gymnasium floor. They are not caused by
contact with chemicals. They are not perma-
nent and normally heal quickly. However, if you
haven’t healed significantly within a few days,
or if you have any blistering, see your doctor
immediately.
As the air bags deflate, you may see some
smoke-like particles. The particles are a normal
by-product of the process that generates the
non-toxic gas used for air bag inflation. These
airborne particles may irritate the skin, eyes,
nose, or throat. If you have skin or eye irritation,
rinse the area with cool water. For nose or throat
irritation, move to fresh air. If the irritation
continues, see your doctor. If these particles settle on your clothing, follow the garment
manufacturer’s instructions for cleaning.
Do not drive your vehicle after the air bags have
deployed. If you are involved in another collision,
the air bags will not be in place to protect you.
NOTE:
Air bag covers may not be obvious in the interior
trim, but they will open during air bag deploy -
ment.
After any collision, the vehicle should be taken
to an authorized dealer immediately.
Enhanced Accident Response System
In the event of an impact, if the communication
network remains intact, and the power remains
intact, depending on the nature of the event, the
Occupant Restraint Controller (ORC) will determine
whether to have the Enhanced Accident Response
System perform the following functions:
Cut off fuel to the engine (if equipped).
Cut off battery power to the electric motor (if
equipped).
Flash hazard lights as long as the battery has
power.
Turn on the interior lights, which remain on as
long as the battery has power or for 15 minutes
from the intervention of the Enhanced Accident
Response System.
Unlock the power door locks.
Your vehicle may also be designed to perform any
of these other functions in response to the
Enhanced Accident Response System:
Turn off the Fuel Filter Heater, Turn off the HVAC
Blower Motor, Close the HVAC Circulation Door
Cut off battery power to the:
Engine
Electric Motor (if equipped)
Electric power steering
Brake booster
Electric park brake
Automatic transmission gear selector
Horn
Front wiper
Headlamp washer pump
WARNING!
Deployed air bags and seat belt pretensioners
cannot protect you in another collision. Have the
air bags, seat belt pretensioners, and the seat
belt retractor assemblies replaced by an
authorized dealer immediately. Also, have the
Occupant Restraint Controller System serviced
as well.
21_LA_OM_EN_USC_t.book Page 206
Page 237 of 328
IN CASE OF EMERGENCY235
(Continued)
(Continued)
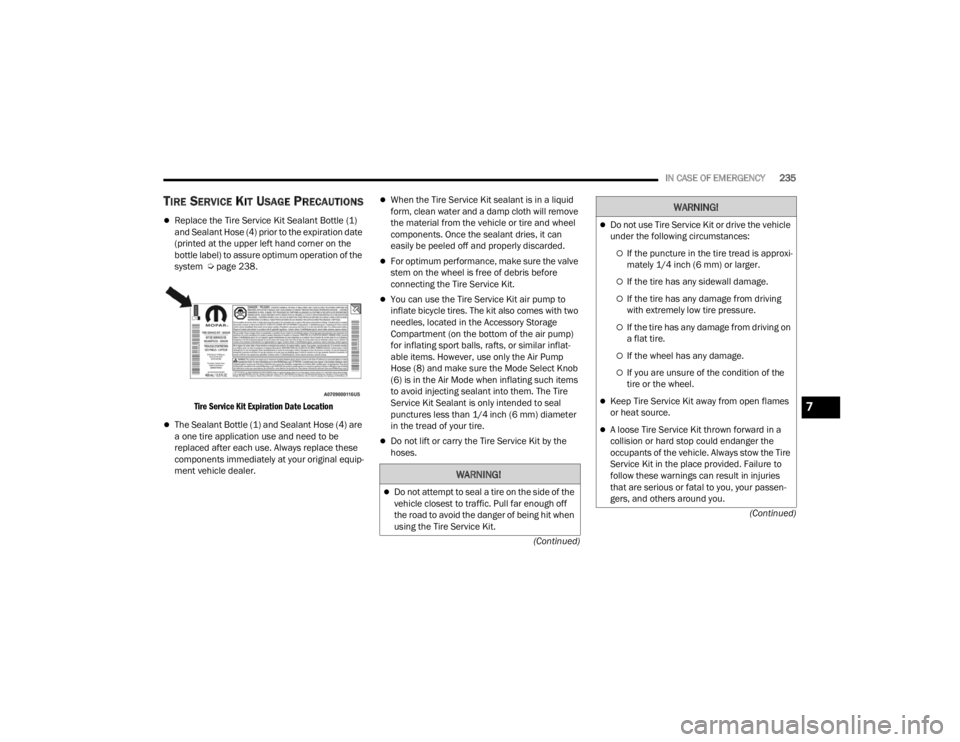
TIRE SERVICE KIT USAGE PRECAUTIONS
Replace the Tire Service Kit Sealant Bottle (1)
and Sealant Hose (4) prior to the expiration date
(printed at the upper left hand corner on the
bottle label) to assure optimum operation of the
system Ú page 238.
Tire Service Kit Expiration Date Location
The Sealant Bottle (1) and Sealant Hose (4) are
a one tire application use and need to be
replaced after each use. Always replace these
components immediately at your original equip -
ment vehicle dealer.
When the Tire Service Kit sealant is in a liquid
form, clean water and a damp cloth will remove
the material from the vehicle or tire and wheel
components. Once the sealant dries, it can
easily be peeled off and properly discarded.
For optimum performance, make sure the valve
stem on the wheel is free of debris before
connecting the Tire Service Kit.
You can use the Tire Service Kit air pump to
inflate bicycle tires. The kit also comes with two
needles, located in the Accessory Storage
Compartment (on the bottom of the air pump)
for inflating sport balls, rafts, or similar inflat -
able items. However, use only the Air Pump
Hose (8) and make sure the Mode Select Knob
(6) is in the Air Mode when inflating such items
to avoid injecting sealant into them. The Tire
Service Kit Sealant is only intended to seal
punctures less than 1/4 inch (6 mm) diameter
in the tread of your tire.
Do not lift or carry the Tire Service Kit by the
hoses.
WARNING!
Do not attempt to seal a tire on the side of the
vehicle closest to traffic. Pull far enough off
the road to avoid the danger of being hit when
using the Tire Service Kit.
Do not use Tire Service Kit or drive the vehicle
under the following circumstances:
If the puncture in the tire tread is approxi -
mately 1/4 inch (6 mm) or larger.
If the tire has any sidewall damage.
If the tire has any damage from driving
with extremely low tire pressure.
If the tire has any damage from driving on
a flat tire.
If the wheel has any damage.
If you are unsure of the condition of the
tire or the wheel.
Keep Tire Service Kit away from open flames
or heat source.
A loose Tire Service Kit thrown forward in a
collision or hard stop could endanger the
occupants of the vehicle. Always stow the Tire
Service Kit in the place provided. Failure to
follow these warnings can result in injuries
that are serious or fatal to you, your passen -
gers, and others around you.
WARNING!
7
21_LA_OM_EN_USC_t.book Page 235
Page 238 of 328
236IN CASE OF EMERGENCY
SEALING A TIRE WITH TIRE SERVICE KIT
(A) Whenever You Stop To Use Tire Service
Kit:
1. Pull over to a safe location and turn on the
vehicle’s Hazard Warning Flashers.
2. Verify that the valve stem (on the wheel with the deflated tire) is in a position that is near to
the ground. This will allow the Tire Service Kit
Hoses (4) and (8) to reach the valve stem and keep the Tire Service Kit flat on the ground.
This will provide the best positioning of the kit
when injecting the sealant into the deflated
tire and running the air pump. Move the
vehicle as necessary to place the valve stem in
this position before proceeding.
3. Place the transmission in PARK (auto transmission) or in Gear (manual
transmission) and place the ignition in the OFF
position.
4. Apply the parking brake.
(B) Setting Up To Use Tire Service Kit:
1. Push in the Mode Select Knob (6) and turn to the Sealant Mode position.
2. Uncoil the Sealant Hose (4) and then remove the cap from the fitting at the end of the hose.
3. Place the Tire Service Kit flat on the ground next to the deflated tire.
4. Remove the cap from the valve stem and then screw the fitting at the end of the Sealant Hose
(4) onto the valve stem.
5. Uncoil the Power Plug (7) and insert the plug into the vehicle’s 12 Volt power outlet.
NOTE:Do not remove foreign objects (e.g., screws or
nails) from the tire.
(C) Injecting Tire Service Kit Sealant Into
The Deflated Tire:
Always start the engine before turning ON the
Tire Service Kit.
NOTE:Manual transmission vehicles must have the
parking brake engaged and the gear selector in
NEUTRAL.
After pushing the Power Button (3), the sealant
(white fluid) will flow from the Sealant Bottle (1)
through the Sealant Hose (4) and into the tire.
NOTE:Sealant may leak out through the puncture in the
tire.
If the sealant (white fluid) does not flow within
0 – 10 seconds through the Sealant Hose :
1. Push the Power Button (3) to turn Off the Tire Service Kit. Disconnect the Sealant Hose (4)
from the valve stem. Make sure the valve
stem is free of debris. Reconnect the Sealant
Hose (4) to the valve stem. Check that the
Mode Select Knob (6) is in the Sealant Mode
position and not Air Mode. Push the Power
Button (3) to turn On the Tire Service Kit.
2. Connect the Power Plug (7) to a different 12 Volt power outlet in your vehicle or another
vehicle, if available. Make sure the engine is
running before turning ON the Tire Service Kit.
Take care not to allow the contents of Tire
Service Kit to come in contact with hair, eyes,
or clothing. Tire Service Kit sealant is harmful
if inhaled, swallowed, or absorbed through the
skin. It causes skin, eye, and respiratory irrita -
tion. Flush immediately with plenty of water if
there is any contact with eyes or skin. Change
clothing as soon as possible, if there is any
contact with clothing.
Tire Service Kit Sealant solution contains
latex. In case of an allergic reaction or rash,
consult a physician immediately. Keep Tire
Service Kit out of reach of children. If swal -
lowed, rinse mouth immediately with plenty of
water and drink plenty of water. Do not induce
vomiting! Consult a physician immediately.
WARNING!
21_LA_OM_EN_USC_t.book Page 236