ABS DODGE CHALLENGER 2022 Owners Manual
[x] Cancel search | Manufacturer: DODGE, Model Year: 2022, Model line: CHALLENGER, Model: DODGE CHALLENGER 2022Pages: 336, PDF Size: 16.47 MB
Page 7 of 336
5
MULTIMEDIA
UCONNECT SYSTEMS ......................................... 122
CYBERSECURITY ................................................. 122
UCONNECT SETTINGS ........................................ 123Customer Programmable Features .............. 123
UCONNECT INTRODUCTION................................ 141
System Overview ........................................... 141Drag & Drop Menu Bar ................................. 143Safety And General Information ................... 143
UCONNECT MODES ............................................. 144
Steering Wheel Audio Controls ..................... 144
Radio Mode .................................................. 145
Media Mode .................................................. 154
Phone Mode ................................................. 156
ANDROID AUTO™ & APPLE CARPLAY® —
IF EQUIPPED ........................................................ 167
Android Auto™ .............................................. 167Apple CarPlay®.............................................. 169Android Auto™ And Apple CarPlay®
Tips And Tricks............................................... 171
PERFORMANCE PAGES ...................................... 171
Home .............................................................. 172
Timers ............................................................ 174
Gauges ........................................................... 176G-Force ........................................................... 177Engine ............................................................ 178
Dynamometer (Dyno) .................................... 178 DODGE DRIVE MODES — IF EQUIPPED ............ 179
Performance Control — If Equipped ............. 179
RADIO OPERATION AND MOBILE
PHONES ............................................................... 184
Regulatory And Safety Information .............. 184
SAFETY
SAFETY FEATURES .............................................. 185 Anti-Lock Brake System (ABS) ..................... 185
Electronic Brake Control (EBC) System ...... 186
AUXILIARY DRIVING SYSTEMS.......................... 191
Blind Spot Monitoring (BSM) —
If Equipped..................................................... 191Forward Collision Warning (FCW)
Operation — If Equipped ............................... 194
Tire Pressure Monitoring System (TPMS) .... 196
OCCUPANT RESTRAINT SYSTEMS ................... 200
Occupant Restraint Systems Features ....... 200
Important Safety Precautions ...................... 200Seat Belt Systems ........................................ 201Supplemental Restraint Systems (SRS) ...... 207Child Restraints ............................................ 216 SAFETY TIPS ........................................................ 230
Transporting Passengers.............................. 230
Transporting Pets ....................................... 230
Safety Checks You Should Make
Inside The Vehicle ........................................ 230
Periodic Safety Checks You Should
Make Outside The Vehicle ............................ 231
Exhaust Gas................................................... 232
Carbon Monoxide Warnings ........................ 232
IN CASE OF EMERGENCY
HAZARD WARNING FLASHERS ........................ 233
ASSIST AND SOS MIRROR — IF EQUIPPED...... 233
JACKING AND TIRE CHANGING ......................... 237Preparations For Jacking ............................ 237
Jack Location/Spare Tire Stowage ............. 237
Jacking And Changing A Tire ....................... 238
TIRE SERVICE KIT — IF EQUIPPED ..................... 241
Tire Service Kit Storage ................................ 241Tire Service Kit Components And
Operation ....................................................... 242Tire Service Kit Usage Precautions .............. 242
Sealing A Tire With Tire Service Kit .............. 244
22_LA_OM_EN_USC_t.book Page 5
Page 13 of 336
11
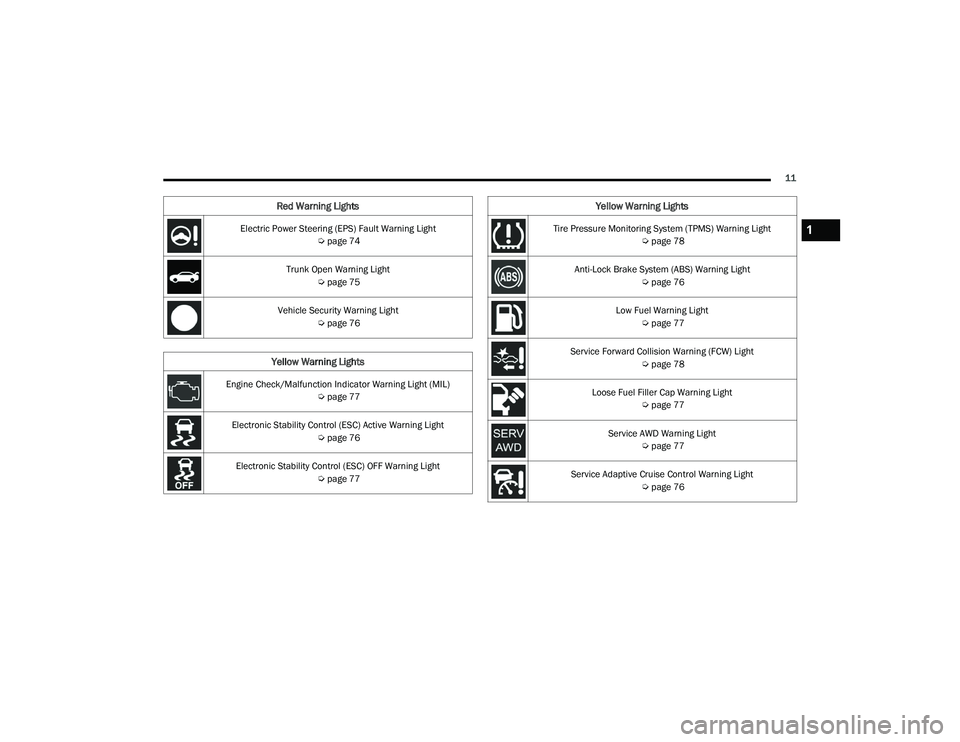
Electric Power Steering (EPS) Fault Warning Light Úpage 74
Trunk Open Warning Light Úpage 75
Vehicle Security Warning Light Úpage 76
Yellow Warning Lights
Engine Check/Malfunction Indicator Warning Light (MIL)
Úpage 77
Electronic Stability Control (ESC) Active Warning Light Úpage 76
Electronic Stability Control (ESC) OFF Warning Light Úpage 77
Red Warning Lights
Tire Pressure Monitoring System (TPMS) Warning Light
Úpage 78
Anti-Lock Brake System (ABS) Warning Light Úpage 76
Low Fuel Warning Light Úpage 77
Service Forward Collision Warning (FCW) Light Úpage 78
Loose Fuel Filler Cap Warning Light Úpage 77
Service AWD Warning Light Úpage 77
Service Adaptive Cruise Control Warning Light Úpage 76
Yellow Warning Lights
1
22_LA_OM_EN_USC_t.book Page 11
Page 23 of 336
GETTING TO KNOW YOUR VEHICLE21
VEHICLE SECURITY SYSTEM — IF EQUIPPED
The Vehicle Security system monitors the vehicle
doors for unauthorized entry and the Keyless
Enter ‘n Go™ Ignition for unauthorized operation.
While the Vehicle Security system is armed, interior
switches for door locks and trunk release are
disabled. If something triggers the alarm, the
Vehicle Security system will provide the following
audible and visible signals:
The horn will pulse
The turn signals will flash
The Vehicle Security Light in the instrument
cluster will flash
TO ARM THE SYSTEM
Follow these steps to arm the Vehicle Security
system:
1. Make sure the vehicle’s ignition is placed in
the OFF position.
2. Perform one of the following methods to lock the vehicle:
Push lock on the interior power door lock
switch with the driver and/or passenger
door open.
Push the lock button on the exterior Passive
Entry door handle with a valid key fob avail -
able in the same exterior zone Ú page 24.
Push the lock button on the key fob.
3. If any doors are open, close them.
TO DISARM THE SYSTEM
The Vehicle Security system can be disarmed using
any of the following methods:
Push the unlock button on the key fob.
Grab the Passive Entry door handle to unlock
the door Ú page 24.
Push the START/STOP ignition button (requires
at least one valid key fob in the vehicle).
NOTE:
The driver's door key cylinder and the trunk
button on the key fob cannot arm or disarm the
Vehicle Security system.
When the Vehicle Security system is armed, the
interior power door lock switches will not unlock
the doors.
The Vehicle Security system is designed to protect
your vehicle. However, you can create conditions
where the system will give you a false alarm. If one
of the previously described arming sequences has
occurred, the Vehicle Security system will arm,
regardless of whether you are in the vehicle or not. If you remain in the vehicle and open a door, the
alarm will sound. If this occurs, disarm the Vehicle
Security system.
If the Vehicle Security system is armed and the
battery becomes disconnected, the Vehicle
Security system will remain armed when the
battery is reconnected; the exterior lights will flash,
and the horn will sound. If this occurs, disarm the
Vehicle Security system.
REARMING THE SYSTEM
If something triggers the alarm and no action is
taken to disarm it, the Vehicle Security system will
turn the horn off after a 29 second cycle (with five
seconds between cycles and up to eight cycles if
the trigger remains active) and then rearm itself.
SECURITY SYSTEM MANUAL OVERRIDE
The Vehicle Security system will not arm if you lock
the doors using the manual door lock.
TAMPER ALERT
If something has triggered the Vehicle Security
system in your absence, the horn will sound three
times and the exterior lights will blink three times
when you disarm the Vehicle Security system.
2
22_LA_OM_EN_USC_t.book Page 21
Page 75 of 336
GETTING TO KNOW YOUR INSTRUMENT PANEL73
What to do when an electrical load reduction
action message is present (“Battery Saver On” or
“Battery Saver Mode”)
During a trip:
Reduce power to unnecessary loads if possible:
Turn off redundant lights (interior or exte -
rior)
Check what may be plugged in to power
outlets +12 Volts, 115 Volts AC, USB ports
Check HVAC settings (blower, temperature)
Check the audio settings (volume)
After a trip:
Check if any aftermarket equipment was
installed (additional lights, upfitter electrical
accessories, audio systems, alarms) and review
specifications if any (load and Ignition Off Draw
currents).
Evaluate the latest driving cycles (distance,
driving time and parking time).
The vehicle should have service performed if
the message is still present during consecutive
trips and the evaluation of the vehicle and
driving pattern did not help to identify the cause.
WARNING LIGHTS AND MESSAGES
The warning/indicator lights will illuminate in the
instrument panel together with a dedicated
message and/or acoustic signal when applicable.
These indications are indicative and precautionary
and as such must not be considered as exhaustive
and/or alternative to the information contained in
the Owner’s Manual, which you are advised to read
carefully in all cases. Always refer to the
information in this chapter in the event of a failure
indication. All active telltales will display first if
applicable. The system check menu may appear
different based upon equipment options and
current vehicle status. Some telltales are optional
and may not appear.
RED WARNING LIGHTS
Air Bag Warning Light
This warning light will illuminate to
indicate a fault with the air bag, and will
turn on for four to eight seconds as a bulb
check when the ignition is placed in the
ON/RUN or ACC/ON/RUN position. This light will
illuminate with a single chime when a fault with the
air bag has been detected, it will stay on until the
fault is cleared. If the light is either not on during
startup, stays on, or turns on while driving, have
the system inspected at an authorized dealer as
soon as possible.
Brake Warning Light
This warning light monitors various brake
functions, including brake fluid level and
parking brake application. If the brake
light turns on it may indicate that the
parking brake is applied, that the brake fluid level
is low, or that there is a problem with the Anti-Lock
Brake System reservoir.
If the light remains on when the parking brake has
been disengaged, and the fluid level is at the full
mark on the master cylinder reservoir, it indicates
a possible brake hydraulic system malfunction or
that a problem with the Brake Booster has been
detected by the Anti-Lock Brake System (ABS) /
Electronic Stability Control (ESC) system. In this
case, the light will remain on until the condition has
been corrected. If the problem is related to the
brake booster, the ABS pump will run when
applying the brake, and a brake pedal pulsation
may be felt during each stop.
The dual brake system provides a reserve braking
capacity in the event of a failure to a portion of the
hydraulic system. A leak in either half of the dual
brake system is indicated by the Brake Warning
Light, which will turn on when the brake fluid level
in the master cylinder has dropped below a
specified level.
The light will remain on until the cause is corrected.
3
22_LA_OM_EN_USC_t.book Page 73
Page 76 of 336
74GETTING TO KNOW YOUR INSTRUMENT PANEL
NOTE:The light may flash momentarily during sharp
cornering maneuvers, which change fluid level
conditions. The vehicle should have service
performed, and the brake fluid level checked.
If brake failure is indicated, immediate repair is
necessary.
Vehicles equipped with the Anti-Lock Brake System
(ABS) are also equipped with Electronic Brake
Force Distribution (EBD). In the event of an EBD
failure, the Brake Warning Light will turn on along
with the ABS Light. Immediate repair to the ABS
system is required.
Operation of the Brake Warning Light can be
checked by turning the ignition switch from the OFF
position to the ON/RUN position. The light should
illuminate for approximately two seconds. The light
should then turn off unless the parking brake is
applied or a brake fault is detected. If the light does
not illuminate, have the light inspected by an
authorized dealer. The light also will turn on when the parking brake
is applied with the ignition switch in the ON/RUN
position.
NOTE:This light shows only that the parking brake is
applied. It does not show the degree of brake appli
-
cation.
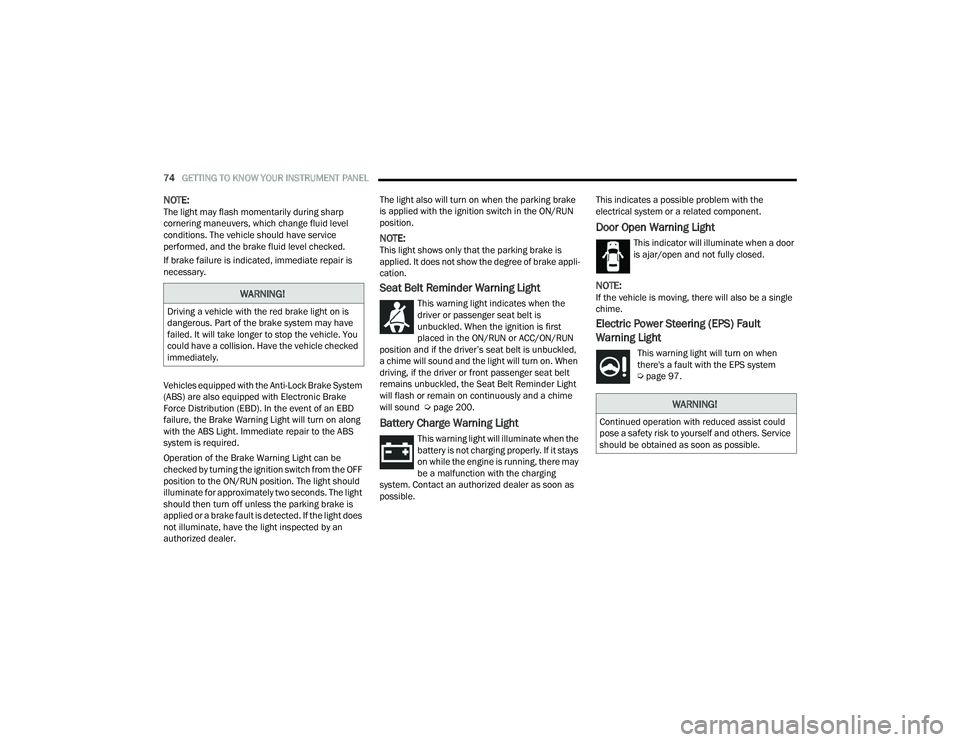
Seat Belt Reminder Warning Light
This warning light indicates when the
driver or passenger seat belt is
unbuckled. When the ignition is first
placed in the ON/RUN or ACC/ON/RUN
position and if the driver’s seat belt is unbuckled,
a chime will sound and the light will turn on. When
driving, if the driver or front passenger seat belt
remains unbuckled, the Seat Belt Reminder Light
will flash or remain on continuously and a chime
will sound Ú page 200.
Battery Charge Warning Light
This warning light will illuminate when the
battery is not charging properly. If it stays
on while the engine is running, there may
be a malfunction with the charging
system. Contact an authorized dealer as soon as
possible. This indicates a possible problem with the
electrical system or a related component.
Door Open Warning Light
This indicator will illuminate when a door
is ajar/open and not fully closed.
NOTE:If the vehicle is moving, there will also be a single
chime.
Electric Power Steering (EPS) Fault
Warning Light
This warning light will turn on when
there's a fault with the EPS system
Ú
page 97.
WARNING!
Driving a vehicle with the red brake light on is
dangerous. Part of the brake system may have
failed. It will take longer to stop the vehicle. You
could have a collision. Have the vehicle checked
immediately.
WARNING!
Continued operation with reduced assist could
pose a safety risk to yourself and others. Service
should be obtained as soon as possible.
22_LA_OM_EN_USC_t.book Page 74
Page 78 of 336
76GETTING TO KNOW YOUR INSTRUMENT PANEL
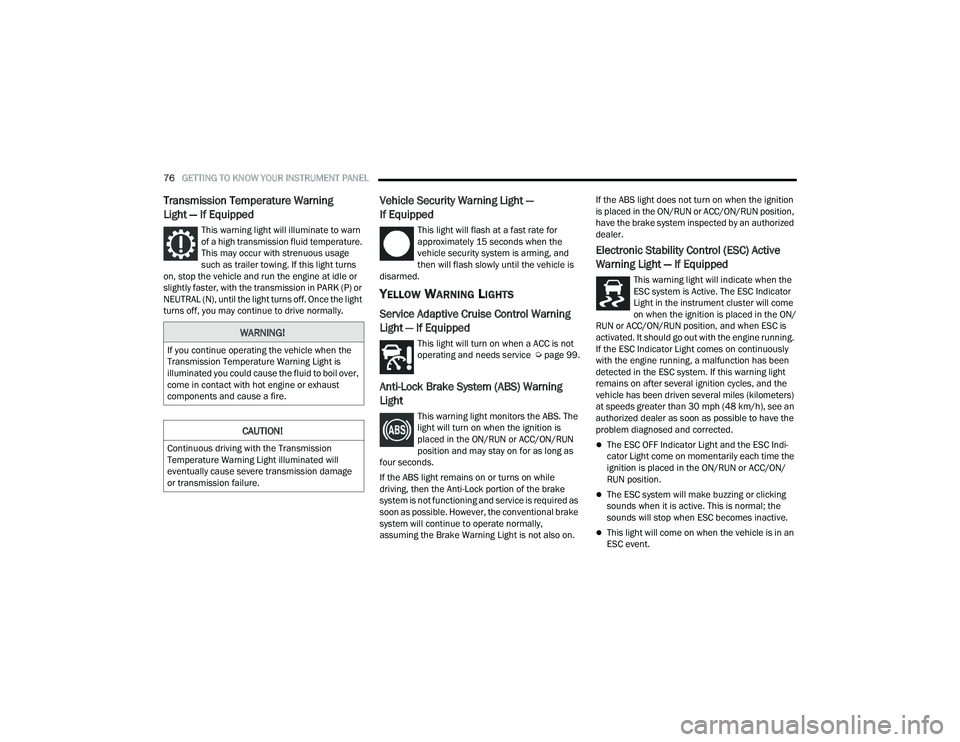
Transmission Temperature Warning
Light — If Equipped
This warning light will illuminate to warn
of a high transmission fluid temperature.
This may occur with strenuous usage
such as trailer towing. If this light turns
on, stop the vehicle and run the engine at idle or
slightly faster, with the transmission in PARK (P) or
NEUTRAL (N), until the light turns off. Once the light
turns off, you may continue to drive normally.
Vehicle Security Warning Light —
If Equipped
This light will flash at a fast rate for
approximately 15 seconds when the
vehicle security system is arming, and
then will flash slowly until the vehicle is
disarmed.
YELLOW WARNING LIGHTS
Service Adaptive Cruise Control Warning
Light — If Equipped
This light will turn on when a ACC is not
operating and needs service Ú page 99.
Anti-Lock Brake System (ABS) Warning
Light
This warning light monitors the ABS. The
light will turn on when the ignition is
placed in the ON/RUN or ACC/ON/RUN
position and may stay on for as long as
four seconds.
If the ABS light remains on or turns on while
driving, then the Anti-Lock portion of the brake
system is not functioning and service is required as
soon as possible. However, the conventional brake
system will continue to operate normally,
assuming the Brake Warning Light is not also on. If the ABS light does not turn on when the ignition
is placed in the ON/RUN or ACC/ON/RUN position,
have the brake system inspected by an authorized
dealer.
Electronic Stability Control (ESC) Active
Warning Light — If Equipped
This warning light will indicate when the
ESC system is Active. The ESC Indicator
Light in the instrument cluster will come
on when the ignition is placed in the ON/
RUN or ACC/ON/RUN position, and when ESC is
activated. It should go out with the engine running.
If the ESC Indicator Light comes on continuously
with the engine running, a malfunction has been
detected in the ESC system. If this warning light
remains on after several ignition cycles, and the
vehicle has been driven several miles (kilometers)
at speeds greater than 30 mph (48 km/h), see an
authorized dealer as soon as possible to have the
problem diagnosed and corrected.
The ESC OFF Indicator Light and the ESC Indi -
cator Light come on momentarily each time the
ignition is placed in the ON/RUN or ACC/ON/
RUN position.
The ESC system will make buzzing or clicking
sounds when it is active. This is normal; the
sounds will stop when ESC becomes inactive.
This light will come on when the vehicle is in an
ESC event.
WARNING!
If you continue operating the vehicle when the
Transmission Temperature Warning Light is
illuminated you could cause the fluid to boil over,
come in contact with hot engine or exhaust
components and cause a fire.
CAUTION!
Continuous driving with the Transmission
Temperature Warning Light illuminated will
eventually cause severe transmission damage
or transmission failure.
22_LA_OM_EN_USC_t.book Page 76
Page 104 of 336
102STARTING AND OPERATING
If ACC is set when the vehicle speed is below
20 mph (32 km/h), the set speed will default to
20 mph (32 km/h).
NOTE:Fixed Speed Cruise Control cannot be set below
20 mph (32 km/h).
If either system is set when the vehicle speed is
above 20 mph (32 km/h), the set speed shall be
the current speed of the vehicle.
NOTE:
Keeping your foot on the accelerator pedal can
cause the vehicle to continue to accelerate
beyond the set speed. If this occurs, the
message “DRIVER OVERRIDE” will display in the
instrument cluster display.
If you continue to accelerate beyond the set
speed while ACC is enabled, the system will not
be controlling the distance between your vehicle
and the vehicle ahead. The vehicle speed will
only be determined by the position of the accel-
erator pedal.
To Cancel
The following conditions cancel the ACC or Fixed
Speed Cruise Control systems:
The brake pedal is applied.
The parking brake is applied.
The CANC (cancel) button is pushed.
An Anti-Lock Brake System (ABS) event occurs.
The gear selector is removed from the DRIVE
position.
The Electronic Stability Control/Traction Control
System (ESC/TCS) activates.
The following conditions will only cancel the ACC
system:
The vehicle speed goes below 15 mph
(24 km/h).
To Turn Off
The system will turn off and erase the set speed in
memory if:
The Adaptive Cruise Control (ACC) on/off button
is pushed
The Fixed Speed Cruise Control on/off button is
pushed
The ignition is placed in the OFF position
To Resume
If there is a set speed in memory, push the RES
(resume) button and remove your foot from the
accelerator pedal. The instrument cluster display
will show the last set speed.
Resume can be used at any speed above 20 mph
(32 km/h) when only Fixed Speed Cruise Control is
being used.
Resume can be used at any speed above 0 mph
(0 km/h) when ACC is active.
WARNING!
In Fixed Speed Cruise Control mode, the system
will not react to vehicles ahead. In addition, the
proximity warning does not activate and no
alarm will sound even if you are too close to the
vehicle ahead since neither the presence of the
vehicle ahead nor the vehicle-to-vehicle distance
is detected. Be sure to maintain a safe distance
between your vehicle and the vehicle ahead.
Always be aware which mode is selected.
WARNING!
The Resume function should only be used if
traffic and road conditions permit. Resuming a
set speed that is too high or too low for
prevailing traffic and road conditions could
cause the vehicle to accelerate or decelerate too
sharply for safe operation. Failure to follow these
warnings can result in a collision and death or
serious personal injury.
22_LA_OM_EN_USC_t.book Page 102
Page 152 of 336
150MULTIMEDIA
FAVORITES
Press the Favorites button on the touchscreen to
activate the favorites menu, which will time out
within 20 seconds in absence of user interaction.
You can exit the Favorites Menu by a press of the X
button.
The Favorites feature enables you to set a favorite
artist or song that is currently playing. The radio
then uses this information to alert you when either
the favorite artist or song is being played at any
time by any of the SiriusXM® Channels.
The maximum number of favorites that can be
stored in the Radio is 50.
Favorite Artist: While the song is playing, to set a
favorite artist, press the Favorites button on the
touchscreen and then the Favorite Artist button on
the touchscreen.
Favorite Song: While the song is playing, to set a
favorite song, press the Favorites button on the
touchscreen and then the Favorite Song button on
the touchscreen.
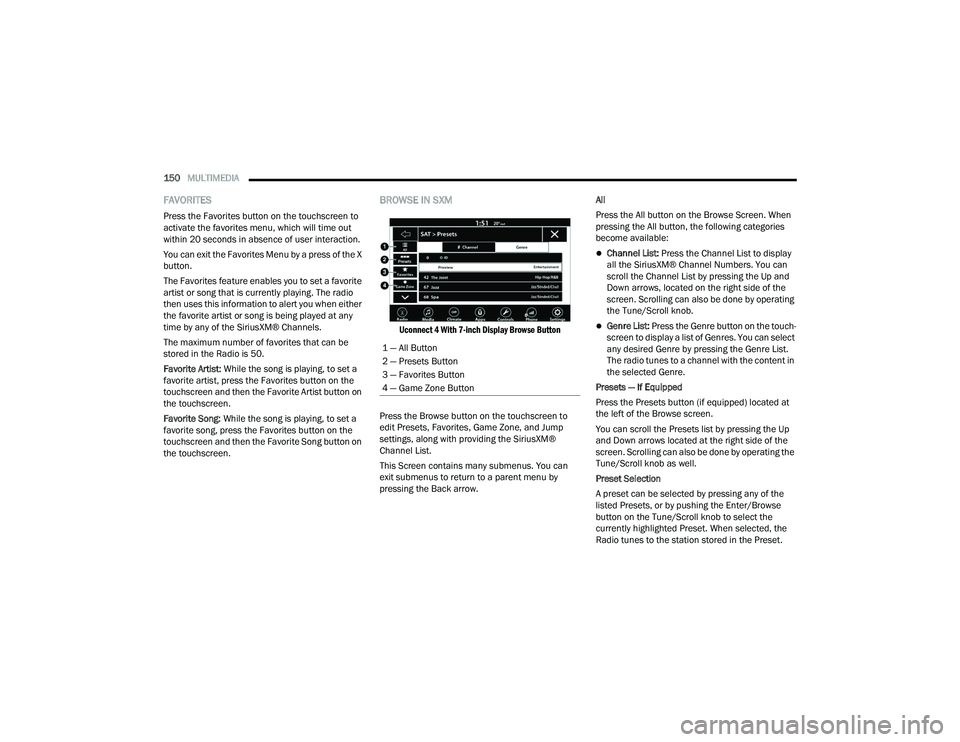
BROWSE IN SXM
Uconnect 4 With 7-inch Display Browse Button
Press the Browse button on the touchscreen to
edit Presets, Favorites, Game Zone, and Jump
settings, along with providing the SiriusXM®
Channel List.
This Screen contains many submenus. You can
exit submenus to return to a parent menu by
pressing the Back arrow. All
Press the All button on the Browse Screen. When
pressing the All button, the following categories
become available:
Channel List:
Press the Channel List to display
all the SiriusXM® Channel Numbers. You can
scroll the Channel List by pressing the Up and
Down arrows, located on the right side of the
screen. Scrolling can also be done by operating
the Tune/Scroll knob.
Genre List: Press the Genre button on the touch -
screen to display a list of Genres. You can select
any desired Genre by pressing the Genre List.
The radio tunes to a channel with the content in
the selected Genre.
Presets — If Equipped
Press the Presets button (if equipped) located at
the left of the Browse screen.
You can scroll the Presets list by pressing the Up
and Down arrows located at the right side of the
screen. Scrolling can also be done by operating the
Tune/Scroll knob as well.
Preset Selection
A preset can be selected by pressing any of the
listed Presets, or by pushing the Enter/Browse
button on the Tune/Scroll knob to select the
currently highlighted Preset. When selected, the
Radio tunes to the station stored in the Preset.
1 — All Button
2 — Presets Button
3 — Favorites Button
4 — Game Zone Button
22_LA_OM_EN_USC_t.book Page 150
Page 176 of 336
174MULTIMEDIA
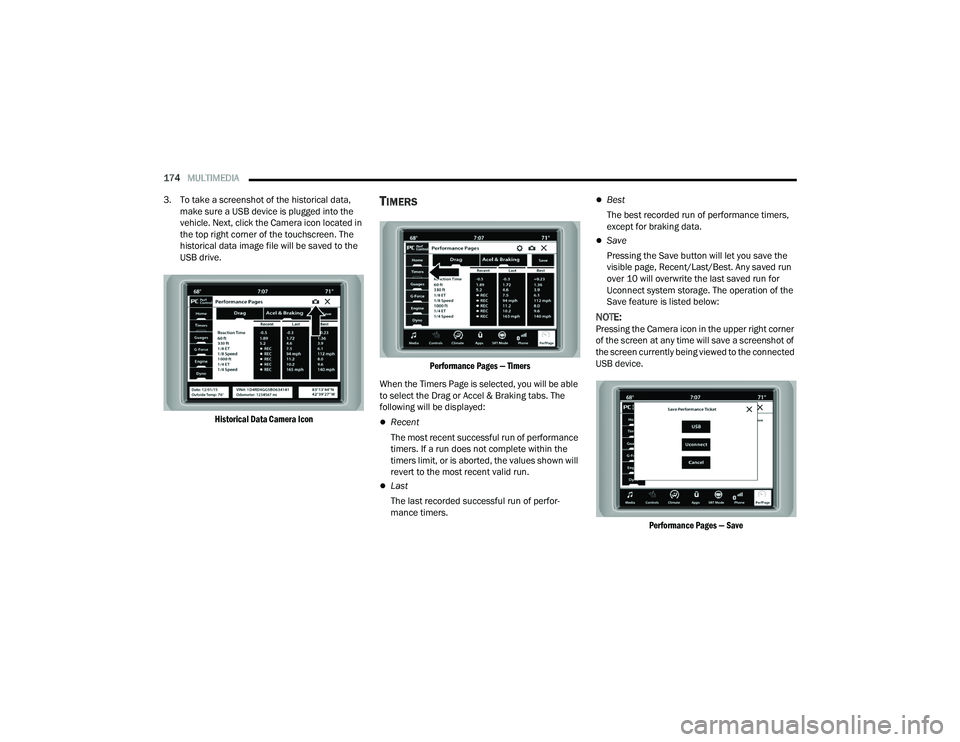
3. To take a screenshot of the historical data, make sure a USB device is plugged into the
vehicle. Next, click the Camera icon located in
the top right corner of the touchscreen. The
historical data image file will be saved to the
USB drive.
Historical Data Camera Icon
TIMERS
Performance Pages — Timers
When the Timers Page is selected, you will be able
to select the Drag or Accel & Braking tabs. The
following will be displayed:
Recent
The most recent successful run of performance
timers. If a run does not complete within the
timers limit, or is aborted, the values shown will
revert to the most recent valid run.
Last
The last recorded successful run of perfor -
mance timers.
Best
The best recorded run of performance timers,
except for braking data.
Save
Pressing the Save button will let you save the
visible page, Recent/Last/Best. Any saved run
over 10 will overwrite the last saved run for
Uconnect system storage. The operation of the
Save feature is listed below:
NOTE:Pressing the Camera icon in the upper right corner
of the screen at any time will save a screenshot of
the screen currently being viewed to the connected
USB device.
Performance Pages — Save
22_LA_OM_EN_USC_t.book Page 174
Page 177 of 336
MULTIMEDIA175
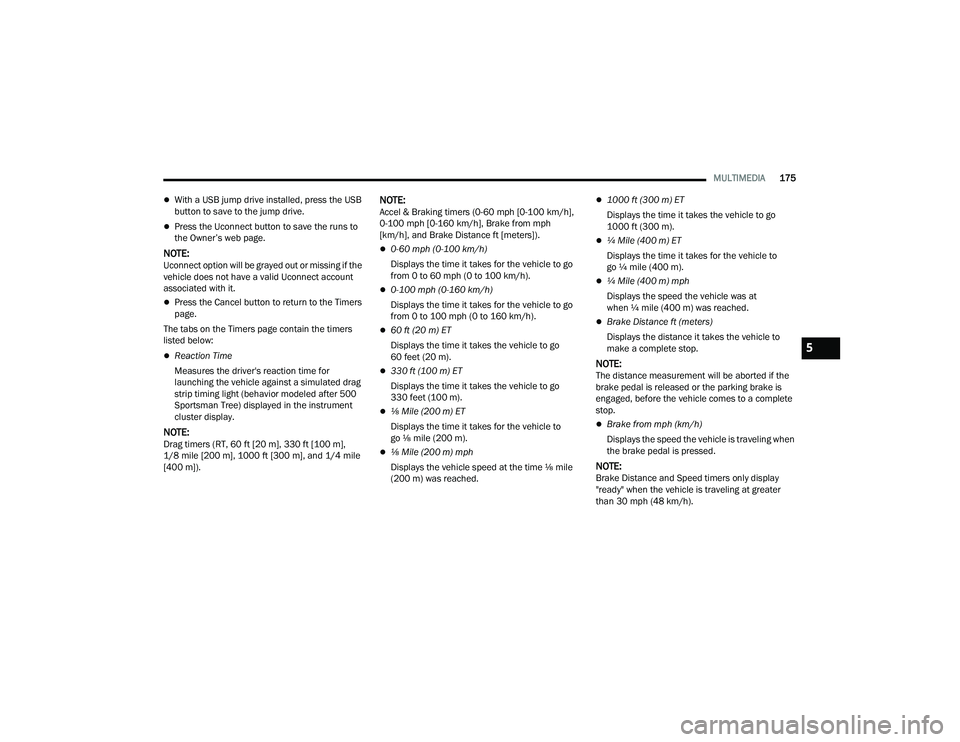
With a USB jump drive installed, press the USB
button to save to the jump drive.
Press the Uconnect button to save the runs to
the Owner’s web page.
NOTE:Uconnect option will be grayed out or missing if the
vehicle does not have a valid Uconnect account
associated with it.
Press the Cancel button to return to the Timers
page.
The tabs on the Timers page contain the timers
listed below:
Reaction Time
Measures the driver's reaction time for
launching the vehicle against a simulated drag
strip timing light (behavior modeled after 500
Sportsman Tree) displayed in the instrument
cluster display.
NOTE:Drag timers (RT, 60 ft [20 m], 330 ft [100 m],
1/8 mile [200 m], 1000 ft [300 m], and 1/4 mile
[400 m]).
NOTE:Accel & Braking timers (0-60 mph [0-100 km/h],
0-100 mph [0-160 km/h], Brake from mph
[km/h], and Brake Distance ft [meters]).
0-60 mph (0-100 km/h)
Displays the time it takes for the vehicle to go
from 0 to 60 mph (0 to 100 km/h).
0-100 mph (0-160 km/h)
Displays the time it takes for the vehicle to go
from 0 to 100 mph (0 to 160 km/h).
60 ft (20 m) ET
Displays the time it takes the vehicle to go
60 feet (20 m).
330 ft (100 m) ET
Displays the time it takes the vehicle to go
330 feet (100 m).
⅛ Mile (200 m) ET
Displays the time it takes for the vehicle to
go ⅛ mile (200 m).
⅛ Mile (200 m) mph
Displays the vehicle speed at the time ⅛ mile
(200 m) was reached.
1000 ft (300 m) ET
Displays the time it takes the vehicle to go
1000 ft (300 m).
¼ Mile (400 m) ET
Displays the time it takes for the vehicle to
go ¼ mile (400 m).
¼ Mile (400 m) mph
Displays the speed the vehicle was at
when ¼ mile (400 m) was reached.
Brake Distance ft (meters)
Displays the distance it takes the vehicle to
make a complete stop.
NOTE:The distance measurement will be aborted if the
brake pedal is released or the parking brake is
engaged, before the vehicle comes to a complete
stop.
Brake from mph (km/h)
Displays the speed the vehicle is traveling when
the brake pedal is pressed.
NOTE:Brake Distance and Speed timers only display
"ready" when the vehicle is traveling at greater
than 30 mph (48 km/h).
5
22_LA_OM_EN_USC_t.book Page 175